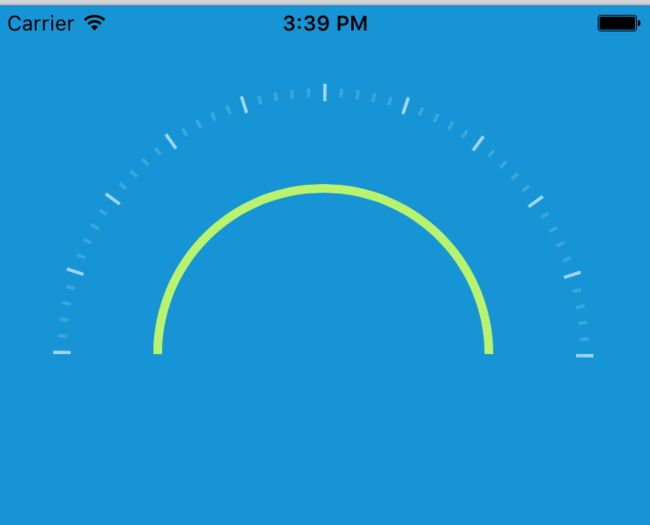
我们首先看一下这个速度表盘的效果:
为了实现上述的效果,我们首当其冲的是得了解的是贝塞尔曲线,听上去好高大上的样子,接下来我先就我了解贝塞尔曲线的知识给未接触的朋友普及一下。
Bézier curve(贝塞尔曲线)是应用于二维图形应用程序的数学曲线.主要有起始点、终止点(也称锚点)、控制点这几个概念。通过调整控制点,贝塞尔曲线的形状会发生变化。
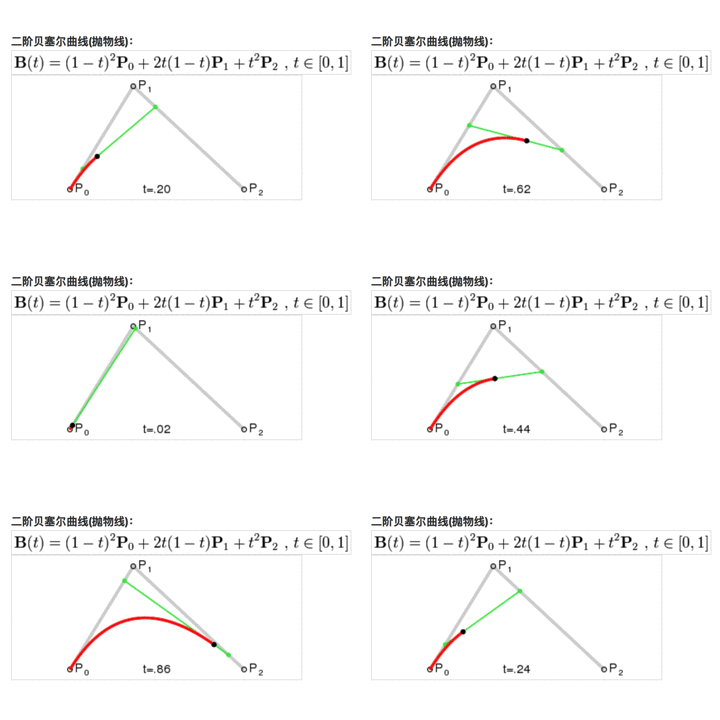
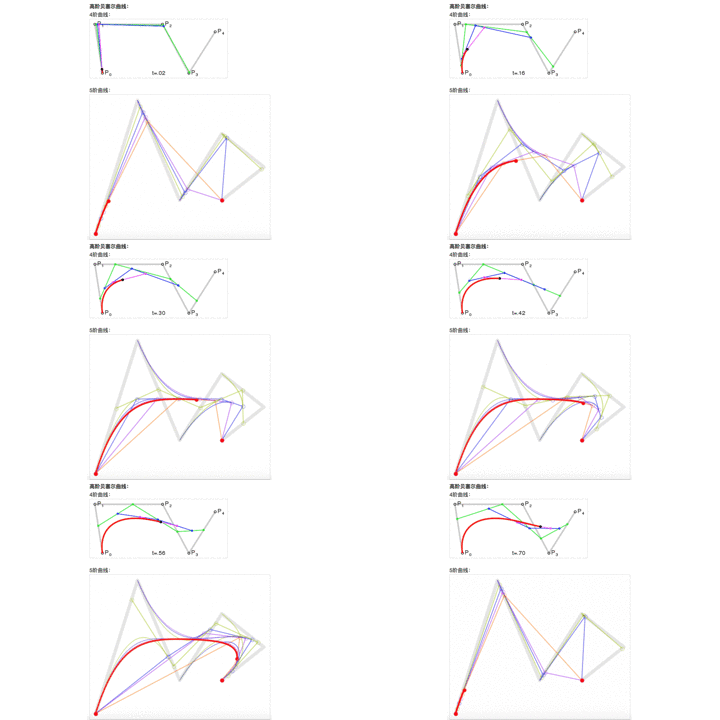
大家先欣赏一下各种贝塞尔曲线
一阶
二阶
三阶
高阶
- 我们要完成上述表盘的效果,需要用到的就是贝塞尔曲线!
我们看一下苹果官方文档对它的介绍
The UIBezierPath class lets you define a path consisting of straight and curved line segments and render that path in your custom views. You use this class initially to specify just the geometry for your path. Paths can define simple shapes such as rectangles, ovals, and arcs or they can define complex polygons that incorporate a mixture of straight and curved line segments. After defining the shape, you can use additional methods of this class to render the path in the current drawing context.
上述文字简单翻译一下的意思是:你可以使用贝塞尔曲线来定义直线和曲线和自定义的图形。官方还有很长的篇幅来解释它,有兴趣的可以去看。
下面我主要介绍UIBezierPath和CAShapeLayer一起使用,完成上述表盘的效果,我默认你已经经过查找资料对他们很熟悉。
首先我们分解步骤
-
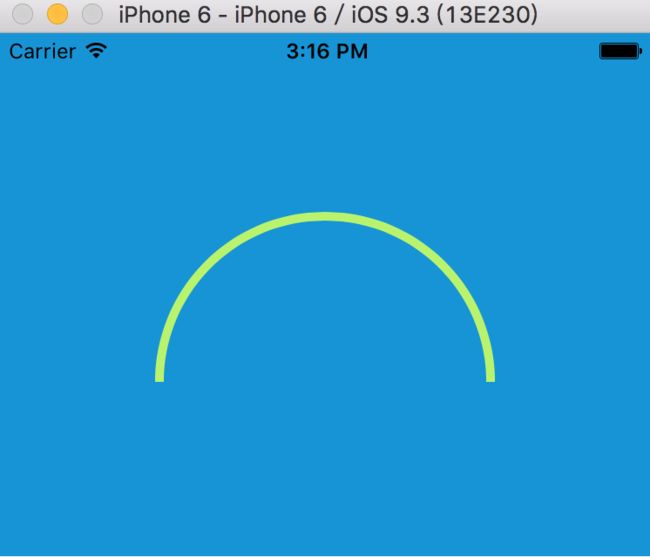
1.画出内侧的圆弧
苹果官方提供了3阶以下的api接口,我使用一个二阶的api,实现圆弧。
    //主要解释一下各个参数的意思
    //center  中心点(可以理解为圆心)
    //radius  半径
    //startAngle 起始角度
    //endAngle  结束角度
    //clockwise  是否顺时针
    UIBezierPath *cicrle     = [UIBezierPath bezierPathWithArcCenter:centers
                                                              radius:95
                                                              startAngle:- M_PI
                                                              endAngle: 0
                                                              clockwise:YES];
    CAShapeLayer *shapeLayer = [CAShapeLayer layer];
    shapeLayer.lineWidth     = 5.f;
    shapeLayer.fillColor     = [UIColor clearColor].CGColor;
    shapeLayer.strokeColor   = RGBColor(185,243,110).CGColor;
    shapeLayer.path          = cicrle.CGPath;

    [self.layer addSublayer:shapeLayer];
弧线的参考系:
- 2.画出外侧的刻度
  CGFloat perAngle = M_PI / 50;
//我们需要计算出每段弧线的起始角度和结束角度
//这里我们从- M_PI 开始,我们需要理解与明白的是我们画的弧线与内侧弧线是同一个圆心
  for (int i = 0; i< 51; i++) {

        CGFloat startAngel = (-M_PI + perAngle * i);
        CGFloat endAngel   = startAngel + perAngle/5;

        UIBezierPath *tickPath = [UIBezierPath bezierPathWithArcCenter:centers radius:150 startAngle:startAngel endAngle:endAngel clockwise:YES];
        CAShapeLayer *perLayer = [CAShapeLayer layer];

        if (i % 5 == 0) {

            perLayer.strokeColor = [UIColor colorWithRed:0.62 green:0.84 blue:0.93 alpha:1.0].CGColor;
            perLayer.lineWidth   = 10.f;

        }else{
            perLayer.strokeColor = [UIColor colorWithRed:0.22 green:0.66 blue:0.87 alpha:1.0].CGColor;
            perLayer.lineWidth   = 5;

        }

        perLayer.path = tickPath.CGPath;
        [self.layer addSublayer:perLayer];

    }
- 3.增加刻度值
需要使用创建label的方式,首先我们得计算出label的position,然后添加
 CGPoint point      = [self calculateTextPositonWithArcCenter:centers Angle:textAngel];
            NSString *tickText = [NSString stringWithFormat:@"%d",i * 2];

            //默认label的大小14 * 14
            UILabel *text      = [[UILabel alloc] initWithFrame:CGRectMake(point.x - 5, point.y - 5, 14, 14)];
            text.text          = tickText;
            text.font          = font;
            text.textColor     = [UIColor colorWithRed:0.54 green:0.78 blue:0.91 alpha:1.0];
            text.textAlignment = NSTextAlignmentCenter;
            [self addSubview:text];
//默认计算半径135
- (CGPoint)calculateTextPositonWithArcCenter:(CGPoint)center
                                       Angle:(CGFloat)angel
{
    CGFloat x = 135 * cosf(angel);
    CGFloat y = 135 * sinf(angel);

    return CGPointMake(center.x + x, center.y - y);
}
- 4.实现速度显示(实现方式很多,可以是Label,也可以画出来,就不赘述)
这里说一下画的方式
- (void)drawRect:(CGRect)rect
{
     NSDictionary *attributes = [NSDictionary dictionaryWithObjectsAndKeys:[UIFont boldSystemFontOfSize:15],NSFontAttributeName,[UIColor whiteColor], NSForegroundColorAttributeName, nil];
    [@"km/h" drawInRect:CGRectMake(centers.x - 15, centers.y, 60, 20) withAttributes:attributes];
}
- 5.实现进度
// 进度的曲线
    UIBezierPath *progressPath  = [UIBezierPath bezierPathWithArcCenter:centers
                                                                radius:120
                                                                startAngle:- M_PI
                                                                endAngle:0
                                                                clockwise:YES];
                  progressLayer = [CAShapeLayer layer];
    progressLayer.lineWidth     =  50.f;
    progressLayer.fillColor     = [UIColor clearColor].CGColor;
    progressLayer.strokeColor   =  RGBAColor(185,243,110,0.2).CGColor;
    progressLayer.path          = progressPath.CGPath;
    progressLayer.strokeStart   = 0;
    progressLayer.strokeEnd     = 0;
我们只需要改变strokeEnd即可实现速度变化,默认0~1之间。
//提供一个外部的接口,通过重写setter方法来改变进度

- (void)setSpeed:(double)speed
{
                     _speed = speed;
    progressLayer.strokeEnd = _speed? _speed/100:0;
    speedLabel.text = [NSString stringWithFormat:@"%.f",speed];
}
我们可以在外部通过定时器方法模拟速度表盘的变化,即可实现上述速度表盘。
结尾:本文只是简单的介绍一种思路,个人感觉可以优化的空间很多,打算整理写一个上传gitHub的三方库,提供多个可供外界改变的接口,希望有兴趣的朋友一起来做,维护这个库,欢迎私信联系。


