CoreOS为世界的集装箱基础设施提供动力
轻量级Linux操作系统,专为群集部署而设计,为您的关键应用程序提供自动化,安全性和可扩展性
CoreOS也叫Container Linux
我们将在CentOS7.3上使用Cobbler安装Container Linux
关闭selinux
安装所需软件
[root@brave ~]# yum install dhcp cobbler pykickstart -y
启动httpd
systemctl enable httpd && systemctl start httpd
启动tftp
sed -i '/disable/s/yes/no/' /etc/xinetd.d/tftp
systemctl enable tftp && systemctl start tftp
配置dhcp服务
cat << EOF > /etc/dhcp/dhcpd.conf
subnet 192.168.2.0 netmask 255.255.255.0 {
range 192.168.2.200 192.168.2.250;
next-server 192.168.2.2;
filename "pxelinux.0";
option ntp-servers 192.168.2.2;
}
EOF
请修改相应ip,否则dhcp服务启动不了
systemctl enable dhcpd && systemctl start dhcpd
准备文件 pxelinux.0
cp /usr/share/syslinux/pxelinux.0 /var/lib/tftpboot/
下载启动配置
cd /var/lib/tftpboot/pxelinux.cfg/
wget https://raw.githubusercontent.com/bravem/bravem.github.com/master/coreos.install/default
下载镜像和内核文件
cd ..
wget http://stable.release.core-os.net/amd64-usr/current/coreos_production_pxe.vmlinuz
wget http://stable.release.core-os.net/amd64-usr/current/coreos_production_pxe_image.cpio.gz
https://coreos.com/os/docs/latest/booting-with-ipxe.html 这个网站可以找到最新的下载地址
下载镜像启动配置文件example.ign
cd /var/www/html/
wget https://raw.githubusercontent.com/bravem/bravem.github.com/master/coreos.install/example.ign
启动配置和文件包含了core用户的密码和ssh秘钥,请修改
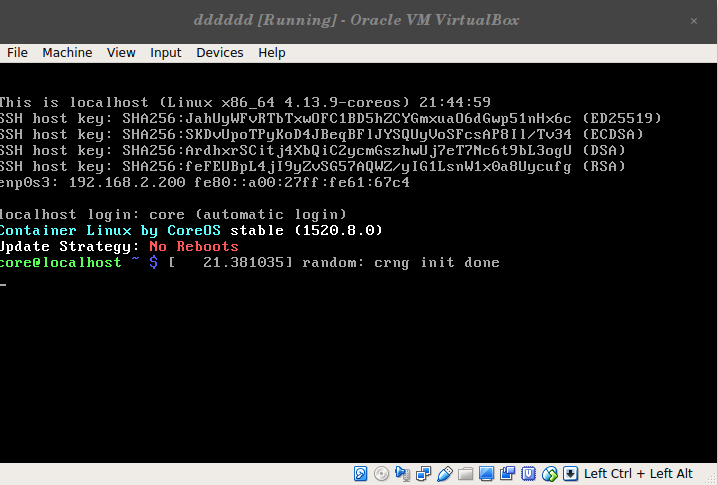
这时,镜像启动已经搭建好了,可以测试 测试前关闭防火墙 iptables -F
这时启动的只是一个LiveCD 我们还需要把系统安装到硬盘接着回到CentOs
mkdir /var/www/html/coreos && cd /var/www/html/coreos
wget https://stable.release.core-os.net/amd64-usr/1520.8.0/coreos_production_image.bin.bz2
wget https://stable.release.core-os.net/amd64-usr/1520.8.0/coreos_production_image.bin.bz2.sig
wget https://raw.githubusercontent.com/bravem/bravem.github.com/master/coreos.install/pxe.sh
wget https://raw.githubusercontent.com/bravem/bravem.github.com/master/coreos.install/coreos-install
coreos-install 第 471和473行需要修改,修改为你的httpd地址下载安装文件
接着下载安装到硬盘的配置文件,这个文件也需要修改配置密码。
wget https://raw.githubusercontent.com/bravem/bravem.github.com/master/coreos.install/ignition.json
所有都已经准备好了,现在重新添加一个虚拟机测试把,注意要2G内存以上。
虚拟机加载好镜像后需要等待一会,以启动服务下载脚步
https://coreos.com/os/docs/latest/booting-with-ipxe.html 官方安装文档
到此就已经安装好了。
coreos默认不能登录root,提供如下修改脚本。
#!bin/bash
sudo mv /etc/ssh/sshd_config{,.bak}
sudo cp /etc/ssh/sshd_config.bak /etc/ssh/sshd_config
sed -i'$a\PermitRootLogin yes'/etc/ssh/sshd_config
sudo systemctl restart sshd
#sudo passwd root
使用etcd容器搭建集群。在3台coreos上运行。需要能连通外网,下载etcd镜像。
docker run -itd -p 2379:2379 -p 2380:2380 --name etcd --restart always --network host etcd etcd --data-dir=data1.etcd --name core106 \
--initial-advertise-peer-urls http://192.168.2.106:2380 --listen-peer-urls http://192.168.2.106:2380 \
--advertise-client-urls http://192.168.2.106:2379 --listen-client-urls http://192.168.2.106:2379 \
--initial-cluster core106=http://192.168.2.106:2380,core107=http://192.168.2.107:2380,core108=http://192.168.2.108:2380 \
--initial-cluster-state new --initial-cluster-token token
docker run -itd -p 2379:2379 -p 2380:2380 --name etcd --restart always --network host etcd etcd --data-dir=data1.etcd --name core107 \
--initial-advertise-peer-urls http://192.168.2.107:2380 --listen-peer-urls http://192.168.2.107:2380 \
--advertise-client-urls http://192.168.2.107:2379 --listen-client-urls http://192.168.2.107:2379 \
--initial-cluster core106=http://192.168.2.106:2380,core107=http://192.168.2.107:2380,core108=http://192.168.2.108:2380 \
--initial-cluster-state new --initial-cluster-token token
docker run -itd -p 2379:2379 -p 2380:2380 --name etcd --restart always --network host etcd etcd --data-dir=data1.etcd --name core108 \
--initial-advertise-peer-urls http://192.168.2.108:2380 --listen-peer-urls http://192.168.2.108:2380 \
--advertise-client-urls http://192.168.2.108:2379 --listen-client-urls http://192.168.2.108:2379 \
--initial-cluster core106=http://192.168.2.106:2380,core107=http://192.168.2.107:2380,core108=http://192.168.2.108:2380 \
--initial-cluster-state new --initial-cluster-token token

