Accordion(手风琴)效果在网页中十分常见。在屏幕更小,可显示范围更有限的移动端,更是使用频繁。
在 Web 开发中,使用 Javascript 操控 DOM,就可以轻松实现这种效果。
在 iOS 端呢,实现一个简易的 Accordion 效果,就简单程度而言,更是有过之而无不及。简直是一马平川、易如反掌,像过清晨的马路一样轻松。
OK,让我来演示一下。
Demo地址:https://github.com/4074/UITableViewAccordionDemo
storyboard操作
我们现在 storyboard 中创建一些必要的 view 和节点
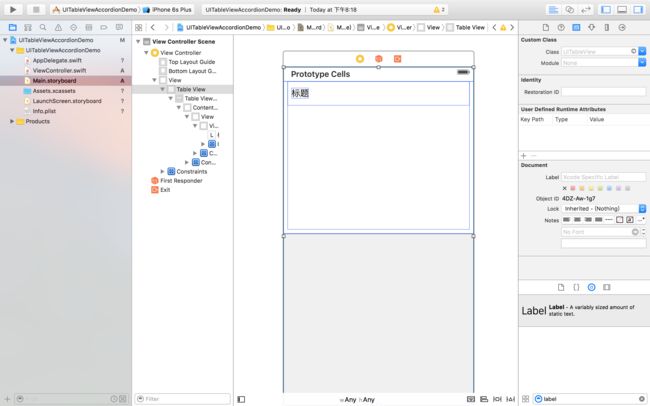
- 在 storyboard 新建一个 view controller;新建一个 table view,使用 auto layout 约束尺寸为 view 的大小;效果如图
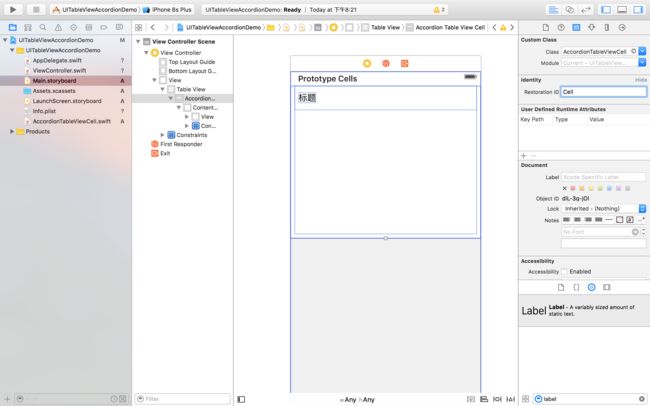
- 在 table view 中添加 cell;在 cell 添加 容器view,一个标题view,一个标题label;效果如图
- 创建
UITableViewCell的子类AccordionTableViewCell。
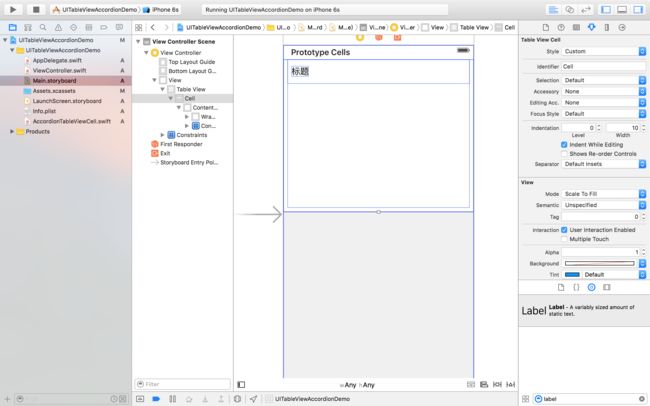
- 设置 cell 的类
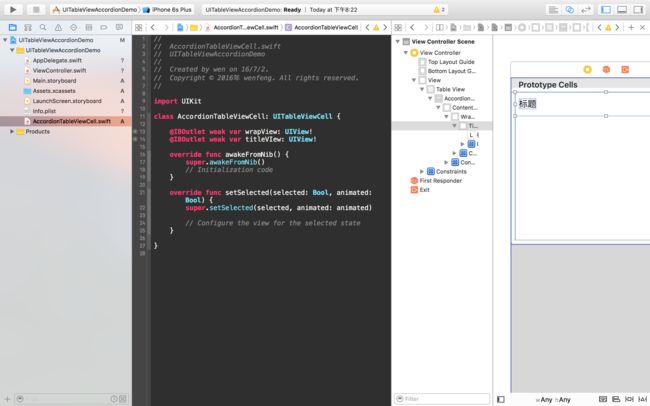
AccordionTableViewCell,identity为Cell(方便后面使用dequeueReusableCellWithIdentifier获取 cell),然后把 cell 中的各个 view 用 IBOutlet 方式引入。
编写代码
接下来主要就是编写代码的时间了。当然代码量十分有限。
- 我们来添加一下 cell 的样式,让它不至于太难看。主要是加一下背景、圆角。
class AccordionTableViewCell: UITableViewCell {

    @IBOutlet weak var wrapView: UIView!
    @IBOutlet weak var titleView: UIView!

    override func awakeFromNib() {
        super.awakeFromNib()
        // Initialization code
        self.selectionStyle = .None

        wrapView.backgroundColor = UIColor.groupTableViewBackgroundColor()
        wrapView.layer.cornerRadius = 4
        wrapView.layer.masksToBounds = true

        titleView.backgroundColor = UIColor.groupTableViewBackgroundColor()
        titleView.layer.cornerRadius = 4
        titleView.layer.masksToBounds = true
    }
}
- 把 table view 引入到 view controller 中,对其也进行一些设置,并把它的数据源、代理都指向 view controller。
tableView.separatorStyle = .None
tableView.dataSource = self
tableView.delegate = self
- 定义一些必要的变量。
let cellHeight: CGFloat = 56  // 高度
let cellHeightExpanded: CGFloat = 360  // 展开高度

let cellCount = 24  // cell 数量
var cellStatus = [Bool](count: 24, repeatedValue: false)  // cell 的展开状态

let onlyOneExpanded = true  // 是否只允许一个展开
- 最最重要的一步来了,扩展 view controller
extension ViewController: UITableViewDataSource, UITableViewDelegate {

    func tableView(tableView: UITableView, numberOfRowsInSection section: Int) -> Int {
        return cellCount
    }

    func tableView(tableView: UITableView, cellForRowAtIndexPath indexPath: NSIndexPath) -> UITableViewCell {
        let cell = tableView.dequeueReusableCellWithIdentifier("Cell", forIndexPath: indexPath) as! AccordionTableViewCell
        // 定义点击手势
        let tapGesture = UITapGestureRecognizer(target: self, action: #selector(self.tapTitleView(_:)))

        // 利用tag传递 cell 的行数
        cell.titleView.tag = indexPath.row

        // 绑定点击手势
        cell.titleView.addGestureRecognizer(tapGesture)

        return cell
    }

    func tableView(tableView: UITableView, heightForRowAtIndexPath indexPath: NSIndexPath) -> CGFloat {
        // 根据状态返回 cell 的高度
        return cellStatus[indexPath.row] ? cellHeightExpanded : cellHeight
    }

    // 点击标题的回调
    func tapTitleView(sender: UITapGestureRecognizer) {
        if let tag = sender.view?.tag {
            if cellStatus[tag] {
                cellStatus[tag] = false
            } else {
                // 如果只允许一个展开,则重置所有状态为 false
                if onlyOneExpanded {
                    cellStatus = [Bool](count: cellCount, repeatedValue: false)
                }
                cellStatus[tag] = true
            }

            // 更新 table view,则会更新高度
            tableView.beginUpdates()
            tableView.endUpdates()

            // 为了点击展开的 cell 不被遮挡,滚动到相应的 cell
            tableView.scrollToRowAtIndexPath(NSIndexPath(forRow: tag, inSection: 0), atScrollPosition: .None, animated: true)
        }
    }
}
成果
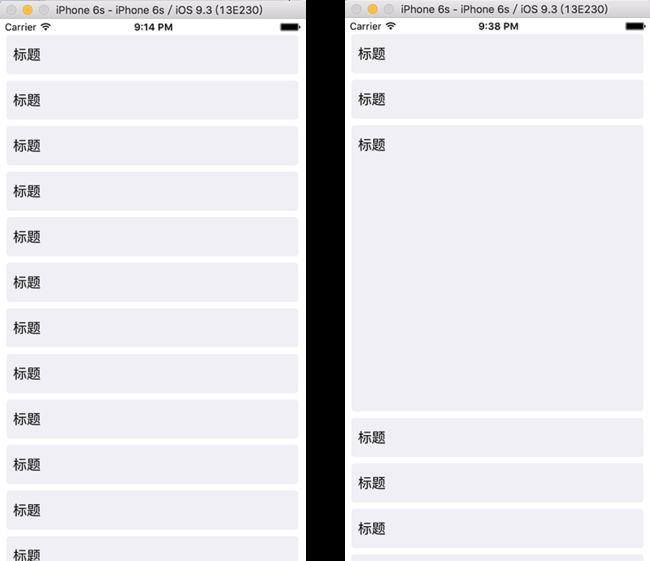
这样,UITableView 简单的 Accordion 效果就完成了,让我们看一下最终的代码,和效果截图。
- AccordionTableViewCell.swift
import UIKit

class AccordionTableViewCell: UITableViewCell {

    @IBOutlet weak var wrapView: UIView!
    @IBOutlet weak var titleView: UIView!

    override func awakeFromNib() {
        super.awakeFromNib()

        self.selectionStyle = .None

        wrapView.backgroundColor = UIColor.groupTableViewBackgroundColor()
        wrapView.layer.cornerRadius = 4
        wrapView.layer.masksToBounds = true

        titleView.backgroundColor = UIColor.groupTableViewBackgroundColor()
        titleView.layer.cornerRadius = 4
        titleView.layer.masksToBounds = true
    }
}
- ViewControler.swift
import UIKit

class ViewController: UIViewController {

    @IBOutlet weak var tableView: UITableView!

    let cellHeight: CGFloat = 56
    let cellHeightExpanded: CGFloat = 360

    let cellCount = 24
    var cellStatus = [Bool](count: 24, repeatedValue: false)

    let onlyOneExpanded = true

    override func viewDidLoad() {
        super.viewDidLoad()

        tableView.separatorStyle = .None
        tableView.dataSource = self
        tableView.delegate = self
    }
}

extension ViewController: UITableViewDataSource, UITableViewDelegate {

    func tableView(tableView: UITableView, numberOfRowsInSection section: Int) -> Int {
        return cellCount
    }

    func tableView(tableView: UITableView, cellForRowAtIndexPath indexPath: NSIndexPath) -> UITableViewCell {
        let cell = tableView.dequeueReusableCellWithIdentifier("Cell", forIndexPath: indexPath) as! AccordionTableViewCell
        let tapGesture = UITapGestureRecognizer(target: self, action: #selector(self.tapTitleView(_:)))
        cell.titleView.tag = indexPath.row
        cell.titleView.addGestureRecognizer(tapGesture)
        return cell
    }

    func tableView(tableView: UITableView, heightForRowAtIndexPath indexPath: NSIndexPath) -> CGFloat {
        return cellStatus[indexPath.row] ? cellHeightExpanded : cellHeight
    }

    func tapTitleView(sender: UITapGestureRecognizer) {
        if let tag = sender.view?.tag {
            if cellStatus[tag] {
                cellStatus[tag] = false
            } else {
                if onlyOneExpanded {
                    cellStatus = [Bool](count: cellCount, repeatedValue: false)
                }
                cellStatus[tag] = true
            }

            tableView.beginUpdates()
            tableView.endUpdates()
            tableView.scrollToRowAtIndexPath(NSIndexPath(forRow: tag, inSection: 0), atScrollPosition: .None, animated: true)
        }
    }
}
- 效果截图。不知道怎么截动图,就放两个状态的截图吧
Demo地址:https://github.com/4074/UITableViewAccordionDemo
有什么疑问可以在留言中提出哦~~~

