前言
最近有个一个需求,需要在屏幕底部显示一个对话框,原本是想要用BottomSheetDialogFragment来完成的,但是因为不需要折叠效果,与需求不符,所以放弃。因此尝试用DialogFragment实现,实现过程踩到一些坑,现在记录下来便于以后查阅。
1. 大小不受控制
  @Nullable
  @Override
  public View onCreateView(LayoutInflater inflater, @Nullable ViewGroup container,
      @Nullable Bundle savedInstanceState) {
    return inflater.inflate(R.layout.dialog_bottom, container, false);
  }
在Fragment中会通过类似上面这样的代码加载一个xml的布局文件,但是这DailogFragment中这样加载出来视图大小是不受xml中的layout_height 和 layout_width 控制的。其中的原因很简单,可以查阅下 DialogFragment.show() 方法。
    public void show(FragmentManager manager, String tag) {
        mDismissed = false;
        mShownByMe = true;
        FragmentTransaction ft = manager.beginTransaction();
        ft.add(this, tag);
        ft.commit();
    }
DialogFragment是通过 FragmentTransac.add() 添加进入FragmentManager中的,因此在 onCreateView 阶段,传递进来的container参数是 null,而 LayoutInflate.inflate() 在 root 为 null 时不会设置LayoutParams,核心代码如下所示。
final View temp = createViewFromTag(root, name, inflaterContext, attrs);
ViewGroup.LayoutParams params = null;
if (root != null) {
        // Create layout params that match root, if supplied
        params = root.generateLayoutParams(attrs);
        if (!attachToRoot) {
        // Set the layout params for temp if we are not
        // attaching. (If we are, we use addView, below)
        temp.setLayoutParams(params);
        }
}
要想控制显示的 Dialog 的大小,只能通过直接设置 Window 的大小实现。而且 Window.setLayout 必须在 onActivityCreate 完成后调用才能生效。下面的代码设置Window的大小匹配屏幕的大小。
  @Override
  public void onActivityCreated(Bundle savedInstanceState) {
    super.onActivityCreated(savedInstanceState);
    Window window = getDialog().getWindow();
    if (window != null) {
      window.setLayout(MATCH_PARENT, MATCH_PARENT);
    }
  }
2. Dialog周围有空隙
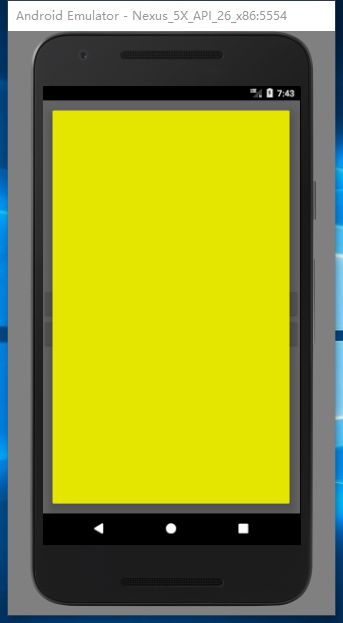
按照上面的方法设置了 Window 的大小之后,虽然是设置了 MATCH_PARENT 但在四周还是留下了一些间隙,如下图所示。
这其实是因为Dialog中默认设置的带有 padding 的
windowsBackground 照成的。但是在BottomSheetDialog中并没有这样的 padding 效果,那是因为BottomSheetDialog并没有使用默认的主题效果。
    public BottomSheetDialog(@NonNull Context context, @StyleRes int theme) {
        super(context, getThemeResId(context, theme));
        // We hide the title bar for any style configuration. Otherwise, there will be a gap
        // above the bottom sheet when it is expanded.
        supportRequestWindowFeature(Window.FEATURE_NO_TITLE);
    }

    private static int getThemeResId(Context context, int themeId) {
        if (themeId == 0) {
            // If the provided theme is 0, then retrieve the dialogTheme from our theme
            TypedValue outValue = new TypedValue();
            if (context.getTheme().resolveAttribute(
                    R.attr.bottomSheetDialogTheme, outValue, true)) {
                themeId = outValue.resourceId;
            } else {
                // bottomSheetDialogTheme is not provided; we default to our light theme
                themeId = R.style.Theme_Design_Light_BottomSheetDialog;
            }
        }
        return themeId;
    }
所以可以通过自定义一个主题,添加 STYLE_NO_FRAME 就可以实现视图铺满屏幕的效果,示例代码:
  @Override
  public void onCreate(@Nullable Bundle savedInstanceState) {
    super.onCreate(savedInstanceState);
    setStyle(STYLE_NO_FRAME, 0);
  }
3. 控制视图位置
因为根视图与Window大小相同控制不了,为了更加方便的控制视图的位置,可以学习 BottomSheetDialog,通过在真实视图上包裹一层根视图实现,下面是核心代码截取。
    @Override
    public void setContentView(@LayoutRes int layoutResId) {
        super.setContentView(wrapInBottomSheet(layoutResId, null, null));
    }

    private View wrapInBottomSheet(int layoutResId, View view, ViewGroup.LayoutParams params) {
        final FrameLayout container = (FrameLayout) View.inflate(getContext(),
                R.layout.design_bottom_sheet_dialog, null);
        final CoordinatorLayout coordinator =
                (CoordinatorLayout) container.findViewById(R.id.coordinator);
        if (layoutResId != 0 && view == null) {
            view = getLayoutInflater().inflate(layoutResId, coordinator, false);
        }
        FrameLayout bottomSheet = (FrameLayout) coordinator.findViewById(R.id.design_bottom_sheet);
        if (params == null) {
            bottomSheet.addView(view);
        } else {
            bottomSheet.addView(view, params);
        }
        // We treat the CoordinatorLayout as outside the dialog though it is technically inside
        coordinator.findViewById(R.id.touch_outside).setOnClickListener(new View.OnClickListener() {
            @Override
            public void onClick(View view) {
                if (mCancelable && isShowing() && shouldWindowCloseOnTouchOutside()) {
                    cancel();
                }
            }
        });
        return container;
    }
而我们则是选择在 onCreateView 中操作。
  @Nullable
  @Override
  public View onCreateView(LayoutInflater inflater, @Nullable ViewGroup container,
      @Nullable Bundle savedInstanceState) {
    container = new FrameLayout(getContext());
    return inflater.inflate(R.layout.dialog_bottom, container, true);
  }
这样只需要在xml中使用 android:layout_gravity="bottom" 即可控制视图显示在底部。