1.环境准备
1.1.Rust
参照官网即可,我的系统是macOS Mojave,不过官网中有对其他系统的说明,运行如下脚本:
curl https://sh.rustup.rs -sSf | sh
为了让下载更顺畅,可以配置国内源,原因都懂的。在~/.profile中添加如下两行:
export RUSTUP_DIST_SERVER=https://mirrors.sjtug.sjtu.edu.cn/rust-static
export RUSTUP_UPDATE_ROOT=https://mirrors.sjtug.sjtu.edu.cn/rust-static/rustup
也可以使用rustcc的源
[source.crates-io]
replace-with = "rustcc"
[source.rustcc]
registry = "https://code.aliyun.com/rustcc/crates.io-index.git"
项目源码在https://github.com/rustcc/lernaean-deploy
1.2.Pre-requirement
参照substrate官网,编译安装substrate需要一些预装依赖。substrate提供了快速安装和完全安装两种形式,都是傻瓜式一键安装,不过我个人更喜欢手动安装,能比较清晰的了解其中的步骤。姑且也把两种方式列出来吧。
- 快速安装,直接执行脚本
curl https://getsubstrate.io -sSf | bash -s -- --fast
会顺带安装所有需要的依赖
- 完全安装,其实就是去掉了
--fast参数
curl https://getsubstrate.io -sSf | bash
如果足够幸运,到目前为止安装过程已经完成。
- 手动安装
查看安装脚本,可以发现需要预先安装的依赖,不同的系统都有不同的预装,mac直接使用brew:
brew install openssl cmake llvm
网络有问题,还得配代理。。。我也是折腾了半天
2.编译安装
第一步没什么说的,先拿到代码
git clone https://github.com/paritytech/substrate
接下来就可以编译安装了。编译substrate过程中,需要从crates.io下载包,再次更换国内源,在~/.cargo目录下添加config文件,写入如下内容:
[source.crates-io]
registry = "https://github.com/rust-lang/crates.io-index"
replace-with = 'sjtug'
[source.sjtug]
registry = "https://mirrors.sjtug.sjtu.edu.cn/git/crates.io-index"
正式开始吧
- 编译安装substrate
cd ~/rustptah/src/substrate
./scripts/init.sh
./scripts/build.sh
cargo install --force --path . substrate
成功后,可以在~/.cargo/bin下看到substrate可执行文件
- 编译安装subkey
Subkey是什么?
Subkey is a commandline utility included with Substrate that generates or restores Substrate keys.
继续在上一步的substrate根目录下
cargo install --force --path ./subkey subkey
- 安装substrate提供的快捷工具脚本
f=`mktemp -d`
git clone https://github.com/paritytech/substrate-up $f
cp -a $f/substrate-* ~/.cargo/bin
cp -a $f/polkadot-* ~/.cargo/bin
3.验证
3.1.基本
3.2.启动一个新的节点
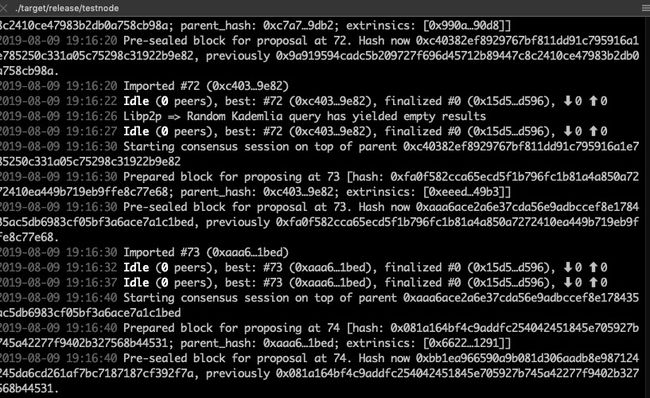
使用刚刚安装好的脚本substrate-node-new
substrate-node-new testnode garry
成功后可以看到不断有新的区块生成。
在第一次执行这个指令的时候,可能会重新同步
substrate repo,速度感人,且没什么必要,将runtime/wasm下的Cargo.lock删除,再重新执行即可。
说到删除
Cargo.lock,之前还碰到了一个问题:在vscode中配置了rls,但打开substrate项目,下方的状态条显示RLS一直卡在Starting转圈,并不会自动构建,查资料有人在16年使用RLS时就遇到过,官方回复说是bug,但不影响RLS工作-_-||...在删除了项目根目录下的Cargo.lock后,RLS也恢复了正常。
3.3.通过Polkadot.js UI查看
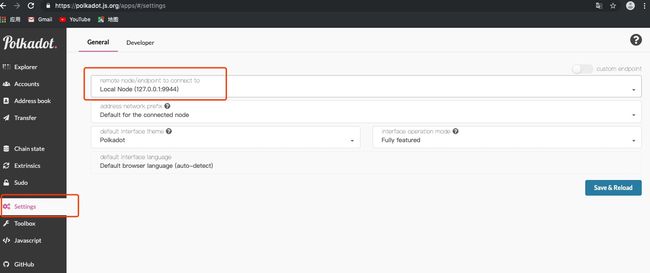
Polkadot.js提供了一个UI界面,可以在浏览器中访问如下网址
https://polkadot.js.org/apps/#/explorer
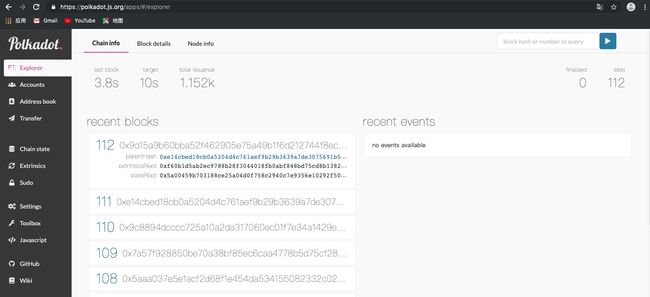
然后在左侧面板中选择Settings标签,选择连接本地节点,就可以看到刚刚启动的node了
在UI的Explorer中可以直观的看到当前block和event信息,其他标签也可以愉快的自行探索啦!
如果想重新启动,清除上一次的运行数据,使用如下命令
./target/release/testnode purge-chain --dev -y


