图像处理RGBA模型
R - red
G - Green
B - Blue
A - Alpha
色调、饱和度、亮度处理图像色彩
- 色调:调节物体红丶绿丶蓝具体的颜色
ColorMatrix hueMatrix = new ColorMatrix();
hueMatrix.setRotate(0, hue);//红
hueMatrix.setRotate(1, hue);//绿
hueMatrix.setRotate(2, hue);//蓝
正常值:hue = 0.0f
常用取值范围:hue ∈ (-180.0f, 180.0f)
- 饱和度:指颜色的纯度,数值0到100%(颜色从灰到饱和)进行描述。
ColorMatrix saturationMatrix = new ColorMatrix();
saturationMatrix.setSaturation(saturation);
正常值:saturation  = 1.0f
常用取值范围:saturation ∈ (0.0f, 2.0f)
- 亮度:颜色的相对明暗程度
ColorMatrix lumMatrix = new ColorMatrix();
lumMatrix.setScale(lum, lum, lum, 1);
正常值:lum = 1.0f
常用取值范围:lum ∈ (0.0f,  2.0f)
- 将以上饱和度、亮度、色调融合
ColorMatrix imageMatrix = new ColorMatrix();
imageMatrix.postConcat(hueMatrix);
imageMatrix.postConcat(saturationMatrix);
imageMatrix.postConcat(lumMatrix);
- 绘制
Bitmap bmp = Bitmap.createBitmap(bitmap.getWidth(), bitmap.getHeight(), Bitmap.Config.ARGB_8888);
Canvas canvas = new Canvas(bmp);
Paint paint = new Paint(Paint.ANTI_ALIAS_FLAG);
paint.setColorFilter(new ColorMatrixColorFilter(imageMatrix));
canvas.drawBitmap(bitmap, 0, 0, paint);
imageView.setImageBitmap(bmp);
颜色矩阵变换处理图像色彩
- 上面的方式实质上也是改变的颜色矩阵来达到的效果
- 这是一个表示原图正常状态的颜色矩阵(初始化矩阵)
{1, 0, 0, 0, 0,
    0, 1, 0, 0, 0,
    0, 0, 1, 0, 0,
    0, 0, 0, 1, 0}
- 矩阵相乘公式:颜色矩阵 x 颜色RGBA矩阵分量 = 转变后的RGBA
{a, b, c, d, e,                  {R                 {aR + bR + cR + dR + e,          {R1
    f, g, h, i, j,                   G                  fG + gG + hG + iG + j,           G1
    k, l, m, n, o,        x          B        =         kB + lB + mB + nB + o,     =     B1
    p, q, r, s, t}                   A                  pA + qA + rA + sA + t}           A1}
                                     1}
第一行控制R
第二行控制G
第三行控制B
第四行控制A
第五列:颜色的偏移量
- 通过矩阵变换得到新的bitmap
public static Bitmap handleImageMatrix(Bitmap bitmap, float[] matrixValues) {
        Bitmap bmp = Bitmap.createBitmap(bitmap.getWidth(), bitmap.getHeight(), Bitmap.Config.ARGB_8888);
        Canvas canvas = new Canvas(bmp);
        Paint paint = new Paint(Paint.ANTI_ALIAS_FLAG);
        paint.setColorFilter(new ColorMatrixColorFilter(matrixValues));
        canvas.drawBitmap(bitmap, 0, 0, paint);
        return bmp;
}
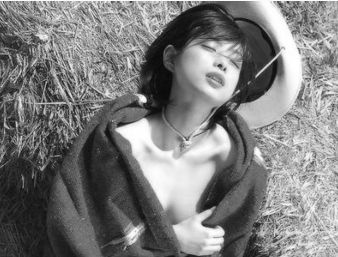
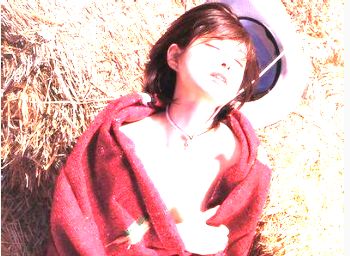
《老照片风格》
{0.393, 0.769, 0.189, 0, 0,
0.249, 0.686, 0.168, 0, 0,
0.272, 0.534, 0.131, 0, 0,
0, 0, 0, 1, 0}
{0.393, 0.769, 0.189, 0, 0,
0.249, 0.686, 0.168, 0, 0,
0.272, 0.534, 0.131, 0, 0,
0, 0, 0, 1, 0}
通过修改像素点处理图片色彩
- 对每个像素点进行修改,下面是一些算法
这里对每一个像素点进行处理
ABC:代表三个挨着的像素点
-
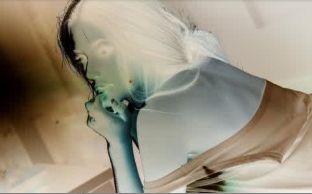
底片效果算法:
B.r = 255 - B.r;
B.g = 255 - B.g;
B.b = 255 - B.b;
-
老照片效果算法:
newR = (int) (0.393 * pixR + 0.769 * pixG + 0.189 * pixB);
newG = (int) (0.249 * pixR + 0.686 * pixG + 0.168 * pixB);
newB = (int) (0.272 * pixR + 0.534 * pixG + 0.131 * pixB);
-
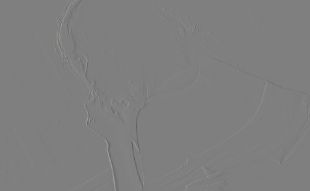
浮雕效果算法:
B.r = C.r - B.r + 127;
B.g = C.g - B.g + 127;
B.b = C.b - B.b + 127;
- 下面是具体代码和效果
    /**
     * 限制argb取值范围
     *
     * @param value
     * @return
     */
    public static int limit(int value) {
        if (value > 255) {
            return 255;
        } else if (value < 0) {
            return 0;
        }
        return value;
    }
    /**
     * 底片
     *
     * @param bitmap
     * @return
     */
    public static Bitmap handleImagePix(Bitmap bitmap) {
        int width = bitmap.getWidth();
        int height = bitmap.getHeight();
        int r, g, b, a;
        int[] imgPixels = new int[width * height];
        int[] newImgPixels = new int[width * height];
        bitmap.getPixels(imgPixels, 0, width, 0, 0, width, height);
        for (int i = 0; i < imgPixels.length; i++) {
            r = Color.red(imgPixels[i]);
            g = Color.green(imgPixels[i]);
            b = Color.blue(imgPixels[i]);
            a = Color.alpha(imgPixels[i]);

            r = limit(255 - r);
            g = limit(255 - g);
            b = limit(255 - b);

            newImgPixels[i] = Color.argb(a, r, g, b);
        }

        Bitmap newBitmap = Bitmap.createBitmap(width, height, Bitmap.Config.ARGB_8888);
        newBitmap.setPixels(newImgPixels, 0, width, 0, 0, width, height);
        return newBitmap;
    }
    /**
     * 怀旧
     *
     * @param bitmap
     * @return
     */
    public static Bitmap handleImagePix2(Bitmap bitmap) {
        int width = bitmap.getWidth();
        int height = bitmap.getHeight();
        int r, g, b, a, newR, newG, newB;
        int[] imgPixels = new int[width * height];
        int[] newImgPixels = new int[width * height];
        bitmap.getPixels(imgPixels, 0, width, 0, 0, width, height);
        for (int i = 0; i < imgPixels.length; i++) {
            r = Color.red(imgPixels[i]);
            g = Color.green(imgPixels[i]);
            b = Color.blue(imgPixels[i]);
            a = Color.alpha(imgPixels[i]);

            newR = limit((int) (0.393 * r + 0.769 * g + 0.189 * b));
            newG = limit((int) (0.249 * r + 0.686 * g + 0.168 * b));
            newB = limit((int) (0.272 * r + 0.534 * g + 0.131 * b));

            newImgPixels[i] = Color.argb(a, newR, newG, newB);
        }

        Bitmap newBitmap = Bitmap.createBitmap(width, height, Bitmap.Config.ARGB_8888);
        newBitmap.setPixels(newImgPixels, 0, width, 0, 0, width, height);
        return newBitmap;
    }
    /**
     * 浮雕
     *
     * @param bitmap
     * @return
     */
    public static Bitmap handleImagePix3(Bitmap bitmap) {
        int width = bitmap.getWidth();
        int height = bitmap.getHeight();
        int r, g, b, a, cr, cg, cb;
        int[] imgPixels = new int[width * height];
        int[] newImgPixels = new int[width * height];
        bitmap.getPixels(imgPixels, 0, width, 0, 0, width, height);
        for (int i = 0; i < imgPixels.length - 1; i++) {
            r = Color.red(imgPixels[i]);
            g = Color.green(imgPixels[i]);
            b = Color.blue(imgPixels[i]);
            a = Color.alpha(imgPixels[i]);

            cr = Color.red(imgPixels[i + 1]);
            cg = Color.green(imgPixels[i + 1]);
            cb = Color.blue(imgPixels[i + 1]);

            r = limit(cr - r + 127);
            g = limit(cg - g + 127);
            b = limit(cb - b + 127);

            newImgPixels[i] = Color.argb(a, r, g, b);
        }

        Bitmap newBitmap = Bitmap.createBitmap(width, height, Bitmap.Config.ARGB_8888);
        newBitmap.setPixels(newImgPixels, 0, width, 0, 0, width, height);
        return newBitmap;
    }
图片矩阵变换实现变形效果
- 矩阵变换相乘公式
{a, b, c,          X          a * X + b * Y + c          X′
   d, e, f,     x    Y     =    d * X + e * Y + f    =     Y′
   g, h, i}          1          g * X + h * Y + i          1′
- 初始化矩阵
{1, 0, 0,
   0, 1, 0,
   0, 0, 1}
- ❶平移变换
△x:表示x轴方向平移量
△y:表示y轴方向平移量
{1, 0, △x,        x1        x1 + △x
   0, 1, △y,    x   y1   =    y1 + △y
   0, 0, 1}          1         1
- ❷旋转变换
P点坐标(x1, y1),连接坐标中心O,与x轴形成夹角α
r = OP
则如下等式成立
x1 = r * cosα
y1 = r * sinα
-
-
当以O为中心,r为轴,旋转θ角度,此时P点旋转后坐标为(x₂, y₂)
则如下等式成立
x2 = r * cos(α + θ) = r * cosα * cosθ - r * sinα * sinθ = x1 * cosθ - y1 * sinθ
y2 = r * sin(α + θ) = r * sinα * cosθ + r * cosα * sinθ = y1 * cosθ + x1 * sinθ
-
-
将上边等式转换成矩阵表示
{cosθ, -sinθ, 0,            x1            x1 * cosθ - y1 * sinθ             x2
   sinθ,  cosθ, 0,     x      y1      =     y1 * cosθ + x1 * sinθ       =     y2
   0,     0,    1}            1             1                                 1
- ❸缩放变换
P点坐标:(x1, y1),x方向缩放k₁,y方向缩放k₂,
那么新P点坐标(x₂, y₂)满足以下等式:
x2 = x1 * k1
y2 = y1 * k2
-
-
将上边等式转换成矩阵表示
{k1, 0, 0,            x1            x1 * k1            x2
   0, k2, 0,     x      y1     =      y1 * k2      =     y2
   0,  0, 1}            1             1                  1
- ❹错切变换
变换公式:
x2 = x1 + y1 * k1
y2 = y1 + x1 * k2
-
-
将上边等式转换成矩阵表示
{1, k1, 0,            x1            x1 + y1 * k1            x2
   k2, 1, 0,     x      y1     =      y1 + x1 * k2      =     y2
   0,  0, 1}            1             1                       1
- 总结
{a, b, c,
   d, e, f,
   g, h, i}
-
-
通过上边变换得出:
a,e:控制缩放
c,f:控制平移
b,d:控制错切
效果与代码
public class ImageMatrixView extends View{
    private Bitmap bitmap;
    private Matrix matrix;

    public ImageMatrixView(Context context) {
        super(context);
        init();
    }

    public ImageMatrixView(Context context, AttributeSet attrs) {
        super(context, attrs);
        init();
    }

    public ImageMatrixView(Context context, AttributeSet attrs, int defStyleAttr) {
        super(context, attrs, defStyleAttr);
        init();
    }

    private void init() {
        bitmap = BitmapFactory.decodeResource(getResources(), R.mipmap.ic_launcher);
        matrix = new Matrix();
        float[] translateF = new float[]{
                1, 0, 140,
                0, 1, 140,
                0, 0, 1
        };
        matrix.setValues(translateF);
    }

    @Override
    protected void onDraw(Canvas canvas) {
        super.onDraw(canvas);
        canvas.drawBitmap(ImageHelper.handleImagePix2(bitmap), 0, 0, null);
        canvas.drawBitmap(bitmap, matrix, null);
    }
}
安卓中提供的一些矩阵变换API接口
缩放:matrix.setScale()
旋转:matrix.setRotate()
平移:matrix.setTranslate()
错切:matrix.setSkew()
矩阵组合:matrix.post...
画笔风格实现不同图形特效
图片混合
-
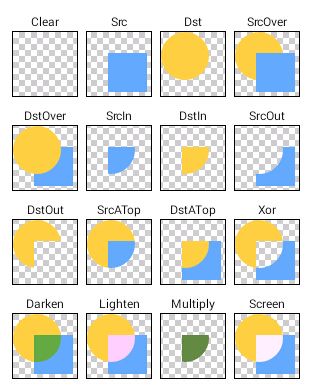
Xfermode
画布上先画上去的为Dst,后画上去的为Src。这里通过SrcIn实现图片圆角。
public class RoundRectView extends View {
    private Bitmap outBitmap;
    private Matrix matrix;

    public RoundRectView(Context context) {
        super(context);
        init();
    }

    public RoundRectView(Context context, @Nullable AttributeSet attrs) {
        super(context, attrs);
        init();
    }

    public RoundRectView(Context context, @Nullable AttributeSet attrs, int defStyleAttr) {
        super(context, attrs, defStyleAttr);
        init();
    }

    private void init() {
        setLayerType(LAYER_TYPE_SOFTWARE, null);//关闭硬件加速
        Bitmap bitmap = BitmapFactory.decodeResource(getResources(), R.drawable.b);
        outBitmap = Bitmap.createBitmap(bitmap.getWidth(), bitmap.getHeight(), Bitmap.Config.ARGB_8888);
        Canvas canvas = new Canvas(outBitmap);
        Paint paint = new Paint(Paint.ANTI_ALIAS_FLAG);
        //Dst
        canvas.drawRoundRect(0, 0, bitmap.getWidth(), bitmap.getHeight(), 100, 100, paint);
        paint.setXfermode(new PorterDuffXfermode(PorterDuff.Mode.SRC_IN));//设置风格
        //Src
        canvas.drawBitmap(bitmap, 0, 0, paint);

        matrix = new Matrix();//将图片缩小一倍
        matrix.setScale(0.5f, 0.5f);
    }

    @Override
    protected void onDraw(Canvas canvas) {
        super.onDraw(canvas);
        canvas.drawBitmap(outBitmap, matrix, null);
    }
}
- 与另一张图片混合
public class RoundRectView extends View {
    private Bitmap outBitmap;
    private Matrix matrix;

    public RoundRectView(Context context) {
        super(context);
        init();
    }

    public RoundRectView(Context context, @Nullable AttributeSet attrs) {
        super(context, attrs);
        init();
    }

    public RoundRectView(Context context, @Nullable AttributeSet attrs, int defStyleAttr) {
        super(context, attrs, defStyleAttr);
        init();
    }

    private void init() {
        matrix = new Matrix();//将图片缩小
        matrix.setScale(0.7f, 0.7f);
        matrix.postTranslate(100f, 0f);

        setLayerType(LAYER_TYPE_SOFTWARE, null);//关闭硬件加速
        Bitmap bitmap = BitmapFactory.decodeResource(getResources(), R.drawable.b);
        Bitmap bitmap2 = BitmapFactory.decodeResource(getResources(), R.drawable.mask);
        outBitmap = Bitmap.createBitmap(bitmap2.getWidth(), bitmap2.getHeight(), Bitmap.Config.ARGB_8888);
        Canvas canvas = new Canvas(outBitmap);
        Paint paint = new Paint(Paint.ANTI_ALIAS_FLAG);
        canvas.drawBitmap(bitmap2, matrix, null);
        paint.setXfermode(new PorterDuffXfermode(PorterDuff.Mode.SRC_IN));
        canvas.drawBitmap(bitmap, 0, 0, paint);
    }

    @Override
    protected void onDraw(Canvas canvas) {
        super.onDraw(canvas);
        canvas.drawBitmap(outBitmap, matrix, null);
    }
}
图片渐变
Shader
线性渐变
环形渐变
扫描渐变
组合渐变
简单的实现一下倒影效果
public class ReflectView extends View {
    private Bitmap srcBitmap;
    private Bitmap refBitmap;
    private Paint paint;

    public ReflectView(Context context) {
        super(context);
        init();
    }

    public ReflectView(Context context, @Nullable AttributeSet attrs) {
        super(context, attrs);
        init();
    }

    public ReflectView(Context context, @Nullable AttributeSet attrs, int defStyleAttr) {
        super(context, attrs, defStyleAttr);
        init();
    }

    private void init() {
        //1.原图片
        srcBitmap = BitmapFactory.decodeResource(getResources(), R.drawable.e);
        //2.创建倒影图
        Matrix matrix = new Matrix();//通过矩阵变换:y轴对折
        matrix.setScale(1, -1);
        refBitmap = Bitmap.createBitmap(srcBitmap, 0, 0, srcBitmap.getWidth(), srcBitmap.getHeight(), matrix, true);

        //3.设置画笔渐变
        paint = new Paint(Paint.ANTI_ALIAS_FLAG);
        //线性渐变
        paint.setShader(new LinearGradient(0, srcBitmap.getHeight(), 0, srcBitmap.getHeight() * 1.4f,
                0xDD000000, 0x10000000,
                Shader.TileMode.CLAMP));
        //4.设置混合模式
        paint.setXfermode(new PorterDuffXfermode(PorterDuff.Mode.DST_IN));
    }

    @Override
    protected void onDraw(Canvas canvas) {
        canvas.drawColor(Color.BLACK);
        canvas.drawBitmap(srcBitmap, 0, 0, null);
        canvas.drawBitmap(refBitmap, 0, srcBitmap.getHeight(), null);
        canvas.drawRect(0, srcBitmap.getHeight(), srcBitmap.getWidth(), srcBitmap.getHeight() * 2, paint);
    }
}
BitmapShader
- REPEAT:重复
- CLAMP:边缘拉伸
- MIRROR:镜像重复
-
效果
-
通过设置图像画笔画圆
public class BitmapShaderView extends View {
    private Bitmap bitmap;
    private Paint paint;
    private BitmapShader bitmapShader;

    public BitmapShaderView(Context context) {
        super(context);
        init();
    }

    public BitmapShaderView(Context context, @Nullable AttributeSet attrs) {
        super(context, attrs);
        init();
    }

    public BitmapShaderView(Context context, @Nullable AttributeSet attrs, int defStyleAttr) {
        super(context, attrs, defStyleAttr);
        init();
    }

    private void init() {
        paint = new Paint(Paint.ANTI_ALIAS_FLAG);
        bitmap = BitmapFactory.decodeResource(getResources(), R.drawable.d);
        bitmapShader = new BitmapShader(bitmap, Shader.TileMode.CLAMP, Shader.TileMode.CLAMP);
        paint.setShader(bitmapShader);
    }

    @Override
    protected void onDraw(Canvas canvas) {
        super.onDraw(canvas);
        canvas.drawCircle(700, 400, 400, paint);
    }
}
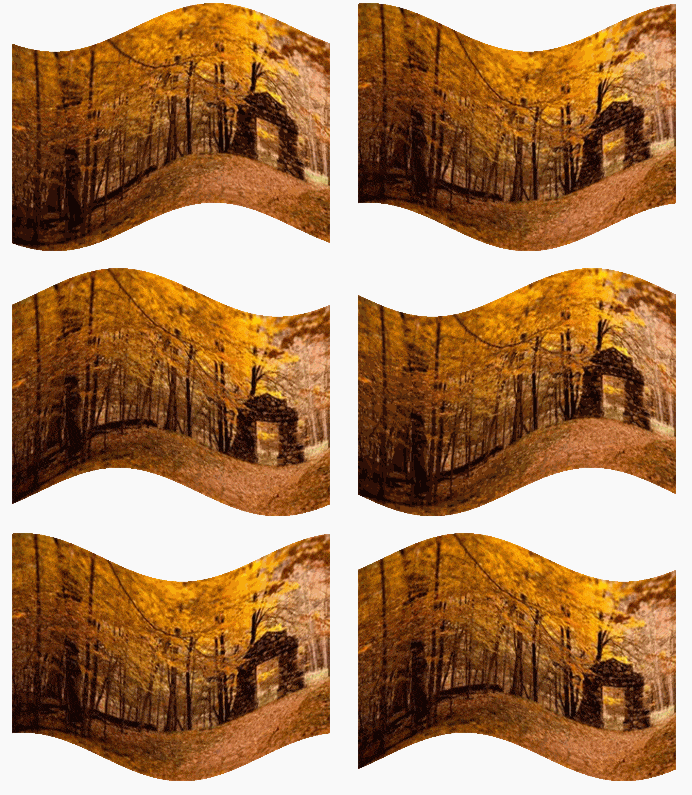
像素块处理图像drawBitmapMesh
public class MeshView extends View {
    private int WIDTH = 200;//横向网格
    private int HEIGHT = 200;//纵向网格
    private int COUNT = (WIDTH + 1) * (HEIGHT + 1);//所有点的数量
    private float[] orig = new float[COUNT * 2];//保存所有点的坐标,原始坐标
    private float[] verts = new float[COUNT * 2];//保存所有点的坐标,变换后的坐标
    private Bitmap bitmap;
    private float k = 1;//变化偏移量


    public MeshView(Context context) {
        super(context);
        init();
    }

    public MeshView(Context context, @Nullable AttributeSet attrs) {
        super(context, attrs);
        init();
    }

    public MeshView(Context context, @Nullable AttributeSet attrs, int defStyleAttr) {
        super(context, attrs, defStyleAttr);
        init();
    }

    private void init() {
        bitmap = BitmapFactory.decodeResource(getResources(), R.drawable.f);
        float width = bitmap.getWidth();
        float height = bitmap.getHeight();
        int index = 0;
        //将所有点的坐标点保存到orig,verts。
        //A(x1,y1),B(x2,y2),C(x3,y3)是挨着的三点,保存在数组中的方式为:[x1,y1,x2,y2,x3,y3]
        for (int i = 0; i < HEIGHT + 1; i++) {
            float fy = height * i / HEIGHT;
            for (int j = 0; j < WIDTH + 1; j++) {
                orig[index * 2] = verts[index * 2] = width * j / WIDTH;
                orig[index * 2 + 1] = verts[index * 2 + 1] = fy + 100;
                index ++;
            }
        }
    }

    @Override
    protected void onDraw(Canvas canvas) {
        int index = 0;
        //波浪,x坐标不变,y坐标改变
        for (int i = 0; i < HEIGHT + 1; i++) {
            for (int j = 0; j < WIDTH + 1; j++) {
                float offsetY = (float) Math.sin((float)j / WIDTH * 2 * Math.PI + k * 2 * Math.PI);
                verts[index * 2 + 1] = orig[index * 2 + 1] + offsetY * 80;
                index ++;
            }
        }
        k += 0.1f;
        canvas.drawBitmapMesh(bitmap, WIDTH, HEIGHT, verts, 0, null, 0, null);
        invalidate();
    }
}
学习路径:
Android图像处理-打造美图秀秀从它开始: http://www.imooc.com/learn/302
Android图像处理-变"换"莫测的图像: http://www.imooc.com/learn/343

