Tesseract API Basic Example using CMake Configuration
参考文档:https://github.com/tesseract-ocr/tesseract/wiki/APIExample
Tesseract提供的API可以在baseapi.h文件中找到。然而,如果没有个示例带我们飞一会儿,也是颇难搞懂到底该怎么调用tesseract的api。
我们知道,如果要调用一个第三方的库,那我们需要在工程的属性中增加:
- 第三方库头文件的位置。
- 第三方库库文件的位置。
- 第三方库中,需要链接的lib文件的文件名。
而且,Debug和Release需要分开来配置。手动配置真的是麻烦极了。而且,即使你配置好了,如果你第三方库的位置改变了,那对不起,请重新配置;如果你要把工程给别人来使用,而别人的第三方库所放的位置与你所放的不同,对不起,需要重新配置;如果你想要换一个操作系统进行开发,对不起,请重新配置!那有没有办法可以绕过这些麻烦事,使得只用麻烦一次,以后永远简单呢?答案是有。工具就是CMake。可参看我的另一篇文章:CMake简要教程。这里,我给大家举例介绍,如何使用CMake来添加第三方库。
首先,我们需要将第三方库Tesseract所提供的东西集中存放。比如,我在F盘的extralib中建立了一个Tesseract文件夹。文件夹中,有bin文件夹include文件夹,lib文件夹,以及tessdata文件夹。其中:
- bin:存放.dll文件。
- include:存放.h文件。
- lib:存放.lib文件。
- tessdata:存放.traineddata文件。
其中,tesseract的.h文件比较分散。我是直接在原来的tessract中搜索所有的.h文件,然后再拷贝到这边来的。
其中,chi_sim代表简体中文,eng就不用说了,代表英文。tessdata文件夹中的内容可以在官方网站中下载到。
好了,现在有了这样一个文件夹,我们下面的目标是让CMake可以找到这些文件夹。为了达到这个目的,首先需要自己写名为TesseractConfig.cmake一个文件,放在刚刚建立的tesseract文件夹中。所以,tesseract文件夹最终看起来是这个样子的:
如果CMake能找到TesseractConfig.cmake这个文件,就可以通过find_package函数来找到Tesseract的各个文件夹的路径了。但问题是,CMake如何找到TesseractConfig.cmake这个文件呢?在Windows操作系统的环境下,有两种方法:
- 将TesseractConfig.cmake这个文件所在的文件夹路径添加到系统环境变量的Path中。
- 在CMake的GUI界面中手动配置。
在正式介绍之前,先来看一看TesseractConfig.cmake中该怎么写:
# ===================================================================================
#  The Tesseract CMake configuration file
#
#  Usage from an external project:
#    In your CMakeLists.txt, add these lines:
#
#    FIND_PACKAGE(Tesseract REQUIRED)
#    TARGET_LINK_LIBRARIES(MY_TARGET_NAME ${Tesseract_LIBS})
#
#    This file will define the following variables:
#      - Tesseract_LIBS                     : The list of libraries to link against.
#      - Tesseract_LIB_DIR                  : The directory(es) where lib files are. Calling
#                                             LINK_DIRECTORIES with this path is NOT needed.
#      - Tesseract_INCLUDE_DIRS             : The Tesseract include directories.
#      - Tesseract_VERSION                  : The version of this Tesseract build. Example: "2.4.0"
#      - Tesseract_VERSION_MAJOR            : Major version part of Tesseract_VERSION. Example: "2"
#      - Tesseract_VERSION_MINOR            : Minor version part of Tesseract_VERSION. Example: "4"
#      - Tesseract_VERSION_PATCH            : Patch version part of Tesseract_VERSION. Example: "0"
#
#    Advanced variables:
#      - Tesseract_CONFIG_PATH
#
# ===================================================================================

set(Tesseract_VERSION_MAJOR 3)
set(Tesseract_VERSION_MINOR 4)
set(Tesseract_VERSION_PATCH 1)
set(Tesseract_VERSION ${Tesseract_VERSION_MAJOR}.${Tesseract_VERSION_MINOR}.${Tesseract_VERSION_PATCH})

get_filename_component(Tesseract_CONFIG_PATH "${CMAKE_CURRENT_LIST_FILE}" PATH CACHE)
set(Tesseract_LIB_DIR "${Tesseract_CONFIG_PATH}/lib")
set(Tesseract_INCLUDE_DIRS "${Tesseract_CONFIG_PATH}/include")

set(Tesseract_LIBS_DBG "liblept171d.lib" "libtesseract304d.lib")
set(Tesseract_LIBS_OPT "liblept171.lib" "libtesseract304.lib")
foreach(__tesslib ${Tesseract_LIBS_DBG})
  list(APPEND Tesseract_LIBS debug "${Tesseract_LIB_DIR}/${__tesslib}")
endforeach()
foreach(__tesslib ${Tesseract_LIBS_OPT})
  list(APPEND Tesseract_LIBS optimized "${Tesseract_LIB_DIR}/${__tesslib}")
endforeach()

set(Tesseract_FOUND TRUE CACHE BOOL "" FORCE)
好了,准备工作到此为之,接下来我们可以开始正式地构建示例程序Basic-example了。首先新建文件夹samples。然后在samples文件夹中新建文件夹Basic-example,新建文件CMakeLists.txt。
这里的CMakeLists.txt可以很简单(当然也可以很复杂,但作为示例,理当简单一点)。
cmake_minimum_required(VERSION 3.0)
project(tesseract-api-examples)
add_subdirectory(Basic-example)
第一句话表示,cmake的版本号最小为3.0(低于cmake 3.0则无法构建)。第二句话表示构建一个解决方案,名字叫做tesseract-api-examples。第三句表示添加子目录Basic-example。添加子目录的意思,其实是开始执行子目录中的CMakeLists.txt。所以,如果想通过add_subdirectory添加子目录,那就必须保证这个子目录中有CMakeLists.txt这个文件。
现在,我们进入Basic-example文件夹中,新建两个文件:Basic-example.cpp以及CMakeLists.txt
在Basic-example.cpp中,我们将官网上提供的代码粘上来:
#include
#include

int main()
{
    char *outText;

    tesseract::TessBaseAPI *api = new tesseract::TessBaseAPI();
    // Initialize tesseract-ocr with English, without specifying tessdata path
    if (api->Init(NULL, "eng")){
        fprintf(stderr, "Could not initialize tesseract.\n");
        exit(1);
    }

    // Open input image with leptonica library
    Pix *image = pixRead("D:\\open_source\\tesseract-3.04.01\\tesseract\\testing\\phototest.tif");
    api->SetImage(image);
    // Get OCR result
    outText = api->GetUTF8Text();
    printf("OCR output:\n%s", outText);

    // Destroy used object and release memory
    api->End();
    delete [] outText;
    pixDestroy(&image);

    return 0;
}
而在CMakeLists.txt中,可以用6句话来完成:
set(the_target "Basic-example")
find_package(Tesseract REQUIRED)
aux_source_directory(. SRC_LIST)
include_directories(${Tesseract_INCLUDE_DIRS})
add_executable(${the_target} ${SRC_LIST})
target_link_libraries(${the_target} ${Tesseract_LIBS})
其中,
- 第一行设定the_target名为"Basic-example"。
- 第二行寻找Tesseract第三方库。
- 第三行寻找当前文件夹下的所有.c文件和.cpp文件,并把文件名放在SRC_LIST中。
- 第四行添加第三方库目录Tesseract_INCLUDE_DIRS。
- 第五行设定项目Basic-example的生成目标是一个可执行文件。
- 第六行添加依赖的第三方库。
好了,一切准备就绪,就差构建了!打开CMake-GUI软件。
设定cmake的源路径和目标路径。如果对这两个路径不是很清楚的,还是请移步CMake简要教程。
点击config
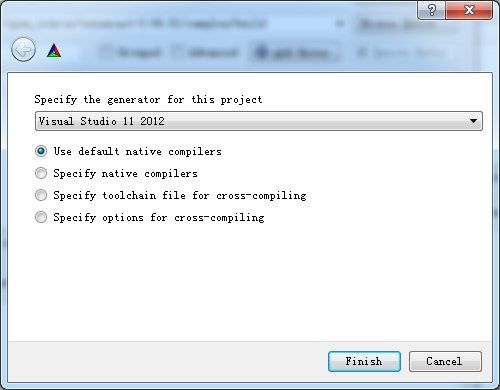
出现一个选框,选择你所使用的C++编译器。我使用的是VS2012。点击Finish。
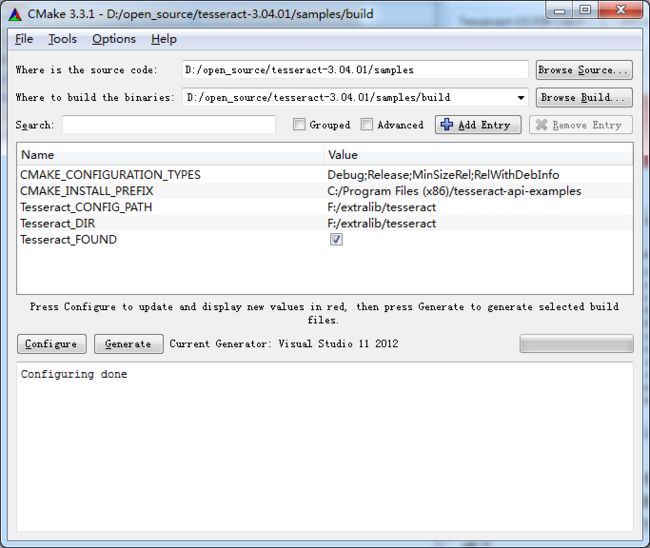
在一段时间的等待之后,出现如下的界面:
注意Tesseract_DIR那一行。我这边自动找到了。那是因为这个我已经把这个路径放置到环境变量的Path中了。你可以选择将你的路径放置到环境变量中,也可以在这里手动选择这个目录。如果是通过手动选择的方式,那么这个目录会保存在Cache中,下次配置也不需要再次选择了。
再次点击Configure。
红色条带消失,消息栏显示Configuring done。此时,点击Generate。
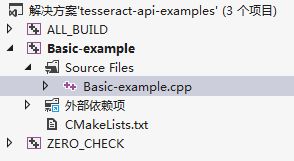
生成成功!接下来,就可以打开build文件夹下面的tesseract-api-examples.sln这一工程文件了。
将Basic-example设为启动项。生成,成功!
运行!啊哦!
唉,不好意思,太激动了,脑残了一把!我们现在还需要将Tesseract的bin文件夹放到环境变量的Path中,这样,程序才能找到dll文件。
现在可以开始调试程序了。
OK。运行程序。
成功执行~
我们再回过头来看一看这个示例程序。看看它做了一些什么事。
#include
#include

int main()
{
    char *outText;

    tesseract::TessBaseAPI *api = new tesseract::TessBaseAPI();
    // Initialize tesseract-ocr with English, without specifying tessdata path
    if (api->Init(NULL, "eng")){
        fprintf(stderr, "Could not initialize tesseract.\n");
        exit(1);
    }

    // Open input image with leptonica library
    Pix *image = pixRead("D:\\open_source\\tesseract-3.04.01\\tesseract\\testing\\phototest.tif");
    api->SetImage(image);
    // Get OCR result
    outText = api->GetUTF8Text();
    printf("OCR output:\n%s", outText);

    // Destroy used object and release memory
    api->End();
    delete [] outText;
    pixDestroy(&image);

    return 0;
}
首先包含了两个头文件:
#include
#include
这其实说明了,这个示例程序用到了两个库。一个是tesseract,一个是leptonica。tesseract用来做OCR。leptonica可以处理基本的图像处理的需求。
接下来,在main函数中,定义了一个对象:
tesseract::TessBaseAPI *api = new tesseract::TessBaseAPI();
其中,tesseract是命名空间。TessBaseAPI是一个类名。这个类的注释是这么写的:
/**
* Base class for all tesseract APIs.
* Specific classes can add ability to work on different inputs or produce
* different outputs.
* This class is mostly an interface layer on top of the Tesseract instance
* class to hide the data types so that users of this class don't have to
* include any other Tesseract headers.
*/
也就是说:
所有的tesseract的API都在这个类中。
所以,如果我们把这个类搞明白了,也就知道Tesseract的API的所有调用方法了。好事啊~这个类一会儿再回过来看。先把代码读完。
    // Initialize tesseract-ocr with English, without specifying tessdata path
    if (api->Init(NULL, "eng")){
        fprintf(stderr, "Could not initialize tesseract.\n");
        exit(1);
    }
来看一看Init的注释~
/**
   * Instances are now mostly thread-safe and totally independent,
   * but some global parameters remain. Basically it is safe to use multiple
   * TessBaseAPIs in different threads in parallel, UNLESS:
   * you use SetVariable on some of the Params in classify and textord.
   * If you do, then the effect will be to change it for all your instances.
   *
   * Start tesseract. Returns zero on success and -1 on failure.
   * NOTE that the only members that may be called before Init are those
   * listed above here in the class definition.
   *
   * The datapath must be the name of the parent directory of tessdata and
   * must end in / . Any name after the last / will be stripped.
   * The language is (usually) an ISO 639-3 string or NULL will default to eng.
   * It is entirely safe (and eventually will be efficient too) to call
   * Init multiple times on the same instance to change language, or just
   * to reset the classifier.
   * The language may be a string of the form [~][+[~]]* indicating
   * that multiple languages are to be loaded. Eg hin+eng will load Hindi and
   * English. Languages may specify internally that they want to be loaded
   * with one or more other languages, so the ~ sign is available to override
   * that. Eg if hin were set to load eng by default, then hin+~eng would force
   * loading only hin. The number of loaded languages is limited only by
   * memory, with the caveat that loading additional languages will impact
   * both speed and accuracy, as there is more work to do to decide on the
   * applicable language, and there is more chance of hallucinating incorrect
   * words.
   * WARNING: On changing languages, all Tesseract parameters are reset
   * back to their default values. (Which may vary between languages.)
   * If you have a rare need to set a Variable that controls
   * initialization for a second call to Init you should explicitly
   * call End() and then use SetVariable before Init. This is only a very
   * rare use case, since there are very few uses that require any parameters
   * to be set before Init.
   *
   * If set_only_non_debug_params is true, only params that do not contain
   * "debug" in the name will be set.
   */
看着这么长的英文估计还挺累,不如我来翻译一下:
实例大多数情况下是线程安全的,并且是完全独立的。但是仍然保留了一些全局参量。基本上在不同的线程中并行地使用多个TessBaseAPIs是安全的,除非:你使用了SetVariable改变了某些参数的值。如果你这么做了,那么你所有的实例的效果都会为之发生改变。
启动tesseract。如果成功返回0,如果失败返回-1。注意能在Init方法前面调用的成员函数是那些在类定义中列在Init之前的那些函数。
datapath必须为tessdata的父目录,并且必须以/终止。最后一个/后面所出现的字符将被全部删除。language参数通常是一个ISO639-3的字符串,如果是NULL将被默认设置为eng。在单个实例中,多次调用Init方法来改变语言或重置分类器是没有问题的,(并且会逐渐变地更快速)。
language参数可以写成[]
[+[ ]]*的形式,即表明可以加载多种语言。例如hin+eng会加载北印度语和英语。Languages可以在内部被设置为一种或多种语言,因此符号可以用来覆盖。例如,如果hin被设置为默认加载eng,则hin+eng会强制只加载hin。可以被加载的语言的数量仅仅由内存限制,但是加载多种语言会同时影响速度和准确率。因为这需要更多的工作来决定它是哪种语言,并且更有可能产生错误。
警告:一旦改变语言,所有的Tesseract参数被重置为默认值。(每种语言可能不一样。)
再接着看代码:
    // Open input image with leptonica library
    Pix *image = pixRead("D:\\open_source\\tesseract-3.04.01\\tesseract\\testing\\phototest.tif");
pixRead是Leptonica的函数,它读取一张图片,并将图片的结果保存在Pix结构体中。
api->SetImage(image);
SetImage函数为Tesseract提供去识别的图片。
    // Get OCR result
    outText = api->GetUTF8Text();
GetUTF8Text函数识别图片中的文字,并返回char*数组。
    // Destroy used object and release memory
    api->End();
    delete [] outText;
    pixDestroy(&image);
最后一部分是释放和销毁。
关于End方法,代码中的注释是这么写的
  /**
   * Close down tesseract and free up all memory. End() is equivalent to
   * destructing and reconstructing your TessBaseAPI.
   * Once End() has been used, none of the other API functions may be used
   * other than Init and anything declared above it in the class definition.
   */
  void End();
最后释放数组和图像。合情合理,没有什么好说的。
如果需要完整的示例文件及CMakeLists.txt,可以点击此处下载。


