Masonry是一个轻量级的OC布局框架, 拥有自己的描述语法,采用更优雅的链式语法封装自动布局,简洁明了,并具有高可读性,而且同时支持 iOS 和 Max OS X。
Masonry支持的属性与NSLayoutAttrubute的对照:
| MASConstraint (Masonry) | NSAutoLayout | 说明 |
|---|---|---|
| left | NSLayoutAttributeLeft | 左侧 |
| top | NSLayoutAttributeTop | 上侧 |
| right | NSLayoutAttributeRight | 右侧 |
| bottom | NSLayoutAttributeBottom | 下侧 |
| leading | NSLayoutAttributeLeading | 首部 |
| trailing | NSLayoutAttributeTrailing | 尾部 |
| width | NSLayoutAttributeWidth | 宽 |
| height | NSLayoutAttributeHeight | 高 |
| centerX | NSLayoutAttributeCenterX | 横向中点 |
| centerY | NSLayoutAttributeCenterY | 纵向中点 |
| baseline | NSLayoutAttributeBaseline | 文本基线 |
其中leading与left, trailing与right 在正常情况下是等价的。但是当一些布局是从右至左时(比如阿拉伯文) 则会对调, 换句话说就是基本可以 用left和right就好了。
- 在Masonry中能够添加AutoLayout约束有三个函数:
/*
mas_makeConstraints 只负责新增约束 Autolayout不能同时存在两条针对于同一对象的约束 否则会报错
mas_updateConstraints 针对上面的情况 会更新在block中出现的约束 不会导致出现两个相同约束的情况
mas_remakeConstraints 则会清除之前的所有约束 仅保留最新的约束
*/
- (NSArray *)mas_makeConstraints:(void(^)(MASConstraintMaker *make))block;
- (NSArray *)mas_updateConstraints:(void(^)(MASConstraintMaker *make))block;
- (NSArray *)mas_remakeConstraints:(void(^)(MASConstraintMaker *make))block;
-
equalTo和mas_equalTo的区别?
mas_equalTo是宏,在MASConstraint.h文件中定义:
#define mas_equalTo(...) equalTo(MASBoxValue((__VA_ARGS__)))
mas_equalTo 比equalTo多了类型转换操作, 大多数时候两个方法都是 通用的,但是对于数值元素使用mas_equalTo。对于对象或是多个属性的处理,使用equalTo。
以几个学习Masonry:
1 中心点与self.view相同,宽度为300*300
// exp1: 中心点与self.view相同,宽度为300*300
-(void)exp1 {
    UIView *view = [UIView new];
    [view setBackgroundColor:[UIColor redColor]];
    [self.view addSubview:view];
    [view mas_makeConstraints:^(MASConstraintMaker *make) {
        make.center.equalTo(self.view);
        make.size.mas_equalTo(CGSizeMake(300, 300));
    }];
}
2 上下左右边距都为10
-(void)exp2 {
    UIView *view = [UIView new];
    [view setBackgroundColor:[UIColor redColor]];
    [self.view addSubview:view];
    [view mas_makeConstraints:^(MASConstraintMaker *make) {
        // 写法1
        make.edges.equalTo(self.view).with.insets(UIEdgeInsetsMake(10, 10, 10, 10));

        /*
        // 写法2
        make.top.equalTo(self.view).with.offset(10);
        make.left.equalTo(self.view).with.offset(10);
        make.bottom.equalTo(self.view).with.offset(-10);
        make.right.equalTo(self.view).with.offset(-10);
         */

        /*
        // 写法3
        make.top.left.bottom.and.right.equalTo(self.view).with.insets(UIEdgeInsetsMake(10, 10, 10, 10));
         */
    }];
}
- edges 就是top,left,bottom,right简化写法
- 写法2中 bottom和right的offset是负数,因为计算的是绝对的数值,也就是view的bottom的y值减去self.view的bottom的y值是-10,view的right的x值减去self.view的right的x值是-10。
-
and和with什么事件都没做,只是从应用语法看上去很顺。
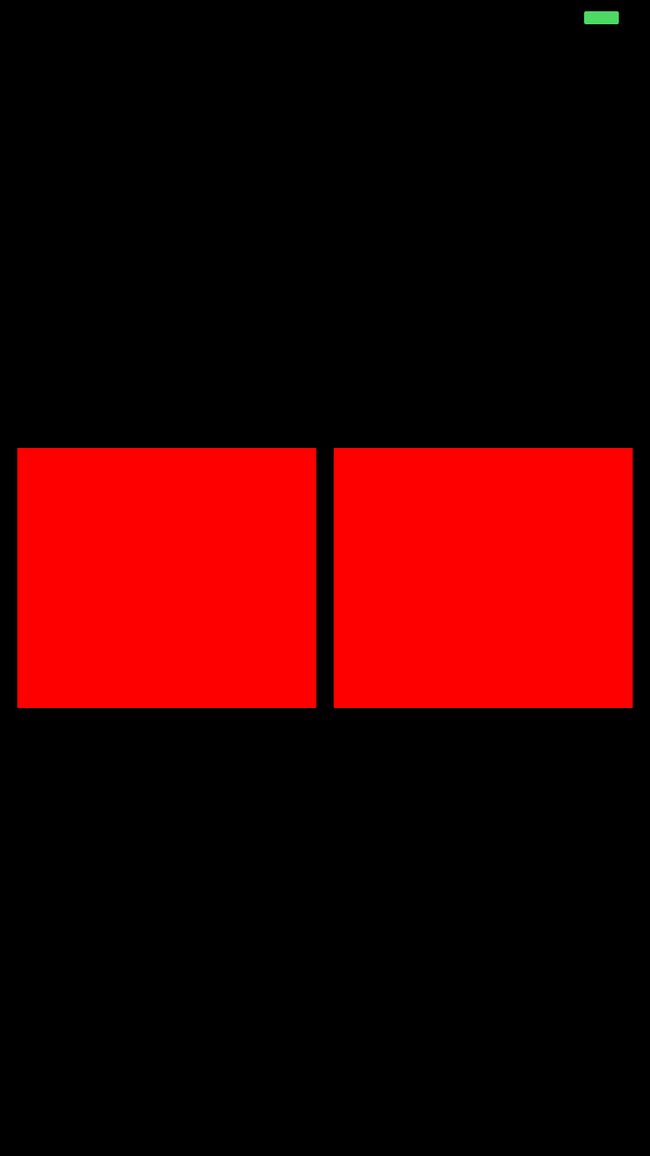
3 让两个高度为150的view垂直居中且等宽且等间隔排列 间隔为10(自动计算器高度)
-(void)exp3{

    UIView *view1 = [UIView new];
    [view1 setBackgroundColor:[UIColor redColor]];
    [self.view addSubview:view1];

    UIView *view2 = [UIView new];
    [view2 setBackgroundColor:[UIColor redColor]];
    [self.view addSubview:view2];

    [view1 mas_makeConstraints:^(MASConstraintMaker *make) {

        make.centerY.mas_equalTo(self.view.mas_centerY);
        make.height.mas_equalTo(150);
        make.width.mas_equalTo(view2.mas_width);
        make.left.mas_equalTo(self.view.mas_left).with.offset(10);
        make.right.mas_equalTo(view2.mas_left).offset(-10);

    }];
    [view2 mas_makeConstraints:^(MASConstraintMaker *make) {

        make.centerY.mas_equalTo(self.view.mas_centerY);
        make.height.mas_equalTo(150);
        make.width.mas_equalTo(view1.mas_width);
        make.left.mas_equalTo(view1.mas_right).with.offset(10);
        make.right.equalTo(self.view.mas_right).offset(-10);

    }];

}
4 iOS自带计算器布局
-(void)exp4{

    //申明区域,displayView是显示区域,keyboardView是键盘区域
    UIView *displayView = [UIView new];
    [displayView setBackgroundColor:[UIColor blackColor]];
    [self.view addSubview:displayView];

    UIView *keyboardView = [UIView new];
    [self.view addSubview:keyboardView];

    //先按1:3分割 displView(显示结果区域)和 keyboardView(键盘区域)
    [displayView mas_makeConstraints:^(MASConstraintMaker *make) {
        make.top.equalTo(self.view.mas_top);
        make.left.and.right.equalTo(self.view);
        make.height.equalTo(keyboardView).multipliedBy(0.3f);
    }];

    [keyboardView mas_makeConstraints:^(MASConstraintMaker *make) {
        make.top.equalTo(displayView.mas_bottom);
        make.bottom.equalTo(self.view.mas_bottom);
        make.left.and.right.equalTo(self.view);

    }];

    //设置显示位置的数字为0
    UILabel *displayNum = [[UILabel alloc]init];
    [displayView addSubview:displayNum];
    displayNum.text = @"0";
    displayNum.font = [UIFont fontWithName:@"HeiTi SC" size:70];
    displayNum.textColor = [UIColor whiteColor];
    displayNum.textAlignment = NSTextAlignmentRight;
    [displayNum mas_makeConstraints:^(MASConstraintMaker *make) {
        make.left.and.right.equalTo(displayView).with.offset(-10);
        make.bottom.equalTo(displayView).with.offset(-10);
    }];


    //定义键盘键名称,?号代表合并的单元格
    NSArray *keys = @[@"AC",@"+/-",@"%",@"÷"
                      ,@"7",@"8",@"9",@"x"
                      ,@"4",@"5",@"6",@"-"
                      ,@"1",@"2",@"3",@"+"
                      ,@"0",@"?",@".",@"="];


    int indexOfKeys = 0;
    for (NSString *key in keys){
        //循环所有键
        indexOfKeys++;
        int rowNum = indexOfKeys %4 ==0? indexOfKeys/4:indexOfKeys/4 +1;
        int colNum = indexOfKeys %4 ==0? 4 :indexOfKeys %4;
        NSLog(@"index is:%d and row:%d,col:%d",indexOfKeys,rowNum,colNum);

        //键样式
        UIButton *keyView = [UIButton buttonWithType:UIButtonTypeCustom];
        [keyboardView addSubview:keyView];
        [keyView setTitleColor:[UIColor blackColor] forState:UIControlStateNormal];
        [keyView setTitle:key forState:UIControlStateNormal];
        [keyView.layer setBorderWidth:1];
        [keyView.layer setBorderColor:[[UIColor blackColor]CGColor]];
        [keyView.titleLabel setFont:[UIFont fontWithName:@"Arial-BoldItalicMT" size:30]];

        //键约束
        [keyView mas_makeConstraints:^(MASConstraintMaker *make) {

            //处理 0 合并单元格
            if([key isEqualToString:@"0"] || [key isEqualToString:@"?"] ){

                if([key isEqualToString:@"0"]){
                    [keyView mas_makeConstraints:^(MASConstraintMaker *make) {
                        make.height.equalTo(keyboardView.mas_height).with.multipliedBy(.2f);
                        make.width.equalTo(keyboardView.mas_width).multipliedBy(.5);
                        make.left.equalTo(keyboardView.mas_left);
                        make.baseline.equalTo(keyboardView.mas_baseline).with.multipliedBy(.9f);
                    }];
                }if([key isEqualToString:@"?"]){
                    [keyView removeFromSuperview];
                }

            }
            //正常的单元格
            else{
                make.width.equalTo(keyboardView.mas_width).with.multipliedBy(.25f);
                make.height.equalTo(keyboardView.mas_height).with.multipliedBy(.2f);

                //按照行和列添加约束,这里添加行约束
                switch (rowNum) {
                    case 1:
                    {
                        make.baseline.equalTo(keyboardView.mas_baseline).with.multipliedBy(.1f);
                        keyView.backgroundColor = [UIColor colorWithRed:205 green:205 blue:205 alpha:1];

                    }
                        break;
                    case 2:
                    {
                        make.baseline.equalTo(keyboardView.mas_baseline).with.multipliedBy(.3f);
                    }
                        break;
                    case 3:
                    {
                        make.baseline.equalTo(keyboardView.mas_baseline).with.multipliedBy(.5f);
                    }
                        break;
                    case 4:
                    {
                        make.baseline.equalTo(keyboardView.mas_baseline).with.multipliedBy(.7f);
                    }
                        break;
                    case 5:
                    {
                        make.baseline.equalTo(keyboardView.mas_baseline).with.multipliedBy(.9f);
                    }
                        break;
                    default:
                        break;
                }
                //按照行和列添加约束,这里添加列约束
                switch (colNum) {
                    case 1:
                    {
                        make.left.equalTo(keyboardView.mas_left);

                    }
                        break;
                    case 2:
                    {
                        make.right.equalTo(keyboardView.mas_centerX);

                    }
                        break;
                    case 3:
                    {
                        make.left.equalTo(keyboardView.mas_centerX);
                    }
                        break;
                    case 4:
                    {
                        make.right.equalTo(keyboardView.mas_right);
                        [keyView setBackgroundColor:[UIColor colorWithRed:243 green:127 blue:38 alpha:1]];
                    }
                        break;
                    default:
                        break;
                }
            }
        }];
    }

}
代码: MasonryDemo
参考:
Masonry介绍与使用实践(快速上手Autolayout)
Masonry的使用


