上一章节iOS10 本地推送你玩过了吗?,了解了本地推送了,这一节,玩耍一下iOS10的远程推送。了解了本地推送之后,再去了解远程推送就简单多了。
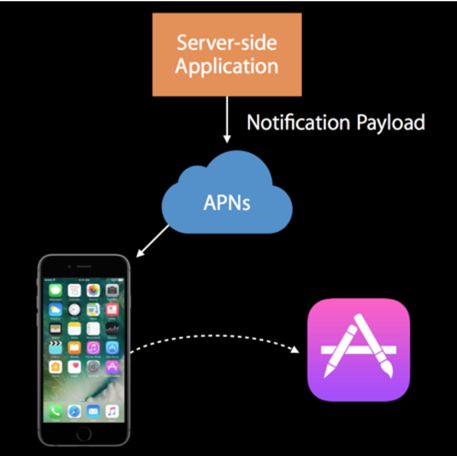
远程推送的原理图
图品来自
说一下我们远程推送的一般的需求。
1、远程推送是在用户的app没有处于前台的时候用来提醒用户使用app的一种手段,为了提醒用户相关的信息。以增加app的活跃度。
2、当收到远程推送的时候,用户点击提醒框,根据提醒的内容,进入相关的具体内容的展示界面
别的木有了吧。我感觉最主要的就是这两个场景。
让我们玩一下iOS10的远程推送。
1、证书文件的配置,这里就不用说了吧
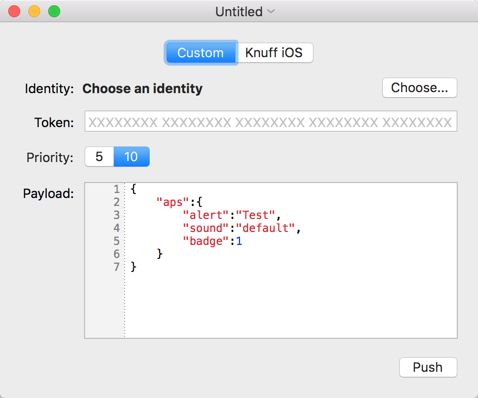
2、介绍一个好用的测试工具 Kunff
3、注册远程推送动作
    // 注册 push
    func registerPush(application:UIApplication) {

        // 首先通过系统版本进行判断,进行不同的注册
        let version:NSString = UIDevice.current.systemVersion as NSString;
        let versionFloat = version.floatValue
        if versionFloat < 10{

            let settings = UIUserNotificationSettings.init(types: [.alert, .sound, .badge], categories: nil)
            application.registerUserNotificationSettings(settings)

        }else{

            if #available(iOS 10.0, *) {
                UNUserNotificationCenter.current().requestAuthorization(options: [.alert, .sound, .badge]) {
                    granted, error in
                    if granted {
                        // 用户允许进行通知

                        print("用户允许进行通知了")

                    }else{
                        print("用户不允许进行通知了")
                    }
                }

                // 向 APNs 请求 token:
                UIApplication.shared.registerForRemoteNotifications()

            } else {
                // Fallback on earlier versions
            }
        }
    }
添加这个方法之后。
UIApplication.shared.registerForRemoteNotifications()
就会走
// 获取token,有需要的话将token上传到推送服务器
    func application(_ application: UIApplication, didRegisterForRemoteNotificationsWithDeviceToken deviceToken: Data) {

        let tokenString = deviceToken.hexString
        print("Get Push token: \(tokenString)")
    }
4、证书也准备好了,测试软件也准备就绪了,代码也写好了,跑一把呗。
当然了别忘了这个
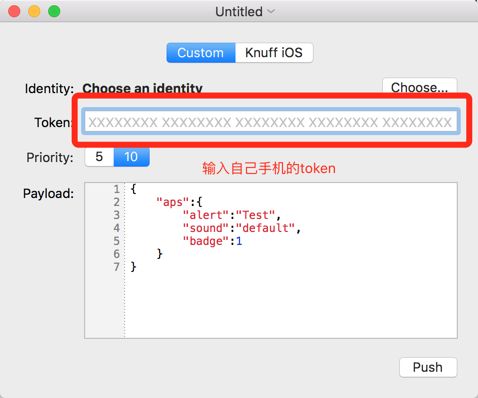
获取自己的测试手机的token,小插曲<经测试发现,这个token会发生变化的。在开发环境下,app卸载之后,重新运行,token就会发生变化>。
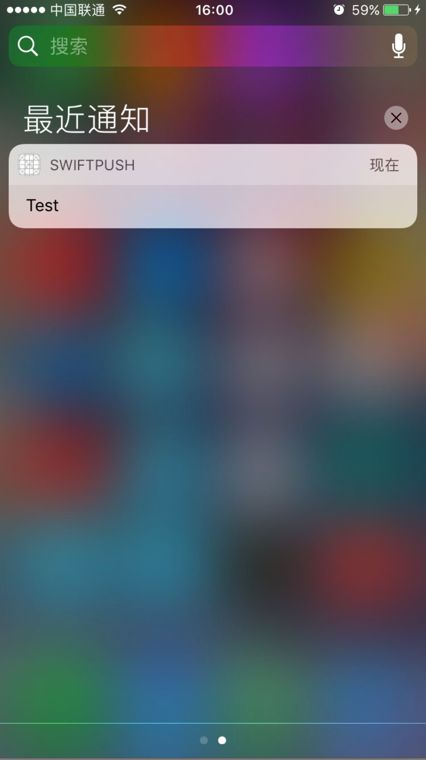
进行简单的测试
通了
上一节,我们了解了本地推送的相关。iOS10 本地推送你玩过了吗?
本地推送提前设置的,title,subtitle,categoryIdentifier等等参数都能。
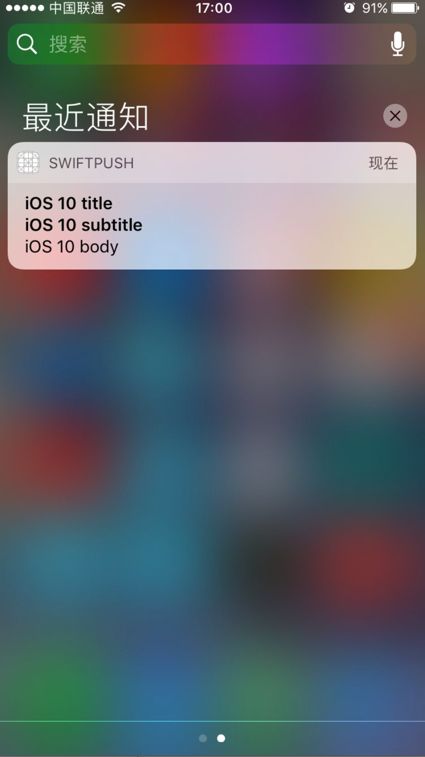
如果想添加这些东西,则需要将 alert从字符串换为字典,新的 payload 是:
{
  "aps":{
    "alert":{
      "title":"iOS 10 title",
      "subtitle":"iOS 10 subtitle",
      "body":"iOS 10 body"
    },
    "sound":"default",
    "badge":1
  }
}
玩一下
有一个无脑问题,这么写推送信息不行吗?
{
  "aps":{
    "alert":{
      "title":"iOS 10 title",
      "subtitle":"iOS 10 subtitle",
      "body":"iOS 10 body",
       "sound":"default",
       "badge":3
    }
  }
}
把** "sound":"default", "badge":3** 写在alert的里面不行吗?这样写虽然能收到推送,但是sound 和 badge的作用就废了,感兴趣的可以自行实验。
5、看一下接收远程推送的方法,是不是很熟悉,接收本地推送的也是这个方法
func userNotificationCenter(_ center: UNUserNotificationCenter, didReceive response: UNNotificationResponse, withCompletionHandler completionHandler: @escaping () -> Void)
当然了,远程推送也是可以通过categoryIdentifier来设置自定义的交互。
发送远程推送的内容
{
  "aps":{
    "alert":{
      "title":"iOS 10 title",
      "subtitle":"iOS 10 subtitle",
      "body":"iOS 10 body"
    },
    "category":"saySomethingCategory",
    "sound":"default",
    "badge":3
  }
}
"category":"saySomethingCategory"需要写在alert平级的地方。不然解析不出来的。
收到推送的样式展示,因为
了解了本地推送,再了解远程推送是不是就很简单了。
等等,本地推送不是能展示多媒体附件,音频,视频,还有图片。
远程推送这些东西能做到吗?当然也能做到了。
但是展示多媒体的时候肯定得是访问的本地的文件路径,那么可以猜想一下,远程推送肯定是推送的附件的下载路径,下载下来之后再去展示。
iOS10 之前收到推送之后就会直接展示了,iOS10 有这个能力下载完了附件再去展示吗?
答案是可以,但是得借助苹果的另一个神器
最后,献上参考Demo地址:https://github.com/RunOfTheSnail/PushDemo001
下一章实现远程推送展示推送的图片。
iOS10 通知extension之 Service Extension你玩过了吗?
参考资料:
http://www.cocoachina.com/ios/20160628/16833.html
https://onevcat.com/2016/08/notification/
http://www.cnblogs.com/lidongq/p/5968923.html
https://developer.apple.com/reference/usernotifications/unnotificationattachment
图画的不错
http://www.jianshu.com/p/2f3202b5e758
http://www.cocoachina.com/ios/20161021/17820.html
