1.1 圆中三角形
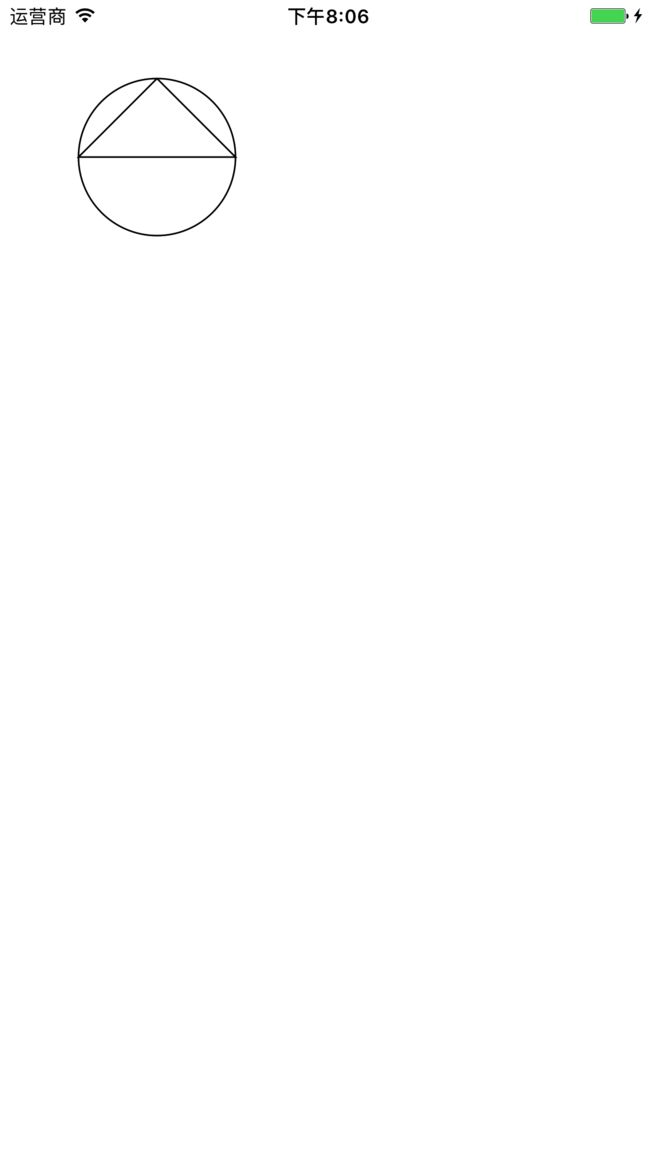
- (void)drawRect:(CGRect)rect{
    CGRect inFrame = CGRectMake(50, 50, 100, 100);
    CGContextRef ctx = UIGraphicsGetCurrentContext();
    CGContextSetLineWidth(ctx, 1);
    CGContextAddEllipseInRect(ctx, inFrame);
    CGContextMoveToPoint(ctx, CGRectGetMidX(inFrame), CGRectGetMinY(inFrame));
    CGContextAddLineToPoint(ctx, CGRectGetMinX(inFrame), CGRectGetMidY(inFrame));
    CGContextAddLineToPoint(ctx, CGRectGetMaxX(inFrame), CGRectGetMidY(inFrame));
    CGContextAddLineToPoint(ctx, CGRectGetMidX(inFrame), CGRectGetMinY(inFrame));
    CGContextStrokePath(ctx);
}
效果如图1.1
1.2 单纯画圆
- (void)drawRect:(CGRect)rect{
    CGRect inFrame = CGRectMake(50, 50, 100, 100);
    CGContextRef ctx = UIGraphicsGetCurrentContext();
    CGContextSetLineWidth(ctx, 1);
    CGContextAddEllipseInRect(ctx, inFrame);
    CGContextStrokePath(ctx);
}
// 单纯画圆
1.3 圆中直线
- (void)drawRect:(CGRect)rect{
    CGRect inFrame = CGRectMake(50, 50, 100, 100);
    CGContextRef ctx = UIGraphicsGetCurrentContext();
    CGContextSetLineWidth(ctx, 1);
    CGContextAddEllipseInRect(ctx, inFrame);
    CGContextAddLineToPoint(ctx, CGRectGetMinX(inFrame), CGRectGetMidY(inFrame));
    CGContextStrokePath(ctx);
}
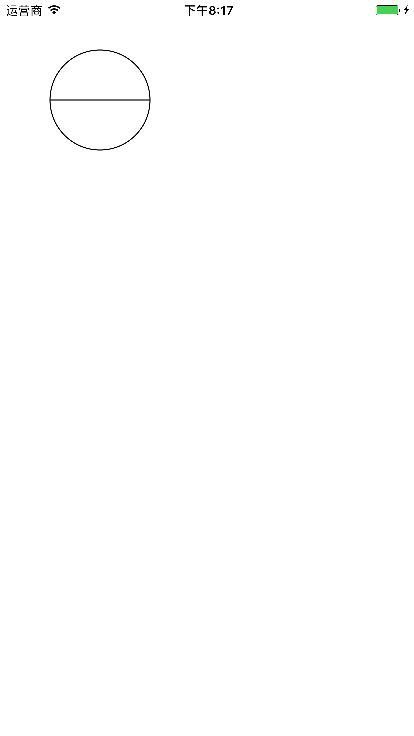
如图1.3
1.4 直线 ,如图1.4
// 一条直线
- (void)drawRect:(CGRect)rect {
    UIColor *color = [UIColor redColor];
    [color set]; //设置线条颜色
    UIBezierPath *path = [UIBezierPath bezierPath];
    [path moveToPoint:CGPointMake(30, 30)];
//moveToPoint:这个方法是设置起始点
    [path addLineToPoint:CGPointMake(200, 80)];
    path.lineWidth = 10.0;
    path.lineCapStyle = kCGLineCapRound; //线条拐角
    path.lineJoinStyle = kCGLineJoinBevel; //终点处理
    [path stroke]; //Draws line 根据坐标点连线
}
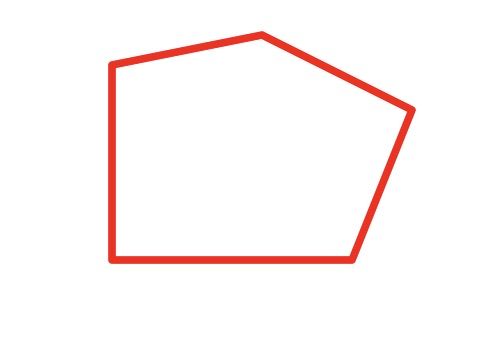
1.5 多边形 如图1.5
// 多边形
- (void)drawRect:(CGRect)rect {
    UIColor *color = [UIColor redColor];
    [color set]; //设置线条颜色

    UIBezierPath* path = [UIBezierPath bezierPath];
    path.lineWidth = 5.0;

    path.lineCapStyle = kCGLineCapRound; //线条拐角
    path.lineJoinStyle = kCGLineJoinRound; //终点处理

    [path moveToPoint:CGPointMake(200.0, 50.0)];//起点

    // Draw the lines
    [path addLineToPoint:CGPointMake(300.0, 100.0)];
    [path addLineToPoint:CGPointMake(260, 200)];
    [path addLineToPoint:CGPointMake(100.0, 200)];
    [path addLineToPoint:CGPointMake(100, 70.0)];
    [path closePath];//第五条线通过调用closePath方法得到的

    [path stroke];//Draws line 根据坐标点连线
//    [path fill];//颜色填充
}
// 注: [path addLineToPoint:CGPointMake(, )]; 设置好起点之后会依次连线,fill方法是填充整个线条包含的面积的颜色
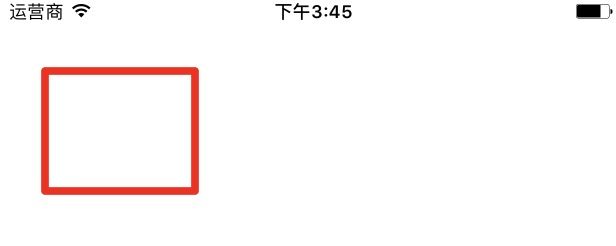
1.6 矩形 代码如下,如图1.6
//  矩形
- (void)drawRect:(CGRect)rect {
    UIColor *color = [UIColor redColor];
    [color set]; //设置线条颜色
    UIBezierPath* path = [UIBezierPath bezierPathWithRect:CGRectMake(30, 50, 100, 80)];
    path.lineWidth = 5.0;
    path.lineCapStyle = kCGLineCapRound; //线条拐角
    path.lineJoinStyle = kCGLineJoinRound; //终点处理
    [path stroke];
}
1.7 圆形或者椭圆形 代码如下 图形如图1.7
使用+ (UIBezierPath *)bezierPathWithOvalInRect:(CGRect)rect这个方法创建圆形或者椭圆形。
传入的rect矩形参数绘制一个内切曲线,如果我们传入的rect是矩形就得到矩形的内切椭圆,如果传入的是 正方形得到的就是正方形的内切圆。
- (void)drawRect:(CGRect)rect {
    UIColor *color = [UIColor redColor];
    [color set];
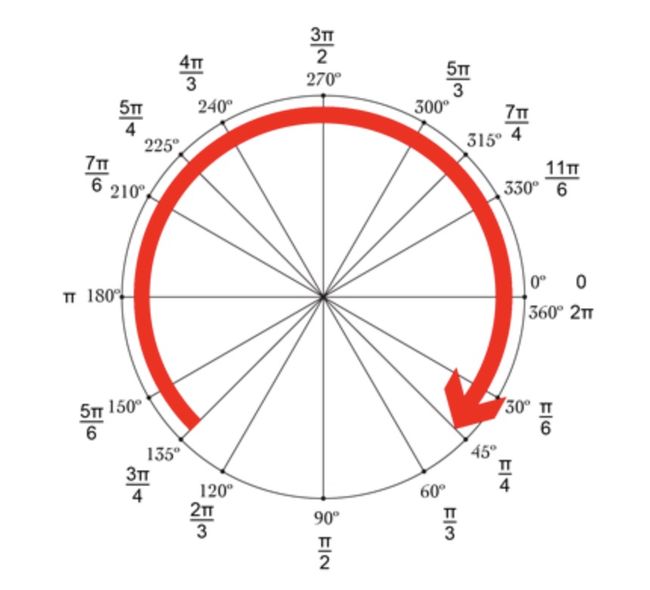
    UIBezierPath *path = [UIBezierPath bezierPathWithArcCenter:CGPointMake(100, 100) radius:90 startAngle:0 endAngle:2*M_PI clockwise:YES];
    path.lineWidth = 5.0;
    path.lineCapStyle = kCGLineCapRound;
    path.lineJoinStyle = kCGLineJoinRound;
    [path stroke];
}
/*ArcCenter: 原点
radius: 半径
startAngle: 开始角度
endAngle: 结束角度
clockwise: 是否顺时针方向 */
参考系如下图
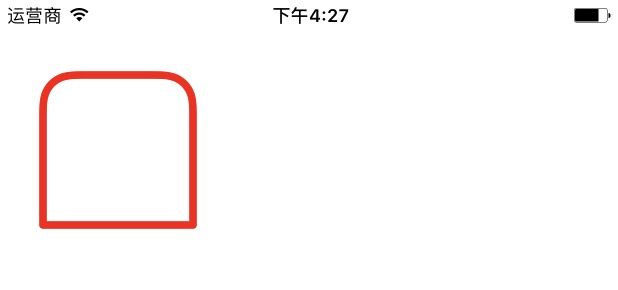
1.8 矩形拐角圆角,代码如下,图形如图1.8
- (void)drawRect:(CGRect)rect {
    UIColor *color = [UIColor redColor];
    [color set];
    UIBezierPath *path = [UIBezierPath bezierPathWithRoundedRect:CGRectMake(0, 0, 100, 100) byRoundingCorners:UIRectCornerTopRight cornerRadii:CGSizeMake(20, 20)];
    path.lineCapStyle = kCGLineCapRound;
    path.lineJoinStyle = kCGLineJoinRound;
    path.lineWidth = 5.0;
    [path stroke];
}
以上是在view的drawRect方法里绘制图形,下面介绍在控制器中直接绘制的方法
@property (strong, nonatomic) CAShapeLayer *shapeLayer;

- (void)viewDidLoad {
    [super viewDidLoad];

    [self setupCirclePath]; // 画圆并填充颜色

}
//  2.1 画圆并填充颜色 如图 2.1
- (void)setupCirclePath {
    // 创建出CAShapeLayer
    self.shapeLayer = [CAShapeLayer layer];
    self.shapeLayer.frame = CGRectMake(0, 0, 200, 200);//设置shapeLayer的尺寸和位置
    self.shapeLayer.position = self.view.center;
    self.shapeLayer.fillColor = [UIColor yellowColor].CGColor;//填充颜色为ClearColor
    //设置线条的宽度和颜色
    self.shapeLayer.lineWidth = 1.0f;
    self.shapeLayer.strokeColor = [UIColor redColor].CGColor;
    //创建出圆形贝塞尔曲线
    UIBezierPath *circlePath = [UIBezierPath bezierPathWithOvalInRect:CGRectMake(0, 0, 200, 200)];
    //让贝塞尔曲线与CAShapeLayer产生联系
    self.shapeLayer.path = circlePath.CGPath;
    //添加并显示
    [self.view.layer addSublayer:self.shapeLayer];
}
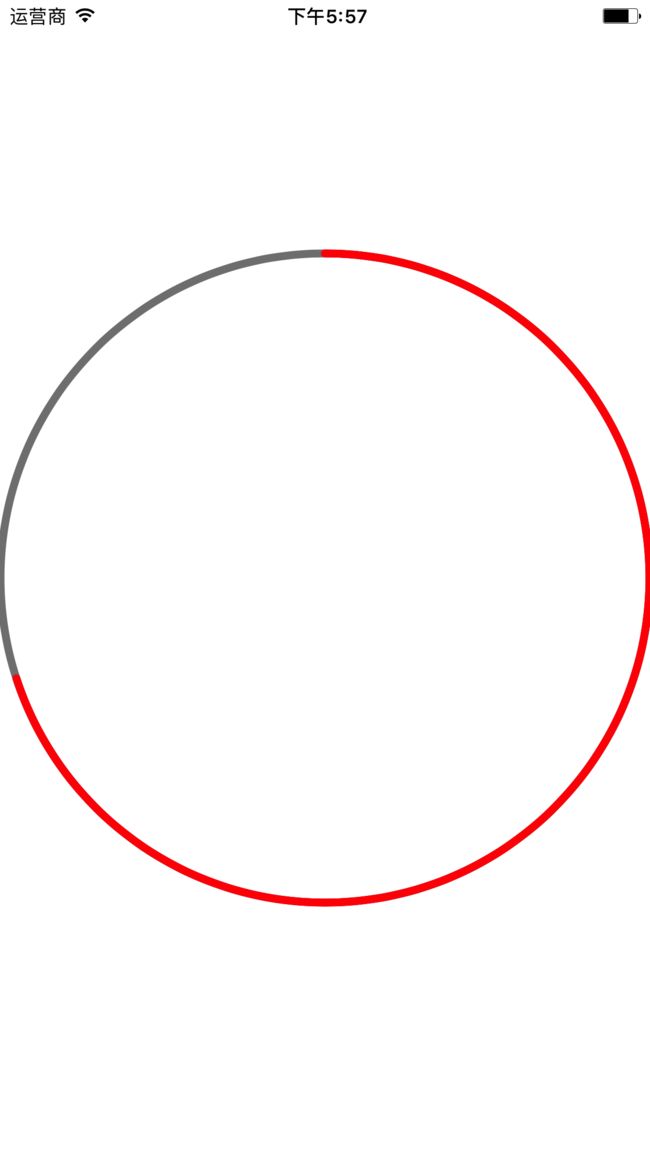
2.2 画两个圆形 ,可作为进度条, 如图2.2
-(void)createBezierPath:(CGRect)mybound
{
    //外圆
    _trackPath = [UIBezierPath bezierPathWithArcCenter:self.view.center radius:(mybound.size.width - 0.7)/ 2 startAngle:0 endAngle:M_PI * 2 clockwise:YES];;

    _trackLayer = [CAShapeLayer new];
    [self.view.layer addSublayer:_trackLayer];
    _trackLayer.fillColor = nil;
    _trackLayer.strokeColor=[UIColor grayColor].CGColor;
    _trackLayer.path = _trackPath.CGPath;
    _trackLayer.lineWidth=5;
    _trackLayer.frame = mybound;

    //内圆
    _progressPath = [UIBezierPath bezierPathWithArcCenter:self.view.center radius:(mybound.size.width - 0.7)/ 2 startAngle:- M_PI_2 endAngle:(M_PI * 2) * 0.7 - M_PI_2 clockwise:YES];

    _progressLayer = [CAShapeLayer new];
    [self.view.layer addSublayer:_progressLayer];
    _progressLayer.fillColor = nil;
    _progressLayer.strokeColor=[UIColor redColor].CGColor;
    _progressLayer.lineCap = kCALineCapRound;
    _progressLayer.path = _progressPath.CGPath;
    _progressLayer.lineWidth=5;
    _progressLayer.frame = mybound;
}
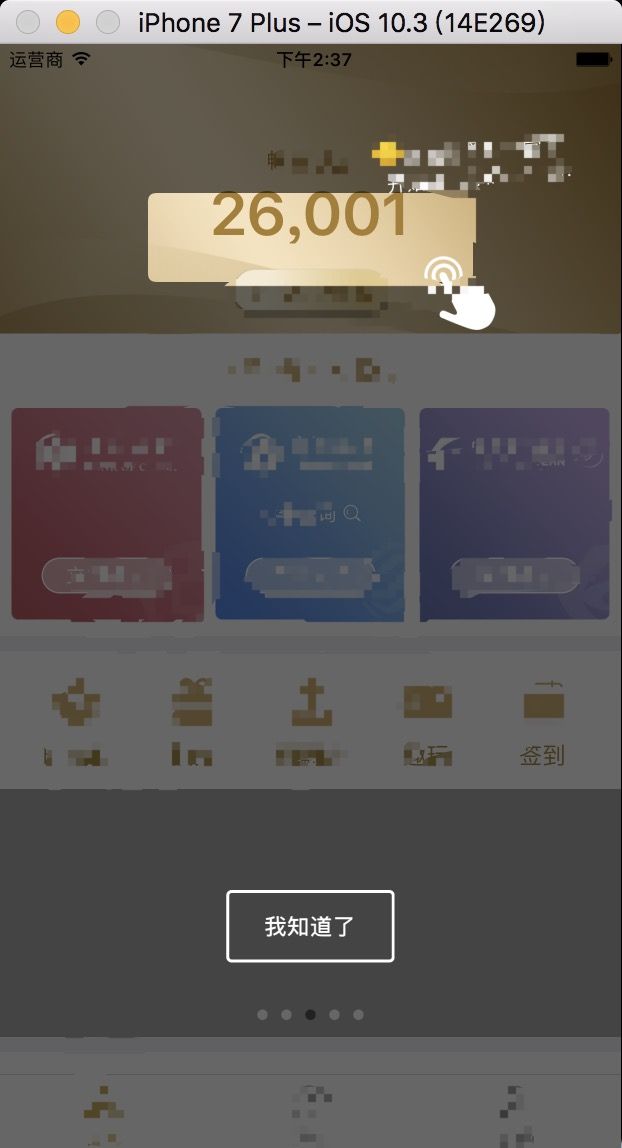
3.1 加蒙层,挖去一部分露出下面view 如图3.1
#import


typedef void(^GuideViewCloseBlock)();

@interface JFGuideView : UIView

@property (nonatomic,copy)GuideViewCloseBlock closeBlock;

- (instancetype)initWithFrame:(CGRect)frame textWidth:(CGFloat)textWidth;

@end


#import "JFGuideView.h"

@interface JFGuideView() {
    UIView *_integralView;
    UIButton *_OkButton;
}

@end

@implementation JFGuideView {
    CGFloat _textWidth;
}

- (instancetype)initWithFrame:(CGRect)frame textWidth:(CGFloat)textWidth {
    if (self = [super initWithFrame:frame]) {
        _textWidth = textWidth;
        [self setupView];
    }
    return self;
}

- (void)setupView {
    self.backgroundColor = kClearColor;
    UIView *bgView = [[UIView alloc] initWithFrame:self.bounds];
    bgView.backgroundColor = kRGBA(0, 0, 0, 0.6);
    [self addSubview:bgView];
    UIBezierPath *path = [UIBezierPath bezierPathWithRect:self.bounds];
    CGFloat width = MAX(_textWidth, kAppAdaptWidth(62)) + kAppAdaptWidth(50);
    CGRect whiteFrame = CGRectMake((self.width - width) / 2, kAppAdaptHeight(90), width, kAppAdaptHeight(54));
    [path appendPath:[[UIBezierPath bezierPathWithRoundedRect:whiteFrame cornerRadius:5.0] bezierPathByReversingPath]];
    CAShapeLayer *shapeLayer = [CAShapeLayer layer];
    shapeLayer.path = path.CGPath;
    bgView.layer.mask = shapeLayer;

    UIButton *button = [UIButton buttonWithType:UIButtonTypeCustom];
    button.frame = CGRectMake(0, kDeviceHeight - kAppAdaptHeight(112 + 44), kAppAdaptWidth(102), kAppAdaptHeight(44));
    button.centerX = self.width / 2;
    button.backgroundColor = kClearColor;
    [self addSubview:button];
    [button.layer setCornerRadius:kAppAdaptWidth(3.5)];
    [button.layer setBorderColor:kWhiteColor.CGColor];
    [button.layer setBorderWidth:2];
    [button setTitle:@"我知道了" forState:UIControlStateNormal];
    button.titleLabel.font = kAppFontBold(15);
    [button setTitleColor:kWhiteColor forState:UIControlStateNormal];
    [button addTarget:self action:@selector(dismissView) forControlEvents:UIControlEventTouchUpInside];

    UIImageView *tapImageView = [[UIImageView alloc] initWithImage:[UIImage imageNamed:@"double-tap"]];
    tapImageView.frame = CGRectMake(CGRectGetMaxX(whiteFrame) - kAppAdaptWidth(30), kAppAdaptHeight(128), kAppAdaptWidth(44), kAppAdaptHeight(45.5));

    [self addSubview:tapImageView];

    UIImageView *textImageView = [[UIImageView alloc] initWithImage:[UIImage imageNamed:@"coin"]];
    textImageView.frame = CGRectMake(kAppAdaptWidth(225), kAppAdaptHeight(53), kAppAdaptWidth(120), kAppAdaptHeight(38));
    [self addSubview:textImageView];
}

// 移除view
- (void)dismissView {
    [self removeFromSuperview];
    if (_closeBlock) {
        _closeBlock();
    }
}
