当我们把推送证书配置好再把极光SDK拖入项目配置,然后注册极光推送,完成代理,这样没有太多意外你就能收到消息了,但是我们都知道还需要做一些处理,都是哪些呢?
●
当收到消息时,app在前台如何处理
● 在后台如何处理?
● 未启动如何处理?
● 当app在前台收到消息如何跳转到指定页面?
● 在后台收到系统通知,点击通知栏又如何跳转指定页面?
● 未启动时点击通知栏又如何跳转指定页面?
● 收到自定义通知如何显示?
● 怎么给指定用户发送消息?
● 当有多个类型通知的时候,怎么拿到服务器发送过来的extras的内容,然后根据类型做出正确的跳转?
● 怎么在app内部开启、关闭通知?
● 你测试包(真机调试)收到通知后,怎么确定上架包也能收到消息?
今天小伙伴问我Badge怎么弄,我这边徽章个数是从服务器请求的,使用WZLBadge这个三方绘制的。另外,我个人遇到的一个崩溃问题 觉得有必要让大家看下。
在上面我抛出了一些问题,基本都是我们集成极光后前端需要处理的事情,下面我一个个解决这些问题。我个人没有总结太多,肯定有缺失,这里只是给不知道的伙伴列举一些常见的。若有误,请指出。
○
当收到消息时,app在前台如何处理?如何跳转?
当应用在前台时,接收到通知消息首先会调用极光的这个代理
#pragma mark- JPUSHRegisterDelegate
// iOS 10 Support
- (void)jpushNotificationCenter:(UNUserNotificationCenter *)center willPresentNotification:(UNNotification *)notification withCompletionHandler:(void (^)(NSInteger))completionHandler {
 // Required
    NSDictionary * userInfo = notification.request.content.userInfo;
    if([notification.request.trigger isKindOfClass:[UNPushNotificationTrigger class]
        ]) {
        [JPUSHService handleRemoteNotification:userInfo];

    }
    if ([UIApplication sharedApplication].applicationState == UIApplicationStateActive) {
        // 需要执 这个 法,选择 是否提醒 户,有Badge、Sound、Alert三种类型可以选择设置
       completionHandler(UNNotificationPresentationOptionSound);
    }else if ([UIApplication sharedApplication].applicationState == UIApplicationStateBackground) {//后台
        // 需要执 这个 法,选择 是否提醒 户,有Badge、Sound、Alert三种类型可以选择设置
        completionHandler(UNNotificationPresentationOptionAlert);
    }else {//未启动
        // 需要执 这个 法,选择 是否提醒 户,有Badge、Sound、Alert三种类型可以选择设置
        completionHandler(UNNotificationPresentationOptionAlert);
    }
}
在上面代理中有几个判断,当app在前台、后台、未运行。三种状态,解释下
Badge:应用角标 Sound:通知声音 Alert:通知栏 如果你同时需要通知栏展示,声音,角标,只需要以|符号连接即可,不需要的直接删除。
如果你在应用内收到通知(非自定义消息,后面会详细说这个),应该在这个 if ([UIApplication sharedApplication].applicationState == UIApplicationStateActive) {}判断中进行提示、跳转。你可以在这里写一个UIAlertController提示,也可以像我一样提示在顶部,取决你们UI设计。
我的代码
 if ([UIApplication sharedApplication].applicationState == UIApplicationStateActive) {

        /*
         *      当应用在前台  接到通知
         */
        NSString *messageAlert = [[userInfo objectForKey:@"aps"]objectForKey:@"alert"];

        //获取顶层控制器
        UIViewController *currentVC = [self currentViewController];

        [TSMessage showNotificationInViewController:currentVC.navigationController
                                              title:@"系统通知"
                                           subtitle:messageAlert
                                              image:[UIImage imageNamed:@"notifi"]
                                               type:TSMessageNotificationTypeMessage
                                           duration:TSMessageNotificationDurationAutomatic
                                           callback:^{
                                               if (currentVC.navigationController) {
                                                   if ([Person currentLoginUser].userId.length == 11) {
                                                       //先跳转指定tab然后push到指定页面
                                                       BaseTabBarController *myTbabar = (BaseTabBarController *)[UIApplication sharedApplication].keyWindow.rootViewController;
                                                       myTbabar.selectedIndex = 2;
                                                       //改变bar后再次获取当前控制器
                                                       UIViewController *VC = [self currentViewController];
                                                       MyServiceViewController *vc = [[MyServiceViewController alloc] init];
                                                       [vc setHidesBottomBarWhenPushed:YES];
                                                       [VC.navigationController pushViewController:vc animated:YES];
                                                   }else {
                                                       [SVProgressHUD showInfoWithStatus:@"请登录后,前往我的服务查看。"];
                                                   }
                                               }else {
                                                   [SVProgressHUD showErrorWithStatus:@"跳转失败,请自行前往个人中心查看。"];
                                               }

                                           }
                                        buttonTitle:nil
                                     buttonCallback:^{
                                     }
                                         atPosition:TSMessageNotificationPositionNavBarOverlay
                               canBeDismissedByUser:YES];
        completionHandler(UNNotificationPresentationOptionSound); // 需要执 这个 法,选择 是否提醒 户,有Badge、Sound、Alert三种类型可以选择设置

    }
上面代码我选择了一个提示的第三方TSMessage在点击消息的时候做了一个跳转。在调用这个三方的时候你首先要获取当前顶层控制器赋值给这个三方。 UIViewController *currentVC = [self currentViewController];
//获取Window当前显示的ViewController
- (UIViewController*)currentViewController{
    //获得当前活动窗口的根视图
    UIViewController* vc = [UIApplication sharedApplication].keyWindow.rootViewController;
    while (1) {
        //根据不同的页面切换方式,逐步取得最上层的viewController
        if ([vc isKindOfClass:[UITabBarController class]]) {
            vc = ((UITabBarController*)vc).selectedViewController;
        }
        if ([vc isKindOfClass:[UINavigationController class]]) {
            vc = ((UINavigationController*)vc).visibleViewController;
        }
        if (vc.presentedViewController) {
            vc = vc.presentedViewController;
        }else{
            break;
        }
    }
    return vc;
}
有个细节是,当你跳转指定控制器的时候,你有必要判断当前控制器是否可以push过去,即有没有导航栏,如果没有则不能push,当然也可以像我这样先跳转到个人中心,保证有导航栏,但是这样的处理也许不适用你的app.
○
在后台收到消息如何处理?如何跳转?
当你在后台,收到消息,通知栏会弹出一个系统alert,一旦你点击了这个alert,目标app会被唤起,同时调用下面代理函数。
// iOS 10 Support
- (void)jpushNotificationCenter:(UNUserNotificationCenter *)center didReceiveNotificationResponse:(UNNotificationResponse *)response withCompletionHandler:(void (^)())completionHandler;
在这个函数中我们做这样的提示、跳转处理。
 // Required
    NSDictionary *userInfo = response.notification.request.content.userInfo;
    if([response.notification.request.trigger isKindOfClass:[UNPushNotificationTrigger class]]) {

        /*
         *     应用在后台  点击了通知栏
         */
        UIViewController *currentVC = [self currentViewController];
        if (currentVC.navigationController) {
            if ([Person currentLoginUser].userId.length == 11) {
                //先跳转指定tab然后push到指定页面
                BaseTabBarController *myTbabar = (BaseTabBarController *)[UIApplication sharedApplication].keyWindow.rootViewController;
                myTbabar.selectedIndex = 2;
                MyServiceViewController *vc = [[MyServiceViewController alloc] init];
                [vc setHidesBottomBarWhenPushed:YES];
                //改变bar后再次获取当前控制器
                UIViewController *VC = [self currentViewController];
                [VC.navigationController pushViewController:vc animated:YES];
            }else {
                [SVProgressHUD showInfoWithStatus:@"请登录后,前往我的服务查看。"];
            }
        }else {
            //避免没有导航栏跳转崩溃的问题
            [SVProgressHUD showErrorWithStatus:@"跳转失败,请自行前往个人中心查看。"];
        }
        [JPUSHService handleRemoteNotification:userInfo];
    }
    completionHandler(); // 系统要求执 这个 法
以上跳转代码、获取当前顶层控制器都是相同的,不再解释。
○
未启动时受到消息如何处理?如何跳转
这种情况是最不容易找到的,因为当你的应用未启动,点击了通知栏,它没有调用任何极光的代理,这时候需要我们去启动函数进行判断。
- (BOOL)application:(UIApplication *)application didFinishLaunchingWithOptions:(NSDictionary *)launchOptions {
    [self appStateInactive:launchOptions];
}
在上面启动函数中调用一个方法,来判断是否是收到通知启动的。最后,进行目标控制器跳转。
- (void)appStateInactive:(NSDictionary *)launchOptions {
      /*
 *     当应用不在后台    点击通知栏
 */
NSDictionary* pushInfo = [launchOptions objectForKey:@"UIApplicationLaunchOptionsRemoteNotificationKey"];
if (pushInfo) {
    NSDictionary *apsInfo = [pushInfo objectForKey:@"aps"];
    if(apsInfo) {
        [self.mainTab.tabBar showBadgeOnItemIndex:2];
        UIViewController *currentVC = [self currentViewController];
        if (currentVC.navigationController) {
            if ([Person currentLoginUser].userId.length == 11) {
                //先跳转指定tab然后push到指定页面
                BaseTabBarController *myTbabar = (BaseTabBarController *)[UIApplication sharedApplication].keyWindow.rootViewController;
                myTbabar.selectedIndex = 2;
                MyServiceViewController *vc = [[MyServiceViewController alloc] init];
                [vc setHidesBottomBarWhenPushed:YES];
                //更改后bar后再次获取当前控制器
                UIViewController *VC = [self currentViewController];
                [VC.navigationController pushViewController:vc animated:YES];
            }else {
                [SVProgressHUD showInfoWithStatus:@"请登录后,前往我的服务查看。"];
            }
        }
    }

}

}
○
收到自定义通知如何显示?
自定义消息,这个比较特殊,它必须是在app正在前台的时候才能收到消息,收到消息的位置而且不在代理中,而是在一个通知中。
当注册极光后可以加入下面代码。注册一个通知。
// 注册通知   当收到自定义消息的时候
    [[NSNotificationCenter defaultCenter] addObserver:self
                                                 selector:@selector(networkDidReceiveMessage:)
                                                     name:kJPFNetworkDidReceiveMessageNotification
                                                   object:nil];
这个通知类型极光文档是这样解释的
kJPFNetworkDidReceiveMessageNotification // 收到消息(非APNS)
实现这个通知方法
/*
 *      当在前台  接收到  自定义消息 通知
 */
- (void)networkDidReceiveMessage:(NSNotification *)notification {

    //有没有未读消息
    [self.mainTab.tabBar showBadgeOnItemIndex:2];


    NSDictionary *userInfo = [notification userInfo];
    NSString *content = [userInfo valueForKey:@"content"];

    //获取顶层
    UIViewController *currentVC = [self currentViewController];
    [TSMessage showNotificationInViewController:currentVC.navigationController
                                          title:@"系统通知"
                                       subtitle:content
                                          image:[UIImage imageNamed:@"notifi"]
                                           type:TSMessageNotificationTypeMessage
                                       duration:TSMessageNotificationDurationAutomatic
                                       callback:^{
                                           //判断是否有导航栏
                                           if (currentVC.navigationController) {
                                               if ([Person currentLoginUser].userId.length == 11) {
                                                   //先跳转指定tab然后push到指定页面
                                                   BaseTabBarController *myTbabar = (BaseTabBarController *)[UIApplication sharedApplication].keyWindow.rootViewController;
                                                   myTbabar.selectedIndex = 2;
                                                   //改变bar后再次获取当前控制器
                                                   UIViewController *VC = [self currentViewController];
                                                   MyServiceViewController *vc = [[MyServiceViewController alloc] init];
                                                   [vc setHidesBottomBarWhenPushed:YES];
                                                   [VC.navigationController pushViewController:vc animated:YES];
                                               }else {
                                                   [SVProgressHUD showInfoWithStatus:@"请登录后,前往我的服务查看。"];
                                               }
                                           }else {//没有导航栏
                                               [SVProgressHUD showErrorWithStatus:@"跳转失败,请自行前往个人中心查看。"];
                                           }
                                       }
                                    buttonTitle:nil
                                 buttonCallback:^{
                                 }
                                     atPosition:TSMessageNotificationPositionNavBarOverlay
                           canBeDismissedByUser:YES];

}
上面代码几乎和在前台收通知的代码是一样的。有点需要说明的是这里我直接取的content这个key。我这边让后台传的是这个,当然也有后台会放extras这个字段的json数据,我后面会有代码详细说这个解析。
○
怎么给指定用户发送消息?
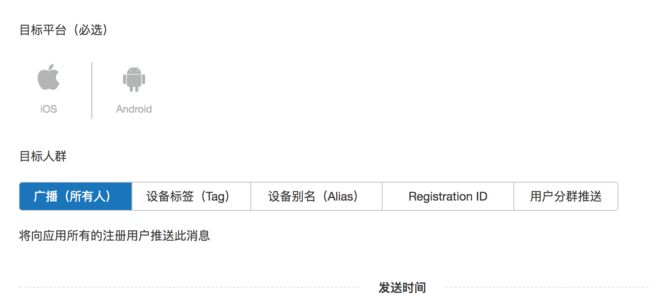
通知一般不是广播式的,有时候需要针对不同用户群体或者个体发送通知,例如优惠券等。极光提供了几种区分用户的方法,在Web中我们可以看到
设备标签、别名、ID、群推
标签和别名差不多。只说别名。现在有这个场景:我想给我所有的注册用户推送消息,没注册的不想推。
这时候,你需要在极光登录成功(非常重要,否则你可能出现注册别名无效的情况)的通知方法中向极光服务器注册Alias。如下代码,建议以userId或者服务器登录返回tag值注册,这样后台方便发送消息。登录成功的通知名称:kJPFNetworkDidLoginNotification
[JPUSHService setAlias:userId callbackSelector:@selector(alias:) object:self];
这样你在web选择对应别名发送通知,就可以推送到希望推送到的手机上了。
○
当有多个类型通知的时候,怎么拿到服务器发送过来的extras的内容,然后根据类型做出正确的跳转?
在上面我们一直说的都是在控制台直接发送消息,然而实际上我们推送都是后台开发人员以API的形式对接极光的服务器。通知往往携带一些所需的参数,例如红包里面的金额cost...不多说废话,直接看我的解析代码吧!
//json解析
- (NSDictionary *)jsonWithString:(NSString *)dataString {
    NSData *data = [dataString dataUsingEncoding:NSUTF8StringEncoding];
    NSDictionary *dic = [NSJSONSerialization JSONObjectWithData:data options:NSJSONReadingMutableContainers error:nil];
    return dic;
}
//内部收到消息,提示
- (void)showMessageWithUserInfo:(NSDictionary *)userInfo {

    //获取顶层控制器
    [self.mainTab.tabBar showBadgeOnItemIndex:2];
    UIViewController *currentVC = [self currentViewController];
    NSString *messageAlert = [[userInfo objectForKey:@"aps"] objectForKey:@"alert"];
    NSString *extras = [userInfo objectForKey:@"extras"];
    NSDictionary *dic = [self jsonWithString:extras];

    NSString *notifiType = [NSString stringWithFormat:@"%@",dic[@"messag_type"]];

    [TSMessage showNotificationInViewController:currentVC.navigationController title:@"系统通知" subtitle:messageAlert image:[UIImage imageNamed:@"notifi"] type:TSMessageNotificationTypeMessage duration:TSMessageNotificationDurationAutomatic callback:^{
        if (currentVC.navigationController) {
            if ([Person currentLoginUser].userId.length == 11) {
                if ([notifiType isEqualToString:@"1"]) {//消息类型
                    CommentViewController *vc = [[CommentViewController alloc] initWithNibName:@"CommentViewController" bundle:nil];
                    vc.orderTitle = dic[@"item_title"];
                    vc.remark = dic[@"comments"];
                    vc.time = dic[@"item_time"];
                    vc.orderId = [NSString stringWithFormat:@"%@",dic[@"item_id"]];
                    [vc setHidesBottomBarWhenPushed:YES];
                    [currentVC.navigationController pushViewController:vc animated:YES];
                }else {
                    //其他消息类型
                }

            }else {
                [SVProgressHUD showInfoWithStatus:@"请登录后,前往我的服务查看。"];
            }
        }else {
            [SVProgressHUD showErrorWithStatus:@"跳转失败,请自行前往个人中心查看。"];
        }
    } buttonTitle:nil buttonCallback:^{
    } atPosition:TSMessageNotificationPositionNavBarOverlay
                           canBeDismissedByUser:YES];

}
//外部收到消息。点击了消息
- (void)touchAlertWithUserInfo:(NSDictionary *)userInfo {

    [self.mainTab.tabBar showBadgeOnItemIndex:2];
    UIViewController *currentVC = [self currentViewController];
    NSString *extras = userInfo[@"extras"];
    NSDictionary *dic = [self jsonWithString:extras];
    NSString *notifiType = [NSString stringWithFormat:@"%@",dic[@"messag_type"]];

    if (currentVC.navigationController) {
        if ([Person currentLoginUser].userId.length == 11) {
            if ([notifiType isEqualToString:@"1"]) {//消息类型
                //先跳转指定tab然后push到指定页面
                BaseTabBarController *myTbabar = (BaseTabBarController *)[UIApplication sharedApplication].keyWindow.rootViewController;
                myTbabar.selectedIndex = 1;
                //改变bar后再次获取当前控制器
                UIViewController *VC = [self currentViewController];
                CommentViewController *vc = [[CommentViewController alloc] initWithNibName:@"CommentViewController" bundle:nil];
                vc.orderTitle = dic[@"item_title"];
                vc.remark = dic[@"comments"];
                vc.time = dic[@"item_time"];
                vc.orderId = [NSString stringWithFormat:@"%@",dic[@"item_id"]];
                [vc setHidesBottomBarWhenPushed:YES];
                [VC.navigationController pushViewController:vc animated:YES];
            }

        }else {
            [SVProgressHUD showInfoWithStatus:@"请登录后,前往我的服务查看。"];
        }
    }else {
        [SVProgressHUD showErrorWithStatus:@"跳转失败,请自行前往个人中心查看。"];
    }
}
我把以上方法独立出来。方法都有注释,不再讲解。那么,这时候我仅仅需要在合适的位置调用这些方法即可!
例如。在后台的时候
// iOS 10 Support
- (void)jpushNotificationCenter:(UNUserNotificationCenter *)center didReceiveNotificationResponse:(UNNotificationResponse *)response withCompletionHandler:(void (^)())completionHandler {
    // Required
    NSDictionary *userInfo = response.notification.request.content.userInfo;
    if([response.notification.request.trigger isKindOfClass:[UNPushNotificationTrigger class]]) {
        /*
         *     应用在后台  点击了通知栏
         */
        [self touchAlertWithUserInfo:userInfo];
        [JPUSHService handleRemoteNotification:userInfo];
    }
    completionHandler(); // 系统要求执 这个 法
}
在前台的时候
// iOS 10 Support
- (void)jpushNotificationCenter:(UNUserNotificationCenter *)center willPresentNotification:(UNNotification *)notification withCompletionHandler:(void (^)(NSInteger))completionHandler {
    // Required
    NSDictionary *userInfo = notification.request.content.userInfo;
    if([notification.request.trigger isKindOfClass:[UNPushNotificationTrigger class]
        ]) {
        [JPUSHService handleRemoteNotification:userInfo];
    }
    if ([UIApplication sharedApplication].applicationState == UIApplicationStateActive) {

        /*
         *      当应用在前台  接到通知
         */
        NSLog(@"userInfo : %@",userInfo);
        //提示
        [self showMessageWithUserInfo:userInfo];
        completionHandler(UNNotificationPresentationOptionSound); // 需要执 这个 法,选择 是否提醒 户,有Badge、Sound、Alert三种类型可以选择设置

    }else if ([UIApplication sharedApplication].applicationState == UIApplicationStateBackground) {//后台
        completionHandler(UNNotificationPresentationOptionAlert); // 需要执 这个 法,选择 是否提醒 户,有Badge、Sound、Alert三种类型可以选择设置
    }else {//未启动
        completionHandler(UNNotificationPresentationOptionAlert); // 需要执 这个 法,选择 是否提醒 户,有Badge、Sound、Alert三种类型可以选择设置
    }
}
我们看到通过方法独立出来,我们的代码更简洁,逻辑也更清晰了。
○
怎么在app内部开启、关闭通知?
一般都在app设置中有一个switch的开关。来开启关闭通知,代码很简单,直接贴上来。有一点需要注意,就是这个开关的状态需要存到本地,有高要求的存服务器。
cell.textLabel.text = @"消息提醒";
        UISwitch *swi = [[UISwitch alloc] initWithFrame:CGRectMake(CGRectGetWidth(cell.frame)-15,7.5, 45, 30)];
        //存储到本地
        NSUserDefaults *defaults = [[NSUserDefaults alloc] init];
        NSString *isNotification = [defaults objectForKey:@"isNotification"];
        NSLog(@"noti %@",isNotification);
        if ([isNotification isEqualToString:@"0"]) {
            swi.on = NO;
        }else {
            swi.on = YES;
        }
        [swi addTarget:self action:@selector(onOrOff:) forControlEvents:UIControlEventValueChanged];
        [cell.contentView addSubview:swi];
#pragma mark -- 消息推送的 开/关
- (void)onOrOff:(UISwitch *)swi {
    NSUserDefaults *defaults = [[NSUserDefaults alloc] init];
    if (!swi.on) {//存入本地
        [[UIApplication sharedApplication] unregisterForRemoteNotifications];//关闭
        [defaults setObject:@"0" forKey:@"isNotification"];
    }else {
        [[UIApplication sharedApplication] registerForRemoteNotifications];
        [defaults setObject:@"1" forKey:@"isNotification"];
    }
}
另外,不要忘记!你需要在启动代理中也进行判断开关
- (BOOL)application:(UIApplication *)application didFinishLaunchingWithOptions:(NSDictionary *)launchOptions {
   //是否关闭了推送?
    NSUserDefaults *defaults = [[NSUserDefaults alloc] init];
    NSString *isNotification = [defaults objectForKey:@"isNotification"];
    if ([isNotification isEqualToString:@"0"]) {
        [[UIApplication sharedApplication] unregisterForRemoteNotifications];//关闭
    }else {
        [[UIApplication sharedApplication] registerForRemoteNotifications];//开启
    }
}
○
你测试包(真机调试)收到通知后,怎么确定上架包也能收到消息?
想要测试上架包,首先更改极光注册代码。production改为YES
[JPUSHService setupWithOption:launchOptions appKey:kJPushAPPKey channel:@"apsForProduction" apsForProduction:YES
            advertisingIdentifier:nil];
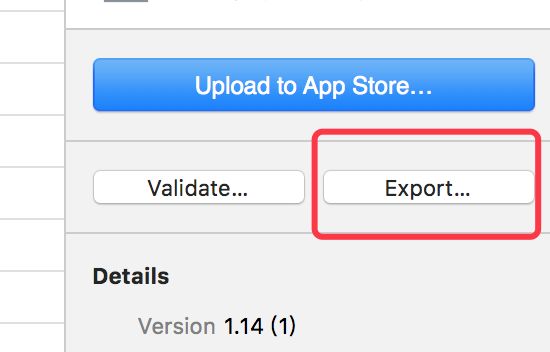
(开发、生产证书配置不再说,网上很多)这个就涉及到打包的知识了,开发环境就是真机调试的我就不说了。我们这里使用蒲公英平台安装生产环境包,archive后选择
然后选择Ad Hoc
这样打包就是生产包了。如果你没有对应的证书可以去配置,同时你还需要配置对应描述文件。
iOS技术交流群:511860085 成堆的技术视频福利,欢迎加入!


