前言
作为一枚程序媛妹子,在这条撸码的道路上越走越远,表问:我怎么变这样~变得这样疯狂-_-!(不自觉哼起了tfboys的歌,sorry我是狂热阿姨粉= = )。
开发这段时间,一直没怎么写过博文,没好好的去总结零碎的知识点(那些零碎的知识点依旧零碎着= = )so~咳咳,为了强大自我的撸码水平提高逼格,以此作为开篇文章,陆续在空闲时间整理出常用的实用的管用的代码来巩固/强化/熟练必要的知识点。
so~ boys and girls 跟着我左手右手一个慢动作 嘿!
正题
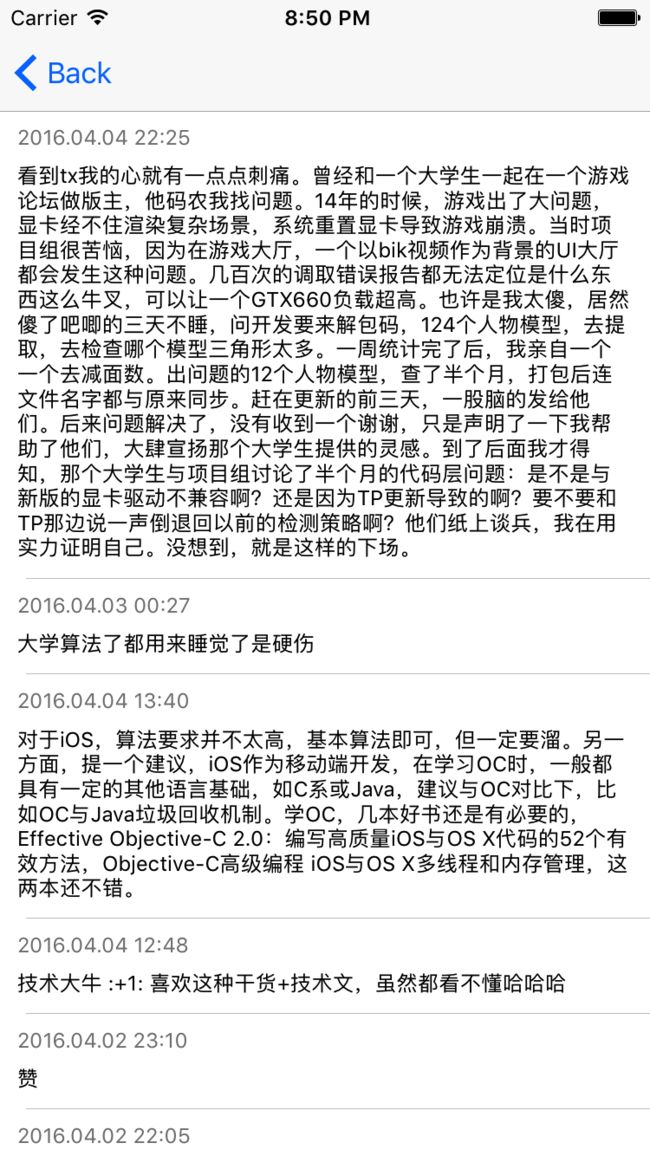
言归正传,有关UITableViewCell高度自适应的这个问题,我想...对于绝大多数的你们早已不是问题,算是给刚入坑的小白们整理一下喽!纯代码方法,拖拽的别绕道,也过来瞅一瞅哈!
方法
- 1.普通(或提前)计算cell的自适应高度
- 2.通过FrameModel方式获取cell的自适应高度
- 3.通过Masonry获取cell的自适应高度
注意:
大前提都是不要忘记在cell.m文件中,给contentLabel添加如下两行代码:
contentLabel.numberOfLines = 0;
[contentLabel sizeToFit];
1.普通(或提前)计算cell的自适应高度
我觉得不必说啥吧,算是入门级的简单方法了。
...
...
...
还是说一嘴...
普通计算:
1.在cell.m文件添加:
- (void)layoutSubviews {

    [super layoutSubviews];

    [self.contentLabel sizeToFit];
}
注意:这里的 [self.contentLabel sizeToFit]要写在- (void)layoutSubviews方法里。
2.在viewcontroller.m文件中,为方法- (CGFloat)tableView:(UITableView *)tableView heightForRowAtIndexPath:(NSIndexPath *)indexPath中添加如下代码:
- (CGFloat)tableView:(UITableView *)tableView heightForRowAtIndexPath:(NSIndexPath *)indexPath {

    OneModel *model = self.array[indexPath.row];
    NSString *content = model.content;

    // 写法1.
    NSDictionary *dic = @{NSFontAttributeName:[UIFont systemFontOfSize:12.0]};

    CGRect contentRect = [content boundingRectWithSize:CGSizeMake([UIScreen mainScreen].bounds.size.width - 20, CGFLOAT_MAX) options:(NSStringDrawingUsesLineFragmentOrigin) attributes:dic context:nil];

    // 写法2.
    //    NSMutableAttributedString *attrStr = [[NSMutableAttributedString alloc] initWithString:content];
    //
    //    NSRange allRange = [content rangeOfString:content];
    //
    //    [attrStr addAttribute:NSFontAttributeName value:[UIFont systemFontOfSize:12.0] range:allRange];
    //
    //    [attrStr addAttribute:NSForegroundColorAttributeName value:[UIColor blackColor] range:allRange];
    //
    //    NSStringDrawingOptions options = NSStringDrawingUsesLineFragmentOrigin | NSStringDrawingUsesFontLeading;
    //    CGRect contentRect = [attrStr boundingRectWithSize:CGSizeMake([UIScreen mainScreen].bounds.size.width - 20, CGFLOAT_MAX) options:options context:nil];

    CGFloat contentHeight;
    contentHeight = ceilf(contentRect.size.height);

    return  10 + 10 + 10 + contentHeight + 10;// timeHeight + contentHeight
}
搞定~!就是这么的easy哈哈哈哈哈
提前计算:
在普通计算的前提上进化的~
1.在cell.h文件中:
/**
 根据指定的model数据返回当前cell的高度
 @param model 数据模型
 return cell高度
 */
+ (CGFloat)cellHeightWithModel:(OneModel *)model;
2.在cell.m文件中:
- (void)layoutSubviews {

    [super layoutSubviews];

    [self.contentLabel sizeToFit];
}
+ (CGFloat)cellHeightWithModel:(OneModel *)model {

    NSString *content = model.content;

    // 写法1.
    NSDictionary *dic = @{NSFontAttributeName:[UIFont systemFontOfSize:12.0]};
    CGRect contentRect = [content boundingRectWithSize:CGSizeMake([UIScreen mainScreen].bounds.size.width - 20, CGFLOAT_MAX) options:(NSStringDrawingUsesLineFragmentOrigin) attributes:dic context:nil];

    // 写法2.
//    NSMutableAttributedString *attrStr = [[NSMutableAttributedString alloc] initWithString:content];
//    NSRange allRange = [content rangeOfString:content];
//    [attrStr addAttribute:NSFontAttributeName value:[UIFont systemFontOfSize:12.0] range:allRange];
//    [attrStr addAttribute:NSForegroundColorAttributeName value:[UIColor blackColor] range:allRange];
//    NSStringDrawingOptions options = NSStringDrawingUsesLineFragmentOrigin | NSStringDrawingUsesFontLeading;
//    CGRect contentRect = [attrStr boundingRectWithSize:CGSizeMake([UIScreen mainScreen].bounds.size.width - 20, CGFLOAT_MAX) options:options context:nil];

    CGFloat contentHeight;
    contentHeight = ceilf(contentRect.size.height);

    return  10 + 10 + 10 + contentHeight + 10;// timeHeight + contentHeight
}
3.在viewController.m文件中,添加私有方法,调用cell创建的+号方法,提前计算出不同的model内容对应的cell高度,然后依次添加到一个数组中:
#pragma mark - private methods
- (void)loadData {

    NSString *filePath = [[NSBundle mainBundle] pathForResource:@"DataDemo" ofType:@"plist"];
    NSMutableArray *data = [[NSMutableArray alloc] initWithContentsOfFile:filePath];
    for (NSDictionary *tempDic in data) {
        OneModel *model = [OneModel jxt_initWithDictionary:tempDic];
        [self.array addObject:model];

        CGFloat cellHeight = [One2Cell cellHeightWithModel:model];
        [self.heightArray addObject:[NSNumber numberWithFloat:cellHeight]];
    }
    [self.tableView reloadData];
}
在- (CGFloat)tableView:(UITableView *)tableView heightForRowAtIndexPath:(NSIndexPath *)indexPath方法中,直接调用数组中对应的高度即可:
- (CGFloat)tableView:(UITableView *)tableView heightForRowAtIndexPath:(NSIndexPath *)indexPath {

    NSNumber *cellHeight = self.heightArray[indexPath.row];
    return cellHeight.floatValue;
}
搞定~!
2.通过FrameModel方式获取cell的自适应高度
此方法需要创建一个FrameModel,用来计算cell的自适应高度。
1.创建FrameModel,继承与NSObject:
#import
#import
#import "TwoModel.h"

@interface TwoFrameModel : NSObject

@property (nonatomic, assign) CGFloat cellHeight;

@property (nonatomic, assign) CGRect timeLabelFrame;
@property (nonatomic, assign) CGRect contentLabelFrame;

@property (nonatomic, strong) TwoModel *model;

@end
- FrameModel.m中,计算每个frame值,最后计算cell高度:
- (void)setModel:(TwoModel *)model {

    _model = model;

    CGFloat timeLabelX = kPadding;
    CGFloat timeLabelY = kPadding;
    CGFloat timeLabelW = kWidth - 20;
    CGFloat timeLabelH = kPadding;

    self.timeLabelFrame = CGRectMake(timeLabelX, timeLabelY, timeLabelW, timeLabelH);


    NSDictionary *dic = @{NSFontAttributeName:[UIFont systemFontOfSize:Kfont]};

    CGRect contentLabelRect = [_model.content boundingRectWithSize:CGSizeMake(kWidth - 20, 100000) options:(NSStringDrawingUsesLineFragmentOrigin) attributes:dic context:nil];

    CGFloat contentLabelX = kPadding;
    CGFloat contentLabelY = CGRectGetMaxY(self.timeLabelFrame) + kPadding;
    CGFloat contentLabelW = contentLabelRect.size.width;
    CGFloat contentLabelH = contentLabelRect.size.height;

    self.contentLabelFrame = CGRectMake(contentLabelX, contentLabelY, contentLabelW, contentLabelH);


    // cellHeight
    self.cellHeight = CGRectGetMaxY(self.contentLabelFrame) + kPadding;
}
3.cell.h文件中:
@property (nonatomic, strong) TwoFrameModel *frameModel;
4.cell.m文件中:
- (void)layoutSubviews {

    [super layoutSubviews];

    self.timeLabel.frame = _frameModel.timeLabelFrame;
    self.contentLabel.frame = _frameModel.contentLabelFrame;
}

- (void)setFrameModel:(TwoFrameModel *)frameModel {

    _frameModel = frameModel;

    self.timeLabel.text = _frameModel.model.time;
    self.contentLabel.text = _frameModel.model.content;
}
5.在viewcontroller.m文件中
#pragma mark - private methods
- (void)loadData {

    NSString *filePath = [[NSBundle mainBundle] pathForResource:@"DataDemo" ofType:@"plist"];
    NSMutableArray *data = [[NSMutableArray alloc] initWithContentsOfFile:filePath];
    NSLog(@"data:%@", data);
    for (NSDictionary *tempDic in data) {
        TwoFrameModel *frameModel = [[TwoFrameModel alloc] init];
        frameModel.model = [TwoModel jxt_initWithDictionary:tempDic];
        [self.array addObject:frameModel];
    }

    [self.tableView reloadData];
}
- (CGFloat)tableView:(UITableView *)tableView heightForRowAtIndexPath:(NSIndexPath *)indexPath {

    return [self.array[indexPath.row] cellHeight];
}
搞定~!
3.通过Masonry获取cell的自适应高度
pod Masonry
1.创建tableview时,必须给一个估计高度:
_tableView.estimatedRowHeight = 175;// 需要给cell高度估计值,可以随便给,但不能不给
2.不需要写- (CGFloat)tableView:(UITableView *)tableView heightForRowAtIndexPath:(NSIndexPath *)indexPath方法,写了的话cell高度以此代理方法为准了= = 。
3.cell.m文件中,一定要给最后一个控件添加bottom距contentview的bottom间距!!!
#pragma mark - private methods
- (void)setUp {

    [self.contentView addSubview:[self timeLabel]];
    [self.contentView addSubview:[self contentLabel]];

    [self.timeLabel mas_makeConstraints:^(MASConstraintMaker *make) {
        make.top.mas_equalTo(kPadding);
        make.left.mas_equalTo(kPadding);
        make.right.mas_equalTo(-kPadding);
    }];

    [self.contentLabel mas_makeConstraints:^(MASConstraintMaker *make) {
        make.top.mas_equalTo(self.timeLabel.mas_bottom).offset(kPadding);
        make.left.mas_equalTo(kPadding);
        make.right.mas_equalTo(-kPadding);
        make.bottom.mas_equalTo(-kPadding);// 最后一个控件的bottom是关键点!!!
    }];

}
OVER~~~~
怎么样 就是这么的简单粗暴!
可能我的方法有问题或者不够巧妙,有更好的方法或是我代码有不规范的地方,热烈欢迎大大们前来指教!!!
第一篇正式的博客就写到这里啦- - (日常追剧去-_-hahaha)

