cocos2d-js Shader系列3:多重纹理 multiple textures multiple samplers
上一篇,我们学习了怎么便捷的控制sprite的颜色,而这个都是默认一个texture的,如果要实现类似mask的效果,或者更个性化的多纹理效果,怎么实现呢?
这就是这一节需要介绍的内容。
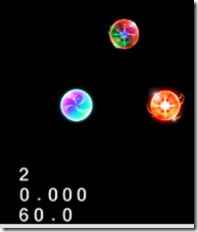
例如上图的效果,下方2个球是原图,而上方的图就是由2个球通过某个公式合成的效果了。这里重点不是怎么合成,而是怎么把多个纹理推送到fragment shader中。
相信大家都会想到,首先需要在fragment shader中添加多一个Sample2D:
uniform sampler2D CC_Texture0

uniform sampler2D CC_Texture1
但是通过简单的绑定纹理,只能绑定到第一个sampler上:
this.tex1 = cc.textureCache.addImage("res2/item_2.png");

gl.bindTexture(gl.TEXTURE_2D, this.tex1)
那么关键点来了,我们需要利用gl的32个texture缓存。
this.tex1Location = gl.getUniformLocation(p, "CC_Texture0");

this.tex2Location = gl.getUniformLocation(p, "CC_Texture1");


gl.activeTexture(gl.TEXTURE0);          //webgl中一共32个,可以看cocos2d列的常量

gl.bindTexture(gl.TEXTURE_2D, this.tex1.getName());

gl.uniform1i(this.tex1Location, 0);     //把CC_Texture0指向gl.TEXTURE0

gl.activeTexture(gl.TEXTURE1);

gl.bindTexture(gl.TEXTURE_2D, this.tex2.getName());

gl.uniform1i(this.tex1Location, 1);
核心是先激活某个纹理缓存,然后绑定sampler2D到对应的位置。最后,我们需要记得在draw之后清空,否则会影响下一个Node的绘制。
gl.activeTexture(gl.TEXTURE0);

gl.bindTexture(gl.TEXTURE_2D, null);

gl.activeTexture(gl.TEXTURE1);

gl.bindTexture(gl.TEXTURE_2D, null);

gl.bindBuffer(gl.ARRAY_BUFFER, null);
全部代码:
var MultiTexturesLayer = cc.Layer.extend({

    ctor:function() {

        this._super();

        if( 'opengl' in cc.sys.capabilities ) {

            var node1 = new cc.Sprite("res2/item_2.png");

            var node2 = new cc.Sprite("res2/item_3.png");

            this.addChild(node1);

            this.addChild(node2);

            node1.x = 500;

            node2.x = 200;

            node1.y = node2.y = 400;

            var glnode = new cc.Node();

            this.addChild(glnode,10);

            this.glnode = glnode;

            var winSize = cc.director.getWinSize();

            glnode.x = winSize.width/2;

            glnode.y = winSize.height/2;

            glnode.width = 128;

            glnode.height = 128;

            glnode.anchorX = 0.5;

            glnode.anchorY = 0.5;

            var MULTI_TEXTURES_FRAGMENT_SHADER =

                "precision lowp float;   \n"

                + "varying vec2 v_texCoord;  \n"

                + "uniform sampler2D CC_Texture0; \n"

                + "uniform sampler2D CC_Texture1; \n"

                + "void main() \n"

                + "{  \n"

                    + "    vec4 color1 =  texture2D(CC_Texture0, v_texCoord);   \n"

                    + "    vec4 color2 =  texture2D(CC_Texture1, v_texCoord);   \n"

                    + "    gl_FragColor = vec4(color1.r*color2.r, color1.g*color2.g, color1.b*color2.b, color1.a*color2.a);   \n"

                + "}";

            var DEFAULT_VERTEX_SHADER =

                "attribute vec4 a_position; \n"

                + "attribute vec2 a_texCoord; \n"

                + "varying mediump vec2 v_texCoord; \n"

                + "void main() \n"

                + "{ \n"

                + "    gl_Position = (CC_PMatrix * CC_MVMatrix) * a_position;  \n"

                + "    v_texCoord = a_texCoord;               \n"

                + "}";

            this.shader = new cc.GLProgram();

            this.shader.initWithVertexShaderByteArray(DEFAULT_VERTEX_SHADER, MULTI_TEXTURES_FRAGMENT_SHADER);

            this.shader.addAttribute(cc.ATTRIBUTE_NAME_POSITION, cc.VERTEX_ATTRIB_POSITION);

            this.shader.addAttribute(cc.ATTRIBUTE_NAME_TEX_COORD, cc.VERTEX_ATTRIB_TEX_COORDS);

            this.shader.link();

            this.shader.updateUniforms();   //绑定位置,这个是cocos封装后必须做的事。详细可以看代码

            this.initGL();

            var p = this.shader.getProgram();

            this.tex1Location = gl.getUniformLocation(p, "CC_Texture0");    //如果frag shader最终没有用某个uniform,该uniform会被优化删掉

            this.tex2Location = gl.getUniformLocation(p, "CC_Texture1");

            trace(this.tex1Location, this.tex2Location);

            glnode.draw = function() {

                this.shader.use();                      //使用这个shader来绘制,封装了gl的use。跟指定glnode.shaderProgram类似

                this.shader.setUniformsForBuiltins();   //设置坐标系变换

                gl.activeTexture(gl.TEXTURE0);          //webgl中一共32个,可以看cocos2d列的常量

                gl.bindTexture(gl.TEXTURE_2D, this.tex1.getName());

                gl.uniform1i(this.tex1Location, 0);     //把CC_Texture0指向gl.TEXTURE0

                gl.activeTexture(gl.TEXTURE1);

                gl.bindTexture(gl.TEXTURE_2D, this.tex2.getName());

                gl.uniform1i(this.tex2Location, 1);

                cc.glEnableVertexAttribs( cc.VERTEX_ATTRIB_FLAG_TEX_COORDS | cc.VERTEX_ATTRIB_FLAG_POSITION);   //实际对gl的api做了封装,增加了这两个属性的位置映射。用于vertexAttribPointer

                // Draw fullscreen Square

                gl.bindBuffer(gl.ARRAY_BUFFER, this.squareVertexPositionBuffer);

                gl.vertexAttribPointer(cc.VERTEX_ATTRIB_POSITION, 2, gl.FLOAT, false, 0, 0);

                gl.bindBuffer(gl.ARRAY_BUFFER, this.squareVertexTextureBuffer);

                gl.vertexAttribPointer(cc.VERTEX_ATTRIB_TEX_COORDS, 2, gl.FLOAT, false, 0, 0);

                gl.drawArrays(gl.TRIANGLE_STRIP, 0, 4);

                gl.activeTexture(gl.TEXTURE0);

                gl.bindTexture(gl.TEXTURE_2D, null);

                gl.activeTexture(gl.TEXTURE1);

                gl.bindTexture(gl.TEXTURE_2D, null);        //使用完必须置为空,否则影响其他node

                gl.bindBuffer(gl.ARRAY_BUFFER, null);

            }.bind(this);

        }

    },

    initGL:function() {

        var tex1 = cc.textureCache.addImage("res2/item_2.png");

        var tex2 = cc.textureCache.addImage("res2/item_3.png");

        this.tex1 = tex1;

        this.tex2 = tex2;

        //

        // Square

        //

        var squareVertexPositionBuffer = this.squareVertexPositionBuffer = gl.createBuffer();

        gl.bindBuffer(gl.ARRAY_BUFFER, squareVertexPositionBuffer);

        var vertices = [

            128,  128,

            0,    128,

            128,  0,

            0,    0

        ];

        gl.bufferData(gl.ARRAY_BUFFER, new Float32Array(vertices), gl.STATIC_DRAW);

        var squareVertexTextureBuffer = this.squareVertexTextureBuffer = gl.createBuffer();

        gl.bindBuffer(gl.ARRAY_BUFFER, squareVertexTextureBuffer);

        var texcoords = [

            0, 0,

            1, 0,

            0, 1,

            1, 1

        ];

        gl.bufferData(gl.ARRAY_BUFFER, new Float32Array(texcoords), gl.STATIC_DRAW);

        gl.bindBuffer(gl.ARRAY_BUFFER, null);

    }

});
2014.11.07 补充:
由于3.1版本关于坐标系的计算发生了改变,上述例子不会正常显示。
需要扩展cc.Node为cc.GLNode。
cc.GLNode = cc.GLNode || cc.Node.extend({

    ctor:function(){

        this._super();

        this.init();

    },

    _initRendererCmd:function(){

        this._rendererCmd = new cc.CustomRenderCmdWebGL(this, function(){

            cc.kmGLMatrixMode(cc.KM_GL_MODELVIEW);

            cc.kmGLPushMatrix();

            cc.kmGLLoadMatrix(this._stackMatrix);


            this.draw();


            cc.kmGLPopMatrix();

        });

    }

});
另外,在new cc.GLProgram后retain一下就可以兼容jsb了(cocos2d-js 3.1后)
