Bootstrap框架---krajee插件fileinput--最好用的文件上传组件----单多张图片上传交互方式三(推荐)


我们在前一章已经实现了 Bootstrap框架---Uploadify插件----多张图片上传交互方式二 。

 Bootstrap框架---Uploadify插件----多张图片上传交互方式二


本章主要关注单多张图片上传在Bootstrap框架中的布局和实现。


我们在之前的文章中已经在SpringMVC基础框架的基础上应用了BootStrap的后台框架,在此基础上记录 单多张图片上传在Bootstrap框架中的布局方式三和实现

应用bootstrap模板


基础项目源码下载地址为:

SpringMVC+Shiro+MongoDB+BootStrap基础框架


我们在基础项目中已经做好了首页index的访问。
现在就在index.jsp页面和index的路由Controller上做修改,实现  单多张图片上传在Bootstrap框架中的布局和实现


效果图


Krajee的FileInput插件介绍

介绍

插件主页地址是:

http://plugins.krajee.com/file-input

可以从这里看到很多Demo的代码展示:

http://plugins.krajee.com/file-basic-usage-demo

这是一个增强的 HTML5 文件输入控件,是一个 Bootstrap 3.x 的扩展,实现文件上传预览,多文件上传等功能:

bootstrap-fileinput是一款基于Bootstrap 3.x的html5文件上传插件。该文件上传插件带有预览图效果,可同时选择多个文件。该插件使用bootstrap CSS3样式来制作文件上传界面,美观大方。并且它提供了多国语言,你可以选择使用中文。

该文件上传插件比普通的文件上传插件功能更强大,它可以对图片、文本文件、HTML文件、视频文件、音频文件、flash文件生成预览图。另外,它还可以基于AJAX上传文件,拖拽上传文件,查看上传进度,可以选择性的预览,添加或删除文件。


特点

该文件上传插件的特点有:

AJAX上传功能基于HTML5 FormData(绝大多数现代浏览器都支持该属性)。在不支持该属性的浏览器中会回退为普通的文件上传组件。使用AJAX必须设置uploadUrl属性。

允许你添加、移除和追加文件。添加的文件可以生成预览图。
可以将文件拖拽到指定区域来上传文件。
可以一个个的删除或更新文件,也可以同时完成这些操作。
如果showPreview属性设置为false,或者浏览器不支持uploadUrl属性,将会回退为普通的文件上传组件。
可以配置文件上传等待指示,文件上传成功信息,文件上传出错信息。
在使用ajax上传文件时可以添加额外的表单信息。
可以显示文件当前上传的进度。
可以取消和终止当前正在上传的任务。
文件上传完毕会自动刷新预览区域的内容。


插件外部依赖需求


Bootstrap 3.x

最新版本的jQuery

大多数现代浏览器都支持HTML5(inputs和FileReader AP),CSS3和jQuery。对于IE浏览器,必须是IE10以上的版本。IE9及以下的版本会回退为普通的文件上传组件,并且不支持选择多个文件和HTML 5 FileReader API。

AJAX上传需要浏览器支持HTML5 FormData和XHR2 (XMLHttpRequest 2)。大多数现代浏览器都支持FormData和XHR2。在不支持这些特性的浏览器中将会回退为普通的文件上传组件。


引用

一般情况下,我们需要引入下面两个文件,插件才能正常使用:

bootstrap-fileinput/css/fileinput.min.css
bootstrap-fileinput/js/fileinput.min.js
简单的界面效果如下所示,和众多上传文件控件一样,可以接受各种类型的文件。当然,我们也可以指定具体接受的文件类型等功能。
如果需要考虑中文化,那么还需要引入文件:

bootstrap-fileinput/js/fileinput_locale_zh.js


下载文件地址:

https://github.com/kartik-v/bootstrap-fileinput

http://download.csdn.net/detail/q383965374/9879093
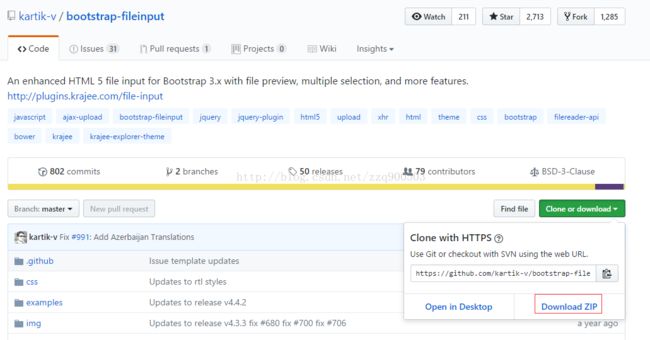


下载解压后得到相关资源文件。

我们在自己的项目资源文件夹中新建目录bootstrap-fileinput,把相关文件放进去。如图所示:


在index.jsp中引用文件代码如下:


初始化插件

// initialize with defaults
$("#input-id").fileinput();
 
// with plugin options
$("#input-id").fileinput({'showUpload':false, 'previewFileType':'any'});       
         

#input-id是文件上传input元素的ID标识符(例如:type = file)。

你也可以直接通过HTML5 data属性来初始化插件。


或者使用封装方法

html代码


JS代码

//初始化fileinput控件(第一次初始化)
function initFileInput(ctrlName, uploadUrl) {    
    var control = $('#' + ctrlName); 
    control.fileinput({
        language: 'zh', //设置语言
        uploadUrl: uploadUrl, //上传的地址
        allowedFileExtensions : ['jpg', 'png','gif'],//接收的文件后缀
        showUpload: false, //是否显示上传按钮
        showCaption: false,//是否显示标题
        browseClass: "btn btn-primary", //按钮样式             
        previewFileIcon: "", 
    });
}


//初始化fileinput控件(第一次初始化)
initFileInput("file-Portrait", "/User/EditPortrait");


 配置参数


showCaption:是否显示文件的标题。默认值true。
showPreview:是否显示文件的预览图。默认值true。
showRemove:是否显示删除/清空按钮。默认值true。
showUpload:是否显示文件上传按钮。默认是submit按钮,除非指定了uploadUrl属性。默认值true。
showCancel:是否显示取消文件上传按钮。只有在AJAX上传线程中该属性才可见可用。默认值true。
captionClass:在标题容器上额外的class。类型string。
previewClass:在预览区域容器上的额外的class。类型string。
mainClass:添加在文件上传主容器。类型string。
initialDelimiter:在initialPreview属性中用于上传多个文件时的分隔符。默认值:'*$$*'。
initialPreview:类型string或array。显示的初始化预览内容。你可以传入一个简单的HTML标签用于显示图片、文本或文件。如果设置一个字符串,会在初始化预览图中显示一个文件。你可以在initialDelimiter属性中设置分隔符用于显示多个预览图。如果设置为数组,初始化预览图中会显示数组中所有的文件。
下面的CSS样式用于显示各种不同类型的文件预览图:
image files:CSS样式为file-preview-image
text files:CSS样式为file-preview-text
other files:CSS样式为file-preview-other
下面的例子是如何设置不同类型文件的初始化预览图:

// for image files
initialPreview: [
    "Desert",
    "Jelly Fish",
],
 
// for text files
initialPreview: "
" + "This is the sample text file content upto wrapTextLength of 250 characters" + "[…]" + "
" // for other files initialPreview: "
" + "

" + "Filename.xlsx" + "
"

initialPreviewCount:类型int。被添加到选择的文件的初始化预览图的数量。当overwriteInitial属性设置为false时,该参数可以显示正确的文件标题。

initialPreviewDelimiter:类型string。用于分割初始化预览图内容的分割符。只有在initialPreview属性传入的参数是字符串而不是数组时可用。默认值是:*$$*。


initialPreviewConfig:类型:array。每一个initialPreview项的配置属性。数组中的每一个元素都应该是下面关键字组成的对象或关联数组:

- `caption`: _string_, the caption or filename to display for each initial preview item content.
- `width`: _string_, the CSS width of the image/content displayed.
- `url`: _string_, the URL for deleting the image/content in the initial preview via AJAX post response. This will default to `deleteUrl` if not set.
- `key`: _string|object_, the key that will be passed as data to the `url` via AJAX POST.
- `extra`: _object|function_, the extra data that will be passed as data to the initial preview delete url/AJAX server call via POST. This will default to `deleteExtraData` if not set.


下面是配置initialPreviewConfig属性的一个例子。


// setup initial preview with data keys 
initialPreview: [
    "Desert",
    "Jelly Fish",
],
// initial preview configuration
initialPreviewConfig: [
    {
        caption: 'desert.jpg', 
        width: '120px', 
        url: '/localhost/avatar/delete', 
        key: 100, 
        extra: {id: 100}
    },
    {
        caption: 'jellyfish.jpg', 
        width: '120px', 
        url: '/localhost/avatar/delete', 
        key: 101, 
        extra: function() { 
            return {id: $("#id").val()};
        },
    }
] 


注意:ajax delete操作会通过POST向服务器发送下面的数据:
key:在initialPreviewConfig['key']中设置的key值。
通过initialPreviewConfig['extra']或deleteExtraData格式传入的其它作为key: value键值对数据。
initialPreviewShowDelete:是否为每一个由initialPreview插件的预览图创建一个删除按钮。


previewThumbTags:类型array。预览图的一组标签。它会在预览图生成之后动态的替换掉缩略图标签。例如:


// change thumbnail footer template
layoutTemplates.footer = '';
 
// set preview template tags
previewThumbTags = {
    '{CUSTOM_TAG_NEW}': 'CUSTOM MARKUP',
    '{CUSTOM_TAG_INIT}': ' '
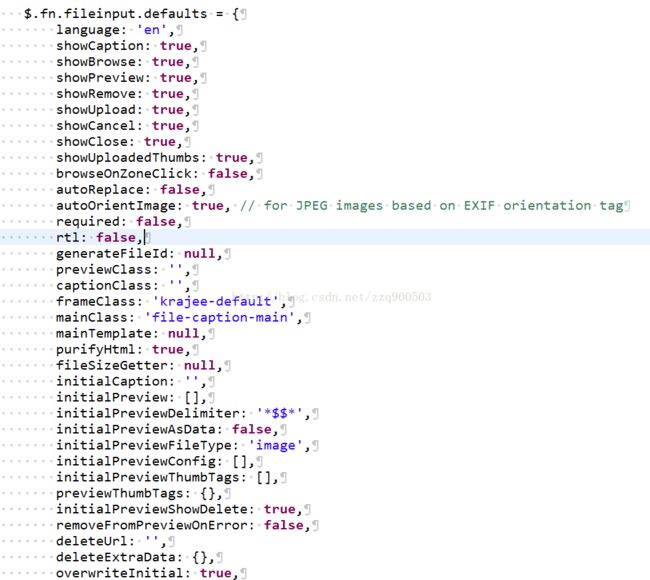
};  

上面只是该文件上传插件一部分的属性,要查看完整的属性和可用方法,可以查看:

https://github.com/kartik-v/bootstrap-fileinput/

也可以查看 fileinput.js中的$.fn.fileinput.defaults方法,如图:


JSP页面

<%@ include file="./include/header.jsp"%>
<%@ taglib uri="com.data.web.view.function" prefix="cf" %>


                            多张(动态)图片上传 Uploadify                        


                                <%@ include file="./include/footer.jsp"%>  


返回信息辅助实体类

AjaxResult.java

package com.test.util;

import org.springframework.data.annotation.Transient;

/**
 * AjaxResult
 * 
 * 标准化的ajax响应, 取代之前直接返回结果的方式。
 * 
 */
public class AjaxResult {

	@Transient
	public static final int CODE_SUCCESS = 1;
	@Transient
	public static final int CODE_FAILURE = 0;
	@Transient
	public static final AjaxResult RESULT_ERROR = new AjaxResult(
			CODE_FAILURE, "执行出错了", null);
	@Transient
	public static final AjaxResult RESULT_SUCCESS = new AjaxResult(
			CODE_SUCCESS, null, null);
	@Transient
	public static final AjaxResult RESULT_INVAILD_PARAMETER = new AjaxResult(
			CODE_FAILURE, "参数格式不正确", null);

	private int code = CODE_FAILURE;
	private String error;
	private Object result;

	public static AjaxResult resultError(String error) {
		return new AjaxResult(CODE_FAILURE, error, null);
	}

	public static AjaxResult resultSuccess(Object result) {
		return new AjaxResult(CODE_SUCCESS, null, result);
	}

	/**
	 * @param code
	 * @param error
	 * @param result
	 */
	public AjaxResult(int code, String error, Object result) {
		super();
		this.code = code;
		this.error = error;
		this.result = result;
	}

	/**
	 * @return the code
	 */
	public int getCode() {
		return code;
	}

	/**
	 * @param code
	 *            the code to set
	 */
	public void setCode(int code) {
		this.code = code;
	}

	/**
	 * @return the error
	 */
	public String getError() {
		return error;
	}

	/**
	 * @param error
	 *            the error to set
	 */
	public void setError(String error) {
		this.error = error;
	}

	/**
	 * @return the result
	 */
	public Object getResult() {
		return result;
	}

	/**
	 * @param result
	 *            the result to set
	 */
	public void setResult(Object result) {
		this.result = result;
	}
}


JSONResult.java

package com.test.util;

/**
 * JSONResult
 * 标准化的JSON响应
 * 
 * 
 * {@link JSONResult#success(Object)}
 * {@link JSONResult#error(String)}
 * 
* * */ public class JSONResult { /** * 成功的代码 */ public static final int CODE_SUCCESS = 0; /** * 错误的代码,可根据错误类型进行详细分类 */ public static final int CODE_ERROR = -1; /** * 空白的成功响应 */ public static final JSONResult RESULT_SUCCESS_NO_DATA = new JSONResult(CODE_SUCCESS, null, null); private int code; private String msg; private Object data; /** * 创建一个成功的响应 * * @param data * @return */ public static JSONResult success(Object data) { return new JSONResult(CODE_SUCCESS, null, data); } /** * 创建一个错误的响应 * * @param msg * @return */ public static JSONResult error(String msg) { return new JSONResult(CODE_ERROR, msg, null); } /** * @param code * @param msg * @param data */ public JSONResult(int code, String msg, Object data) { this.code = code; this.setMsg(msg); this.data = data; } public int getCode() { return code; } public JSONResult setCode(int code) { this.code = code; return this; } public Object getData() { return data; } public JSONResult setData(Object data) { this.data = data; return this; } public String getMsg() { return msg; } public JSONResult setMsg(String msg) { this.msg = msg; return this; } }


Pic.java

package com.test.domain.entity;


import java.util.List;

public class Pic {
private String id;
private String name;
private String description;
private List imagePaths; // 图片
public String getId() {
return id;
}
public void setId(String id) {
this.id = id;
}
public String getName() {
return name;
}
public void setName(String name) {
this.name = name;
}
public String getDescription() {
return description;
}
public void setDescription(String description) {
this.description = description;
}
public List getImagePaths() {
return imagePaths;
}
public void setImagePaths(List imagePaths) {
this.imagePaths = imagePaths;
}


}


Image.java

package com.test.domain.entity;

/**
 * 图片 Image
 */
public class Image {

    private String title; //名称
    private String description; //描述
    private String filePath; //文件地址

    public String getTitle() {
        return title;
    }

    public void setTitle(String title) {
        this.title = title;
    }

    public String getDescription() {
        return description;
    }

    public void setDescription(String description) {
        this.description = description;
    }

    public String getFilePath() {
        return filePath;
    }

    public void setFilePath(String filePath) {
        this.filePath = filePath;
    }

    public Image() {
    }

    /**
     * @param title
     * @param filePath
     */
    public Image(String title, String filePath) {
        this.title = title;
        this.filePath = filePath;
    }
}


页面路由控制器

IndexController.java

package com.test.web.controller;


import java.io.IOException;


import org.springframework.stereotype.Controller;
import org.springframework.ui.Model;
import org.springframework.web.bind.annotation.RequestBody;
import org.springframework.web.bind.annotation.RequestMapping;
import org.springframework.web.bind.annotation.ResponseBody;


import com.test.domain.entity.Pic;
import com.test.util.JSONResult;


/**
 * IndexController
 * 
 * 
 */
@Controller
public class IndexController {


@RequestMapping("/")
public String index(Model model) throws IOException {
          model.addAttribute("hostname", "http://127.0.0.1:8080/");
return "/index";
}


@RequestMapping("/pic/save")
@ResponseBody
public JSONResult saveMigrateLine(@RequestBody Pic pic) {
//保存pic记录
//int result = save(pic);
int result =1;
return result > 0 ? JSONResult.success("保存成功")
:JSONResult.error("保存失败!");
}
}


文件上传接收控制器

UploadController.java

package com.test.web.controller;

import java.io.File;
import java.io.FileOutputStream;
import java.io.IOException;
import java.io.InputStream;
import java.io.OutputStream;
import java.text.SimpleDateFormat;
import java.util.Date;
import java.util.HashMap;
import java.util.Iterator;
import java.util.List;

import javax.servlet.http.HttpServletRequest;
import javax.servlet.http.HttpServletResponse;

import org.apache.commons.fileupload.FileItem;
import org.apache.commons.fileupload.FileUploadException;
import org.apache.commons.fileupload.disk.DiskFileItemFactory;
import org.apache.commons.fileupload.servlet.ServletFileUpload;
import org.slf4j.Logger;
import org.slf4j.LoggerFactory;
import org.springframework.stereotype.Controller;
import org.springframework.web.bind.annotation.RequestMapping;
import org.springframework.web.bind.annotation.ResponseBody;

import com.test.util.AjaxResult;

/**
 * 通用的上传(保存到本地服务器)
 * 
 */
@Controller
public class UploadController {

    private final Logger logger = LoggerFactory.getLogger(getClass().getName());

    /**
     * 上传到服务器,文件名称随机生成(基本可以保证不重复)
     * 
     * @param request
     * @param response
     * @return AjaxResult 存储的文件的相对路径
     * @throws IOException 
     */
    @RequestMapping("/upload")
    @ResponseBody
    public AjaxResult upload(HttpServletRequest request, HttpServletResponse response) throws IOException {
        try {
        	String filePath="/uploadfile";
        	//获取文件存储路径  (虚拟目录映射为本机服务器的实际目录)
            String path = request.getSession().getServletContext().getRealPath(filePath); 
        	//如果保存在ROOT里,重新发包后静态资源会丢失,所以保存在ROOT包的上级路径webapp中
            path=path.replace("ROOT\\", "");
            String fileNameResult ="";
            // 判断enctype属性是否为multipart/form-data  
            boolean isMultipart = ServletFileUpload.isMultipartContent(request);  
            if (!isMultipart)  
                throw new IllegalArgumentException(  
                        "上传内容不是有效的multipart/form-data类型.");  
      
            // Create a factory for disk-based file items  
            DiskFileItemFactory factory = new DiskFileItemFactory();  
      
            // Create a new file upload handler  
            ServletFileUpload upload = new ServletFileUpload(factory);  
            // Parse the request  
            List items = upload.parseRequest(request);  
      
            Iterator iter = items.iterator();  
            while (iter.hasNext()) {  
                FileItem item = (FileItem) iter.next();  
      
                if (item.isFormField()) {  
                    // 如果是普通表单字段  
                    String name = item.getFieldName();  
                    String value = item.getString();  
                    // ...  
                } else {  
                    // 如果是文件字段  
                    String fieldName = item.getFieldName();  
                    String fileName = item.getName();  
                    String contentType = item.getContentType();  
                    boolean isInMemory = item.isInMemory();  
                    long sizeInBytes = item.getSize();  
                    String fileExt = fileName.substring(fileName.lastIndexOf('.'));
                    String fileNameNew =getFileNameNew()+fileExt;
                    fileNameResult=fileNameNew;
                    //保存到本地
                        InputStream uploadedStream = item.getInputStream();  
                        savePic(path,uploadedStream,fileNameNew);
                        uploadedStream.close();  
                }  
            }  
            
            return AjaxResult.resultSuccess(filePath+"/"+fileNameResult);
        } catch (FileUploadException e) {
            logger.warn(e.getMessage(), e);
            return AjaxResult.resultError(e.getMessage());
        }
    }
    
    private void savePic(String path,InputStream inputStream, String fileName) {
    	 
        OutputStream os = null;
        try {
          // 2、保存到临时文件
          // 1K的数据缓冲
          byte[] bs = new byte[1024];
          // 读取到的数据长度
          int len;
          // 输出的文件流保存到本地文件
     
          File tempFile = new File(path);
          if (!tempFile.exists()) {
            tempFile.mkdirs();
            //如果图片是保存在ROOT项目外,首次创建目录,tomcat加载需要时间,所以需要延迟10秒
            Thread.sleep(10000);
          }
          os = new FileOutputStream(tempFile.getPath() + File.separator + fileName);
          // 开始读取
          while ((len = inputStream.read(bs)) != -1) {
            os.write(bs, 0, len);
          }
     
        } catch (IOException e) {
          e.printStackTrace();
        } catch (Exception e) {
          e.printStackTrace();
        } finally {
          // 完毕,关闭所有链接
          try {
            os.close();
            inputStream.close();
          } catch (IOException e) {
            e.printStackTrace();
          }
        }
      }

    private String getFileNameNew() {
        SimpleDateFormat fmt = new SimpleDateFormat("yyyyMMddHHmmssSSS");
        return fmt.format(new Date());
      }

}


目前上传的文件是接收后保存到本地服务器中,如果要上传到远程服务器或者七牛云等,只需要修改UploadController.java即可。


这里只给出了 uploadify 上传图片的案例。 但其实 这个DEMO也可以用于上传 zip等文件。 只需要稍微调整jsp页面把图片显示去掉即可。


你可能感兴趣的:(web模块积累,web,java)