Tensorflow lite for 移动端安卓开发(二)——完整详细过程训练自己的模型
官方给的Tensorflow lite demo是ImageNet 中训练的1000类物体识别,基于移动端的项目需要,现在要用模型训练自己的数据,提供两种训练方法,这也是自己在摸索Tensorflow过程中,尝试的两种方法。
(一)利用examples中的retrain.py 脚本进行迁移学习
https://github.com/tensorflow/tensorflow/tree/r1.8/tensorflow/examples/image_retraining
迁移学习指的是将训练好的模型通过简单的训练使其适用于一个新的问题,该脚本利用已有训练好的模型(mobilenet,inceptionv3等)来重新训练新的数据,固定模型的特征提取层(瓶颈层,bottleneck),对新数据,直接利用这个训练好的神经网络对图像进行特征提取得到每张图片的特征向量,将该向量作为输入来训练一个新的单层全连接神经网络处理新的分类问题。
该脚本的README.md如下:特意强调该脚本产生的计算流图兼容Tensorflow Tite转化器,能直接转化成TFlite格式的模型
retrain.py is an example script that shows how one can adapt a pretrained
network for other classification problems. A detailed overview of this script
can be found at:
https://codelabs.developers.google.com/codelabs/tensorflow-for-poets/#0
The script also shows how one can train layers
with quantized weights and activations instead of taking a pre-trained floating
point model and then quantizing weights and activations.
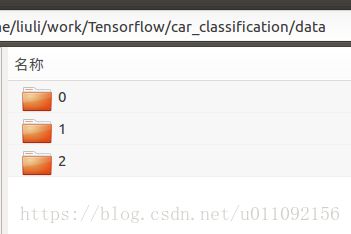
The output graphdef produced by this script is compatible with the TensorFlow
Lite Optimizing Converter and can be converted to TFLite format.按照脚本要求准备数据,将数据按照每个类别存放在各自的文件夹下:
阅读源码,查看脚本中几个重要的输入参数
‘–image_dir’
标记图像文件夹的路径
‘output_graph’
存放训练好的计算图(该计算图已经进行了变量固化,可以直接转化为TFlite)
‘–output_labels’
输出标签
‘–summaries_dir’
存放训练日志,用TensorfBord打开,可以查看训练过程
‘–how_many_training_steps’
训练次数
‘–bottleneck_dir’
存放瓶颈层输出的特征向量
‘–architecture’
预训练好的用于提取图像特征的模型
‘–saved_model_dir’
存放导出的模型,含有计算流图和变量值
‘–final_tensor_name’
输出层的节点名字
1) 生成output_graph.pb文件
python /home/liuli/tensorflow-r1.8/tensorflow/examples/image_retraining/retrain.py --image_dir /home/liuli/work/Tensorflow/car_classification/data/ --learning_rate=0.0005 --testing_percentage=10 --validation_percentage=10 --train_batch_size=32 --validation_batch_size=-1 --flip_left_right True --random_scale=30 --random_brightness=30 --eval_step_interval=200 --how_many_training_steps=6000 --architecture=mobilenet_1.0_224_quant ----model_dir=/home/liuli/work/Tensorflow/car_classification/imagenet2) 转化成.tflite文件
cd /home/liuli/tensorflow
bazel build tensorflow/contrib/lite/toco:toco
bazel run --config=opt tensorflow/contrib/lite/toco:toco -- \
  --input_file=/home/liuli/work/Tensorflow/output_graph.pb \
  --input_format=TENSORFLOW_GRAPHDEF \
  --output_format=TFLITE \
  --output_file=/home/liuli/work/Tensorflow/5.tflite \
  --inference_type=QUANTIZED_UINT8 \
  --input_array=input \
  --output_array=final_result \
  --input_shape=1,224,224,3 \
  --mean_value=128 \
  --std_value=127
其中output_array 为模型的输出节点,和 retrain.py 中的 final_tensor_name对应。
使用retrain.py迁移学习,能很快达到收敛,但精度不够,我用mobilenet float型接口训练完后准确率只有0.82
(二)利用Tensorflow中的slim API进行训练
Tensorflow-slim API是专门可以用来做图像识别的模型库,
https://github.com/tensorflow/models/tree/master/research/slim
网上有很多关于它的介绍,下面介绍用train_image_classifier.py函数训练自己的模型
1)准备自己的数据
具体方法参考之前的一篇博客
https://blog.csdn.net/u011092156/article/details/80607601
2)训练自己的模型
根据实际情况,选择重新训练,或者使用现有模型进行微调
重新训练模型:
DATASET_DIR=/home/liuli/work/Tensorflow/cars
TRAIN_DIR=/home/liuli/work/Tensorflow/car_train_logs
python train_image_classifier.py \
    --train_dir=${TRAIN_DIR} \
    --dataset_name=car \
    --dataset_split_name=train \
    --dataset_dir=${DATASET_DIR} \
    --model_name=mobilenet_v1
微调现有模型:
DATASET_DIR=/home/liuli/work/Tensorflow/cars
TRAIN_DIR=/home/liuli/work/Tensorflow/car_train_logs
CHECKPOINT_PATH=/home/liuli/work/Tensorflow/mobilenet_v1_1.0_224/mobilenet_v1_1.0_224.ckpt
python train_image_classifier.py \
    --train_dir=${TRAIN_DIR} \
    --dataset_name=car \
    --dataset_split_name=train \
    --dataset_dir=${DATASET_DIR} \
    --model_name=mobilenet_v1 \
    --checkpoint_path=${CHECKPOINT_PATH} \
    --checkpoint_exclude_scopes=MobilenetV1/Logits,MobilenetV1/AuxLogits \
    --trainable_scopes=MobilenetV1/Logits,MobilenetV1/AuxLogits
3)测试模型性能
DATASET_DIR=/home/liuli/work/Tensorflow/cars
CHECKPOINT_FILE=/home/liuli/work/Tensorflow/car_train_logs/model.ckpt-89078

python eval_image_classifier.py \
    --alsologtostderr \
    --checkpoint_path=${CHECKPOINT_FILE} \
    --dataset_name=car \
    --dataset_split_name=validation \
    --dataset_dir=${DATASET_DIR} \
    --model_name=mobilenet_v1
重新训练的方法,迭代了将近90000次,花费了10个小时,最后模型收敛的准确率为0.881,通过对比方法一中的准确率,发现重新训练准确率提升很明显
4)导出计算图
python export_inference_graph.py \
    --alsologtostderr \
    --model_name=mobilenet_v1 \
    --image_size=224 \
    --dataset_name=car \
    --output_file=/tmp/mobilenet_v1_224.pb
5)将变量值保存成常量,固化计算图
cd /home/liuli/tensorflow
freeze_graph --input_graph=/tmp/mobilenet_v1_224.pb \
  --input_checkpoint=/home/liuli/work/Tensorflow/car_train_logs/model.ckpt-89078 \
  --input_binary=true \
  --output_graph=/home/liuli/work/Tensorflow/1_frozen.pb \
  --output_node_names=MobilenetV1/Predictions/Reshape_1
6)转化成.tflite
生成float inference模型
cd /home/liuli/tensorflow
bazel build tensorflow/contrib/lite/toco:toco
bazel run --config=opt tensorflow/contrib/lite/toco:toco -- \
  --input_file=/home/liuli/work/Tensorflow/1_frozen.pb \
  --output_file=/home/liuli/work/Tensorflow/7_float.tflite \
  --inference_type=FLOAT \
  --input_shape=1,224,224,3 \
  --input_array=input \
  --output_array=MobilenetV1/Predictions/Reshape_1
生成Quant inference模型
cd /home/liuli/tensorflow
bazel build tensorflow/contrib/lite/toco:toco
bazel run --config=opt tensorflow/contrib/lite/toco:toco -- \
  --input_file=/home/liuli/work/Tensorflow/1_frozen.pb \
  --output_file=/home/liuli/work/Tensorflow/7.tflite \
  --input_format=TENSORFLOW_GRAPHDEF \
  --output_format=TFLITE \
  --inference_type=QUANTIZED_UINT8 \
  --input_shape=1,224,224,3 \
  --input_array=input \
  --output_array=MobilenetV1/Predictions/Reshape_1 \
  --default_ranges_min=0 \
  --default_ranges_max=6 \
  --std_value=127.5 \
  --mean_value=127.5
相比Float inference(浮点型)模型,Quant inference(量化)模型的精度很低,在下一篇博客中介绍了在移动端进行模型测试的方法
https://blog.csdn.net/u011092156/article/details/80639811
总结:
以上介绍了两种方法训练自己的数据,大家可以结合自己的需求,以及硬件配置进行选择,在计算资源受限,没有GPU的机器上训练时,可以优先考虑使用迁移学习,虽然精度不高,但是训练时间短,当计算资源充足时,则考虑重新训练,此时还可以对模型进行调参,达到最佳性能。