Linux系统管理—修复MBR扇区故障、修复GRUB引导故障、清除Linux各种密码
【centos6.5】
修复MBR扇区故障
1、挂载/dev/sdb1到/backup,将MBR扇区备份至此,毁坏MBR扇区,重启
[root@localhost ~]# init 3
[root@localhost ~]# fdisk /dev/sdb
Device contains neither a valid DOS partition table, nor Sun, SGI or OSF disklabel
Building a new DOS disklabel with disk identifier 0xc4d08778.
Changes will remain in memory only, until you decide to write them.
After that, of course, the previous content won't be recoverable.
Warning: invalid flag 0x0000 of partition table 4 will be corrected by w(rite)
WARNING: DOS-compatible mode is deprecated. It's strongly recommended to
switch off the mode (command 'c') and change display units to
sectors (command 'u').
Command (m for help): n
Command action
e extended
p primary partition (1-4)
p
Partition number (1-4): 1
First cylinder (1-130, default 1):
Using default value 1
Last cylinder, +cylinders or +size{K,M,G} (1-130, default 130):
Using default value 130
Command (m for help): w
The partition table has been altered!
Calling ioctl() to re-read partition table.
Syncing disks.
[root@localhost ~]# fdisk -l
Disk /dev/sda: 42.9 GB, 42949672960 bytes
255 heads, 63 sectors/track, 5221 cylinders
Units = cylinders of 16065 * 512 = 8225280 bytes
Sector size (logical/physical): 512 bytes / 512 bytes
I/O size (minimum/optimal): 512 bytes / 512 bytes
Disk identifier: 0x00058c62
Device Boot Start End Blocks Id System
/dev/sda1 * 1 64 512000 83 Linux
Partition 1 does not end on cylinder boundary.
/dev/sda2 64 5222 41430016 8e Linux LVM
Disk /dev/sdb: 1073 MB, 1073741824 bytes
255 heads, 63 sectors/track, 130 cylinders
Units = cylinders of 16065 * 512 = 8225280 bytes
Sector size (logical/physical): 512 bytes / 512 bytes
I/O size (minimum/optimal): 512 bytes / 512 bytes
Disk identifier: 0xc4d08778
Device Boot Start End Blocks Id System
/dev/sdb1 1 130 1044193+ 83 Linux
Disk /dev/mapper/VolGroup-lv_root: 40.3 GB, 40340815872 bytes
255 heads, 63 sectors/track, 4904 cylinders
Units = cylinders of 16065 * 512 = 8225280 bytes
Sector size (logical/physical): 512 bytes / 512 bytes
I/O size (minimum/optimal): 512 bytes / 512 bytes
Disk identifier: 0x00000000
Disk /dev/mapper/VolGroup-lv_swap: 2080 MB, 2080374784 bytes
255 heads, 63 sectors/track, 252 cylinders
Units = cylinders of 16065 * 512 = 8225280 bytes
Sector size (logical/physical): 512 bytes / 512 bytes
I/O size (minimum/optimal): 512 bytes / 512 bytes
Disk identifier: 0x00000000
root@localhost ~]# mkfs.ext4 /dev/sdb1
mke2fs 1.41.12 (17-May-2010)
文件系统标签=
操作系统:Linux
块大小=4096 (log=2)
分块大小=4096 (log=2)
Stride=0 blocks, Stripe width=0 blocks
65280 inodes, 261048 blocks
13052 blocks (5.00%) reserved for the super user
第一个数据块=0
Maximum filesystem blocks=268435456
8 block groups
32768 blocks per group, 32768 fragments per group
8160 inodes per group
Superblock backups stored on blocks:
32768, 98304, 163840, 229376
正在写入inode表: 完成
Creating journal (4096 blocks): 完成
Writing superblocks and filesystem accounting information: 完成
This filesystem will be automatically checked every 38 mounts or
180 days, whichever comes first. Use tune2fs -c or -i to override.
[root@localhost ~]# mkdir /backup
[root@localhost ~]# mount /dev/sdb1 /backup
[root@localhost ~]# dd if=/dev/sda of=/backup/sda.mbr.bak bs=512 count=1
记录了1+0 的读入
记录了1+0 的写出
512字节(512 B)已复制,0.0242714 秒,21.1 kB/秒
[root@localhost ~]# du -sh /backup/sda.mbr.bak
4.0K /backup/sda.mbr.bak
[root@localhost ~]# ls -l /backup/sda.mbr.bak
-rw-r--r--. 1 root root 512 3月 20 04:35 /backup/sda.mbr.bak
[root@localhost ~]# dd if=/dev/zero of=/dev/sda bs=512 count=1
记录了1+0 的读入
记录了1+0 的写出
512字节(512 B)已复制,0.00116769 秒,438 kB/秒
[root@localhost ~]#reboot
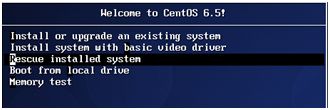
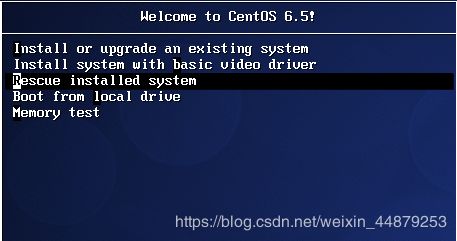
2、挂载系统光盘,从光盘引导进入安全模式
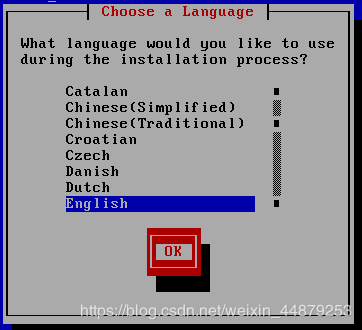
选择语言:英语
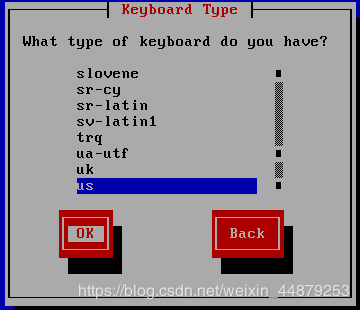
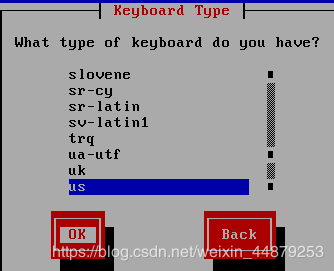
选择键盘:美式键盘
是否开启网络访问,选择no
选择“Continue”
选择OK
开始shell
运行诊断
重启
选择shell
在shell界面将/dev/sdb1/挂载使用,将里面的备份写入/dev/sda,重启
至此可以重新进入系统,MBR分区修复成功
二、修复GRUB引导故障
1、方法一,尝试手动输入【针对配置文件和有备份的情况】
[root@localhost ~]# cat /boot/grub/grub.conf
# grub.conf generated by anaconda
#
# Note that you do not have to rerun grub after making changes to this file
# NOTICE: You have a /boot partition. This means that
# all kernel and initrd paths are relative to /boot/, eg.
# root (hd0,0)
# kernel /vmlinuz-version ro root=/dev/mapper/VolGroup-lv_root
# initrd /initrd-[generic-]version.img
#boot=/dev/sda
default=0
timeout=5
splashimage=(hd0,0)/grub/splash.xpm.gz
hiddenmenu
title CentOS (2.6.32-431.el6.x86_64)
root (hd0,0)
kernel /vmlinuz-2.6.32-431.el6.x86_64 ro root=/dev/mapper/VolGroup-lv_root rd_NO_LUKS rd_NO_MD rd_LVM_LV=VolGroup/lv_swap crashkernel=auto LANG=zh_CN.UTF-8 rd_LVM_LV=VolGroup/lv_root KEYBOARDTYPE=pc KEYTABLE=us rd_NO_DM rhgb quiet
initrd /initramfs-2.6.32-431.el6.x86_64.img
[root@localhost ~]# mount /dev/sdb1 /backup
[root@localhost ~]# cd /boot/grub
[root@localhost grub]# ls
device.map grub.conf minix_stage1_5 stage2
e2fs_stage1_5 iso9660_stage1_5 reiserfs_stage1_5 ufs2_stage1_5
fat_stage1_5 jfs_stage1_5 splash.xpm.gz vstafs_stage1_5
ffs_stage1_5 menu.lst stage1 xfs_stage1_5
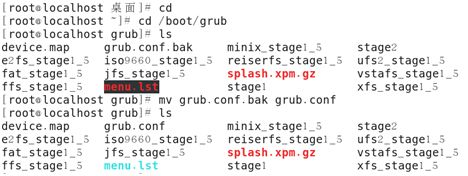
[root@localhost grub]# mv grub.conf grub.conf.bak
[root@localhost grub]# ls
device.map grub.conf.bak minix_stage1_5 stage2
e2fs_stage1_5 iso9660_stage1_5 reiserfs_stage1_5 ufs2_stage1_5
fat_stage1_5 jfs_stage1_5 splash.xpm.gz vstafs_stage1_5
ffs_stage1_5 menu.lst stage1 xfs_stage1_5
[root@localhost grub]# reboot
引导停滞,出现“grub>”提示符
进行手动输入,注意:内核信息无法tab补全,需查看之前备份(输入自己主机备份的内核信息)
重新登录进去,修改grub。conf文件 【如果不修改重启之后会进入grub界面出现死循环】
2、方法二:进入急救模式,重建grub程序。需要提前备份MBR前446字节 【针对有备份的情况】
[root@localhost ~]# dd if=/dev/sda of=/backup/sda.mbr.bak bs=446 count=1
[root@localhost ~]# ls /backup
[root@localhost ~]# mount /dev/sdb1 /backup
[root@localhost ~]# ls /backup
grub.conf lost+found sda.mbr.bak
[root@localhost ~]# ls /boot/grub
device.map grub.conf minix_stage1_5 stage2
e2fs_stage1_5 iso9660_stage1_5 reiserfs_stage1_5 ufs2_stage1_5
fat_stage1_5 jfs_stage1_5 splash.xpm.gz vstafs_stage1_5
ffs_stage1_5 menu.lst stage1 xfs_stage1_5
[root@localhost ~]# cd /boot/grub
[root@localhost grub]# ls
device.map grub.conf minix_stage1_5 stage2
e2fs_stage1_5 iso9660_stage1_5 reiserfs_stage1_5 ufs2_stage1_5
fat_stage1_5 jfs_stage1_5 splash.xpm.gz vstafs_stage1_5
ffs_stage1_5 menu.lst stage1 xfs_stage1_5
[root@localhost grub]# mv grub.conf grub.conf.bak 【bak表示备份文件】
[root@localhost grub]# ls
device.map grub.conf.bak minix_stage1_5 stage2
e2fs_stage1_5 iso9660_stage1_5 reiserfs_stage1_5 ufs2_stage1_5
fat_stage1_5 jfs_stage1_5 splash.xpm.gz vstafs_stage1_5
ffs_stage1_5 menu.lst stage1 xfs_stage1_5
[root@localhost grub]# dd if=/dev/zero of=/dev/sda bs=446 count=1
记录了1+0 的读入
记录了1+0 的写出
446字节(446 B)已复制,0.0424687 秒,10.5 kB/秒
[root@localhost grub]# reboot
进去急求模式shell
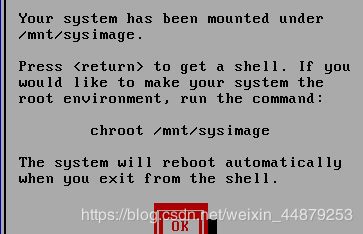
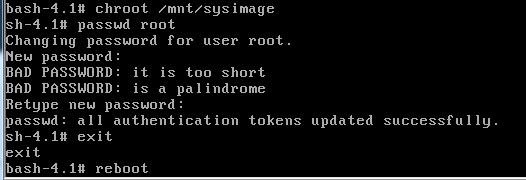
进去shell后,将根路径修改为/mnt/sysimage (chroot/mnt/sysimage)
![]()
命令“-l|grep”中间是通道号
3、方法三:若无MBR备份,进去急救模式,重新安装grub程序 【只针对扇区修复,不会修复配置文件,除非编辑文本】
进入安全模式shell同方法二
改变磁盘根目录到/mnt/sysimage
重新安装grub引导程序
退出重启
Chroot挂载的意思 挂载到伪目录
关机
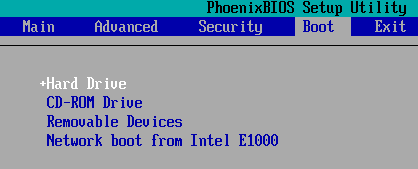
从“打开电源时进入固件”进入
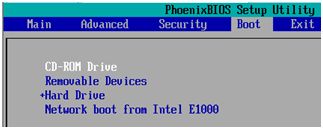
进入boot界面把“Hard Drive(硬盘)”放入第一位
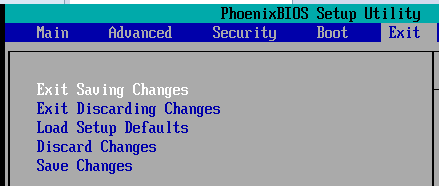
进入Exit界面 选Exit Saving Changes(保存并退出)选yes
向上:shift键++键
三、清除Linux各种密码
3.1方法一
重启主机按“↑”进入字符界面
按e键
按“下键”
按e键
按“空格 1”
回车再按b
输入paasswd
输入新密码,回车,再输一遍,再输入reboot,回车
密码修改成功
3.2方法二、密码修改
进入急救模式的方法
从电源固件进入 boot里选
保存退出,再重启进入急救模式
进入伪根目录chroot /mnt/sysimage
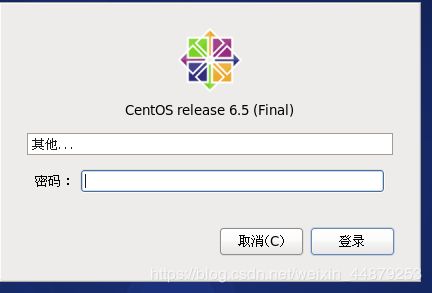
3.3方法三
![]()
按“x键删除单个字符‘
删除密文前
删除密文后,保存退出
实验补充:
1、init(0-7)表示runlevels的运行级别
2、进行修复GRUB引导故障,需提前记下内核的UUID或者存储的绝对路径,此处数据出错任何一个都会导致修复失败
(1)内核信息如果忘了备份,可以找台好的机器手抄其内核信息(之前做实验用的老师机子内核信息就会失败)
(2)直接把/boot/geub/grub.conf改为grub.conf.bak重启后出现以下问题,一直循环在这个界面
无论按什么命令都显示无法找到命令
(3)如果一直在grub界面循环并且输任何命令都显示无此命令,把配置文件修改过来,用第3种方案可以急救
(3)伪目录chroot /mnt/sysimage

