caffe安装详细完整过程(Ubuntu16.04、Ubuntu18.04系统)
在ubuntu(Ubuntu16.04、ubuntu18.04)系统下成功安装caffe框架详细笔记
目录
Caffe编译安装指导
Caffe安装参考文档:
确认编译器版本
安装anaconda2
安装opencv和protobuf
编译caffe
安装SSH人脸检测算法源码中的caffe框架
ssh人脸检测算法:https://blog.csdn.net/wsq_zqfl/article/details/92810501
Caffe编译安装指导
说明:本文假定用户已经正确安装了cuda和cudnn,如果未正确安装,可参考如下面的链接
-
Caffe安装参考文档:
https://blog.csdn.net/haoji007/article/details/52081273
https://blog.csdn.net/yhaolpz/article/details/71375762
-
确认编译器版本
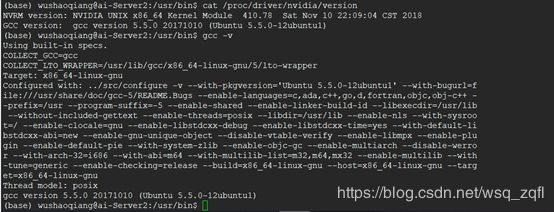
首先确定系统所使用的gcc/g++/c++的版本,并且尽量和
“cat /proc/driver/nvidia/version”输出中的gcc版本保持一致。
查看系统安装了那些编译器版本:
- 查看系统gcc/g++/c++/cpp所在的目录

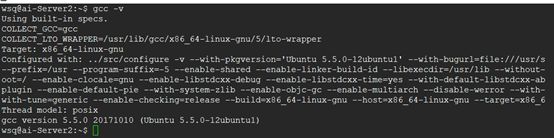
- 查看编译器版本
- 查看gcc版本

上图中的gcc软链接指向的是gcc-5,说明版本正确
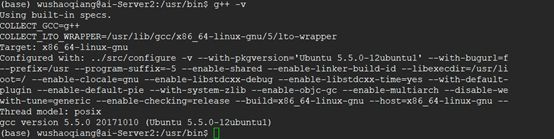
- 查看g++版本

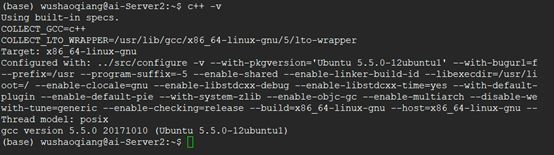
- 查看c++版本

- 查看cpp版本


- gcc安装
如果所需要的编译器版本不存在,则可以安装相应的编译器,安装方法如下:
参考文档:https://www.cnblogs.com/L-Arikes/p/3734382.html
sudo apt-get gcc-5
sudo apt-get g++-5
-
安装anaconda2
下载地址:https://www.anaconda.com/distribution/#download-section
官网安装参考地址:https://docs.anaconda.com/anaconda/install/linux/
下载成功后,在终端执行(2.7版本):
# bash Anaconda2-2.4.1-Linux-x86_64.sh
或者3.5 版本:
# bash Anaconda3-2.4.1-Linux-x86_64.sh
在安装的过程中,会问你安装路径,直接回车默认就可以了。有个地方问你是否将anaconda安装路径加入到环境变量(.bashrc)中,这个一定要输入yes
安装成功后,会有当前用户根目录下生成一个anaconda2的文件夹,里面就是安装好的内容。
输入conda list 就可以查询,你现在安装了哪些库,常用的numpy, scipy名列其中。如果你还有什么包没有安装上,可以运行
conda install *** 来进行安装,
如果某个包版本不是最新的,运行 conda update *** 就可以了
-
安装opencv和protobuf
安装OPENCV:
下载地址:https://opencv.org/releases/
安装指导:https://docs.opencv.org/3.4.6/d7/d9f/tutorial_linux_install.html
protobuf安装
下载地址:https://github.com/protocolbuffers/protobuf/releases
安装指导:https://github.com/protocolbuffers/protobuf/blob/master/src/README.md
-
编译caffe
1、下载ssh代码
cd ~/work
git clone --recursive https://github.com/mahyarnajibi/SSH.git
2、修改源码
首先在你要安装的路径下 clone :
git clone https://github.com/BVLC/caffe.git
替换 cudnn.hpp、cudnn.cpp
cd ~/work
git clone https://github.com/BVLC/caffe.git

cd ~/work/SSH/caffe-ssh
mv include/caffe/util/cudnn.hpp include/caffe/util/cudnn.hpp.bk
cp ~/work/caffe/include/caffe/util/cudnn.hpp include/caffe/util/cudnn.hpp
mv src/caffe/util/cudnn.cpp src/caffe/util/cudnn.cpp.bk
cp ~/work/caffe/src/caffe/util/cudnn.cpp src/caffe/util/cudnn.cpp

# rm -rf ~/work/caffe   #下载caffe的目的 其实就是要获取上面的两个文件,替换完成后 caffe就可以删掉了
- 修改Makefile.config
cp Makefile.config.example Makefile.config
vim Makefile.config
- 第23行
# 修改前:
# OPENCV_VERSION := 3

# 修改后:
OPENCV_VERSION := 3
第38行
# 修改前:
CUDA_ARCH := -gencode arch=compute_20,code=sm_20 \
        -gencode arch=compute_20,code=sm_21 \
        -gencode arch=compute_30,code=sm_30 \

# 修改后:
CUDA_ARCH := -gencode arch=compute_30,code=sm_30 \
第52行
# 修改前:
BLAS := atlas

# 修改后:
BLAS := open

# 注:ATLAS、MKL、OpenBlas 都是矩阵运算库(对矩阵运算过程进行了优化)
# BLAS choice:
# atlas for ATLAS (default)
# mkl for MKL
# open for OpenBlas
第68行:请根据具体环境修改# 修改前: # NOTE: this is required only if you will compile the python interface. # We need to be able to find Python.h and numpy/arrayobject.h. PYTHON_INCLUDE := /usr/include/python2.7 \ /usr/lib/python2.7/dist-packages/numpy/core/include # Anaconda Python distribution is quite popular. Include path: # Verify anaconda location, sometimes it's in root. # ANACONDA_HOME := $(HOME)/anaconda # PYTHON_INCLUDE := $(ANACONDA_HOME)/include \ # $(ANACONDA_HOME)/include/python2.7 \ # $(ANACONDA_HOME)/lib/python2.7/site-packages/numpy/core/include # Uncomment to use Python 3 (default is Python 2) # PYTHON_LIBRARIES := boost_python3 python3.5m # PYTHON_INCLUDE := /usr/include/python3.5m \ # /usr/lib/python3.5/dist-packages/numpy/core/include # We need to be able to find libpythonX.X.so or .dylib. PYTHON_LIB := /usr/lib # PYTHON_LIB := $(ANACONDA_HOME)/lib # 修改后: # NOTE: this is required only if you will compile the python interface. # We need to be able to find Python.h and numpy/arrayobject.h. # PYTHON_INCLUDE := /usr/include/python2.7 \ # /usr/lib/python2.7/dist-packages/numpy/core/include # Anaconda Python distribution is quite popular. Include path: # Verify anaconda location, sometimes it's in root. ANACONDA_HOME := $(HOME)/anaconda3/envs/caffe_python-2-7/ PYTHON_INCLUDE := $(ANACONDA_HOME)/include \ $(ANACONDA_HOME)/include/python2.7 \ $(ANACONDA_HOME)/lib/python2.7/site-packages/numpy/core/include # Uncomment to use Python 3 (default is Python 2) # PYTHON_LIBRARIES := boost_python3 python3.5m # PYTHON_INCLUDE := /usr/include/python3.5m \ # /usr/lib/python3.5/dist-packages/numpy/core/include # We need to be able to find libpythonX.X.so or .dylib. # PYTHON_LIB := /usr/lib PYTHON_LIB := $(ANACONDA_HOME)/lib- 第96行
4、修改Makefile# 修改前: INCLUDE_DIRS := $(PYTHON_INCLUDE) /usr/local/include LIBRARY_DIRS := $(PYTHON_LIB) /usr/local/lib /usr/lib # 修改后: INCLUDE_DIRS := $(PYTHON_INCLUDE) /usr/local/include /usr/include/hdf5/serial/ LIBRARY_DIRS := $(PYTHON_LIB) /usr/local/lib /usr/lib /usr/lib/x86_64-linux-gnu /usr/lib/x86_64-linux-gnu/hdf5/serial
cp Makefile Makefile.bk
vim Makefile
第180行
#修改前:
LIBRARIES += glog gflags protobuf boost_system boost_filesystem m hdf5_hl hdf5
#修改后:
LIBRARIES += glog gflags protobuf boost_system boost_filesystem m hdf5_serial_hl hdf5_serial
第417行
# 修改前:
NVCCFLAGS += -ccbin=$(CXX) -Xcompiler -fPIC $(COMMON_FLAGS)

# 修改后:
NVCCFLAGS += -D_FORCE_INLINES -ccbin=$(CXX) -Xcompiler -fPIC $(COMMON_FLAGS)
OK ,可以开始编译了,在 caffe 目录下执行 :
cd ~/work/SSH/caffe-ssh
make clean
make -j8
make runtest -j8
make pycaffe -j8