android stdudio OpenCV NDK 开发环境搭建 之找查条形码
开发环境
Android Studio 3.6
SDK 28
NDK:android-ndk-r17b
JAVA JDK 1.8
1,opencv sdk 下载
我这里下载的是 3.4.8
OpenCV-3.4.8-android-sdk
下载地址
或者:https://github.com/opencv/opencv
第二步:解压 810M


java中存放的是我们接下来使用的Android SDK
native中存放基于c/c++编译好的本地库文件,JNI层开发需要的头文件和CMake文件
第三步:导入SDK
第三步:导入SDK
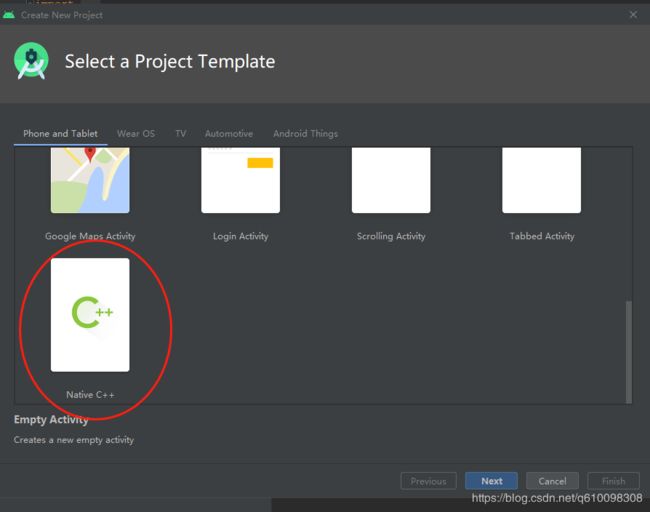
(1)创建一个新的工程,选择 ndk
然后选择 “File”-->"New"-->"Import Module",然后选择OpenCV-3.4.8-android-sdk 中的java文件夹点击OK“”即可;待工程构建完成之后,项目结构如下图

把native文件夹中libs目录下面的所以文件copy到我们 app 项目的src/main/jniLibs目录下
添加项目依赖,app 依赖 openCVLibrary348;
build.gradle
apply plugin: 'com.android.application'

android {
    compileSdkVersion 28
    buildToolsVersion "29.0.2"

    defaultConfig {
        applicationId "com.iai.myapplication"
        minSdkVersion 22
        targetSdkVersion 26
        versionCode 1
        versionName "1.0"

        testInstrumentationRunner "androidx.test.runner.AndroidJUnitRunner"

        externalNativeBuild {
            cmake {
                cppFlags "-std=c++11"
            }
        }
        ndk {
            // 设置支持的 SO 库构架
            abiFilters 'armeabi-v7a' , 'arm64-v8a'//, 'x86', 'x86_64'
            ldLibs "log"
        }
    }

    buildTypes {
        release {
            minifyEnabled false
            proguardFiles getDefaultProguardFile('proguard-android-optimize.txt'), 'proguard-rules.pro'
        }
    }

    externalNativeBuild {
        cmake {
            path "src/main/cpp/CMakeLists.txt"
            version "3.10.2"
        }
    }
}

dependencies {
    implementation fileTree(dir: 'libs', include: ['*.jar'])

    implementation 'androidx.appcompat:appcompat:1.1.0'
    implementation 'androidx.constraintlayout:constraintlayout:1.1.3'
    testImplementation 'junit:junit:4.12'
    androidTestImplementation 'androidx.test.ext:junit:1.1.1'
    androidTestImplementation 'androidx.test.espresso:espresso-core:3.2.0'
    implementation project(path: ':openCVLibrary348')

}
修改 CMakeList.txt
jnigraphics 这个是Bitmap 需要的;
# For more information about using CMake with Android Studio, read the
# documentation: https://d.android.com/studio/projects/add-native-code.html

# Sets the minimum version of CMake required to build the native library.

cmake_minimum_required(VERSION 3.4.1)
set(MY_ROOT ${CMAKE_CURRENT_LIST_DIR})
# Creates and names a library, sets it as either STATIC
# or SHARED, and provides the relative paths to its source code.
# You can define multiple libraries, and CMake builds them for you.
# Gradle automatically packages shared libraries with your APK.
set(OpenCV_DIR "D:/SVN/facesdk/OpenCV-3.4.8-android-sdk/sdk/native/jni")
set(Lib_DIR ${PROJECT_SOURCE_DIR}/../bin)

macro(ADD_ALG_LIBS1)
    foreach(one ${ARGN})
        message(STATUS "Add ${one}")
        add_library(${one}  SHARED IMPORTED)
        set_target_properties(${one} PROPERTIES IMPORTED_LOCATION  ${MY_ROOT}/../jniLibs/${ANDROID_ABI}/lib${one}.so )
        #
        #message(STATUS ""
        list(APPEND ALG_DEP ${one})
    endforeach(one)
endmacro()

ADD_ALG_LIBS1(opencv_java3)

add_library( # Sets the name of the library.
             native-lib

             # Sets the library as a shared library.
             SHARED

             # Provides a relative path to your source file(s).
             native-lib.cpp )

# Searches for a specified prebuilt library and stores the path as a
# variable. Because CMake includes system libraries in the search path by
# default, you only need to specify the name of the public NDK library
# you want to add. CMake verifies that the library exists before
# completing its build.

find_library( # Sets the name of the path variable.
              log-lib

              # Specifies the name of the NDK library that
              # you want CMake to locate.
              log )

# Specifies libraries CMake should link to your target library. You
# can link multiple libraries, such as libraries you define in this
# build script, prebuilt third-party libraries, or system libraries.

target_link_libraries( # Specifies the target library.
                       native-lib
                       opencv_java3
                       jnigraphics
                       # Links the target library to the log library
                       # included in the NDK.
                       ${log-lib} )
NDK 代码
extern "C" JNIEXPORT jobject JNICALL
Java_com_iai_myapplication_MainActivity_getRectSmallImage(
        JNIEnv *env,
        jobject /* this */object, jstring path) {

    string filepath = jstring2str(env,path);
    Mat image, imageGray, imageGuussian;
    Mat imageSobelX, imageSobelY, imageSobelOut;
   // bmp2mat(env, bitmap,  image, false);
    image = imread(filepath);
    //1. 原图像大小调整,提高运算效率
    //resize(image, image, Size(500, 300));

//    // 锐化
//	Mat sblur,usm;
//	GaussianBlur(image, sblur, Size(0, 0), 25);
//	addWeighted(image, 1.5, sblur, -0.5, 0, usm);

    //2. 转化为灰度图
    cvtColor(image, imageGray, CV_RGB2GRAY);

    //3. 高斯平滑滤波
    GaussianBlur(imageGray, imageGuussian, Size(3, 3), 0);


    //4.求得水平和垂直方向灰度图像的梯度差,使用Sobel算子
    Mat imageX16S, imageY16S;
    Sobel(imageGuussian, imageX16S, CV_16S, 1, 0, 3, 1, 0, 4);
    Sobel(imageGuussian, imageY16S, CV_16S, 0, 1, 3, 1, 0, 4);
    convertScaleAbs(imageX16S, imageSobelX, 1, 0);
    convertScaleAbs(imageY16S, imageSobelY, 1, 0);
    imageSobelOut = imageSobelX - imageSobelY;


    //5.均值滤波,消除高频噪声
    blur(imageSobelOut, imageSobelOut, Size(3, 3));


    //6.二值化
    Mat imageSobleOutThreshold;
    threshold(imageSobelOut, imageSobleOutThreshold, 130, 255, CV_THRESH_BINARY);
    //Mat imageOutMat = imageSobleOutThreshold.clone();


    //7.闭运算,填充条形码间隙
    Mat  element = getStructuringElement(0, Size(7, 7));
    morphologyEx(imageSobleOutThreshold, imageSobleOutThreshold, MORPH_CLOSE, element);


    //8. 腐蚀,去除孤立的点
    erode(imageSobleOutThreshold, imageSobleOutThreshold, element);


    //9. 膨胀,填充条形码间空隙,根据核的大小,有可能需要2~3次膨胀操作
    dilate(imageSobleOutThreshold, imageSobleOutThreshold, element);
    dilate(imageSobleOutThreshold, imageSobleOutThreshold, element);
    dilate(imageSobleOutThreshold, imageSobleOutThreshold, element);

    vector> contours;
    vector hiera;

    //10.通过findContours找到条形码区域的矩形边界
    findContours(imageSobleOutThreshold, contours, hiera, CV_RETR_EXTERNAL, CV_CHAIN_APPROX_NONE);

    Rect bigRect = Rect() ;
    bigRect.width=0;

    for (int i = 0; ibigRect.width )
        {
            bigRect = rect ;

        }
        if(rect.width>100)
        {

            Rect rectScale = rect +  Point(-rect.width/8,  -rect.height/8) +
                             Size(rect.width/4, rect.height/4);  //move  //scale;
            Mat myoutMat   = image(rect);     //crop

            std::vector compression_params;
            compression_params.push_back(CV_IMWRITE_PNG_COMPRESSION);
            compression_params.push_back(0);    // 无压缩png.
            compression_params.push_back(cv::IMWRITE_PNG_STRATEGY);
            compression_params.push_back(cv::IMWRITE_PNG_STRATEGY_DEFAULT);

            char tmp[128]={0};

            string ddstr = tmp;
            string filename = "/sdcard/small/"+ddstr +"_.png";
            // Mat dst;
            // resize(myoutMat, dst, Size(),1.5,1.5);//scale 1.5
            jobject sbitmap = createBitmap(env, myoutMat);
            mat2bmp(env, myoutMat, sbitmap, false);


            //imwrite(filename,myoutMat,compression_params);
            LOGE("============getRectSmallImage %s\n",filename.c_str()  );

            return sbitmap;
        }

    }

    jobject sbitmap = createBitmap(env, imageSobelOut);
    mat2bmp(env, imageSobelOut, sbitmap, false);

    return sbitmap;
}
这个主要是查找条形码,并返回 条形码的小区域图片;
原图: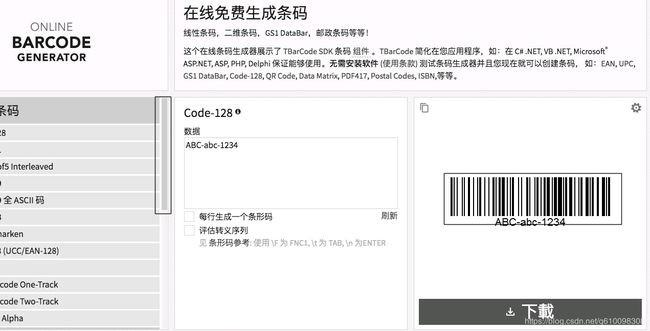
裁后的图片:

还是比较精确的;
注: 读图片记得请求权限;另外 sdk 版本需要都写 23以上才可以;
demo 下载
参考:
https://blog.csdn.net/hfut_why/article/details/84594168
https://blog.csdn.net/qq_15602525/article/details/78533517