如何使用hexo和github搭建个人博客
目录
- 1. 在gihub上创建个人首页
- 2. 使用hexo
- 2.1 安装
- 2.2 初始化
- 2.3 启动
- 2.4 部署
- 2.5 常用hexo命令
- 2.6 _config.yml文件
- 2.7 修改主题
1. 在gihub上创建个人首页
GitHub地址:www.github.com
登录GitHub,如果没有的话需要注册一个账号。
登录之后,点击Your repositories,进入仓库:

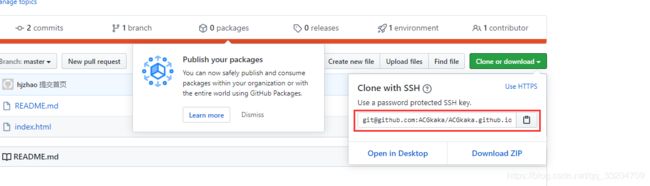
点击new创建一个名称为用户名.github.io的仓库:

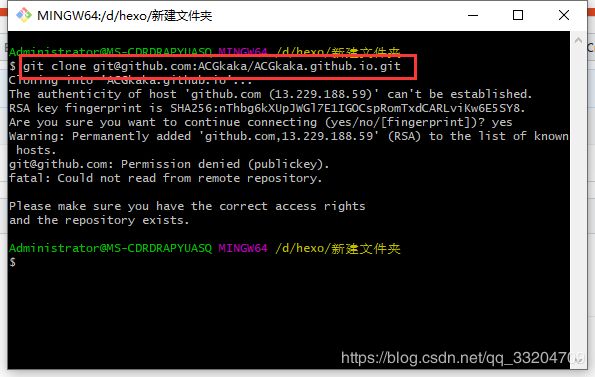
创建完之后,将仓库克隆到到本地:

然后提交一个index.html文件:
index.html
<html>
<head>
    <title>Welcome to ACGkakatitle>
head>
<body>
    <center><h1>Have a nice day.h1>center>
body>
html>
提交完之后访问用户名.github.io,就可以看到你的主页了:

2. 使用hexo
官网地址:http://hexo.io
2.1 安装
下载nodeJs之后,输入官网上的命令,进行安装:
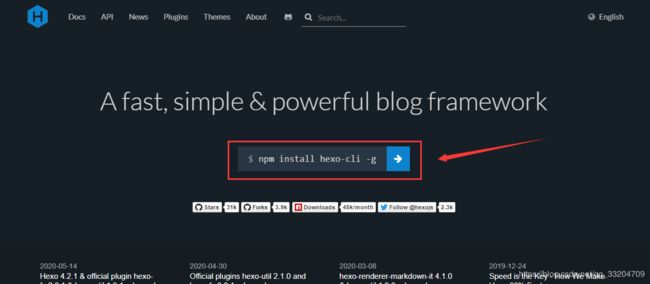
$ npm install hexo-cli -g
2.2 初始化
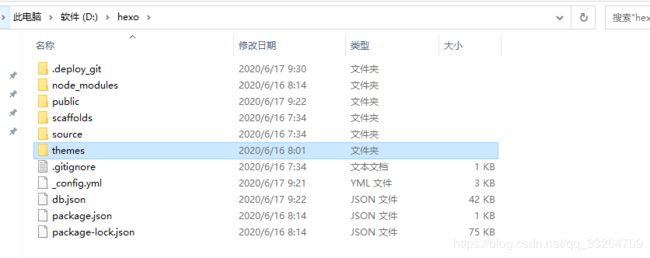
新建hexo文件夹,比如我的是D:\hexo,这个文件夹就是你存放hexo代码的地方,最好不要随便放。
输入命令:
$ cd D:\hexo
$ hexo init
hexo就会自动下载一些文件到这个目录
2.3 启动
输入命令:
$ hexo g # 生成页面
$ hexo s # 启动服务
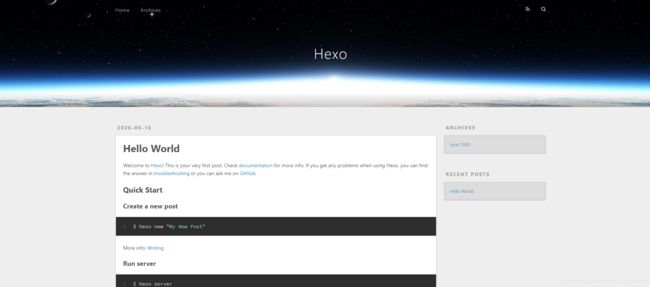
hexo s 是开启本地预览服务,打开浏览器访问 http://localhost:4000 就可以看到页面了:
2.4 部署
修改 _config.yml 配置文件中的地址为git上的地址:
deploy:
  type: git
  repository: [email protected]:ACGkaka/ACGkaka.github.io.git
  branch: master
在hexo目录使用 git bash 打开当前目录:
$ hexo d

如果出现如下错误提示:
Deployer not found: github
或者
Deployer not found: git
是因为还需要安装一个插件:
npm install hexo-deployer-git --save
hexo d执行成功之后,再访问我们github上的个人首页就可以看到效果了,部署成功。

2.5 常用hexo命令
常见命令:
$ hexo new "postName" #新建文章
$ hexo new page "pageName" #新建页面
$ hexo generate #生成静态页面至public目录
$ hexo server #开启预览访问端口(默认端口4000,'ctrl + c'关闭server)
$ hexo deploy #部署到GitHub
$ hexo help  # 查看帮助
$ hexo version  #查看Hexo的版本
缩写:
hexo n == hexo new
hexo g == hexo generate
hexo s == hexo server
hexo d == hexo deploy
组合命令:
$ hexo s -g #生成并本地预览
$ hexo d -g #生成并上传
2.6 _config.yml文件
下面是hexo根目录的配置文件(_config.yml)解释:
# Hexo Configuration
## Docs: https://hexo.io/docs/configuration.html
## Source: https://github.com/hexojs/hexo/

# Site
title: Hexo #网站标题
subtitle:   #网站副标题
description:  #网站描述
author: John Doe  #作者
language:    #语言
timezone:    #网站时区。Hexo 默认使用您电脑的时区。时区列表。比如说:America/New_York, Japan, 和 UTC 。

# URL
## If your site is put in a subdirectory, set url as 'http://yoursite.com/child' and root as '/child/'
url: http://yoursite.com   #你的站点Url
root: /                       #站点的根目录
permalink: :year/:month/:day/:title/   #文章的 永久链接 格式
permalink_defaults:    #永久链接中各部分的默认值

# Directory
source_dir: source   #资源文件夹,这个文件夹用来存放内容
public_dir: public     #公共文件夹,这个文件夹用于存放生成的站点文件。
tag_dir: tags         # 标签文件夹
archive_dir: archives    #归档文件夹
category_dir: categories      #分类文件夹
code_dir: downloads/code     #Include code 文件夹
i18n_dir: :lang                #国际化(i18n)文件夹
skip_render:                #跳过指定文件的渲染,您可使用 glob 表达式来匹配路径。

# Writing
new_post_name: :title.md # 新文章的文件名称
default_layout: post     #预设布局
titlecase: false # 把标题转换为 title case
external_link: true # 在新标签中打开链接
filename_case: 0     #把文件名称转换为 (1) 小写或 (2) 大写
render_drafts: false  #是否显示草稿
post_asset_folder: false  #是否启动 Asset 文件夹
relative_link: false      #把链接改为与根目录的相对位址
future: true                #显示未来的文章
highlight:                    #内容中代码块的设置
  enable: true
  line_number: true
  auto_detect: false
  tab_replace:

# Category & Tag
default_category: uncategorized
category_map:          #分类别名
tag_map:            #标签别名

# Date / Time format
## Hexo uses Moment.js to parse and display date
## You can customize the date format as defined in
## http://momentjs.com/docs/#/displaying/format/
date_format: YYYY-MM-DD         #日期格式
time_format: HH:mm:ss        #时间格式

# Pagination
## Set per_page to 0 to disable pagination
per_page: 10    #分页数量
pagination_dir: page

# Extensions
## Plugins: https://hexo.io/plugins/
## Themes: https://hexo.io/themes/
theme: landscape   #主题名称

# Deployment
## Docs: https://hexo.io/docs/deployment.html
#  部署部分的设置
deploy:
  type: git
  repository: [email protected]:ACGkaka/ACGkaka.github.io.git
  branch: master
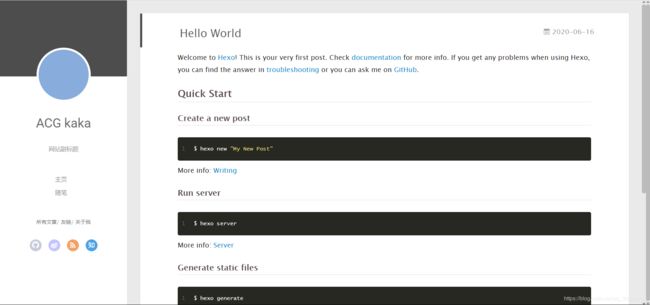
2.7 修改主题
官方主题地址:https://hexo.io/themes/
以yilia举例:
$ cd /f/Workspaces/hexo/
$ git clone https://github.com/litten/hexo-theme-yilia.git themes/yilia
效果如下:
参考地址(文章略有改动):https://www.cnblogs.com/liuxianan/p/build-blog-website-by-hexo-github.html