Android侧滑菜单——DrawerLayout详解使用
介绍
drawerLayout是Support Library包中实现了侧滑菜单效果的控件,可以说drawerLayout是因为第三方控件如MenuDrawer等的出现之后,google借鉴而出现的产物。drawerLayout分为侧边菜单和主内容区两部分,侧边菜单可以根据手势展开与隐藏(drawerLayout自身特性),主内容区的内容可以随着菜单的点击而变化(这需要使用者自己实现)。
原理
原理:添加多个功能选项布局,流行的策划,DrawerLayout:支持拖动显示或者隐藏内容的空间,v4的控件,必须依赖v7
简单使用要点
第一点
drawerLayout其实是一个布局控件,跟LinearLayout等控件是一种东西,但是drawerLayout带有滑动的功能。只要按照drawerLayout的规定布局方式写完布局,就能有侧滑的效果。
<android.support.v4.widget.DrawerLayout   抽屉式布局
    ........
    android:layout_width="match_parent"
    android:layout_height="match_parent"
    >
    <FrameLayout     主页内容
        android:id="@+id/main_fl_content"
        android:layout_width="match_parent"
        android:layout_height="match_parent"
 >
    FrameLayout>
    <FrameLayout     菜单内容
        android:layout_gravity="start"   判断哪个元素是菜单
        android:id="@+id/main_fl_menu"
        android:layout_width="200dp"
        android:layout_height="match_parent"
        android:background="#FFF000">
        <include layout="@layout/main_fl_menu_item"/>   Include 是一个引入功能的指令,会根据Layout变量加载指定的布局 ,Layout前面没有前缀
    FrameLayout>
android.support.v4.widget.DrawerLayout>
也可以
.support.v4.widget.DrawerLayout
    xmlns:android="http://schemas.android.com/apk/res/android"
    android:id="@+id/drawer_layout"
    android:layout_width="match_parent"
    android:layout_height="match_parent">

    "@+id/content_frame"
        android:layout_width="match_parent"
        android:layout_height="match_parent" />

    "@+id/left_drawer"
        android:layout_width="240dp"
        android:layout_height="match_parent"
        android:layout_gravity="start"
        android:choiceMode="singleChoice"
        android:divider="@android:color/transparent"
        android:dividerHeight="0dp"
        android:background="#111"/>
.support.v4.widget.DrawerLayout>
有两点要注意:主内容区的布局代码要放在侧滑菜单布局的前面,这可以帮助DrawerLayout判断谁是侧滑菜单,谁是主内容区;侧滑菜单的部分的布局(这里是ListView)可以设置layout_gravity属性,他表示侧滑菜单是在左边还是右边。
第二点
drawerLayout左侧菜单(或者右侧)的展开与隐藏可以被DrawerLayout.DrawerListener的实现监听到,这样你就可以在菜单展开与隐藏反生的时刻做一些希望做的事情,比如更新actionbar菜单等。如果你的activity有actionbar的话,还是建议你用ActionBarDrawerToggle来监听,ActionBarDrawerToggle实现了DrawerListener,所以他能做DrawerListener可以做的任何事情,同时他还能将drawerLayout的展开和隐藏与actionbar的app 图标关联起来,当展开与隐藏的时候图标有一定的平移效果,点击图标的时候还能展开或者隐藏菜单。
mDrawerToggle = new ActionBarDrawerToggle(
        this,
        mDrawerLayout,
        R.drawable.ic_drawer,
        R.string.drawer_open,
        R.string.drawer_close
        ) {
    public void onDrawerClosed(View view) {
        getActionBar().setTitle(mTitle);
        invalidateOptionsMenu(); // creates call to onPrepareOptionsMenu()
    }
    public void onDrawerOpened(View drawerView) {
        getActionBar().setTitle(mDrawerTitle);
        invalidateOptionsMenu(); // creates call to onPrepareOptionsMenu()
    }
};
mDrawerLayout.setDrawerListener(mDrawerToggle);
或者是
   /**
     * 设置箭头打开动画
     */
    private void initRotateArrowAnimation() {
        //参数1:Activity 参数2:抽屉控件  参数3,4:string
        ActionBarDrawerToggle toggle = new ActionBarDrawerToggle(this,mDrawerLayout,R.string.open,R.string.close);
        //同步状态  作用:把返回图标替换 2,把旋转特效箭头跟抽屉关联
        toggle.syncState();
        //抽屉滑动的距离换成角度,使用箭头旋转
        mDrawerLayout.addDrawerListener(toggle);
    }
第三点
何为侧边菜单。
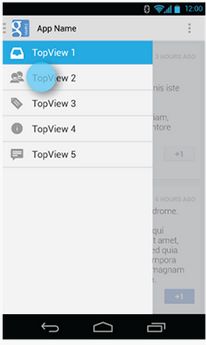
侧边菜单其实只是一个普通的View,一般里面装的是ListView,看起来就像菜单,他完全可以是一个button,textView等等。虽然称为菜单,但跟Activity的菜单形式是两码事,Activity的菜单只需要在资源文件中定义好,就能按照固定的形式显示出来。而drawerLayout的侧边菜单显示成什么样完全是取决于你自己,同样点击事件也完全由你自己去写。如下代码所示我们的侧边菜单是一个ListView显示的:
//如果布局文件是ListView的话就可以设置适配器
mDrawerList.setAdapter(new ArrayAdapter(this,R.layout.drawer_list_item, mPlanetTitles));

//设置点击事件
mDrawerList.setOnItemClickListener(new DrawerItemClickListener());

private class DrawerItemClickListener implements ListView.OnItemClickListener {
    @Override
    public void onItemClick(AdapterView parent, View view, int position, long id) {
        selectItem(position);
    }
}

private void selectItem(int position) {

    Fragment fragment = new PlanetFragment();
    Bundle args = new Bundle();
    args.putInt(PlanetFragment.ARG_PLANET_NUMBER, position);
    fragment.setArguments(args);
    FragmentManager fragmentManager = getFragmentManager();
    fragmentManager.beginTransaction().replace(R.id.content_frame, fragment).commit();

    mDrawerList.setItemChecked(position, true);
    setTitle(mPlanetTitles[position]);
    mDrawerLayout.closeDrawer(mDrawerList);
}
第四点
设置菜单返回键点击事件
 这是Activity提供处理标题元素的事件方法,返回true消费事件  关键点:android.R.id.home  是系统分配置的返回的id
public boolean onOptionsItemSelected(MenuItem item) {
        switch (item.getItemId()){
            case android.R.id.home: //这个id是固定的,系统分配的
            if(mDrawerLayout.isDrawerOpen(mMenuLayout)){
                //如果是打开状态,那么点击就关闭
                mDrawerLayout.closeDrawer(mMenuLayout);
            }else{
                //如果是关闭状态,那么点击就打开
                mDrawerLayout.openDrawer(mMenuLayout);
⑾ }
                break;
            case R.id.menu1://菜单1
                Toast.makeText(this, item.getTitle(), Toast.LENGTH_SHORT).show();
                break;

        return super.onOptionsItemSelected(item);
    }
完整代码案例

首先是我们的主布局,注意:最外层要是DrawerLayout!!!!
activity_main.xml:
.support.v4.widget.DrawerLayout xmlns:android="http://schemas.android.com/apk/res/android"
    android:id="@+id/drawer_layout"
    android:layout_width="match_parent"
    android:layout_height="match_parent">

    "@+id/ly_content"
        android:layout_width="match_parent"
        android:layout_height="match_parent" />

    "@+id/list_left_drawer"
        android:layout_width="180dp"
        android:layout_height="match_parent"
        android:layout_gravity="start"
        android:background="#080808"
        android:choiceMode="singleChoice"
        android:divider="#FFFFFF"
        android:dividerHeight="1dp" />

.support.v4.widget.DrawerLayout>
接着ListView的布局代码和domain类:Item比较简单,就不给出了,直接上中间Fragment的 布局以及代码吧!另外Adapter直接复用我们之前写的那个可复用的MyAdapter!
fg_content.xml:
<RelativeLayout xmlns:android="http://schemas.android.com/apk/res/android"
    android:layout_width="match_parent"
    android:layout_height="match_parent"
    android:orientation="vertical">

    <TextView
        android:id="@+id/tv_content"
        android:layout_width="wrap_content"
        android:layout_height="wrap_content"
        android:layout_centerInParent="true"
        android:textSize="25sp" />

RelativeLayout>
ContentFragment.java:
public class ContentFragment extends Fragment {

    private TextView tv_content;

    @Override
    public View onCreateView(LayoutInflater inflater, ViewGroup container, Bundle savedInstanceState) {
        View view = inflater.inflate(R.layout.fg_content, container, false);
        tv_content = (TextView) view.findViewById(R.id.tv_content);
        String text = getArguments().getString("text");
        tv_content.setText(text);
        return view;
    }
}
最后是我们的Activity类
MainActivity.java:
public class MainActivity extends AppCompatActivity implements AdapterView.OnItemClickListener{
private DrawerLayout drawer_layout;
private ListView list_left_drawer;
private ArrayList- menuLists;
private MyAdapter
- myAdapter = null;
@Override
protected void onCreate(Bundle savedInstanceState) {
super.onCreate(savedInstanceState);
setContentView(R.layout.activity_main);
drawer_layout = (DrawerLayout) findViewById(R.id.drawer_layout);
list_left_drawer = (ListView) findViewById(R.id.list_left_drawer);
menuLists = new ArrayList
- ();
menuLists.add(new Item(R.mipmap.iv_menu_realtime,"实时信息"));
menuLists.add(new Item(R.mipmap.iv_menu_alert,"提醒通知"));
menuLists.add(new Item(R.mipmap.iv_menu_trace,"活动路线"));
menuLists.add(new Item(R.mipmap.iv_menu_settings,"相关设置"));
myAdapter = new MyAdapter
- (menuLists,R.layout.item_list) {
@Override
public void bindView(ViewHolder holder, Item obj) {
holder.setImageResource(R.id.img_icon,obj.getIconId());
holder.setText(R.id.txt_content, obj.getIconName());
}
};
list_left_drawer.setAdapter(myAdapter);
list_left_drawer.setOnItemClickListener(this);
}
@Override
public void onItemClick(AdapterView parent, View view, int position, long id) {
ContentFragment contentFragment = new ContentFragment();
Bundle args = new Bundle();
args.putString("text", menuLists.get(position).getIconName());
contentFragment.setArguments(args);
FragmentManager fm = getSupportFragmentManager();
fm.beginTransaction().replace(R.id.ly_content,contentFragment).commit();
drawer_layout.closeDrawer(list_left_drawer);
}
}
示例2.左右两个侧滑菜单的实现
嗯,不知道你有没有发现,从上面的DrawerLayout的布局,我们大概可以猜到,DrawerLayout 最多由三个部分组成,中间的内容部分,左边的侧滑菜单部分,右边的侧滑菜单部分组成! 下面我们来写一个带有两个侧滑菜单的示例!

首先我们创建两个Fragment以及对应的布局,他们分别是左右侧滑菜单!
左边Fragment:
布局:fg_left.xml,这里就用了一个图片而以,点击后弹出一个新的Activity; 当然你可以根据自己的需求进行扩展!
<LinearLayout xmlns:android="http://schemas.android.com/apk/res/android"
    android:orientation="vertical" android:layout_width="match_parent"
    android:layout_height="match_parent">

    <ImageView
        android:id="@+id/img_bg"
        android:layout_width="match_parent"
        android:layout_height="match_parent"
        android:background="@mipmap/bg_menu_left"/>

LinearLayout>
对应的LeftFragment.java:
public class LeftFragment extends Fragment{

    private DrawerLayout drawer_layout;

    @Override
    public View onCreateView(LayoutInflater inflater, ViewGroup container, Bundle savedInstanceState) {
        View view = inflater.inflate(R.layout.fg_left, container, false);
        ImageView img_bg = (ImageView) view.findViewById(R.id.img_bg);
        img_bg.setOnClickListener(new View.OnClickListener() {
            @Override
            public void onClick(View v) {
                getActivity().startActivity(new Intent(getActivity(),OtherActivity.class));
                drawer_layout.closeDrawer(Gravity.START);
            }
        });
        return view;
    }

    //暴露给Activity,用于传入DrawerLayout,因为点击后想关掉DrawerLayout
    public void setDrawerLayout(DrawerLayout drawer_layout){
        this.drawer_layout = drawer_layout;
    }
}
右面的Fragment:
布局就三个按钮,点击后替换中间部分的Fragment,布局fg_right.xml代码如下:
<RelativeLayout xmlns:android="http://schemas.android.com/apk/res/android"
    android:layout_width="match_parent"
    android:layout_height="match_parent"
    android:orientation="vertical">

    <TextView
        android:id="@+id/tv_content"
        android:layout_width="wrap_content"
        android:layout_height="wrap_content"
        android:layout_centerInParent="true"
        android:textSize="25sp" />

RelativeLayout>
ContentFragment.java:
public class ContentFragment extends Fragment {

    private TextView tv_content;
    private String strContent;
    private int bgColor;

    public ContentFragment(String strContent,int bgColor) {
        this.strContent = strContent;
        this.bgColor = bgColor;
    }

    @Override
    public View onCreateView(LayoutInflater inflater, ViewGroup container, Bundle savedInstanceState) {
        View view = inflater.inflate(R.layout.fg_content, container, false);
        view.setBackgroundColor(getResources().getColor(bgColor));
        tv_content = (TextView) view.findViewById(R.id.tv_content);
        tv_content.setText(strContent);
        return view;
    }
}
编写好以后,就到我们的Activity的布局了以及Activity的代码了: 在此之前我们还需要些一个顶部条形栏的布局:
view_topbar.xml:
<RelativeLayout xmlns:android="http://schemas.android.com/apk/res/android"
    android:layout_width="match_parent"
    android:layout_height="wrap_content"
    android:background="#DCDEDB">

    <Button
        android:id="@+id/btn_right"
        android:layout_width="40dp"
        android:layout_height="40dp"
        android:layout_centerVertical="true"
        android:layout_alignParentRight="true"
        android:background="@drawable/btn_selctor"/>

RelativeLayout>
然后是activity_main.xml:
<android.support.v4.widget.DrawerLayout xmlns:android="http://schemas.android.com/apk/res/android"
    xmlns:tools="http://schemas.android.com/tools"
    android:id="@+id/drawer_layout"
    android:layout_width="match_parent"
    android:layout_height="match_parent">

    <LinearLayout
        android:layout_width="match_parent"
        android:layout_height="match_parent"
        android:orientation="vertical">

        <include
            android:id="@+id/topbar"
            layout="@layout/view_topbar"
            android:layout_width="wrap_content"
            android:layout_height="48dp" />

        <FrameLayout
            android:id="@+id/fly_content"
            android:layout_width="match_parent"
            android:layout_height="match_parent" />

    LinearLayout>

    <fragment
        android:id="@+id/fg_left_menu"
        android:name="jay.com.drawerlayoutdemo2.LeftFragment"
        android:layout_width="300dp"
        android:layout_height="match_parent"
        android:layout_gravity="start"
        android:tag="LEFT"
        tools:layout="@layout/fg_left" />

    <fragment
        android:id="@+id/fg_right_menu"
        android:name="jay.com.drawerlayoutdemo2.RightFragment"
        android:layout_width="100dp"
        android:layout_height="match_parent"
        android:layout_gravity="end"
        android:tag="RIGHT"
        tools:layout="@layout/fg_right" />

android.support.v4.widget.DrawerLayout>
最后是MainActivity.java:
public class MainActivity extends AppCompatActivity implements View.OnClickListener {

    private DrawerLayout drawer_layout;
    private FrameLayout fly_content;
    private View topbar;
    private Button btn_right;
    private RightFragment fg_right_menu;
    private LeftFragment fg_left_menu;
    private FragmentManager fManager;

    @Override
    protected void onCreate(Bundle savedInstanceState) {
        super.onCreate(savedInstanceState);
        setContentView(R.layout.activity_main);
        fManager = getSupportFragmentManager();
        fg_right_menu = (RightFragment) fManager.findFragmentById(R.id.fg_right_menu);
        fg_left_menu = (LeftFragment) fManager.findFragmentById(R.id.fg_left_menu);
        initViews();
    }

    private void initViews() {
        drawer_layout = (DrawerLayout) findViewById(R.id.drawer_layout);
        fly_content = (FrameLayout) findViewById(R.id.fly_content);
        topbar = findViewById(R.id.topbar);
        btn_right = (Button) topbar.findViewById(R.id.btn_right);
        btn_right.setOnClickListener(this);

        //设置右面的侧滑菜单只能通过编程来打开
        drawer_layout.setDrawerLockMode(DrawerLayout.LOCK_MODE_LOCKED_CLOSED,
                Gravity.END);

        drawer_layout.setDrawerListener(new DrawerLayout.DrawerListener() {
            @Override
            public void onDrawerSlide(View view, float v) {

            }

            @Override
            public void onDrawerOpened(View view) {

            }

            @Override
            public void onDrawerClosed(View view) {
                drawer_layout.setDrawerLockMode(
                        DrawerLayout.LOCK_MODE_LOCKED_CLOSED, Gravity.END);
            }

            @Override
            public void onDrawerStateChanged(int i) {

            }
        });

        fg_right_menu.setDrawerLayout(drawer_layout);
        fg_left_menu.setDrawerLayout(drawer_layout);
    }

    @Override
    public void onClick(View v) {
        drawer_layout.openDrawer(Gravity.RIGHT);
        drawer_layout.setDrawerLockMode(DrawerLayout.LOCK_MODE_UNLOCKED,
                Gravity.END);    //解除锁定
    }
}
1. drawer_layout.openDrawer(Gravity.END);
这句是设置打开的哪个菜单START代表左边,END代表右边
2. drawer_layout.setDrawerLockMode(DrawerLayout.LOCK_MODE_LOCKED_CLOSED,Gravity.END); 锁定右面的侧滑菜单,不能通过手势关闭或者打开,只能通过代码打开!即调用openDrawer方法! 接着
drawer_layout.setDrawerLockMode(DrawerLayout.LOCK_MODE_UNLOCKED,Gravity.END); 解除锁定状态,即可以通过手势关闭侧滑菜单 最后在drawer关闭的时候调用:
drawer_layout.setDrawerLockMode(DrawerLayout.LOCK_MODE_LOCKED_CLOSED, Gravity.END); 再次锁定右边的侧滑菜单!
3. 布局代码中的Tag属性的作用? 答:这里没用到,在重写DrawerListener的onDrawerSlide方法时,我们可以通过他的第一个 参数drawerView,调用drawerView.getTag().equals("START")判断触发菜单事件的是哪个 菜单!然后可以进行对应的操作!