ELK (ElasticSearch+Logstash+kibana) Linux(centos7) 安装 使用教程(一) ElasticSearch的安装
ELK介绍:
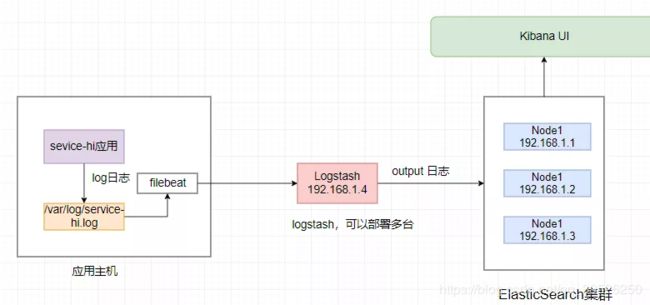
在分布式系统中,应用数量众多,应用调用链复杂,常常使用ELK作为日志收集、分析和展示的组件。本篇文章将讲讲解如何部署ELK,然后讲解如何 使用Filebeat采集Spring Boot的日志输出到Logstash上,logstash再将日志输出到Elasticsearch上,最后展示到kibana上面。整个日志采集流程如下图:
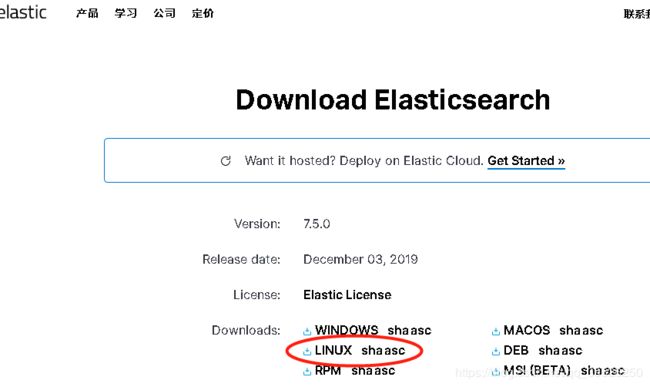
1.下载安装包
https://www.elastic.co/cn/downloads/elasticsearch
https://www.elastic.co/cn/downloads/past-releases
cd /home/niuhao/elasticsearch
#也可在线下载
wget https://artifacts.elastic.co/downloads/elasticsearch/elasticsearch-6.2.4.tar.gz
#执行解压命令:
tar -zxvf elasticsearch-6.7.1.tar.gz
1.1修改
cd /home/niuhao/elasticsearch/elasticsearch-6.7.1
vi config/jvm.options

#-Xms2g

#-Xmx2g

-Xms512m

-Xmx512m
:wq!
1.2修改elasticsearch.yml
vi /home/niuhao/elasticsearch/elasticsearch-6.7.1/config/elasticsearch.yml
# ---------------------------------- Cluster -------------------------------------
#cluster.name: itstar-master
# ------------------------------------ Node --------------------------------------(三个不能一样)
#node.name: node-1
#这种组合表示这个节点即有成为主节点的资格,又存储数据
#node.master: true
# 这个属性表示节点是否存储数据
#node.data: true
# ----------------------------------- Paths ---------------------------------------
path.data: /home/niuhao/elasticsearch/elasticsearch-6.7.1/elasticsearch-logs/data
path.logs: /home/niuhao/elasticsearch/elasticsearch-6.7.1/elasticsearch-logs/logs
# ----------------------------------- Memory -----------------------------------
#bootstrap.memory_lock: false
#bootstrap.system_call_filter: false
# ---------------------------------- Network ------------------------------------
network.host: 0.0.0.0
# --------------------------------- Discovery ------------------------------------
#discovery.zen.ping.unicast.hosts: ["bigdata11"]
#跨域访问的问题
http.cors.enabled: true
http.cors.allow-origin: "*"
:wq!
2.创建新用户
第一步:liunx创建新用户:"adduser niuhao",然后给创建的用户加密码:"passwd niuhao",输入两次密码。
第二步:切换刚才创建的用户:"su niuhao",然后启动elasticsearch。如果显示Permission denied权限不足,则继续进行第三步。
第三步:给新用户赋权限,因为这个用户本身就没有权限,肯定自己不能给自己付权限。所以要用root用户登录并赋予权限,chown -R niuhao /你的elasticsearch安装目录。
通过上面三步就可以启动elasticsearch了。
3.启动
(不能用root账户,先执行3)
#在root账号下 执行

chown -R niuhao /home/niuhao/elasticsearch

#再执行启动命令:

cd /home/niuhao/elasticsearch/elasticsearch-6.7.1

./bin/elasticsearch

#后台启动添加参数 -d:

./bin/elasticsearch -d
4.验证启动是否成功
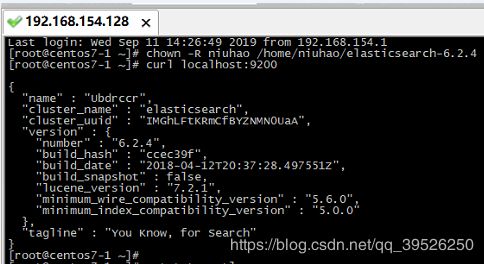
如果一切正常,Elasticsearch就会在默认的9200端口运行。这时,打开另一个命令行窗口,请求该端口:
curl localhost:9200
如果得到如下的返回,就说明启动成功了:
5.远程访问elasticsearch服务
默认情况下,Elasticsearch 只允许本机访问,如果需要远程访问,可以修改 Elasticsearch 安装目录中的config/elasticsearch.yml文件,去掉network.host的注释,将它的值改成0.0.0.0,让任何人都可以访问,然后重新启动 Elasticsearch 。
network.host: 0.0.0.0
上面代码中,"network.host:"和"0.0.0.0"中间有个空格,不能忽略,不然启动会报错。线上服务不要这样设置,要设成具体的 IP。
遇到报错5
ERROR: [3] bootstrap checks failed [1]: max file descriptors [4096] for elasticsearch process is too low, increase to at least [65536] [2]: max number of threads [3802] for user [niuhao] is too low, increase to at least [4096] [3]: max virtual memory areas vm.max_map_count [65530] is too low, increase to at least [262144] [2019-09-11T15:12:16,808][INFO ][o.e.n.Node ] [Ubdrccr] stopping ... [2019-09-11T15:12:16,939][INFO ][o.e.n.Node ] [Ubdrccr] stopped [2019-09-11T15:12:16,940][INFO ][o.e.n.Node ] [Ubdrccr] closing ... [2019-09-11T15:12:16,978][INFO ][o.e.n.Node ] [Ubdrccr] closed
解决方案:
【5.1】
#root身份
vi /etc/security/limits.conf
#文件末尾添加内容(*也是要加上去)
* soft nofile 65536
* hard nofile 131072
* soft nproc 4096
* hard nproc 4096
【5.2】
#root身份 vi /etc/sysctl.conf #让配置永久生效 #文件末尾添加内容
vm.max_map_count=655360
#并执行命令:
sysctl -p
【5.3】
Centos6不支持SecComp,而ES6默认bootstrap.system_call_filter为true
vim config/elasticsearch.yml
禁用:在elasticsearch.yml中配置bootstrap.system_call_filter为false,注意要在Memory下面: 取消bootstrap.memory_lock的注释,添加bootstrap.system_call_filter 配置
#注意在":"后面需要空格
bootstrap.memory_lock: false
bootstrap.system_call_filter: false
视图工具
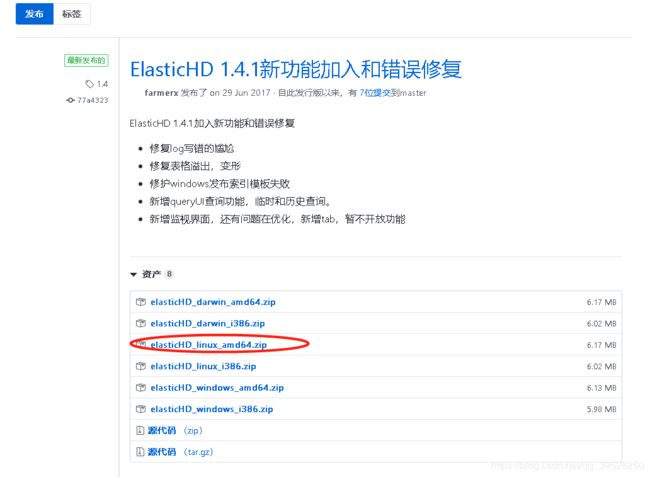
下载:https://github.com/360EntSecGroup-Skylar/ElasticHD/releases/
修改权限;
chmod -R 777 ElasticHD
运行:
./ElasticHD -p 127.0.0.1:9800
如果运行提示 exec: "xdg-open": executable file not found in $PATH 报错
因为找不到xdg-open命令,安装xdg-utils之后命令就可以使用了.
yum install xdg-utils
再次执行
./ElasticHD -p 127.0.0.1:9800
提示如下,表示已经运行成功
To view elasticHD console open http://127.0.0.1:9800 in browser
xdg-open: no method available for opening 'http://127.0.0.1:9800'
exit status 3


