微信小程序+Django—登录界面交互
最近有一个项目是做微信小程序的开发,由于也是刚刚学习了django,所以准备用django来做微信小程序的后台。
由于没有系统的学习过小程序的开发,有些坑要自己慢慢地爬,特此将自己爬过的坑记录下来。
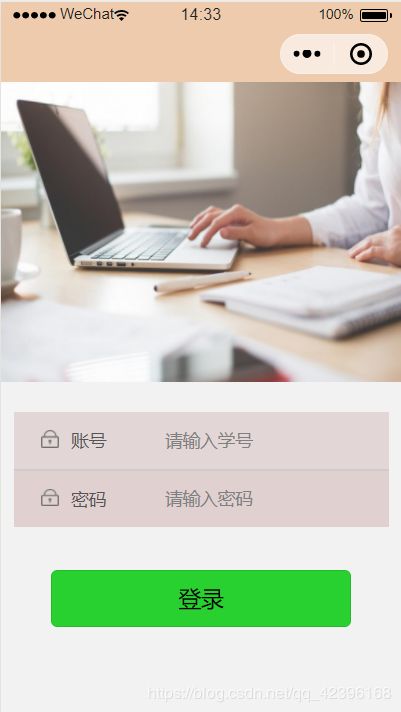
一、微信小程序页面
<view class='container'>
<view class="login-icon">
<image class='login-img' src='../../img/images/loginLog.jpg'>image>
view>
<view class='login-from'>
<view class="inputView">
<image class='namelmage' src='../../img/images/name.png'>image>
<label class='loginLab'>账号label>
<input class='inputText' bindinput='inputName' placeholder='请输入学号' name='username' type='text'/>
<view class='line'>view>
<view class="inputView">
<image class='keylmage' src='../../img/images/name.png'>image>
<label class='loginLab'>密码label>
view>
view>
<view class="login">
这里主要是注意一下账号和密码的view标签里的bindinput和登录按钮的bindap,这是绑定js函数的一个标志。
getinto.wxss
page{
  height: 100%;
}
.container{
   height: 100%;
   display:flex;
   flex-direction: column;
   padding: 0;
   box-sizing: border-box;
   background-color: #f2f2f2

}
.login-icon{
  flex: none;
}
.log-img
{
width: 750rpx;
}
.login-from{
  margin-top: 20px;
  flex:auto;
  height: 100%;
}
.inputView{
  background-color: rgba(223, 205, 205, 0.767);
  line-height: 44px;
  width: 300px;


}
.loginLab
{
  margin: 15px 15px 15px 10px;
  color: #545454;
  font-size: 14px;

}
.inputText{
   flex: block;
  float:right;
  text-align: left;
  margin-right: 22px;
  margin-top: 11px;
  color: #574545;
  font-size: 14px;
}
.namelmage,.keylmage{margin-left: 22px;
width: 14px;
height:14px;


}
.line{
  width: 100%;
  height: 1px;
  background-color: #cccccc;
  margin-top: 1px;
}
.login{
  width: 100%;
  height:auto;

  margin-top: 0px;
  margin-bottom: 0px;
  padding-bottom:0px;

}
.loginbtn{
  background-color: #28d130;
  width: 80%;
  margin-top: 35px;
}

.info{
  text-align: center;
}
getinto.js
const app = getApp()

Page({
  data:{		//此处定义本页面中的全局变量
    result: '',
    username: '',
    passwd: ''
  },
  inputName: function(e){	// 用于获取输入的账号
    this.setData({
      username: e.detail.value	//将获取到的账号赋值给username变量
    })
  },
  inputPwd: function (e) {		// 用于获取输入的密码
    this.setData({
      passwd: e.detail.value	//将获取到的账号赋值给passwd变量
    })
  },


  log: function(e){		//与服务器进行交互
    wx.request({
      url: 'http://192.168.137.1:8000/login',	//获取服务器地址,此处为本地地址
      header:{
        "content-type": "application/x-www-form-urlencoded"		//使用POST方法要带上这个header
      },
      method: "POST",
      data: {		//向服务器发送的信息
        username: this.data.username,
        passwd: this.data.passwd
      },
      success: res => {
        if (res.statusCode == 200) {
          this.setData({
            result: res.data	//服务器返回的结果
          })
        }
      }
    })
  }
})
这里有几个注意点:
1、小程序通过POST请求服务器,一般情况下记得要用header:{
“content-type”: “application/x-www-form-urlencoded” }
2、小程序使用真机调试的时候,访问localhost需要手机与电脑处在同一局域网下,并且url要用电脑的局域网ip,我的就是192.168.137.1。
二、Django
from django.db import models

# Create your models here.


class User(models.Model):
    # 用户账号、要唯一
    userAccount = models.CharField(max_length=20, unique=True)
    # 密码
    userPasswd = models.CharField(max_length=20)
    # 昵称
    userName = models.CharField(max_length=20)
    # 手机号
    userPhone = models.CharField(max_length=20)
    # 地址
    userAdderss = models.CharField(max_length=100)
    # 头像路径
    userImg = models.CharField(max_length=150)
    # 等级
    userRank = models.IntegerField()
    # touken 验证值,每次登陆后都会更新
    userToken = models.CharField(max_length=50)
    @classmethod
    def createuser(cls, account, passwd, name, phone, address, img, rank, token):
        u = cls(userAccount = account, userPasswd = passwd, userName = name, userPhone = phone, userAdderss = address,\
                userImg = img, userRank = rank, userToken = token)
        return u
构造User表,可以直接迁移到数据库中
views.py
from .models import User

from django.http import HttpResponse

def login(request):
    if request.method == "POST":
        username = request.POST.get('username')
        passwd = request.POST.get('passwd')
        try:
            user = User.objects.get(userAccount=username)
            if user.userPasswd != passwd:
                return HttpResponse("用户名或密码错误")

        except User.DoesNotExist as e:
            return HttpResponse("用户名不存在")
        # 登录成功
        print(username)
        print(passwd)
        return HttpResponse("登录成功!")
    else:
        return HttpResponse("请求错误")
此处,Django要用python manage.py runserver 0.0.0.0:8000命令来运行,小程序返回的数据可以用request.POST.get(‘username’)获取,再从数据库中获取到username的信息,信息配对成功,则登录成功。

这里主要讲了一下小程序的坑,有时间我还想写一下Django的一些学习经验。
总得来说,总算迈出了第一步,但这还只是简单的数据交互,真正的登录功能还要实现数据加密等等,路漫漫其修远兮呀!
第一次用Markdown写技术博客,还有很多功能不会,连代码高亮都没实现,希望在下次写博客之前能找到比较实用的方法吧!

