OpenCV图像处理--将图像裁剪为圆形
1,需求
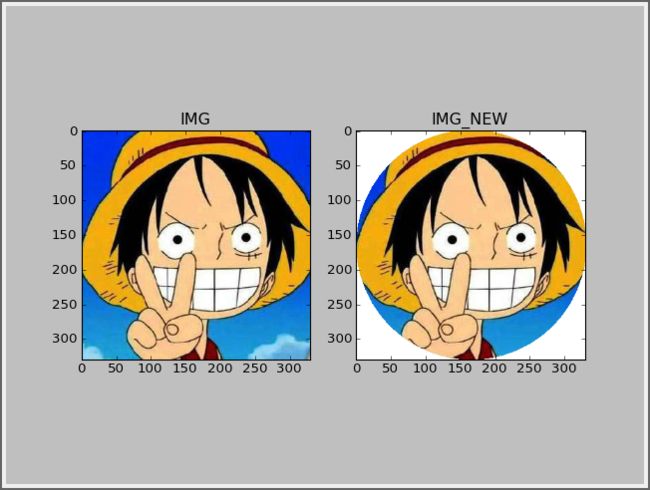
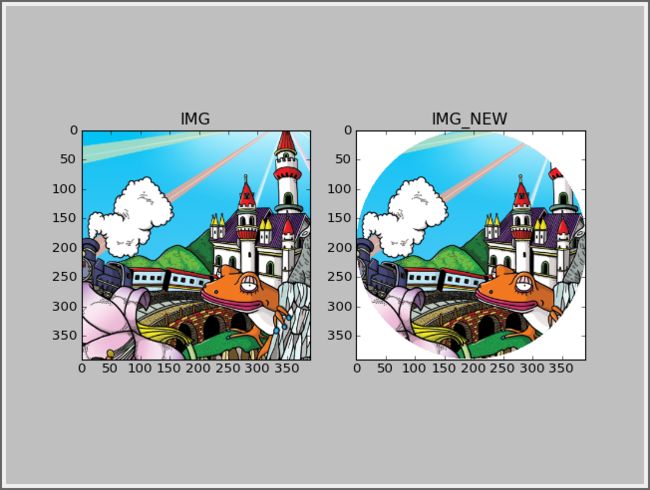
为了便于项目前端展示用户头像,需要将头像处理为圆形,非圆形区域设置为透明。其实,前端可以在显示的时候处理,但是前端采用WebGL,暂时搞不定,所以由后端进行图像的一次性加工。
于是,我们尝试用Linux工具Convert来完成,但是,百思无解,后续决定采用Python+OpenCV。
2,实现
优秀的代码不需要解释,直接看代码吧,O(∩_∩)O。
#coding:utf8

import numpy as np
import cv2
from matplotlib import pyplot as plt
import glob as gb

# 图像处理,获取图片最大内接圆,其他区域置为透明
def img_deal(input_img):
    # cv2.IMREAD_COLOR,读取BGR通道数值,即彩色通道,该参数为函数默认值
    # cv2.IMREAD_UNCHANGED,读取透明(alpha)通道数值
    # cv2.IMREAD_ANYDEPTH,读取灰色图,返回矩阵是两维的
    img = cv2.imread(input_img, cv2.IMREAD_UNCHANGED)
    rows, cols, channel = img.shape

    # 创建一张4通道的新图片,包含透明通道,初始化是透明的
    img_new = np.zeros((rows,cols,4),np.uint8)
    img_new[:,:,0:3] = img[:,:,0:3]

    # 创建一张单通道的图片,设置最大内接圆为不透明,注意圆心的坐标设置,cols是x坐标,rows是y坐标
    img_circle = np.zeros((rows,cols,1),np.uint8)
    img_circle[:,:,:] = 0  # 设置为全透明
    img_circle = cv2.circle(img_circle,(cols/2,rows/2),min(rows, cols)/2,(255),-1) # 设置最大内接圆为不透明

    # 图片融合
    img_new[:,:,3] = img_circle[:,:,0]

    # 保存图片
    cv2.imwrite(input_img+".png", img_new)
    # cv2.imencode('.jpg', img)[1].tofile('./9.jpg')  # 保存到另外的位置

    # 显示图片,调用opencv展示
    # cv2.imshow("img_new", img_new)
    # cv2.waitKey(0)
    # cv2.destroyAllWindows()

    # 显示图片,调用matplotlib.pyplot展示
    plt.subplot(121), plt.imshow(img_convert(img), cmap='gray'), plt.title('IMG')
    plt.subplot(122), plt.imshow(img_convert(img_new), cmap='gray'), plt.title('IMG_NEW')
    plt.show()

# cv2与matplotlib的图像转换,cv2是bgr格式,matplotlib是rgb格式
def img_convert(cv2_img):
    # 灰度图片直接返回
    if len(cv2_img.shape) == 2:
        return cv2_img
    # 3通道的BGR图片
    elif len(cv2_img.shape) == 3 and cv2_img.shape[2] == 3:
        b, g, r = cv2.split(cv2_img)
        return cv2.merge((r, g, b))
    # 4通道的BGR图片
    elif len(cv2_img.shape) == 3 and cv2_img.shape[2] == 4:
        b, g, r, a = cv2.split(cv2_img)
        return cv2.merge((r, g, b, a))
    # 未知图片格式
    else:
        return cv2_img

# 主函数
if __name__ == "__main__":
    img_path = gb.glob("img/*")
    for path in img_path:
        print path
        img_deal(path)
3,效果
4,参考资料
帮助文档
- OpenCV的成套资料比较少,遇到问题还需要查看帮助文档
>>> from matplotlib import pyplot
Backend TkAgg is interactive backend. Turning interactive mode on.
>>> help(pyplot.imshow)
Help on function imshow in module matplotlib.pyplot:

imshow(X, cmap=None, norm=None, aspect=None, interpolation=None, alpha=None, vmin=None, vmax=None, origin=None, extent=None, shape=None, filternorm=1, filterrad=4.0, imlim=None, resample=None, url=None, hold=None, **kwargs)
    call signature::

      imshow(X, cmap=None, norm=None, aspect=None, interpolation=None,
             alpha=None, vmin=None, vmax=None, origin=None, extent=None,
             **kwargs)

    Display the image in *X* to current axes.  *X* may be a float
    array, a uint8 array or a PIL image. If *X* is an array, *X*
    can have the following shapes:

    * MxN -- luminance (grayscale, float array only)
    * MxNx3 -- RGB (float or uint8 array)
    * MxNx4 -- RGBA (float or uint8 array)

    The value for each component of MxNx3 and MxNx4 float arrays should be
    in the range 0.0 to 1.0; MxN float arrays may be normalised.

    An :class:`matplotlib.image.AxesImage` instance is returned.
    ...
参考网页
Matplotlib调用imshow()函数绘制热图
http://blog.csdn.net/Eastmount/article/details/73392106?locationNum=5&fps=1opencv中的Circle函数
http://blog.csdn.net/yangfengman/article/details/52768862cv2.imshow官方介绍(为什么不能显示透明图片,还是不清楚)
http://docs.opencv.org/2.4/modules/highgui/doc/user_interface.html?highlight=imshow#cv2.imshowopencv不规则ROI——圆形ROI
http://www.cnblogs.com/xiangshancuizhu/archive/2011/11/16/2250931.html

