EasyX库使用入门
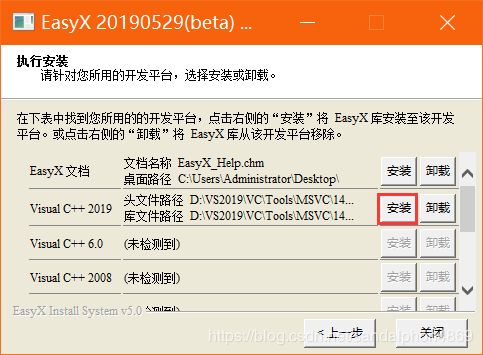
下载最新版:EasyX官网
PS :Dev C++可能检测不到,建议使用Visual Studio Community2019,
VS官网下载:https://visualstudio.microsoft.com/zh-hans/free-developer-offers/
目录
一、基础
1.绘图环境
(1)initgraph
(2)closegraph
2.颜色
(1)颜色常量
(2)setcolor
(3)setlinecolor
(4)settextcolor
(5)setbkcolor
(6)setfillcolor
3.样式
(1)setbkmode
(2)setlinestyle
4.图形
(1)circle
(2)fillcircle
(3)solidcircle
(4)line
(5)putpixel
5.刷屏
(1)BeginBatchDraw
(2)FlushBatchDraw
(3)EndBatchDraw
(4)分析FlushBatchDraw的位置
6.图像
(1)IMAGE
(2)loadimage
(3)putimage
7.清屏
(1)cleardevice
(2)clearrectangle
8.输出字符串
(1)outtextxy
二、例子
1.画十条平行直线
2.以线绘制渐变色窗口
3.用红蓝色交替画线
4.动画效果
(1)只有小球的代码:
(2)复杂绘图代码:
5.反弹的小球
6.时钟
7.雷霆战机
8.更多例子见EasyX官网
一、基础
头文件:#include
1.绘图环境
(1)initgraph
初始化绘图环境
原型:
HWND initgraph(

    int width, //绘图环境的宽度

    int height, //绘图环境的高度

    int flag = NULL

);
参数:
- flag
绘图环境的样式,默认为 NULL。值为 SHOWCONSOLE 则保留原控制台窗口.
(2)closegraph
void closegraph();
//关闭绘图环境
2.颜色
(1)颜色常量
RGB方式
setcolor(RGB(0,0,0));字母方式
setcolor(BLACK);六个十六进制
setcolor(0x000000);每两位十六进制分别对应,蓝色,绿色,红色。
Link:RGB颜色对应表,想要的颜色自己去查一下。
一些常见的颜色:
- 0x000000 黑色
- 0xFF0000 (深)蓝色
- 0xFFAAAA (浅)蓝色
- 0xFFFFFF 白色
(2)setcolor
设置前景颜色(字体颜色和线条颜色),等效于连续执行 easyx.h 中的 setlinecolor 和 settextcolor 函数。
void setcolor(COLORREF color);(3)setlinecolor
这个函数用于设置当前画线颜色。
void setlinecolor(COLORREF color);(4)settextcolor
这个函数用于设置当前文字颜色。
void settextcolor(COLORREF color);(5)setbkcolor
设置当前绘图背景色。
void setbkcolor(COLORREF color);执行 cleardevice() 或 clearcliprgn() 等清除函数时,使用该颜色清空屏幕或裁剪区。
(6)setfillcolor
void setfillcolor(COLORREF color);设置当前填充颜色。
3.样式
(1)setbkmode
设置图案填充和文字输出时的背景模式
void setbkmode(int mode);参数:mode
- OPAQUE 不透明的,背景用当前背景色填充(默认)。
- TRANSPARENT 背景是透明的。
(2)setlinestyle
设置当前画线样式。
原型1:
void setlinestyle(

    const LINESTYLE* pstyle

);
- pstyle
指向画线样式 LINESTYLE 的指针。
原型2:
void setlinestyle(

    int style,

    int thickness = 1,

    const DWORD *puserstyle = NULL,

    DWORD userstylecount = 0

);
- thickness
线的宽度,以像素为单位。
- puserstyle
用户自定义样式数组,仅当线型为 PS_USERSTYLE 时该参数有效。
数组第一个元素指定画线的长度,第二个元素指定空白的长度,第三个元素指定画线的长度,第四个元素指定空白的长度,以此类推。
- userstylecount
用户自定义样式数组的元素数量。 - 返回值:
(无)
示例:
以下局部代码设置画线样式为点划线:
setlinestyle(PS_DASHDOT);以下局部代码设置画线样式为宽度 3 像素的虚线,端点为平坦的:
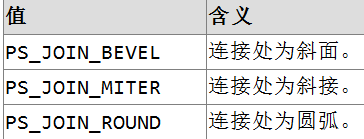
setlinestyle(PS_DASH | PS_ENDCAP_FLAT, 3);以下局部代码设置画线样式为宽度 10 像素的实线,连接处为斜面:
setlinestyle(PS_SOLID | PS_JOIN_BEVEL, 10);以下局部代码设置画线样式为自定义样式(画 5 个像素,跳过 2 个像素,画 3 个像素,跳过 1 个像素……),端点为平坦的:
DWORD a[4] = {5, 2, 3, 1};
setlinestyle(PS_USERSTYLE | PS_ENDCAP_FLAT, 1, a, 4);
4.图形
(1)circle
画一个圆,准确地说,是一个圆形边框。
void circle(

    int x, //圆的圆心 x 坐标。

    int y, //圆的圆心 y 坐标。

    int radius //圆的半径。

);
(2)fillcircle
画填充圆(有边框)。使用当前线形和当前填充样式
void fillcircle(

    int x,

    int y,

    int radius

);
(3)solidcircle
这个函数用于画填充圆(无边框)。使用当前填充样式绘制
void solidcircle(

    int x,

    int y,

    int radius

);
(4)line
这个函数用于画直线。
void line(

    int x1, //直线的起始点的 x 坐标。

    int y1, //直线的起始点的 y 坐标。

    int x2, //直线的终止点的 x 坐标。

    int y2 //直线的终止点的 y 坐标。

);
(5)putpixel
这个函数用于画点。
void putpixel(

    int x,         //点的 x 坐标。

    int y,         //点的 y 坐标。

    COLORREF color //点的颜色。

);
5.刷屏
(1)BeginBatchDraw
这个函数用于开始批量绘图。执行后,任何绘图操作都将暂时不输出到屏幕上,直到执行 FlushBatchDraw 或 EndBatchDraw 才将之前的绘图输出。
用在循环外面,如例5
void BeginBatchDraw();(2)FlushBatchDraw
这个函数用于执行未完成的绘制任务。
用在绘图中间。
void FlushBatchDraw();
(3)EndBatchDraw
这个函数用于结束批量绘制,并执行未完成的绘制任务。
void EndBatchDraw();(4)分析FlushBatchDraw的位置
如例5,函数放在两次绘图中间而不是两次绘图的最下面,因为闪烁是蓝色小球没有被绘制出来,而不是黑色小球没有绘制。所以只要保证绘制出绿色小球,而在函数最贴近上面的绘制是一定能绘制的。如果用在两次绘图的最下面,如下面,再加个Sleep函数控制速度,结果就是什么都没有。因为绿色闪几毫秒就没了。
BeginBatchDraw();

while (1)

{
    setcolor(GREEN);
    setfillcolor(BLUE);
    fillcircle(ball_x, ball_y, radius);
    Sleep(5);

    setcolor(BLACK);
    setfillcolor(BLACK);
    fillcircle(ball_x, ball_y, radius);

    FlushBatchDraw();

    ball_x += ball_vx;
    ball_y += ball_vy;


    if(ball_x <= radius || ball_x >= Width - radius)
        ball_vx = -ball_vx;
    if (ball_y <= radius || ball_y >= Height - radius)
        ball_vy = -ball_vy;
}

EndBatchDraw();
6.图像
(1)IMAGE
实现 IMAGE 对象的直接赋值
class IMAGE(int width = 0, int height = 0);公有成员:
- int getwidth();
返回 IMAGE 对象的宽度,以像素为单位。 - int getheight();
返回 IMAGE 对象的高度,以像素为单位。
示例:
以下局部代码创建 img1、img2 两个对象,之后加载图片 test.jpg 到 img1,并通过赋值操作将 img1 的内容拷贝到 img2:
IMAGE img1, img2;
loadimage(&img1, _T("test.jpg"));
img2 = img1;以下局部代码创建 img 对象,之后加载图片 test.jpg,并将图片的宽高赋值给变量 w、h:

IMAGE img;
loadimage(&img, _T("test.jpg"));
int w, h;
w = img.getwidth();
h = img.getheight();
(2)loadimage
这个函数用于从文件中读取图像。
// 从图片文件获取图像(bmp/jpg/gif/emf/wmf/ico)

void loadimage(

    IMAGE* pDstImg, // 保存图像的 IMAGE 对象指针

    LPCTSTR pImgFile, // 图片文件名

    int nWidth = 0, // 图片的拉伸宽度

    int nHeight = 0, // 图片的拉伸高度

    bool bResize = false // 是否调整 IMAGE 的大小以适应图片

);
// 从资源文件获取图像(bmp/jpg/gif/emf/wmf/ico)
void loadimage(
IMAGE* pDstImg, // 保存图像的 IMAGE 对象指针
LPCTSTR pResType, // 资源类型
LPCTSTR pResName, // 资源名称
int nWidth = 0, // 图片的拉伸宽度
int nHeight = 0, // 图片的拉伸高度
bool bResize = false // 是否调整 IMAGE 的大小以适应图片
);参数:
- pDstImg
保存图像的 IMAGE 对象指针。如果为 NULL,表示图片将读取至绘图窗口。 - pImgFile
图片文件名。支持 bmp / jpg / gif / emf / wmf / ico 类型的图片。gif 类型的图片仅加载第一帧,不支持透明。 - nWidth
图片的拉伸宽度。加载图片后,会拉伸至该宽度。如果为 0,表示使用原图的宽度。 - nHeight
图片的拉伸高度。加载图片后,会拉伸至该高度。如果为 0,表示使用原图的高度。 - bResize
是否调整 IMAGE 的大小以适应图片。 - pResType
图片资源类型。 - pResName
图片资源名称。
(3)putimage
这个函数的几个重载用于在当前设备上绘制指定图像。
// 绘制图像

void putimage(

    int dstX,              // 绘制位置的 x 坐标

    int dstY,              // 绘制位置的 y 坐标

    IMAGE *pSrcImg,        // 要绘制的 IMAGE 对象指针

    DWORD dwRop = SRCCOPY  // 三元光栅操作码(详见备注)

);
备注:
三元光栅操作码(即位操作模式),支持全部的 256 种三元光栅操作码,常用的几种如下:
注:
1. AND / OR / NOT / XOR 为布尔运算。
2. "屏幕颜色"指绘制所经过的屏幕像素点的颜色。
3. "图像颜色"是指通过 IMAGE 对象中的图像的颜色。
4. "当前填充颜色"是指通过 setfillcolor 设置的用于当前填充的颜色。
7.清屏
(1)cleardevice
这个函数用于清除屏幕内容。具体的,是用当前背景色清空屏幕,并将当前点移至 (0, 0)。
void cleardevice();(2)clearrectangle
这个函数用于清空矩形区域
void clearrectangle(

    int left, //矩形左部 x 坐标。

    int top, //矩形上部 y 坐标。

    int right, //矩形右部 x 坐标。

    int bottom //矩形下部 y 坐标。

);
8.输出字符串
(1)outtextxy
这个函数用于在指定位置输出字符串。
void outtextxy(

    int x, //字符串输出时头字母的 x 轴的坐标值

    int y, //字符串输出时头字母的 y 轴的坐标值

    LPCTSTR str

);
void outtextxy(
int x,
int y,
TCHAR c
);例子:如何使用LPCTSTR str和TCHAR c
TCHAR s[100];

_stprintf(s, _T("你的分数:%d"), kill);

outtextxy((WINDOW_WIDTH / 2 + WIDTH / 2) + 50, WINDOW_HEIGHT/2, s);
二、例子
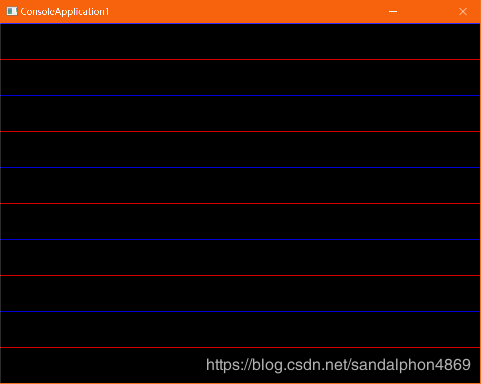
1.画十条平行直线
#include
#include

int main()
{
	// 初始化窗口
	initgraph(640, 480);
	for (int y = 0; y <= 480; y += 48)
	{
		// 画线
		line(0, y, 640, y);
	}
	// 暂停窗口,不让其退出
	getchar();
	// 关闭窗口
	closegraph();

	return 0;
}
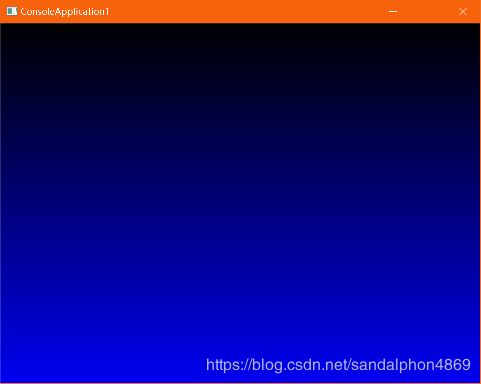
2.以线绘制渐变色窗口
#include
#include

int main()
{
	initgraph(640, 480);
	for (int y = 0; y <= 480; y++)
	{
		setcolor(RGB(0, 0, y / 2));
		line(0, y, 640, y);
	}
	getchar();
	closegraph();

	return 0;
}
3.用红蓝色交替画线
#include
#include

int main()
{
	initgraph(640, 480);
	for (int y = 0; y <= 480; y += 48)
	{
		if ((y / 48) % 2 == 1)
			setcolor(RGB(255, 0, 0));
		else
			setcolor(RGB(0, 0, 255));
		line(0, y, 640, y);
	}
	getchar();
	closegraph();

	return 0;
}
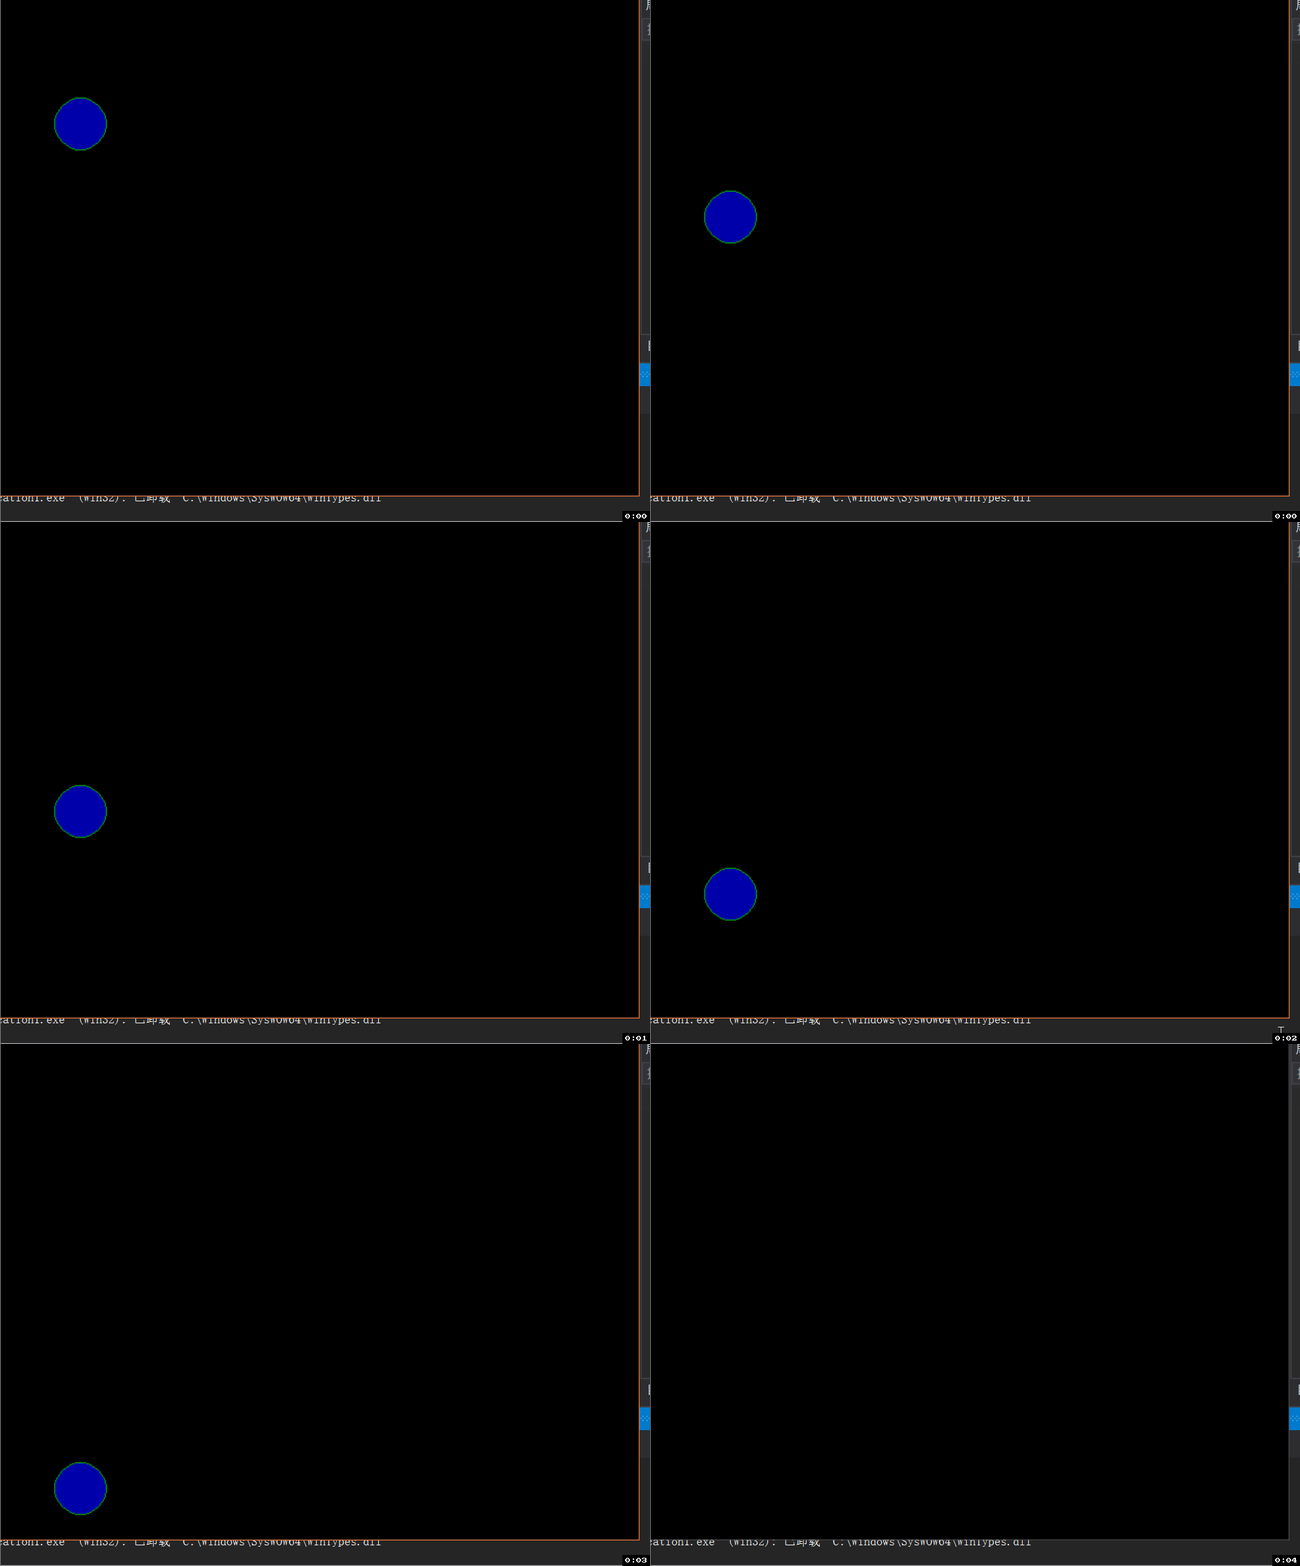
4.动画效果
(1)只有小球的代码:
#include
#include

int main()
{
	initgraph(640, 480);
	setfillcolor(BLUE);
	for (int y = 0; y <= 480; y += 10)
	{
		fillcircle(100, y, 25);
		Sleep(100);
		cleardevice();
	}
	getchar();
	closegraph();

	return 0;
}
(2)复杂绘图代码:
#include
#include

int main()
{
	initgraph(640, 480);
	for (int y = 0; y <= 480; y += 10)
	{
		setcolor(GREEN);
		setfillcolor(BLUE);
		fillcircle(100, y, 25);
		Sleep(100);
		/**
		 * 下面的意思是将绘制出来的圆在显示100毫秒后,将其用背景色覆盖掉
		 * 这样就达到了清除了操作
		 * 为什么不用cleardevice(),因为会将整个屏幕清空,而我们还想保留其他的画面呢
		 */
		setcolor(BLACK);		//不仅填充色要求是黑色,而且边框色要得改变,默认白色
		setfillcolor(BLACK);
		fillcircle(100, y, 25);
	}
	getchar();
	closegraph();

	return 0;
}
5.反弹的小球
#include
#include

#define Width 640
#define Height 480
int main()
{
	// 初始化绘图窗口
	initgraph(640, 480);

	double ball_x=100, ball_y=100;
	double ball_vx=1, ball_vy=1;
	double radius=25;


	BeginBatchDraw();
	while (1)
	{

		setcolor(GREEN);
		setfillcolor(BLUE);
		fillcircle(ball_x, ball_y, radius);
		Sleep(5);
		FlushBatchDraw();

		setcolor(BLACK);
		setfillcolor(BLACK);
		fillcircle(ball_x, ball_y, radius);

		ball_x += ball_vx;
		ball_y += ball_vy;

		if (ball_x <= radius || ball_x >= Width - radius)
			ball_vx = -ball_vx;
		if (ball_y <= radius || ball_y >= Height - radius)
			ball_vy = -ball_vy;


	}

	EndBatchDraw();
    // 另一种不让控制台退出的暂停方式
	system("pause");
	closegraph();
        return 0;
}
6.时钟
#include
#include
#include

#define Width 640
#define Height 480
#define PI 3.14159

int main()
{
	// 初始化绘图窗口
	initgraph(640, 480, SHOWCONSOLE);


	//秒针起始坐标
	int center_x = Width / 2, center_y = Height / 2;
	//秒针终点坐标
	int secondEnd_x, secondEnd_y;
	//分针终点坐标
	int minuteEnd_x, minuteEnd_y;
	//时针终点坐标
	int hourEnd_x, hourEnd_y;


	//秒针长度
	int secondLength = Width / 4;
	//分针长度
	int minuteLength = Width / 5.5;
	//时针长度
	int hourLength = Width / 7;


	//秒针对应转到角度
	float secondAngle = 0;
	//分针对应转到角度
	float minuteAngle = 0;
	//时针对应转到角度
	float hourAngle = 0;

	//定义变量存储系统时间
	SYSTEMTIME ti;
	BeginBatchDraw();

	while (1)
	{
		setfillcolor(YELLOW);
		setlinestyle(PS_DASHDOTDOT, 5);
		setlinecolor(0x555555);
		circle(center_x, center_y, secondLength + 30);
		setcolor(0xAAAAAA);
		setlinestyle(PS_DOT | PS_ENDCAP_SQUARE, 2);
		circle(center_x, center_y, secondLength + 15);
		for (int i = 0; i < 12; i++)
		{
			int x = center_x + cos(i * 30.0 / 360 * 2 * PI) * (secondLength + 15.0);
			int y = center_y - sin(i * 30.0 / 360 * 2 * PI) * (secondLength + 15.0);
			fillcircle(x , y , 5);
		}


		GetLocalTime(&ti);
		secondAngle	= (ti.wSecond / 60.0) * (2 * PI);
		minuteAngle	= (ti.wMinute / 60.0) * (2 * PI);
		hourAngle = ((ti.wHour % 12) / 12.0) * (2 * PI) + (ti.wMinute / 60.0) * (2 * PI / 12.0);

		secondEnd_x = center_x + secondLength * sin(secondAngle);
		secondEnd_y = center_y - secondLength * cos(secondAngle);

		minuteEnd_x = center_x + minuteLength * sin(minuteAngle);
		minuteEnd_y = center_y - minuteLength * cos(minuteAngle);

		hourEnd_x = center_x + hourLength * sin(hourAngle);
		hourEnd_y = center_y - hourLength * cos(hourAngle);


		//画秒针
		setlinestyle(PS_SOLID, 1);
		setcolor(WHITE);
		line(center_x, center_y, secondEnd_x, secondEnd_y);

		//画分针
		setlinestyle(PS_SOLID, 2);
		setcolor(GREEN);
		line(center_x, center_y, minuteEnd_x, minuteEnd_y);

		//画时针
		setlinestyle(PS_SOLID, 5);
		setcolor(RED);
		line(center_x, center_y, hourEnd_x, hourEnd_y);


		FlushBatchDraw();


		setlinestyle(PS_SOLID, 1);
		setcolor(BLACK);
		line(center_x, center_y, secondEnd_x, secondEnd_y);

		setlinestyle(PS_SOLID, 2);
		setcolor(BLACK);
		line(center_x, center_y, minuteEnd_x, minuteEnd_y);

		setlinestyle(PS_SOLID, 5);
		setcolor(BLACK);
		line(center_x, center_y, hourEnd_x, hourEnd_y);
	}
	EndBatchDraw();
	system("pause");
	closegraph();
	return 0;
}
7.雷霆战机
https://blog.csdn.net/sandalphon4869/article/details/80861915
8.更多例子见EasyX官网
https://www.codebus.cn/
