MTCNN配置及训练详细步骤
配置环境为win7 64位,主要完成的任务是用MTCNN完成人脸检测,即使用目标检测框将图像中的人脸框出来,配置过程如下:
1、环境配置
安装anaconda
进入官网:
https://www.anaconda.com/download/
根据python版本下载安装相应的anaconda即可
安装Microsoft Visual Studio 2013
注意此处一定要安装2013版方便后面caffe的编译,下载地址为:
https://msdn.itellyou.cn/
在编译好的VS环境下配置opencv和openblas
配置opencv参考:
https://blog.csdn.net/SherryD/article/details/51734334
配置openblas参考:
https://blog.csdn.net/yangyangyang20092010/article/details/45156881
在VS环境下编译caffe
下载caffe的windows官方编译版本:
https://github.com/happynear/caffe-windows
然后按照:
https://blog.csdn.net/xierhacker/article/details/51834563
安装即可
安装pycharm,并在anaconda的python环境中配置opencv
1、安装pycharm参考:
https://www.jianshu.com/p/042324342bf4
2、在anaconda的python环境中配置opencv
首先在官网:https://opencv.org/releases.html
下载opencv的win pack包,然后直接点exe运行即可,安装完成后,将opencv的安装路径:
E:\OpenCV2\opencv\build\python\2.7\x86下的cv2.pyd移动到anaconda的安装路径:D:\Anaconda\anaconda2\Lib\site-packages下,然后可以在cmd命令进行测试
3、以上配置好后,在pycharm中一个常见的问题就是:
ImportError: No module named google.protobuf.internal这里需要首先到:https://github.com/google/protobuf将protobuf-maste拷贝下来,然后到:https://github.com/google/protobuf/releases中下载protoc-3.5.1-win32.zip
将protoc-3.5.1-win32\bin下的protoc.exe复制到protobuf-master\src文件夹下,按照:
http://sharley.iteye.com/blog/2375044
中的方式进行安装
2、MTCNN配置
github上MTCNN有很多版本,我以从数据集准备到最终的测试的顺序来介绍
训练主要参考:https://github.com/dlunion/mtcnn
测试主要参考:https://github.com/CongWeilin/mtcnn-caffe
数据集的准备
1、将采集好数据集放到一个文件夹中,命名为samples(也可以写成别的名字,但是注意与后面的步骤中需要该文件夹数据的路径要一致)
2、对数据集进行标注,网上有很多的标注工具可以使用:
https://blog.csdn.net/chaipp0607/article/details/79036312
可以使用上面的标注工具进行标注,标注完成后会生成一个txt文档或者是xml文档之类的文档,里面包含了图像检测框的左上角点的坐标和右下角点的坐标信息。
3、根据文档中提供的信息,我们需要将检测框的左上角点的坐标和右下角点的坐标提取出来,整理成以下形式:
samples/filename.jpg xmin ymin xmax ymax
(即:数据集文件夹/图片名 检测框左上角点的x坐标 检测框左上角点的y坐标 检测框右下角点的x坐标 检测框右下角点的y坐标)
我使用的数据标注工具生成的文档如下所示:
<info>
    <src width="480" height="640" depth="3">00ff0abc4818a309b51180264b830211.jpgsrc>
    <object id="E68519DF-E8E1-4C55-9231-CB381DE1CC5A">
        <rect lefttopx="168" lefttopy="168" rightbottomx="313" rightbottomy="340">rect>
        <type>21type>
        <descriinfo>descriinfo>
        <modifydate>2018-05-08 17:04:07modifydate>
    object>
info>
所以我需要将这个文档中的检测框坐标点提取出来,并整理成如上所述的标准形式,形成一个 label.txt 文档
根据以上xml的形式,转换的脚本如下:
# -*- coding:utf-8 -*-

import os
from lxml import etree

##################### 以下部分用于读取xml文件,返回检测框左上角和右下角的坐标 ###################
def read_xml(in_path):
    tree = etree.parse(in_path)
    return tree

def find_nodes(tree, path):
    return tree.findall(path)

def get_obj(xml_path):
    tree = read_xml(xml_path)
    nodes = find_nodes(tree, "src")
    objects = []

    for node in nodes:
        pic_struct = {}
        pic_struct['width'] = str(node.get('width'))
        pic_struct['height'] = str(node.get('height'))
        pic_struct['depth'] = str(node.get('depth'))
        # objects.append(pic_struct)
    nodes = find_nodes(tree, "object")

    for i in range(len(nodes)):
        # obj_struct = {}
        # obj_struct['name'] = str(find_nodes(nodes[i] , 'type')[0].text)
        cl_box = find_nodes(nodes[i], 'rect')
        for rec in cl_box:
            objects = [int(rec.get('lefttopx')), int(rec.get('lefttopy')),
                       int(rec.get('rightbottomx')), int(rec.get('rightbottomy'))]
    return objects

################# 将xml的信息统一成标准形式 ################
def listFile(data_dir, suffix):
    fs = os.listdir(data_dir)
    for i in range(len(fs)-1, -1, -1):
        # 如果后缀不是.jpg就将该文件删除掉
        if not fs[i].endswith(suffix):
            del fs[i]
    return fs

def write_label(data_dir, xml_dir):
    images = listFile(data_dir, ".jpg")
    with open("label.txt", "w") as label:
        for i in range(len(images)):
            image_path = data_dir + "/" + images[i]
            xml_path = xml_dir + "/" + images[i][:-4] + ".txt"
            objects = get_obj(xml_path)
            line = image_path + " " + str(objects[0]) + " " + str(objects[1]) \
                   + " " + str(objects[2]) + " " + str(objects[3]) + "\n"
            label.write(line)

################ 主函数 ###################
if __name__ == '__main__':
    data_dir = "E:/MTCNN/Train/samples"
    xml_dir = "E:/MTCNN/Train/samples/annotation"
    write_label(data_dir, xml_dir)
整理好的 label.txt 形式为:
E:/MTCNN/Train/samples/0019c3f356ada6bcda0b695020e295e6.jpg 102 87 311 417
E:/MTCNN/Train/samples/0043e38f303b247e50b9a07cb5887b39.jpg 156 75 335 295
E:/MTCNN/Train/samples/004e26290d2290ca87e02b737a740aee.jpg 105 122 291 381
E:/MTCNN/Train/samples/00ff0abc4818a309b51180264b830211.jpg 168 168 313 340
E:/MTCNN/Train/samples/015a7137173f29e2cd4663c7cbcad1cb.jpg 127 60 332 398
E:/MTCNN/Train/samples/0166ceba53a4bfc4360e1d12b33ecb61.jpg 149 82 353 378
E:/MTCNN/Train/samples/01e6deccb55b377985d2c4d72006ee34.jpg 185 100 289 249
E:/MTCNN/Train/samples/021e34448c0ed051db501156cf2b6552.jpg 204 91 359 289
......
3、MTCNN训练数据生成及训练
(1) P_Net 的训练
按照MTCNN论文中的说法:

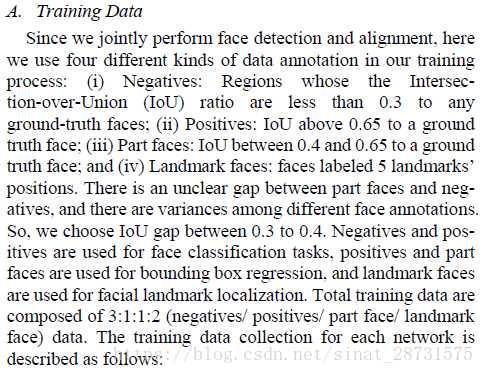
需要将原始数据集的数据分成Negative,Positive,Part faces,Landmark faces四个部分,由于本次主要是进行人脸检测的任务,所以只需要分成Negative,Positive,Part faces三个部分即可,代码如下所示:
# -*- coding:utf-8 -*-
import sys
import numpy as np
import cv2
import os
import numpy.random as npr

stdsize = 12
anno_file = "label.txt"
im_dir = "samples"
pos_save_dir = str(stdsize) + "/positive"
part_save_dir = str(stdsize) + "/part"
neg_save_dir = str(stdsize) + '/negative'
save_dir = "./" + str(stdsize)

def IoU(box, boxes):
    """Compute IoU between detect box and gt boxes

    Parameters:
    ----------
    box: numpy array , shape (5, ): x1, y1, x2, y2, score
        input box
    boxes: numpy array, shape (n, 4): x1, y1, x2, y2
        input ground truth boxes

    Returns:
    -------
    ovr: numpy.array, shape (n, )
        IoU
    """
    box_area = (box[2] - box[0] + 1) * (box[3] - box[1] + 1)
    area = (boxes[:, 2] - boxes[:, 0] + 1) * (boxes[:, 3] - boxes[:, 1] + 1)
    # boxes[:, 0]代表取boxes这个nx4矩阵所有行的第一个数据
    xx1 = np.maximum(box[0], boxes[:, 0])
    yy1 = np.maximum(box[1], boxes[:, 1])
    xx2 = np.minimum(box[2], boxes[:, 2])
    yy2 = np.minimum(box[3], boxes[:, 3])

    # compute the width and height of the bounding box
    w = np.maximum(0, xx2 - xx1 + 1)
    h = np.maximum(0, yy2 - yy1 + 1)

    inter = w * h
    ovr = inter / (box_area + area - inter)
    return ovr

# 生成一系列文件夹用于存储三类样本
def mkr(dr):
    if not os.path.exists(dr):
        os.mkdir(dr)

mkr(save_dir)
mkr(pos_save_dir)
mkr(part_save_dir)
mkr(neg_save_dir)

# 生成一系列txt文档用于存储Positive,Negative,Part三类数据的信息
f1 = open(os.path.join(save_dir, 'pos_' + str(stdsize) + '.txt'), 'w')
f2 = open(os.path.join(save_dir, 'neg_' + str(stdsize) + '.txt'), 'w')
f3 = open(os.path.join(save_dir, 'part_' + str(stdsize) + '.txt'), 'w')

# 读取label.txt
with open(anno_file, 'r') as f:
    annotations = f.readlines()
num = len(annotations)
print "%d pics in total" % num
p_idx = 0 # positive
n_idx = 0 # negative
d_idx = 0 # dont care
idx = 0
box_idx = 0


for annotation in annotations:
    annotation = annotation.strip().split(' ')
    im_path = annotation[0]
    bbox = map(float, annotation[1:])
    boxes = np.array(bbox, dtype=np.float32).reshape(-1, 4)
    print im_path
    img = cv2.imread(im_path)
    idx += 1
    if idx % 100 == 0:
        print idx, "images done"

    height, width, channel = img.shape

    neg_num = 0
    while neg_num < 50:
        # 生成随机数,对每张数据集中的图像进行切割,生成一系列小的图像
        size = npr.randint(40, min(width, height) / 2)
        nx = npr.randint(0, width - size)
        ny = npr.randint(0, height - size)
        crop_box = np.array([nx, ny, nx + size, ny + size])
        # 计算小的图像与标注产生的检测框之间的IoU
        Iou = IoU(crop_box, boxes)

        cropped_im = img[ny : ny + size, nx : nx + size, :]
        resized_im = cv2.resize(cropped_im, (stdsize, stdsize), interpolation=cv2.INTER_LINEAR)

        if np.max(Iou) < 0.3:
            # Iou with all gts must below 0.3
            save_file = os.path.join(neg_save_dir, "%s.jpg"%n_idx)
            f2.write(str(stdsize)+"/negative/%s"%n_idx + ' 0\n')
            cv2.imwrite(save_file, resized_im)
            n_idx += 1
            neg_num += 1


    for box in boxes:
        # box (x_left, y_top, x_right, y_bottom)
        x1, y1, x2, y2 = box
        w = x2 - x1 + 1
        h = y2 - y1 + 1

        # max(w, h) < 40:参数40表示忽略的最小的脸的大小
        # in case the ground truth boxes of small faces are not accurate
        if max(w, h) < 40 or x1 < 0 or y1 < 0:
            continue

        # generate positive examples and part faces
        for i in range(20):
            size = npr.randint(int(min(w, h) * 0.8), np.ceil(1.25 * max(w, h)))

            # delta here is the offset of box center
            delta_x = npr.randint(-w * 0.2, w * 0.2)
            delta_y = npr.randint(-h * 0.2, h * 0.2)

            nx1 = max(x1 + w / 2 + delta_x - size / 2, 0)
            ny1 = max(y1 + h / 2 + delta_y - size / 2, 0)
            nx2 = nx1 + size
            ny2 = ny1 + size

            if nx2 > width or ny2 > height:
                continue
            crop_box = np.array([nx1, ny1, nx2, ny2])

            offset_x1 = (x1 - nx1) / float(size)
            offset_y1 = (y1 - ny1) / float(size)
            offset_x2 = (x2 - nx2) / float(size)
            offset_y2 = (y2 - ny2) / float(size)

            cropped_im = img[int(ny1) : int(ny2), int(nx1) : int(nx2), :]
            resized_im = cv2.resize(cropped_im, (stdsize, stdsize), interpolation=cv2.INTER_LINEAR)

            box_ = box.reshape(1, -1)
            if IoU(crop_box, box_) >= 0.65:
                save_file = os.path.join(pos_save_dir, "%s.jpg"%p_idx)
                f1.write(str(stdsize)+"/positive/%s"%p_idx + ' 1 %.2f %.2f %.2f %.2f\n'%(offset_x1, offset_y1, offset_x2, offset_y2))
                cv2.imwrite(save_file, resized_im)
                p_idx += 1
            elif IoU(crop_box, box_) >= 0.4:
                save_file = os.path.join(part_save_dir, "%s.jpg"%d_idx)
                f3.write(str(stdsize)+"/part/%s"%d_idx + ' -1 %.2f %.2f %.2f %.2f\n'%(offset_x1, offset_y1, offset_x2, offset_y2))
                cv2.imwrite(save_file, resized_im)
                d_idx += 1
        box_idx += 1
        print "%s images done, pos: %s part: %s neg: %s"%(idx, p_idx, d_idx, n_idx)

f1.close()
f2.close()
f3.close()
这里是产生第一个P-Net的训练样本,产生后续R-Net和O-Net的训练样本只需要将上面的 stdsize = 12 参数改成24和48即可,里面有些参数也可以根据自己的需要进行修改。
上面获得了随机切分原图后得到的Negative,Positive,Part faces三类样本的图片路径和样本中的每一张图片里检测框的坐标,我们要进行训练,还是需要将这些信息保存为第三步中label.txt的形式:
import sys
import os

save_dir = "./12"
if not os.path.exists(save_dir):
    os.mkdir(save_dir)
f1 = open(os.path.join(save_dir, 'pos_12.txt'), 'r')
f2 = open(os.path.join(save_dir, 'neg_12.txt'), 'r')
f3 = open(os.path.join(save_dir, 'part_12.txt'), 'r')

pos = f1.readlines()
neg = f2.readlines()
part = f3.readlines()
f = open(os.path.join(save_dir, 'label-train.txt'), 'w')

for i in range(int(len(pos))):
    p = pos[i].find(" ") + 1
    pos[i] = pos[i][:p-1] + ".jpg " + pos[i][p:-1] + "\n"
    f.write(pos[i])

for i in range(int(len(neg))):
    p = neg[i].find(" ") + 1
    neg[i] = neg[i][:p-1] + ".jpg " + neg[i][p:-1] + " -1 -1 -1 -1\n"
    f.write(neg[i])

for i in range(int(len(part))):
    p = part[i].find(" ") + 1
    part[i] = part[i][:p-1] + ".jpg " + part[i][p:-1] + "\n"
    f.write(part[i])

f1.close()
f2.close()
f3.close()
接下来要将其转换成caffe用的lmdb形式,这里我们利用caffe自带的工具,转换代码如下:
"caffe/convert_imageset.exe" "" 12/label.txt train_lmdb12 --backend=mtcnn --shuffle=true由于将原始图片切分成Negative,Positive,Part faces三个部分后数据量很大,所以可能转换的时间会很长。
至此,P_Net的训练数据就准备好了,接下来就可以进行训练了。
训练我们需要配置到caffe的相关prototxt:
上面训练参考链接中的:det1-train.prototxt,solver-12.prototxt,注意调整这两个文件中的路径,然后在根目录下新建models-12文件夹用于存储snapshot,最后使用命令:
"caffe/caffe.exe" train --solver=solver-12.prototxt --weights=det1.caffemodel进行训练即可。
(2) R_Net 的训练
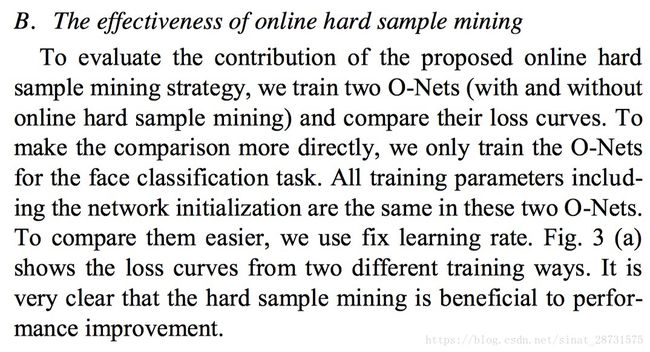
进行完上面P_Net的训练后,继续参考上面的产生数据的代码产生R_Net所需的训练数据,同时因为论文中强调了产生hard_sample会提高模型的预测精度:

所以我们使用下面的代码来产生hard_sample:
import tools
import caffe
import cv2
import numpy as np
import os
from utils import *
deploy = 'det1.prototxt'
caffemodel = 'det1.caffemodel'
net_12 = caffe.Net(deploy,caffemodel,caffe.TEST)
def view_bar(num, total):
    rate = float(num) / total
    rate_num = int(rate * 100)
    r = '\r[%s%s]%d%%  (%d/%d)' % ("#"*rate_num, " "*(100-rate_num), rate_num, num, total)
    sys.stdout.write(r)
    sys.stdout.flush()
def detectFace(img_path,threshold):
    img = cv2.imread(img_path)
    caffe_img = img.copy()-128
    origin_h,origin_w,ch = caffe_img.shape
    scales = tools.calculateScales(img)
    out = []
    for scale in scales:
        hs = int(origin_h*scale)
        ws = int(origin_w*scale)
        scale_img = cv2.resize(caffe_img,(ws,hs))
        scale_img = np.swapaxes(scale_img, 0, 2)
        net_12.blobs['data'].reshape(1,3,ws,hs)
        net_12.blobs['data'].data[...]=scale_img
    caffe.set_device(0)
    caffe.set_mode_gpu()
    out_ = net_12.forward()
        out.append(out_)
    image_num = len(scales)
    rectangles = []
    for i in range(image_num):
        cls_prob = out[i]['cls_score'][0][1]
        roi      = out[i]['conv4-2'][0]
        out_h,out_w = cls_prob.shape
        out_side = max(out_h,out_w)
        rectangle = tools.detect_face_12net(cls_prob,roi,out_side,1/scales[i],origin_w,origin_h,threshold[0])
        rectangles.extend(rectangle)
    return rectangles
anno_file = 'wider_face_train.txt'
im_dir = "WIDER_train/images/"
neg_save_dir  = "24/negative"
pos_save_dir  = "24/positive"
part_save_dir = "24/part"
image_size = 24
f1 = open('24/pos_24.txt', 'w')
f2 = open('24/neg_24.txt', 'w')
f3 = open('24/part_24.txt', 'w')
threshold = [0.6,0.6,0.7]
with open(anno_file, 'r') as f:
    annotations = f.readlines()
num = len(annotations)
print "%d pics in total" % num

p_idx = 0 # positive
n_idx = 0 # negative
d_idx = 0 # dont care
image_idx = 0

for annotation in annotations:
    annotation = annotation.strip().split(' ')
    bbox = map(float, annotation[1:])
    gts = np.array(bbox, dtype=np.float32).reshape(-1, 4)
    img_path = im_dir + annotation[0] + '.jpg'
    rectangles = detectFace(img_path,threshold)
    img = cv2.imread(img_path)
    image_idx += 1
    view_bar(image_idx,num)
    for box in rectangles:
        x_left, y_top, x_right, y_bottom, _ = box
        crop_w = x_right - x_left + 1
        crop_h = y_bottom - y_top + 1
        # ignore box that is too small or beyond image border
        if crop_w < image_size or crop_h < image_size :
            continue

        # compute intersection over union(IoU) between current box and all gt boxes
        Iou = IoU(box, gts)
        cropped_im = img[y_top:y_bottom + 1, x_left:x_right + 1]
        resized_im = cv2.resize(cropped_im, (image_size, image_size), interpolation=cv2.INTER_LINEAR)

        # save negative images and write label
        if np.max(Iou) < 0.3:
            # Iou with all gts must below 0.3
            save_file = os.path.join(neg_save_dir, "%s.jpg"%n_idx)
            f2.write("%s/negative/%s"%(image_size, n_idx) + ' 0\n')
            cv2.imwrite(save_file, resized_im)
            n_idx += 1
        else:
            # find gt_box with the highest iou
            idx = np.argmax(Iou)
            assigned_gt = gts[idx]
            x1, y1, x2, y2 = assigned_gt

            # compute bbox reg label
            offset_x1 = (x1 - x_left)   / float(crop_w)
            offset_y1 = (y1 - y_top)    / float(crop_h)
            offset_x2 = (x2 - x_right)  / float(crop_w)
            offset_y2 = (y2 - y_bottom )/ float(crop_h)

            # save positive and part-face images and write labels
            if np.max(Iou) >= 0.65:
                save_file = os.path.join(pos_save_dir, "%s.jpg"%p_idx)
                f1.write("%s/positive/%s"%(image_size, p_idx) + ' 1 %.2f %.2f %.2f %.2f\n'%(offset_x1, offset_y1, offset_x2, offset_y2))
                cv2.imwrite(save_file, resized_im)
                p_idx += 1

            elif np.max(Iou) >= 0.4:
                save_file = os.path.join(part_save_dir, "%s.jpg"%d_idx)
                f3.write("%s/part/%s"%(image_size, d_idx)     + ' -1 %.2f %.2f %.2f %.2f\n'%(offset_x1, offset_y1, offset_x2, offset_y2))
                cv2.imwrite(save_file, resized_im)
                d_idx += 1

f1.close()
f2.close()
f3.close()
注意修改上面代码的路径,用上面P_Net同样的处理方式将以上数据处理成lmdb的形式并进行训练。O_Net同理。上面的训练完成后就可以进行测试了。
4、MTCNN的测试
经过以上的步骤,在models-12、models-24和models-48会有三个网络对应的caffemodel,再加上det1.prototxt、det2.prototxt和det3.prototxt就可以利用下面的代码进行测试了(主要参考https://github.com/CongWeilin/mtcnn-caffe/tree/master/demo中的代码):
import tools_matrix as tools
import caffe
import cv2
import numpy as np
deploy = 'det1.prototxt'
caffemodel = 'det1.caffemodel'
net_12 = caffe.Net(deploy,caffemodel,caffe.TEST)

deploy = 'det2.prototxt'
caffemodel = 'det2.caffemodel'
net_24 = caffe.Net(deploy,caffemodel,caffe.TEST)

deploy = 'det3.prototxt'
caffemodel = 'det3.caffemodel'
net_48 = caffe.Net(deploy,caffemodel,caffe.TEST)


def detectFace(img_path,threshold):
    img = cv2.imread(img_path)
    caffe_img = (img.copy()-127.5)/128
    origin_h,origin_w,ch = caffe_img.shape
    scales = tools.calculateScales(img)
    out = []
    for scale in scales:
        hs = int(origin_h*scale)
        ws = int(origin_w*scale)
        scale_img = cv2.resize(caffe_img,(ws,hs))
        scale_img = np.swapaxes(scale_img, 0, 2)
        net_12.blobs['data'].reshape(1,3,ws,hs)
        net_12.blobs['data'].data[...]=scale_img
    caffe.set_device(0)
    caffe.set_mode_gpu()
    out_ = net_12.forward()
        out.append(out_)
    image_num = len(scales)
    rectangles = []
    for i in range(image_num):
        cls_prob = out[i]['prob1'][0][1]
        roi      = out[i]['conv4-2'][0]
        out_h,out_w = cls_prob.shape
        out_side = max(out_h,out_w)
        rectangle = tools.detect_face_12net(cls_prob,roi,out_side,1/scales[i],origin_w,origin_h,threshold[0])
        rectangles.extend(rectangle)
    rectangles = tools.NMS(rectangles,0.7,'iou')

    if len(rectangles)==0:
        return rectangles
    net_24.blobs['data'].reshape(len(rectangles),3,24,24)
    crop_number = 0
    for rectangle in rectangles:
        crop_img = caffe_img[int(rectangle[1]):int(rectangle[3]), int(rectangle[0]):int(rectangle[2])]
        scale_img = cv2.resize(crop_img,(24,24))
        scale_img = np.swapaxes(scale_img, 0, 2)
        net_24.blobs['data'].data[crop_number] =scale_img
        crop_number += 1
    out = net_24.forward()
    cls_prob = out['prob1']
    roi_prob = out['conv5-2']
    rectangles = tools.filter_face_24net(cls_prob,roi_prob,rectangles,origin_w,origin_h,threshold[1])

    if len(rectangles)==0:
        return rectangles
    net_48.blobs['data'].reshape(len(rectangles),3,48,48)
    crop_number = 0
    for rectangle in rectangles:
        crop_img = caffe_img[int(rectangle[1]):int(rectangle[3]), int(rectangle[0]):int(rectangle[2])]
        scale_img = cv2.resize(crop_img,(48,48))
        scale_img = np.swapaxes(scale_img, 0, 2)
        net_48.blobs['data'].data[crop_number] =scale_img
        crop_number += 1
    out = net_48.forward()
    cls_prob = out['prob1']
    roi_prob = out['conv6-2']
    pts_prob = out['conv6-3']
    rectangles = tools.filter_face_48net(cls_prob,roi_prob,pts_prob,rectangles,origin_w,origin_h,threshold[2])

    return rectangles

threshold = [0.6,0.6,0.7]
imgpath = ""
rectangles = detectFace(imgpath,threshold)
img = cv2.imread(imgpath)
draw = img.copy()
for rectangle in rectangles:
    cv2.putText(draw,str(rectangle[4]),(int(rectangle[0]),int(rectangle[1])),cv2.FONT_HERSHEY_SIMPLEX,1,(0,255,0))
    cv2.rectangle(draw,(int(rectangle[0]),int(rectangle[1])),(int(rectangle[2]),int(rectangle[3])),(255,0,0),1)
    for i in range(5,15,2):
        cv2.circle(draw,(int(rectangle[i+0]),int(rectangle[i+1])),2,(0,255,0))
cv2.imshow("test",draw)
cv2.waitKey()
cv2.imwrite('test.jpg',draw)
上面只是一个简单的实现过程的介绍,但是需要实现论文里面的效果,还需要很复杂的处理数据和调参过程。