使用vscode开发stm32
-
vscode
下载地址:https://code.visualstudio.com/
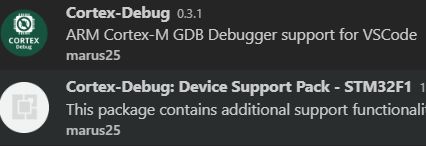
安装插件:Cortec-Debug、Cortex-Debug: Device Support Pack - STM32F1
图1 vscode插件
-
make
(自由软件下的一个:介绍:https://www.gnu.org/software/make/、http://gnuwin32.sourceforge.net/packages/make.htm
下载地址:https://sourceforge.net/projects/gnuwin32/files/make/3.81/make-3.81-dep.zip/download?use_mirror=nchc&download=)
下载库文件和可执行文件,将库文件放到相对应的文件夹下面
图2 make软件下载
添加环境变量到用户环境变量PATH下,make安装路径\bin,比如我的是C:\Program Files (x86)\GnuWin32\bin
查看软件是否可以运行并检查环境变量是否起作用,输入make -v(--version),显示版本信息既安装成功,见图3。
图3 检查make版本信息
-
arm-gcc
交叉编译工具,下载地址:https://developer.arm.com/tools-and-software/open-source-software/developer-tools/gnu-toolchain/gnu-rm/downloads
根据自己的电脑进行响应下载,安装后同样添加到环境变量,D:\Program Files (x86)\GNU Tools ARM Embedded\8 2019-q3-update\bin
图4 检查arm-gcc版本信息
-
vscode的终端选择
Vscode的终端设置为git bash.exe,如果使用git-bash.exe会在vscode之外重新打开一个一个新的窗口,不会在vscode里面打开,。
打开vscode设置或者setting.json,输入终端(注意是用户,不是工作区)
图5 搜索终端
找到内部终端设置,打开settings.json文件
图6 终端选项
修改终端设置为git下的bash,或者安装mingw32,使用windows的cmd和powershell提示错误。
"terminal.integrated.shell.windows": "D:/Program Files/Git/bin/bash.exe",
-
建立编译环境
使用stm32cube生成一个带有makefile的项目。
在项目中打开vscode(让vscode的工作目录和项目的工作目录一致)。
打开终端,终端输入make -j4(-j4指定4线程编译,提高速度)
出现如图7即可。
图7 编译输出
-
使用task的方式进行编译
打开命令面板(左下角设置、ctrl+shift+p、F1),输入task
图8 配置任务
打开task.json文件
配置build命令,build命令用来生成可执行文件(.elf、.hex)
配置clean命令,clean命令用来清除build过程的中间文件以及build目录
{
    "version": "2.0.0",
    "tasks": [
        {
            "label": "clean",
            "type": "shell",
            "command": "make clean",
        },
        {
            "label": "build",
            "type": "shell",
            "command": "make -j4"
        }
    ]
}
点击终端运行任务,建立task.json之后会看到两个task,build和clean
图9 运行任务
图10 task.json配置的任务
点击clean(继续执行而不输出)执行清除build文件,如图12显示,点击build显示如图8,如果已经build过会显示文件是最新的无需make: Nothing to be done for `all'.
图11 make clean
-
安装openocd
openocd介绍:http://openocd.org/,在Getting OpenOCD中下载发行版本
下载地址:http://www.freddiechopin.info/en/download/category/4-openocd
安装之后添加bin文件到环境变量
D:\Program Files (x86)\openocd-0.10.0\bin-x64,
图12 openocd 检测
-
设置运行时文件launch.json
cwd : current working directory for finding dependencies and other files
request: the request type of this launch configuration.
executable:被调试文件的路径
svdFile:根据芯片的型号在插件目录下进行选择
servertype:调试类型
configFiles:openocd的interface和target目录下进行选择
preLaunchTask:运行调试之后先运行task命令生成elf文件
{
    "version": "0.2.0",
    "configurations": [

    {
        "name": "Cortex Debug",
        "cwd": "${workspaceRoot}",
        "executable": "${workspaceFolder}/build/stm32gccdemo.elf",
        "request": "launch",
        "type": "cortex-debug",
        "svdFile": "C:/Users/sspu2/.vscode/extensions/marus25.cortex-debug-dp-stm32f1-1.0.0/data/STM32F103xx.svd",
        "servertype": "openocd",
        "configFiles": [
            "interface/stlink-v2-1.cfg",
            "target/stm32f1x.cfg"
        ],
        "preLaunchTask": "build"
    },
    ]
}
-
进行调试
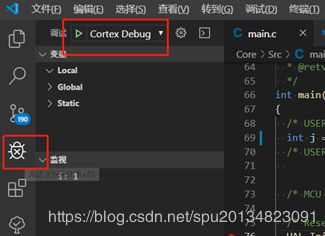
点击调试按钮,选择调试器为Cortex Debug
图13 打开调试
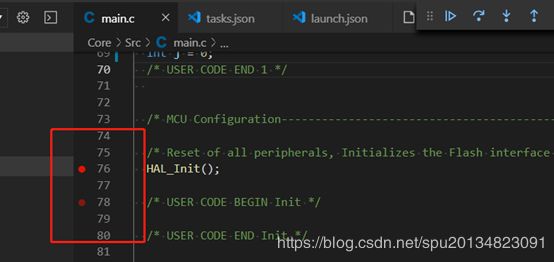
设置断点
图14 设置断点
-
技巧:


