SpringBoot中的 @PropertySource
前言
我们在使用 SpringBoot 的过程中经常会接触到需要注入配置文件中的信息,就比如 resources 目录下的 application.properties,因为 SpringBoot 中默认的配置文件就是它,所以我们不需要额外的配置,直接在其中写上我们需要的信息即可,但是要是我们想自己在其他目录下建配置文件该怎么办呢,那么坐好了,我要开始放大招了。。。
示例
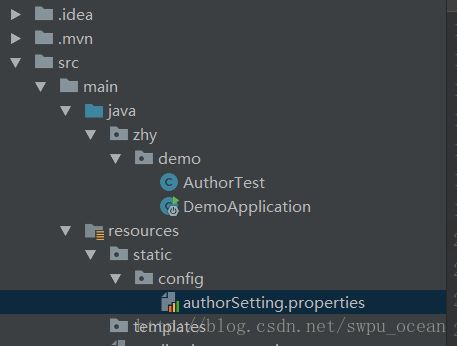
示例目录
1.使用 @Value 注入配置文件信息
authorSetting.properties 中
author.name=zhangocean
author.age=15
AuthorTest 中
package zhy.demo;

import org.springframework.beans.factory.annotation.Value;
import org.springframework.context.annotation.Configuration;
import org.springframework.context.annotation.PropertySource;
import org.springframework.stereotype.Component;

/**
 * @author: zhangocean
 * @Date: Created in 20:41 2018/2/2
 * Describe:
 */
@Component
@PropertySource(value = {"classpath:static/config/authorSetting.properties"},
        ignoreResourceNotFound = false, encoding = "UTF-8", name = "authorSetting.properties")
public class AuthorTest {

    @Value("${author.name}")
    private String name;
    @Value("${author.age}")
    private int age;

    //省略 setter 和 getter
}
@PropertySource 中的属性解释
1.value:指明加载配置文件的路径。
2.ignoreResourceNotFound:指定的配置文件不存在是否报错,默认是false。当设置为 true 时,若该文件不存在,程序不会报错。实际项目开发中,最好设置 ignoreResourceNotFound 为 false。
3.encoding:指定读取属性文件所使用的编码,我们通常使用的是UTF-8。
DemoApplication 中
package zhy.demo;
import org.springframework.beans.factory.annotation.Autowired;
import org.springframework.boot.SpringApplication;
import org.springframework.boot.autoconfigure.SpringBootApplication;
import org.springframework.web.bind.annotation.RequestMapping;
import org.springframework.web.bind.annotation.RestController;
@RestController
@SpringBootApplication
public class DemoApplication {
@Autowired
AuthorTest authorTest;
@RequestMapping("/")
public String index(){
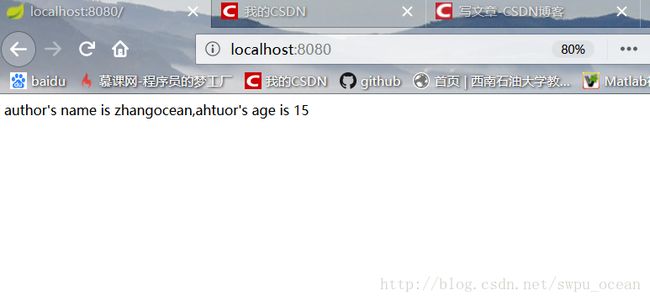
return "author's name is " + authorTest.getName() + ",ahtuor's age is " + authorTest.getAge();
}
public static void main(String[] args) {
SpringApplication.run(DemoApplication.class, args);
}
}
运行结果
当我们使用 @Value 需要注入的值较多时,代码就会显得冗余,于是 @ConfigurationProperties 登场了
2.使用 @ConfigurationProperties 注入配置文件信息
修改 AuthorTest
package zhy.demo;

import org.springframework.boot.context.properties.ConfigurationProperties;
import org.springframework.context.annotation.PropertySource;
import org.springframework.stereotype.Component;

/**
 * @author: zhangocean
 * @Date: Created in 20:41 2018/2/2
 * Describe:
 */
@Component
@ConfigurationProperties(prefix = "author")
@PropertySource(value = {"classpath:static/config/authorSetting.properties"},
        ignoreResourceNotFound = false, encoding = "UTF-8", name = "authorSetting.properties")
public class AuthorTest {

    private String name;
    private int age;

    //省略 setter 和 getter
}
代码解释
1.@ConfigurationProperties 中的 prefix 用来指明我们配置文件中需要注入信息的前缀。
修改 DemoApplication
package zhy.demo;

import org.springframework.beans.factory.annotation.Autowired;
import org.springframework.boot.SpringApplication;
import org.springframework.boot.autoconfigure.SpringBootApplication;
import org.springframework.boot.context.properties.EnableConfigurationProperties;
import org.springframework.web.bind.annotation.RequestMapping;
import org.springframework.web.bind.annotation.RestController;

@RestController
@SpringBootApplication
@EnableConfigurationProperties
public class DemoApplication {

    @Autowired
    AuthorTest authorTest;

    @RequestMapping("/")
    public String index(){
        return "author's name is " + authorTest.getName() + ",ahtuor's age is " + authorTest.getAge();
    }

    public static void main(String[] args) {
        SpringApplication.run(DemoApplication.class, args);
    }
}
代码解释
1.使用 @EnableConfigurationProperties 开启 @ConfigurationProperties 注解。
运行结果
