面试高频(三:前端路由)
(一)前言
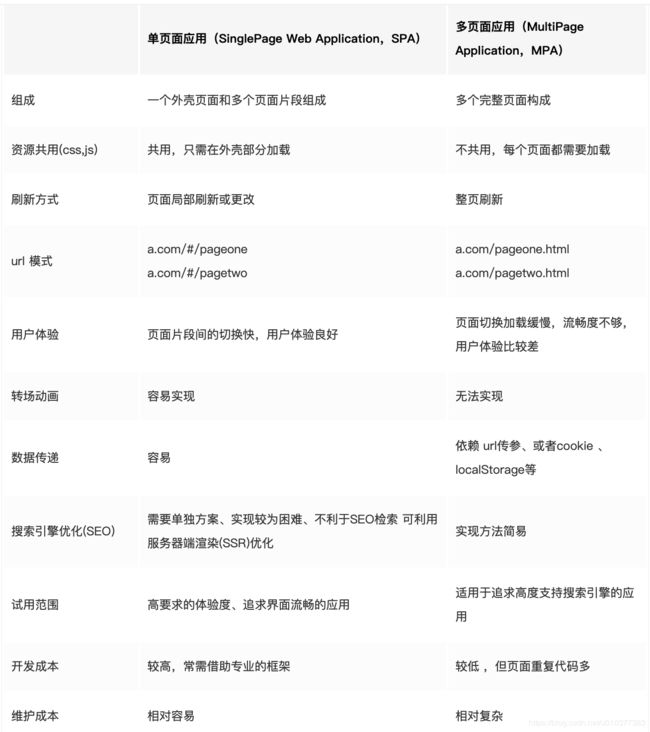
单页面应用(SinglePage Web Application,SPA),跳转仅刷新局部资源 ,公共资源(js、css等)仅需加载一次,路由基于pushState,replaceState(history)或者location.hash(hash)
多页面应用(MultiPage Application,MPA),页面跳转刷新所有资源,每个公共资源(js、css等)需选择性重新加载,路由基于浏览的location.href
url 上的 hash 以 # 开头,原本是为了作为锚点,方便用户在文章导航到相应的位置。
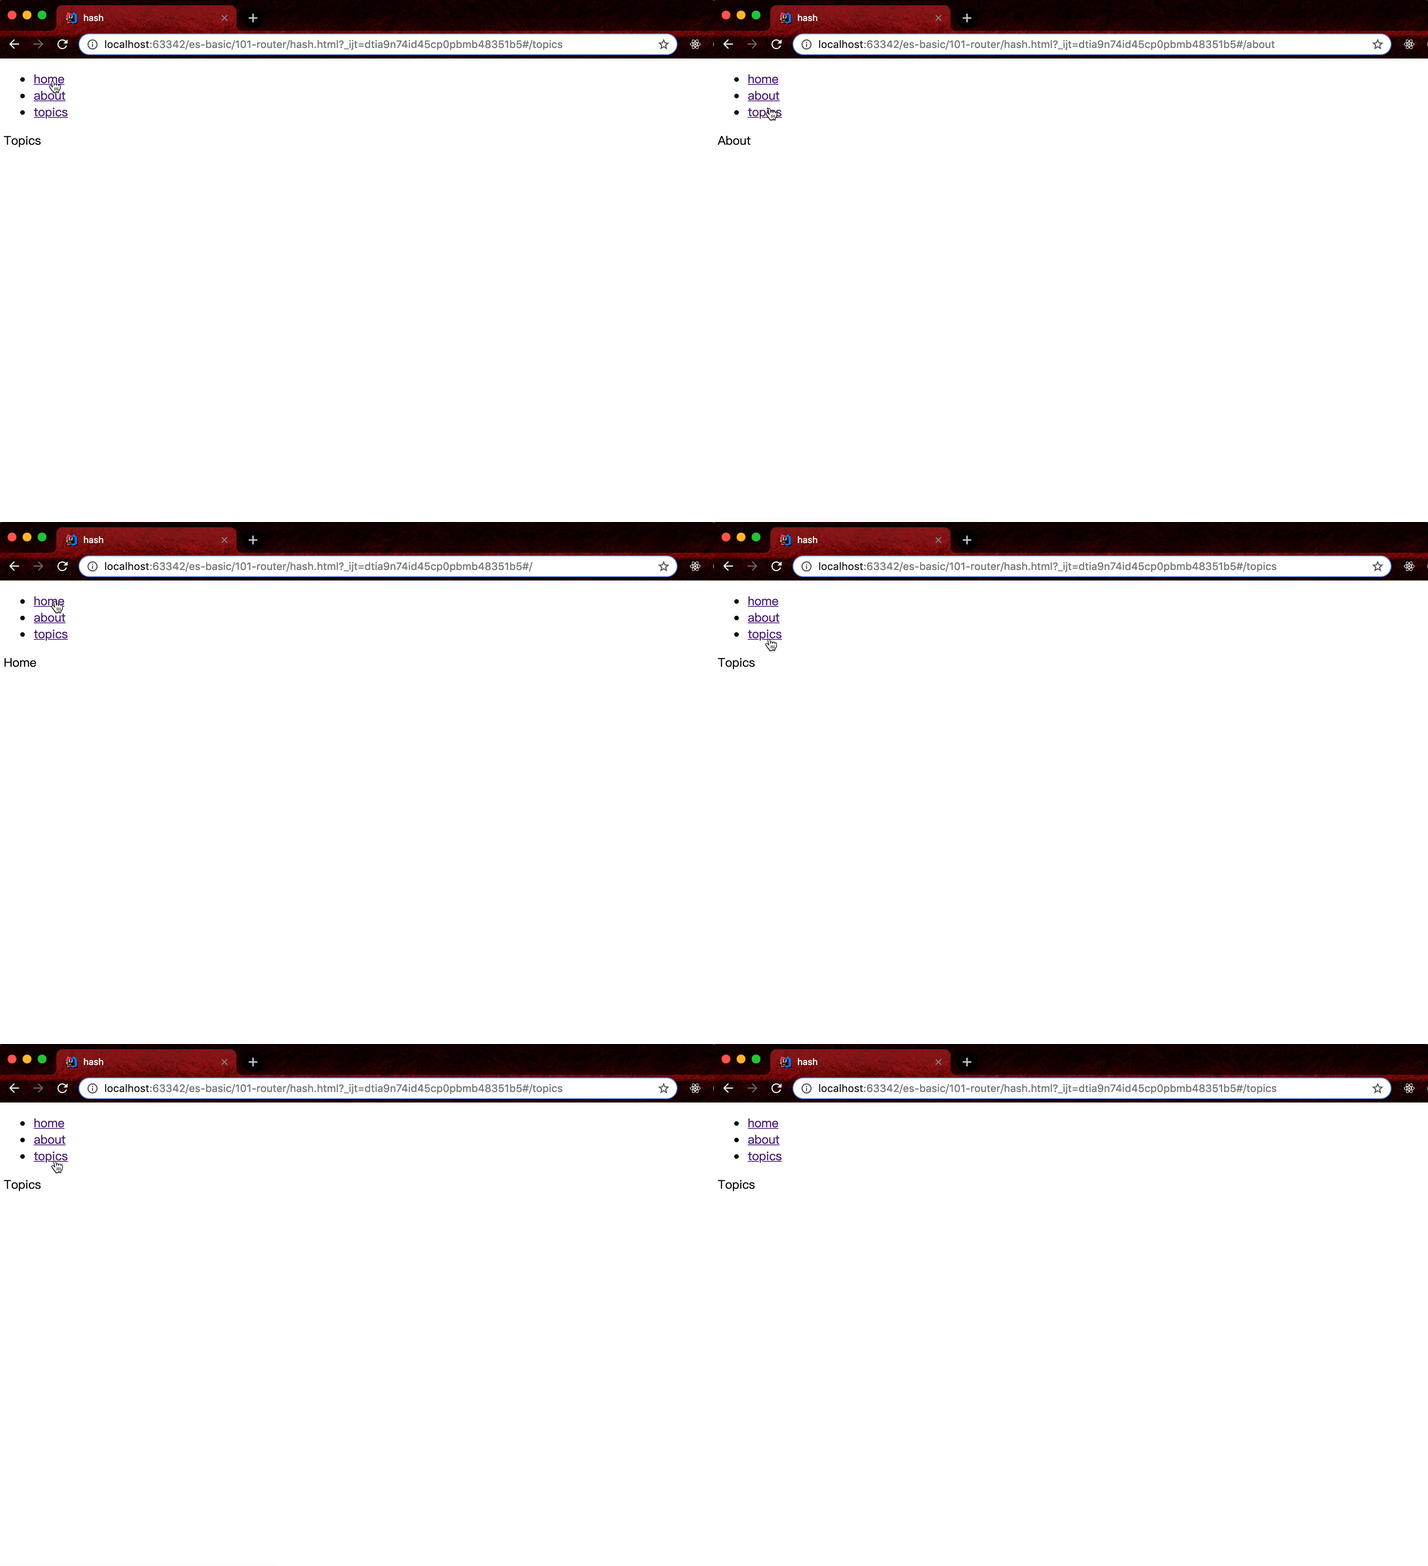
因为 hash 值的改变不会引起页面的刷新,所以用 hash 值来做单页面应用的路由,并且当 url 的 hash 发生变化的时候,可以触发相应 hashchange 回调函数。
- 现在我们写一个hashRouter.js
class Router {
  constructor() {
    this.routes = {};
    this.currentUrl = '';
    this.initListener();
  }
  push(path, callback) {
    this.routes[path] = callback || function() {};
  }
  updateView() {
    this.currentUrl = location.hash.slice(1) || '/';
    this.routes[this.currentUrl] && this.routes[this.currentUrl]();
  }
  initListener() {
    window.addEventListener('load', this.updateView.bind(this), false);
    window.addEventListener('hashchange', this.updateView.bind(this), false);
  }
  removeListener() {
    window.removeEventListener('load', function () {}, false);
    window.removeEventListener('hashchange', function () {}, false);
  }
}
- routes 用来存放不同路由对应的回调函数
- initListener 用来初始化路由,在 load 事件发生后刷新页面,并且绑定 hashchange 事件,当 hash 值改变时触发对应回调函数。
- 我们写一个hash.html
hash
值得注意在第一次进入页面的时候,需要主动触发一次 onhashchange 事件,保证页面能够正常显示。
(四) 前端history路由实现
History 路由是基于 HTML5 规范,在 HTML5 规范中提供了 history.pushState || history.replaceState 来进行路由控制。
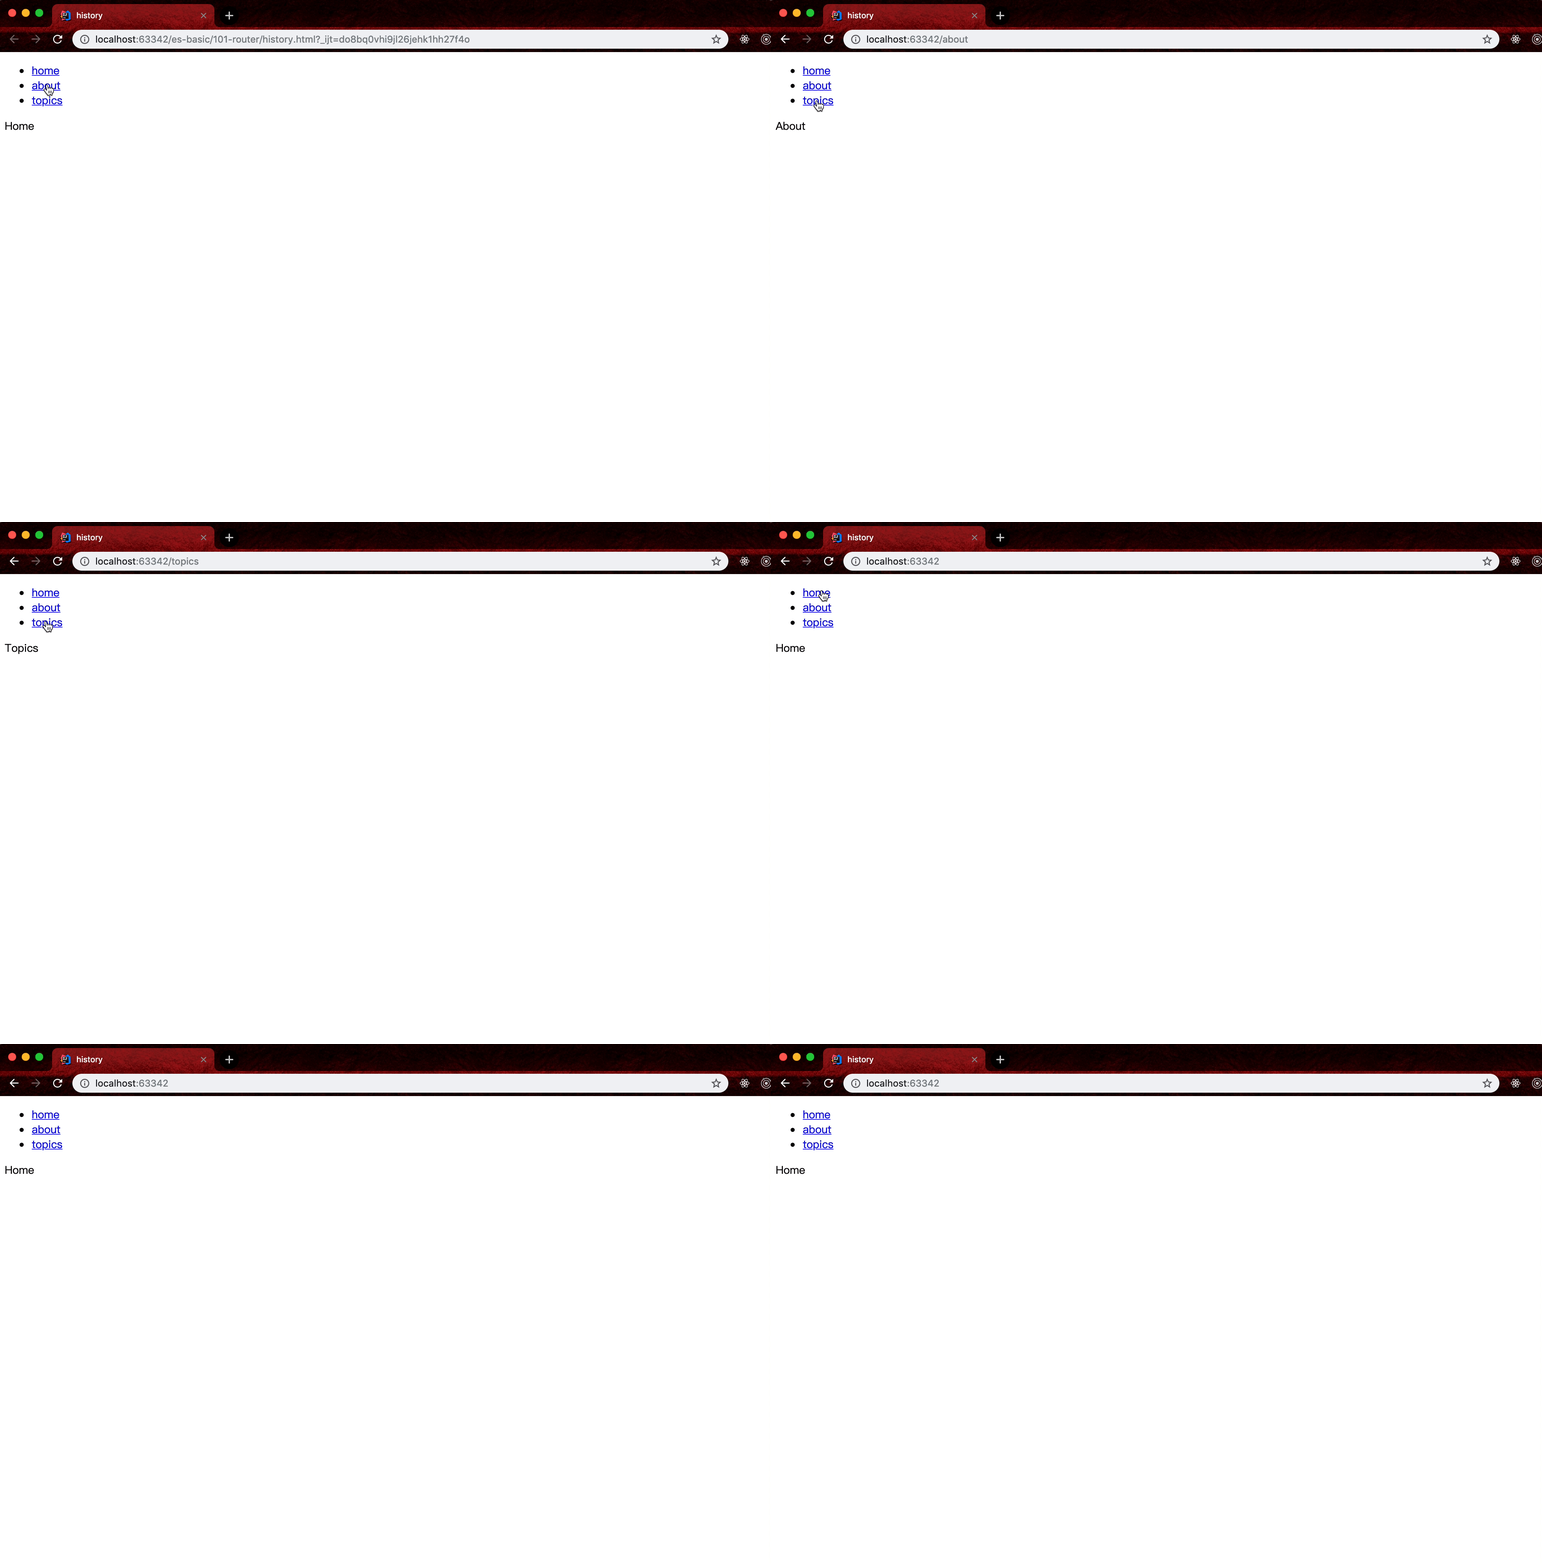
当你执行 history.pushState({}, null, ‘/home’) 时候,页面 url 会从 http://localhost:63342/ 跳转到 http://localhost:63342/home 可以在改变 url 的同时,并不会刷新页面。
先来简单看看 pushState 的用法,参数说明如下:
- state:存储 JSON 字符串,可以用在 popstate 事件中
- title:现在大多浏览器忽略这个参数,直接用 null 代替
- url:任意有效的 URL,用于更新浏览器的地址栏
- 现在我们写一个historyRouter.js
class Router {
  constructor() {
    this.routes = {};
    this.currentUrl = '';
    this.initListener();
    this.initBindLink();
  }
  push(path, callback) {
    this.routes[path] = callback || function() {};
  }
  updateView(url) {
    this.currentUrl = url;
    this.routes[this.currentUrl] && this.routes[this.currentUrl]();
  }
  initBindLink() {
    const allLink = document.querySelectorAll('a[data-href]');
    for (let i = 0, len = allLink.length; i < len; i++) {
      const current = allLink[i];
      current.addEventListener(
        'click',
        e => {
          e.preventDefault();
          const url = current.getAttribute('data-href');
          history.pushState({}, null, url);
          this.updateView(url);
        },
        false
      );
    }
  }
  initListener() {
    window.addEventListener('popstate', () => this.updateView(window.location.pathname));
    window.addEventListener('load', () => this.updateView('/'), false);
  }
  removeListener() {
    window.removeEventListener('load', function () {}, false);
    window.removeEventListener('hashchange', function () {}, false);
  }
}
- 我们写一个history.html
history
跟之前的 html 基本一致,区别在于用 data-href 来表示要实现软路由的链接标签。
当然上面还有情况 3,就是你在 JS 直接触发 pushState 函数,那么这时候你必须要调用视图更新函数,否则就是出现视图内容和 url 不一致的情况。
setTimeout(() => {
  history.pushState({}, null, '/about');
  router.updateView('/about');
}, 2000)


