本篇文章主要介绍以下几个知识点:
- 自定义 View:分类、须知、实例
- 自定义 View 的思想

4.4 自定义 View
4.4.1 自定义 View 的分类
自定义 View 的分类标准不唯一,这里将其分为 4 类:
(1)继承 View 重写 onDraw 方法
主要用于实现一些不规则的效果,需要通过绘制的方式来完成,重写 onDraw。采用此方式需要自身支持 warp_content,并且处理 padding。
(2)继承 ViewGroup 派生特殊的 Layout
主要用于实现自定义的布局,如实现某些看起来像几种 View 组合在一起的效果。采用此方式需要合适地处理 ViewGroup 的测量、布局这两个过程,并同时处理子元素的这两个过程。
(3)继承特定的 View
主要用于实现扩展某种已有的 View 的功能,如 TextView。采用此方式不需要自己支持 warp_content 和 padding 等。
(4)继承特定的 ViewGroup(如 LinearLayout)
和上述方式2 类似,区别在于方式2 更接近 View 的底层。
4.4.2 自定义 View 的须知
自定义 View 的一些注意事项:
(1)让 View 支持 warp_content
直接继承 View 或 ViewGroup 的控件,若不在 onMeasure 中对 wrap_content 做特殊处理,可能无法达到预期效果(具体情形看之前的 4.3.1)。
(2)如果有必要,让你的 View 支持 padding
直接继承 View 的控件,若不在 draw 中处理 padding,则 padding 属性无效。继承 ViewGroup 的控件也要处理。
(3)尽量不要在 View 中使用 Handler
View 本身提供了 post 系列的方法,完全可替代 Handler。
(4)View 中如果有线程或者动画,需要及时停止,参考 View#onDetachedFromWindow
避免内存泄漏。
(5)View 带有滑动嵌套时,要处理好滑动冲突
处理好滑动冲突,否则影响 View 的效果。
4.4.3 自定义 View 的实例
4.4.3.1 继承 View 重写 onDraw 方法
下面来绘制一个简单的圆。在实现过程中需考虑 wrap_content 和 padding,代码如下:
public class CircleView extends View{

    // 颜色
    private int mColor = Color.RED;
    // 画笔样式
    private Paint mPaint = new Paint(Paint.ANTI_ALIAS_FLAG);

    public CircleView(Context context) {
        super(context);
        init();
    }

    public CircleView(Context context, AttributeSet attrs) {
        super(context, attrs);
        init();
    }

    public CircleView(Context context, AttributeSet attrs, int defStyleAttr) {
        super(context, attrs, defStyleAttr);
        init();
    }

    // 初始化
    private void init() {
        mPaint.setColor(mColor);
    }

    @Override
    protected void onDraw(Canvas canvas) {
        super.onDraw(canvas);
        // View 的宽
        int width = getWidth();
        // View 的高
        int height = getHeight();
        // 圆的半径
        int radius = Math.min(width, height) / 2;
        // 绘制圆
        canvas.drawCircle(width / 2, height / 2, radius, mPaint);
    }
}
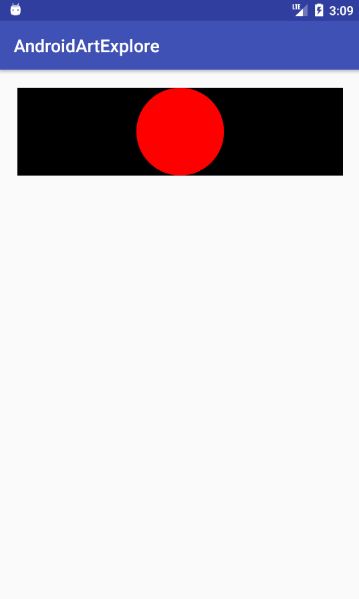
上面的代码就实现了一个圆的自定义 View,运行效果如下:

上面的自定义圆代码很简单,只是一中初级的实现,并不是一个规范的自定义 View,若将布局参数调整如下:
运行效果如下(符合预期效果):

接下来再调整一下,添加布局参数:
android:layout_margin="20dp"
运行效果如下(符合预期效果,因为 margin 是由父容器控制的,不需要在 CircleView 中特殊处理):
接下来继续调整一下,添加布局参数:
android:padding="20dp"
发现运行效果和效果02 一样,即设置的 padding 无效。这是因为继承自 View 和 ViewGroup 的控件,padding 是默认无法生效的,需自己处理。
将宽度设为 wrap_content,运行后也和效果02 一样,即使用 wrap_content 和 match_parent 无区别。这是因为继承自 View 的控件,若不对 wrap_content 做特殊处理,则 wrap_content 相当于 match_parent。
为解决上述的问题,可做如下处理:
针对 wrap_content 问题,只需指定一个 wrap_content 模式的默认宽高即可(如 200px)。
针对 padding 问题,只需绘制时考虑,修改 onDraw 如下:
    @Override
    protected void onDraw(Canvas canvas) {
        super.onDraw(canvas);
        // padding 的值
        final int paddingLeft = getPaddingLeft();
        final int paddingRight = getPaddingRight();
        final int paddingTop = getPaddingTop();
        final int paddingBottom = getPaddingBottom();
        // View 的宽
        int width = getWidth() - paddingLeft - paddingRight;
        // View 的高
        int height = getHeight() - paddingTop - paddingBottom;
        // 圆的半径
        int radius = Math.min(width, height) / 2;
        // 绘制圆
        canvas.drawCircle(paddingLeft + width / 2, paddingTop + height / 2, radius, mPaint);
    }
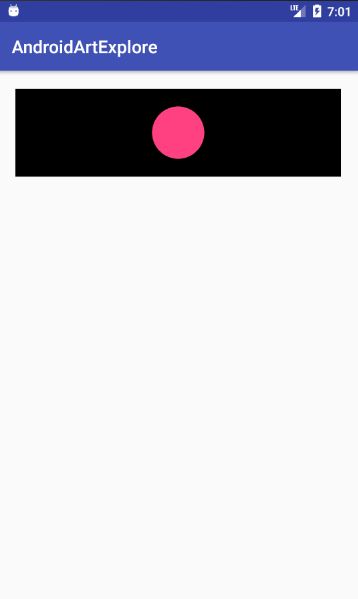
运行效果如下:

接下来,介绍如何提供一些自定义的属性。
第一步,在 values 目录下创建自定义属性的 XML,创建 attrs.xml 文件如下:
第二步,在 View 的构造方法中解析自定义属性的值并做相应的处理,如下:
    public CircleView(Context context, AttributeSet attrs, int defStyleAttr) {
        super(context, attrs, defStyleAttr);
        // 1. 加载自定义属性集合 CircleView
        TypedArray a = context.obtainStyledAttributes(attrs, R.styleable.CircleView);
        // 2. 解析 CircleView 集合中的属性
        // 这里解析其 circle_color 属性(若没指定,则默认红色)
        mColor = a.getColor(R.styleable.CircleView_circle_color, Color.RED);
        // 3. 实现资源
        a.recycle();
        init();
    }
第三步,在布局文件中使用自定义属性,如下:
上面值得注意的是,为了使用自定义属性,必须在布局文件中添加 schemas 声明:xmlns:app="http://schemas.android.com/apk/res-auto"。运行效果如下:
附:完整代码如下:
public class CircleView extends View{

    // 颜色
    private int mColor = Color.RED;
    // 画笔样式
    private Paint mPaint = new Paint(Paint.ANTI_ALIAS_FLAG);

    public CircleView(Context context) {
        super(context);
        init();
    }

    public CircleView(Context context, AttributeSet attrs) {
        this(context, attrs, 0);
    }

    public CircleView(Context context, AttributeSet attrs, int defStyleAttr) {
        super(context, attrs, defStyleAttr);
        // 1. 加载自定义属性集合 CircleView
        TypedArray a = context.obtainStyledAttributes(attrs, R.styleable.CircleView);
        // 2. 解析 CircleView 集合中的属性
        // 这里解析其 circle_color 属性(若没指定,则默认红色)
        mColor = a.getColor(R.styleable.CircleView_circle_color, Color.RED);
        // 3. 实现资源
        a.recycle();
        init();
    }

    // 初始化
    private void init() {
        mPaint.setColor(mColor);
    }

    @Override
    protected void onMeasure(int widthMeasureSpec, int heightMeasureSpec) {
        super.onMeasure(widthMeasureSpec, heightMeasureSpec);
        int widthSpecMode = MeasureSpec.getMode(widthMeasureSpec);
        int widthSpecSize = MeasureSpec.getMode(widthMeasureSpec);
        int heightSpecMode = MeasureSpec.getMode(heightMeasureSpec);
        int heightSpecSize = MeasureSpec.getMode(heightMeasureSpec);
        // 针对 wrap_content 模式,指定默认宽高 200px
        if (widthSpecMode == MeasureSpec.AT_MOST && heightSpecMode == MeasureSpec.AT_MOST) {
            setMeasuredDimension(200, 200);
        } else if (widthSpecMode == MeasureSpec.AT_MOST) {
            setMeasuredDimension(200, heightSpecSize);
        } else if (heightSpecMode == MeasureSpec.AT_MOST) {
            setMeasuredDimension(widthSpecSize, 200);
        }
    }

    @Override
    protected void onDraw(Canvas canvas) {
        super.onDraw(canvas);
        // padding 的值
        final int paddingLeft = getPaddingLeft();
        final int paddingRight = getPaddingRight();
        final int paddingTop = getPaddingTop();
        final int paddingBottom = getPaddingBottom();
        // View 的宽
        int width = getWidth() - paddingLeft - paddingRight;
        // View 的高
        int height = getHeight() - paddingTop - paddingBottom;
        // 圆的半径
        int radius = Math.min(width, height) / 2;
        // 绘制圆
        canvas.drawCircle(paddingLeft + width / 2, paddingTop + height / 2, radius, mPaint);
    }
}
4.4.3.2 继承 ViewGroup 派生特殊的 Layout
采用此方式需要合适地处理 ViewGroup 的测量、布局这两个过程,并同时处理子元素的这两个过程。
需要说明的是,此方法实现一个很规范的自定义 View,是有一定的代价的(通过看 LinearLayout 等的源码可知其实现很复杂)。
在 3.5.3 节中,HorizontalScrollViewEx 就是通过继承自 ViewGroup 的自定义 View,它类似水平方向的 LinearLayout 的控件,它内部的子元素可以水平或竖直滑动(滑动冲突请参考)。这里实现其主要功能,不规范的地方会说明。
这里假设所有子元素的宽高都一样,先看其 onMeasure 方法如下:
    @Override
    protected void onMeasure(int widthMeasureSpec, int heightMeasureSpec) {
        super.onMeasure(widthMeasureSpec, heightMeasureSpec);
        int measureWidth = 0;
        int measureHeight = 0;
        final int childCount = getChildCount();
        measureChildren(widthMeasureSpec, heightMeasureSpec);

        int widthSpecMode = MeasureSpec.getMode(widthMeasureSpec);
        int widthSpecSize = MeasureSpec.getMode(widthMeasureSpec);
        int heightSpecMode = MeasureSpec.getMode(heightMeasureSpec);
        int heightSpecSize = MeasureSpec.getMode(heightMeasureSpec);
        // 1. 判断是否有子元素,若无子元素,则把自己的宽/高设置为 0
        if (childCount == 0) {
            setMeasuredDimension(0, 0);
        }
        // 2. 判断宽和高是否采用 wrap_content
        // 若宽采用 wrap_content,则 HorizontalScrollViewEx 的宽度是所有子元素的宽度之和
        // 若高采用 wrap_content,则 HorizontalScrollViewEx 的高度是第一个子元素的高度
        else if (widthSpecMode == MeasureSpec.AT_MOST && heightSpecMode == MeasureSpec.AT_MOST) {
            final View childView = getChildAt(0);
            measureWidth = childView.getMeasuredWidth() * childCount;
            measureHeight = childView.getMeasuredHeight();
            setMeasuredDimension(measureWidth, measureHeight);
        } else if (widthSpecMode == MeasureSpec.AT_MOST) {
            final View childView = getChildAt(0);
            measureWidth = childView.getMeasuredWidth() * childCount;
            setMeasuredDimension(measureWidth, heightSpecSize);
        } else if (heightSpecMode == MeasureSpec.AT_MOST) {
            final View childView = getChildAt(0);
            measureHeight = childView.getMeasuredHeight();
            setMeasuredDimension(widthSpecSize, measureHeight);
        }
    }
上述代码不规范的地方有两点,第一点是无子元素时不该直接把宽/高设置为 0,而应该根据 LayoutParams 的宽/高来做相应处理;第二点是测量 HorizontalScrollViewEx 的宽/高时没有考虑到 padding 和子元素的 margin,这会影响到其宽/高。
接着看其 onLayout 方法如下:
    @Override
    protected void onLayout(boolean changed, int l, int t, int r, int b) {
        int childLeft = 0;
        final int childCount = getChildCount();
        mChildrenSize = childCount;
        // 遍历所有的子元素,若子元素不是 GONE 状态,则通过 layout 方法将其放在合适的位置上
        for (int i = 0; i < childCount; i++) {
            final View childView = getChildAt(i);
            final int childWidth = childView.getMeasuredWidth();
            mChildWidth = childWidth;
            childView.layout(childLeft, 0, childLeft + childWidth, childView.getMeasuredHeight());
            childLeft += childWidth;
        }
    }
上述代码作用是完成子元素的定位,不规范的地方仍是没有考虑到 padding 和子元素的 margin。
最后,给出 HorizontalScrollViewEx 的完整代码如下:
public class HorizontalScrollViewEx extends ViewGroup {

    private int mChildrenSize;
    private int mChildWidth;
    private int mChildIndex;

    // 分别记录上次滑动的坐标
    private int mLastX = 0;
    private int mLastY = 0;

    // 分别记录上次滑动的坐标(onInterceptTouchEvent)
    private int mLastXIntercept = 0;
    private int mLastYIntercept = 0;

    private Scroller mScroller;

    private VelocityTracker mVelocityTracker;

    public HorizontalScrollViewEx(Context context) {
        super(context);
        init();
    }

    public HorizontalScrollViewEx(Context context, AttributeSet attrs) {
        super(context, attrs);
        init();
    }

    public HorizontalScrollViewEx(Context context, AttributeSet attrs, int defStyleAttr) {
        super(context, attrs, defStyleAttr);
        init();
    }

    private void init() {
        if (mScroller == null) {
            mScroller = new Scroller(getContext());
            mVelocityTracker = VelocityTracker.obtain();
        }
    }

    @Override
    public boolean onInterceptTouchEvent(MotionEvent ev) {
        boolean intercepted = false;
        int x = (int) ev.getX();
        int y = (int) ev.getY();

        switch (ev.getAction()) {
            case MotionEvent.ACTION_DOWN:
                intercepted = false;
                if (!mScroller.isFinished()) {
                    // 为优化滑动体验
                    mScroller.abortAnimation();
                    intercepted = true;
                }
                break;
            case MotionEvent.ACTION_MOVE:
                int deltaX = x - mLastXIntercept;
                int deltaY = y - mLastYIntercept;
                if (Math.abs(deltaX) > Math.abs(deltaY)) {
                    // 在滑动过程中,当水平方向的距离大就判断水平滑动,让父容器拦截事件
                    intercepted = true;
                } else {
                    // 而竖直距离大于就不拦截,事件就传递给了ListView,
                    // 从而 ListView能上下滑动,这就解决了冲突
                    intercepted = false;
                }
                break;
            case MotionEvent.ACTION_UP:
                intercepted = false;
                break;
        }
        mLastX = x;
        mLastY = y;
        mLastXIntercept = x;
        mLastYIntercept = y;
        return intercepted;
    }

    @Override
    public boolean onTouchEvent(MotionEvent event) {
        mVelocityTracker.addMovement(event);
        int x = (int) event.getX();
        int y = (int) event.getY();
        switch (event.getAction()) {
            case MotionEvent.ACTION_DOWN:
                if (!mScroller.isFinished()) {
                    mScroller.abortAnimation();
                }
                break;
            case MotionEvent.ACTION_MOVE:
                int scrollX = getScrollX();
                mVelocityTracker.computeCurrentVelocity(1000);
                float xVelocity = mVelocityTracker.getXVelocity();

                if (Math.abs(xVelocity) >= 50) {
                    mChildIndex = xVelocity > 0 ? mChildIndex - 1 : mChildIndex + 1;
                } else {
                    mChildIndex = (scrollX + mChildWidth / 2) / mChildWidth;
                }
                mChildIndex = Math.max(0, Math.min(mChildIndex, mChildrenSize - 1));
                int dx = mChildIndex * mChildWidth - scrollX;
                smoothScrollBy(dx, 0);
                mVelocityTracker.clear();
                break;
        }
        mLastX = x;
        mLastY = y;
        return true;
    }

    @Override
    protected void onMeasure(int widthMeasureSpec, int heightMeasureSpec) {
        super.onMeasure(widthMeasureSpec, heightMeasureSpec);
        int measureWidth = 0;
        int measureHeight = 0;
        final int childCount = getChildCount();
        measureChildren(widthMeasureSpec, heightMeasureSpec);

        int widthSpecMode = MeasureSpec.getMode(widthMeasureSpec);
        int widthSpecSize = MeasureSpec.getMode(widthMeasureSpec);
        int heightSpecMode = MeasureSpec.getMode(heightMeasureSpec);
        int heightSpecSize = MeasureSpec.getMode(heightMeasureSpec);
        // 1. 判断是否有子元素,若无子元素,则把自己的宽/高设置为 0
        if (childCount == 0) {
            setMeasuredDimension(0, 0);
        }
        // 2. 判断宽和高是否采用 wrap_content
        // 若宽采用 wrap_content,则 HorizontalScrollViewEx 的宽度是所有子元素的宽度之和
        // 若高采用 wrap_content,则 HorizontalScrollViewEx 的高度是第一个子元素的高度
        else if (widthSpecMode == MeasureSpec.AT_MOST && heightSpecMode == MeasureSpec.AT_MOST) {
            final View childView = getChildAt(0);
            measureWidth = childView.getMeasuredWidth() * childCount;
            measureHeight = childView.getMeasuredHeight();
            setMeasuredDimension(measureWidth, measureHeight);
        } else if (widthSpecMode == MeasureSpec.AT_MOST) {
            final View childView = getChildAt(0);
            measureWidth = childView.getMeasuredWidth() * childCount;
            setMeasuredDimension(measureWidth, heightSpecSize);
        } else if (heightSpecMode == MeasureSpec.AT_MOST) {
            final View childView = getChildAt(0);
            measureHeight = childView.getMeasuredHeight();
            setMeasuredDimension(widthSpecSize, measureHeight);
        }
    }

    @Override
    protected void onLayout(boolean changed, int l, int t, int r, int b) {
        int childLeft = 0;
        final int childCount = getChildCount();
        mChildrenSize = childCount;
        // 遍历所有的子元素,若子元素不是 GONE 状态,则通过 layout 方法将其放在合适的位置上
        for (int i = 0; i < childCount; i++) {
            final View childView = getChildAt(i);
            final int childWidth = childView.getMeasuredWidth();
            mChildWidth = childWidth;
            childView.layout(childLeft, 0, childLeft + childWidth, childView.getMeasuredHeight());
            childLeft += childWidth;
        }
    }

    private void smoothScrollBy(int dx, int dy) {
        mScroller.startScroll(getScrollX(), 0, dx, 0, 500);
        invalidate();
    }

    @Override
    public void computeScroll() {
        if (mScroller.computeScrollOffset()) {
            scrollTo(mScroller.getCurrX(), mScroller.getCurrY());
            postInvalidate();
        }
    }

    @Override
    protected void onDetachedFromWindow() {
        mVelocityTracker.recycle();
        super.onDetachedFromWindow();
    }
}
4.4.4 自定义 View 的思想
面对陌生的自定义 View 时,需要用这种自定义 View思想去解决问题:首先掌握基本功,如 View 的弹性滑动、滑动冲突、绘制原理等;掌握基本功后,在面对新的自定义 View 时,要对其进行分类并选择合适的实现思路;另外,平时多积累一些自定义 View 的相关经验,慢慢做到融会贯通。
本篇文章就介绍到这。