ubuntu配置深度学习环境
安装ubuntu
清华镜像站 右侧点击获取下载链接,个人推荐使用衍生版本Xubuntu16.04 配置深度学习环境更简单,Xubuntu17.10目前没有对应版本的cuda及cudnn,后边会有说明怎么降内核来装cuda。Xubuntu18.04还没试过,或许也可以降内核来实现,如果只是存粹安装linux,使用这个最好!
固态硬盘支持ahci模式,安装系统前可参考这个查看是否打开,没有的话视情况去bios进行更改。
- 单硬盘双系统要特别分区,预留出来未分配的主分区(划分主分区原理),新硬盘使用磁盘管理或DiskGenius划分即可,注意要4K对齐。
- 使用好压等压缩工具进入Ubuntu镜像中的casper文件夹,将其中的“initrd.lz”和“vmlinuz.efi”拷贝到C盘根目录下,同时将Ubuntu镜像文件拷贝至C盘根目录下
- EasyBCD设置NeoGrub引导,然后编辑,黑色斜体对应上边三个文件的路径及名称,hdd0,0代表第一磁盘第一分区
参考:利用EasyBCD引导安装Ubuntu16.04
title Install Ubuntu
root (***hd0,0***)
kernel (hd0,0)/vmlinuz.efi boot=casper iso-scan/filename=/***xubuntu-17.10-desktop-amd64.iso*** ro quiet splash locale=zh_CN.UTF-8
initrd (***hd0,0***)/initrd.lz- Ubuhtu安装 建议只建立一个‘’/‘’主分区,安装之前记得sudo umount -l /isodevice,不要勾选下载更新
- 利用EasyBCD添加Xubuntu启动,记得选取boot所在分区,grub类型即可
- 修复可通过上边方法进入同版本镜像的liveCD,输入以下代码 参考文章
sudo add-apt-repository ppa:yannubuntu/boot-repair && sudo apt-get update 配置源和更新
sudo apt-get install -y boot-repair && boot-repair 等待弹出窗口
注意,非efi启动的设备,要在高级模式里去掉相关选项,不然会失败,成功后自动生成一个修复记录链接
配置Linux的使用
- 安装 Terminator 终端(最好用,强烈推荐!)
sudo apt-get install terminator
- 设置启动等待时间及刷屏界面 具体参考这里
sudo apt install gedit #不想安装,也可使用vi/vim
sudo gedit /etc/default/grub
打开修改以下内容GRUB_DEFAULT=0 GRUB_HIDDEN_TIMEOUT=0 GRUB_HIDDEN_TIMEOUT_QUIET=true GRUB_TIMEOUT=10 #设置开机启动等待时间
GRUB_DISTRIBUTOR=lsb_release -i -s 2> /dev/null || echo Debian
GRUB_CMDLINE_LINUX_DEFAULT=”quiet splash” #quiet splash
会关闭代码刷屏启动界面,删掉即可开启 GRUB_CMDLINE_LINUX=”“sudo update-grub #更新启动项
- 更改开机主题动画(可选) 主题网站
sudo update-alternatives –config default.plymouth #选择主题
sudo update-initramfs -u #更新主题
init 6 #固态硬盘开机过快,基本看不到动画,所以也看不到什么效果
- Root用户设置密码,并去除登录错误
sudo passwd root
切换root 登录
如果遇到Error found when loading /root/.profile stdin: is not a tty
sudo gedit /root/.profile
把mesg n 改为 tty -s && mesg n
init 6 重启即可
- 更换火狐新版浏览器 参考文章
首先去官网下载Firefox-latest-x86_64.tar.bz2
sudo apt-get autoremove –purge firefox #彻底删除包及其依赖的软件包+配置文件
tar -xjvf Firefox-latest-x86_64.tar.bz2 #需在下载文件路径下进入终端
sudo mv -v firefox/ /opt
sudo ln -s /opt/firefox/firefox /usr/bin/firefox #设置软链接,命令行下输入firefox才可使用
创建火狐桌面快捷方式,创建名为firefox.desktop的文件,新增内容如下:
[Desktop Entry]
Name=firefox
Comment=firefox
Exec=/opt/firefox/firefox
Icon=/opt/firefox/browser/chrome/icons/default/default128.png
Terminal=false
Type=Application
Categories=Network;WebBrowser;
Encoding=UTF-8
最后将firefox.desktop 文件复制到/usr/share/applications/ 命令如下:
sudo cp -v firefox.desktop /usr/share/applications/
init 6 #重启桌面
- Windows + Ubuntu双系统时间不一致 建议使用该文章中的方法一
sudo timedatectl set-local-rtc 1 #将硬件时间UTC改为CST
sudo apt-get install ntpdate #更新时间
sudo ntpdate time.windows.com #更新时间
sudo hwclock –localtime –systohc #将时间更新到硬件上
init 6 # 重启
至此,安装配置Ubuntu基本完成,如需配置深度学习环境请继续往下看。
配置Cuda9.0及cuDNN7.1
- 首先去软件更新里增填英伟达驱动,推荐输入下边命令更新:参考文章
sudo add-apt-repository ppa:graphics-drivers/ppa
sudo apt update
sudo apt install nvidia-384 nvidia-384-dev
nvidia-smi #如果差看不到 ,重启试试
- 由于cuda只支持7以下的gcc/g++版本,17.10及以上的ubuntu,对gcc/g++进行降级(低版本ubuntu可直接安装cuda)
- gcc-5 降级
sudo apt-get install gcc-5 gcc-5-multilib g++-5 g++-5-multilib
#安装后输入gcc –version发现还是7.2版本,输入:
sudo update-alternatives –install /usr/bin/gcc gcc /usr/bin/gcc-5 40
sudo update-alternatives –install /usr/bin/gcc gcc /usr/bin/gcc-7 50
sudo update-alternatives –config gcc #输入gcc-5对应编号,回车
- g++降级
sudo update-alternatives –install /usr/bin/g++ g++ /usr/bin/g++-5 50
sudo update-alternatives –install /usr/bin/g++ g++ /usr/bin/g++-4.9 40
sudo update-alternatives –config g++ #输入g++-5对应编号,回车
- 安装cuda三个安装包全部下载
chmod +x cuda_9.0*.run
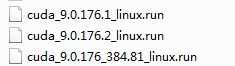
sudo ./cuda_9.0.176_384.81_linux.run –override
接着回车两分钟滚完进度条,开始安装,陆续出现5个选择,一定要注意第二个选项选择n
Install NVIDIA Accelerated Graphics Driver for Linux-x86_64 384.81? 选n!!
sudo ./cuda_9.0.176.1_linux.run –override #安装方法同上
sudo ./cuda_9.0.176.2_linux.run –override
测试cuda是否可用
cd ~/NVIDIA_CUDA-9.0_Samples/5_Simulations/smokeParticles
make
../../bin/x86_64/linux/release/smokeParticles
看到烟雾的图像说明安装成功,输入nvcc –version查看一下cuda的版本,如若找不到,使用下边代码试试
sudo ln -s /usr/local/cuda/bin/nvcc /usr/bin/nvcc # 创建软链接链接到当前cuda的nvcc
nvcc –version
安装cuDNN需要注册下载 cuDNN v7.1.4 Library for Linux

输入以下命令进行解压覆盖和变量更新:
tar -xzvf cudnn-9.0-linux-x64-v7.1.tgz
sudo cp cuda/include/cudnn.h /usr/local/cuda/include
sudo cp cuda/lib64/libcudnn* /usr/local/cuda/lib64
sudo chmod a+r /usr/local/cuda/include/cudnn.h
sudo chmod a+r /usr/local/cuda/lib64/libcudnn*
cd ~
sudo gedit .bashrc #把lib64文件夹添加到环境变量 加入下边一行到末尾
export LD_LIBRARY_PATH=/usr/local/cuda/lib64:$LD_LIBRARY_PATH
source .bashrc
更新变量,配置完成,如需切换cuda及cuDNN可参考 多版本cuda切换
配置深度学习环境(anaconda、keras、tensorflow、pytorch)
系统裸环境下配置torch会出问题,可参考这个,由于pytorch在anaconda第三方远支持比较好,所以建议使用conda并 配合pip进行环境的搭建。
下载miniconda最新包 Miniconda3-latest-Linux-x86_64.sh
代码如下:
sudo sh Miniconda3-latest-Linux-x86_64.sh
conda config --add channels https://mirrors.tuna.tsinghua.edu.cn/anaconda/pkgs/free/
conda config --add channels https://mirrors.tuna.tsinghua.edu.cn/anaconda/pkgs/main/conda
config --add channels https://mirrors.tuna.tsinghua.edu.cn/anaconda/cloud/conda-forge/
conda config --add channels https://mirrors.tuna.tsinghua.edu.cn/anaconda/cloud/msys2/
conda config --add channels https://mirrors.tuna.tsinghua.edu.cn/anaconda/cloud/bioconda/
conda config --add channels https://mirrors.tuna.tsinghua.edu.cn/anaconda/cloud/menpo/
conda config --add channels https://mirrors.tuna.tsinghua.edu.cn/anaconda/cloud/pytorch/
conda create -n pstk python==3.64
source activate pstk
conda install pytorch cuda90 -c pytorch  #配置pytorch
pip install -U -i https://pypi.tuna.tsinghua.edu.cn/simple torchvision pandas sklearn matplotlib seaborn h5py==2.8.0rc1 opencv-python jupyter pillow tensorflow-gpu keras pydot-ng tqdm  #配置sklearn tensorflow-gpu keras等
jupyter notebook# 打开jupyter测试环境是否装好- 新建python3 test.ipynb, 编写如下内容:
import tensorflow as tf
from keras import *
from keras.models import *
a = tf.constant([1.0, 2.0, 3.0], shape=[3], name='a') b =
tf.constant([1.0, 2.0, 3.0], shape=[3], name='b') c = a + b
config =tf.ConfigProto(log_device_placement=True)  # 通过log_device_placement输出每一个运算设备过程。
config.gpu_options.per_process_gpu_memory_fraction =0.1
withtf.Session(config=config) as sess:
    print (sess.run(c))
注意观察命令窗口的gpu运算步骤,和下图一致,说明cudnn配置成功!

输出结果和下图一样,说明keras和tentorflow-gpu配置成功!

- 另起一个cell编写如下内容:
import torch
import torchvision
import torch.nn as nn
from torch.backends import cudnn
print(torch.__version__)
print(torchvision.__version__)
print(cudnn.is_acceptable(xx))
print(torch.cuda.is_available())
x = torch.Tensor([1.0])
print(x)
print(x.cuda())
print(x.cuda().cpu())
对应结果无误,说明pytorch配置成功,至此深度学习环境全部配置完成!