Windows 下 Red Pitaya SD card image制作过程
Red Pitaya SD card image下载地址
http://downloads.redpitaya.com/downloads/red_pitaya_OS-beta.img.zip
Red Pitaya SD card 镜像制作教程原文:
https://github.com/RedPitaya/RedPitaya/blob/master/doc/quickStart/SDcard/SDcard.rst
Windows Red Pitaya SD card 镜像制作
Windows
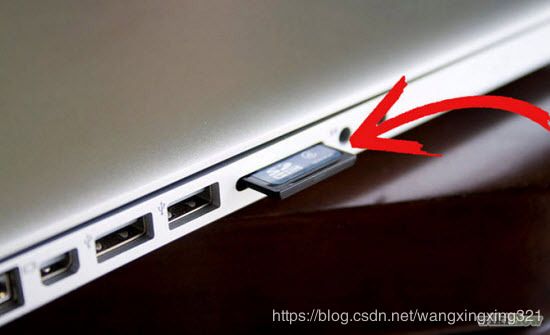
- Insert SD card into your PC or SD card reader.
将SD卡插入您的PC或SD卡读卡器
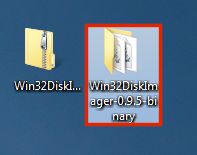
- Download Win32 Disk Imager and extract it.
下载Win32磁盘成像仪并提取它。
下载地址1:https://download.csdn.net/download/wangxingxing321/10755807
下载地址2:https://sourceforge.net/projects/win32diskimager/
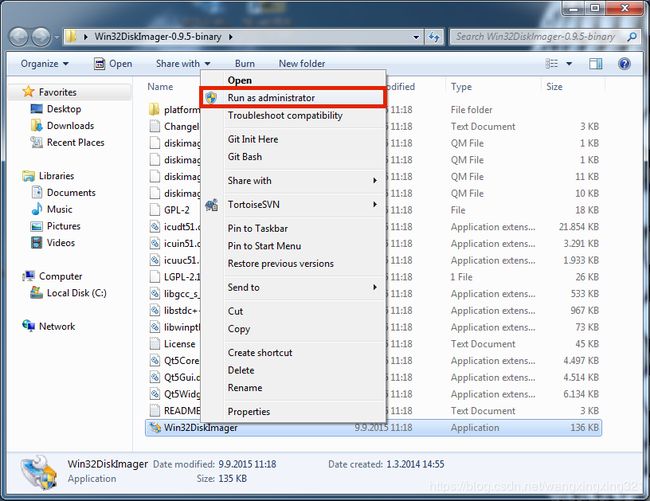
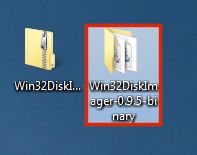
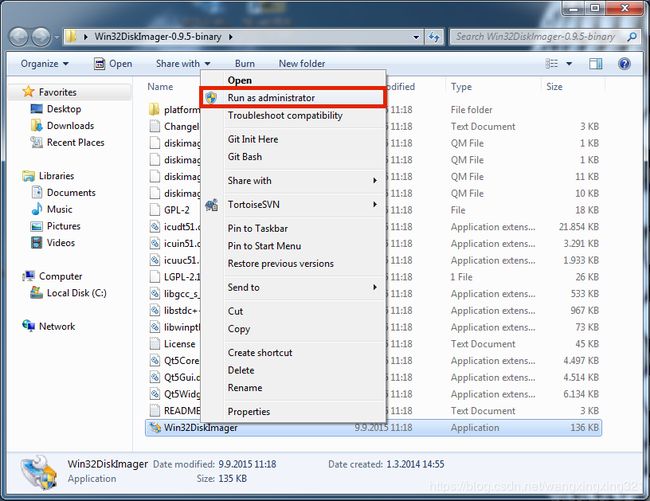
- Open unzipped folder, right-click on the WinDisk32Imager, and select Run as Administrator.
打开解压文件夹,右键单击WinDisk32Imager,并选择Run as Administrator。
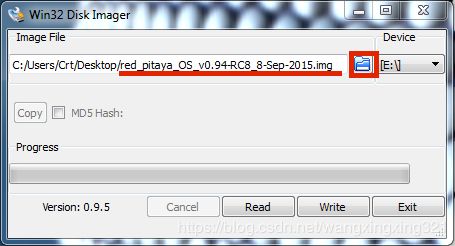
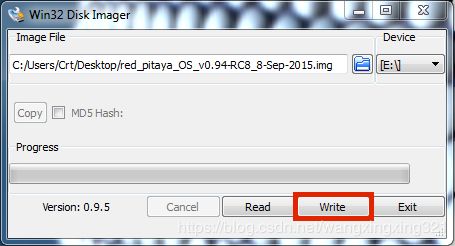
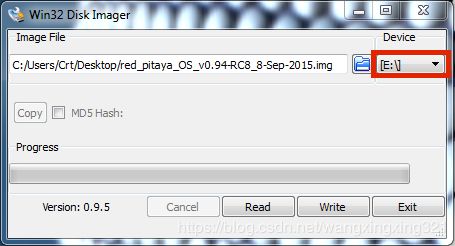
- Under image file box select unzipped Red Pitaya image file.
在图像文件框下选择unzip压缩红色火龙果图像文件。
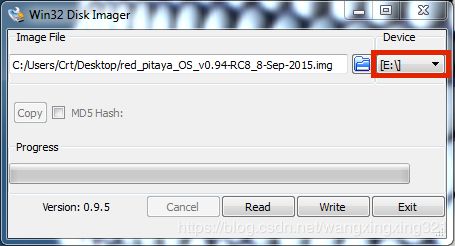
- Under device box select the drive letter of the SD card.
在设备框下选择SD卡的驱动器号。
Note
请注意
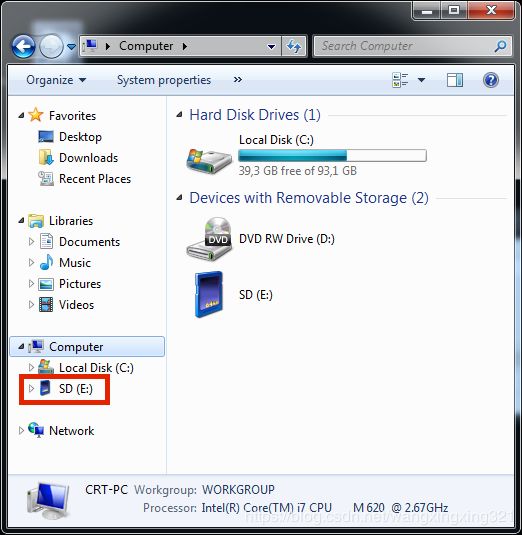
Be careful to select the correct drive. If you choose the wrong one you risk rasing data from the computer's hard disk! You can easily see the drive letter (for example E:) by looking in the left column of Windows Explorer.
小心选择正确的驱动器。如果你选错了,你就有可能消除电脑硬盘上的数据! 通过查看Windows资源管理器的左列,您可以很容易地看到驱动器字母(例如E:)。
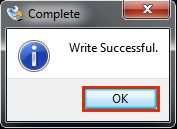
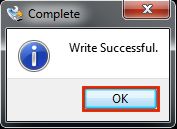
- Click Write and wait for the write to complete.
单击Write,等待写入完成。
- Exit the Imager. 退出成像仪。
Red Pitaya SD card image下载地址
http://downloads.redpitaya.com/downloads/red_pitaya_OS-beta.img.zip
Red Pitaya SD card 镜像制作教程原文:
https://sourceforge.net/projects/win32diskimager/
Windows Red Pitaya SD card 镜像制作
Windows
- Insert SD card into your PC or SD card reader.
将SD卡插入您的PC或SD卡读卡器
- Download Win32 Disk Imager and extract it.
下载Win32磁盘成像仪并提取它。
下载地址:https://sourceforge.net/projects/win32diskimager/
- Open unzipped folder, right-click on the WinDisk32Imager, and select Run as Administrator.
打开解压文件夹,右键单击WinDisk32Imager,并选择Run as Administrator。
- Under image file box select unzipped Red Pitaya image file.
在图像文件框下选择unzip压缩红色火龙果图像文件。
- Under device box select the drive letter of the SD card.
在设备框下选择SD卡的驱动器号。
Note
请注意
Be careful to select the correct drive. If you choose the wrong one you risk rasing data from the computer's hard disk! You can easily see the drive letter (for example E:) by looking in the left column of Windows Explorer.
小心选择正确的驱动器。如果你选错了,你就有可能消除电脑硬盘上的数据! 通过查看Windows资源管理器的左列,您可以很容易地看到驱动器字母(例如E:)。
- Click Write and wait for the write to complete.
单击Write,等待写入完成。
- Exit the Imager. 退出成像仪。

