加入完整的导航
构思
设想的方式,应该是
- 第一页是朋友列表,每个朋友都是一个battle tag(暴雪账号)
- 第二页是某朋友所拥有的所有英雄列表
- 第三页就是我们前面的某英雄的基本信息列表,包括装备、基本属性、技能和追随者。
所以我们先添加几个view controller,再逐步细化。
首先从工具箱中拖拽一个navigation controller,Xcode会默认放一个nav controller和一个tableview controller。然后我们再放一个普通的ViewController。
这些controller的关联方式,按住ctrl键,点击table view controller,一直连接到view controller,松开后,选择"push"方式。同样,再按住ctrl键,点击view controller,一直连接到tab controller。
如果直接运行,还是会得到我们前面的界面,原始是root controller还是tab controller。根据上面设计,我们应该把nav controller设置为root controller。
选择nav controller,在attributes inspector上,勾选initial view controller即可。
验证导航效果
设置事件
在table view controller上,我们增加一个按钮,文字是:Click me from table view。
在view controller上,增加一个按钮,文字是:Click me from view.
下面我们实现点击按钮的事件。
定义一个继承于TableViewController的类,叫做UITableViewControllerProfile。点击story board,选择table controller,在右侧的identity Inspector上修改class名字为刚刚建立的类名。点击Assistant Editor,再点击刚刚加上的按钮,按住ctrl键,拖放到.m文件的@interface部分中,选择action,生成一个事件。
同样,增加一个继承于UIViewController的类,叫做UIViewControllerHero。同样增加一个按钮事件。
设置视图的ID
为了从代码中能够对我们上面修改了类名的controller进行操作,最简单的方式是为view controller设置一个唯一ID。
从story board中选择我们刚刚添加的UI View Controller(这个就是英雄列表),在Identity Inspector中,添加storyboard id,名字为:identityHeroController
同样,设置Tab Controller的ID为:identityDetailedController(这个是我们开始做的那4个tab页)
根据ID进行导航
在table controller的.m文件中,找到buttonTestClicked事件
增加如下代码:
我们可以看到,字符串identityHeroController就是我们在上面Identity Inspector中设置的字符串。
同样,在view controller中的button 做类似的动作
运行后,我们看一下效果。
这是table view controller那一页
点击按钮,我们会导航到英雄列表页面。注意观察左上方,有了一个回退按钮:Root View Controller。
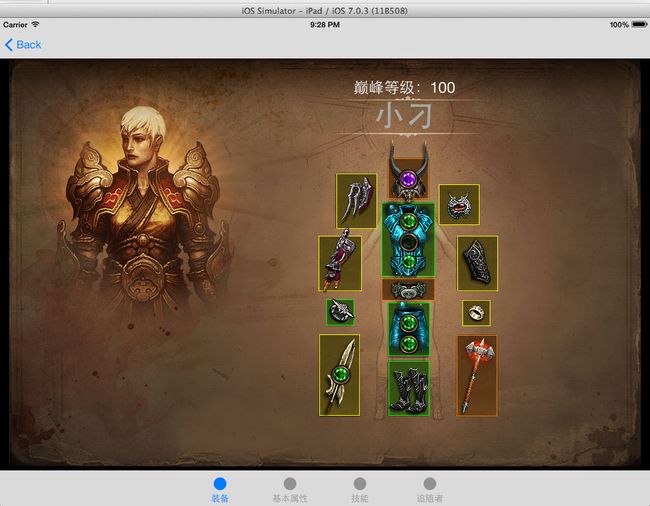
再点击按钮"Click me from view",我们就导航到了我们习惯的tab controller了。
如果我们按左上角的


