Tensorflow数据读取方式主要包括以下三种
- Preloaded data:预加载数据
- Feeding: 通过Python代码读取或者产生数据,然后给后端
- Reading from file: 通过TensorFlow队列机制,从文件中直接读取数据
前两种方法比较基础而且容易理解,在Tensorflow入门教程、书本中经常可以见到,这里不再进行介绍。 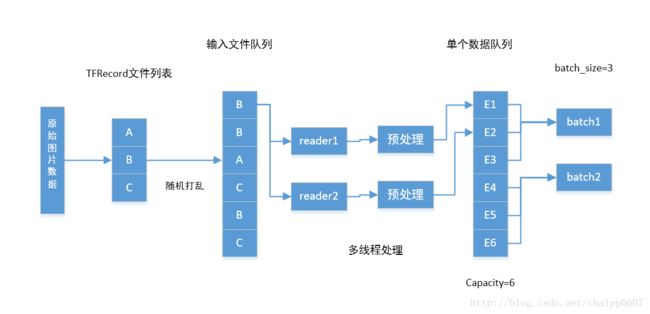
在介绍Tensorflow第三种读取数据方法之前,介绍以下有关队列相关知识
Queue(队列)
队列是用来存放数据的,并且tensorflow中的Queue中已经实现了同步机制,所以我们可以放心的往里面添加数据还有读取数据。如果Queue中的数据满了,那么en_queue(队列添加元素)操作将会阻塞,如果Queue是空的,那么dequeue(队列抛出元素)操作就会阻塞.在常用环境中,一般是有多个en_queue线程同时像Queue中放数据,有一个dequeue操作从Queue中取数据。
Coordinator(协调管理器)
Coordinator主要是用来帮助管理多个线程,协调多线程之间的配合
 1 # Thread body: loop until the coordinator indicates a stop was requested.
 2 # If some condition becomes true, ask the coordinator to stop.
 3 #将coord传入到线程中,来帮助它们同时停止工作
 4 def MyLoop(coord):
 5   while not coord.should_stop():
 6     ...do something...
 7     if ...some condition...:
 8       coord.request_stop()
 9 # Main thread: create a coordinator.
10 coord = tf.train.Coordinator()
11 # Create 10 threads that run 'MyLoop()'
12 threads = [threading.Thread(target=MyLoop, args=(coord,)) for i in xrange(10)]
13 # Start the threads and wait for all of them to stop.
14 for t in threads:
15   t.start()
16 coord.join(threads)
QueueRunner()
QueueRunner可以创建多个线程对队列(queue)进行插入(enqueue)操作,它是一个op,这些线程可以通过上述的Coordinator协调器来协调工作。
在深度学习中样本数据集有多种存储编码形式,以经典数据集Cifar-10为例,公开共下载的数据有三种存储方式:Bin(二进制)、Python以及Matlab版本。此外,我们常用的还有csv(天池竞赛、百度竞赛等)比较常见或txt等,当然对图片存储最为直观的还是可视化展示的TIF、PNG、JPG等。Tensorflow官方推荐使用他自己的一种文件格式叫TFRecord,具体实现及应用会在以后详细介绍。
从上图中可知,Tensorflow数据读取过程主要包括两个队列(FIFO),一个叫做文件队列,主要用作对输入样本文件的管理(可以想象,所有的训练数据一般不会存储在一个文件内,该部分主要完成对数据文件的管理);另一个叫做数据队列,如果对应的数据是图像可以认为该队列中的每一项都是存储在内存中的解码后的一系列图像像素值。
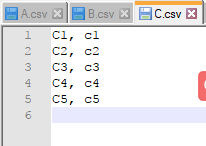
下面,我们分别新建3个csv文件->A.csv;B.csv;C.csv,每个文件下分别用X_i, y_i代表训练样本的数据及标注信息。 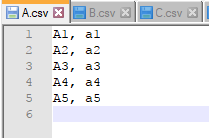

 1 #-*- coding:gbk -*-
 2 import tensorflow as tf
 3 # 队列1:生成一个先入先出队列和一个QueueRunner,生成文件名队列
 4 filenames = ['A.csv', 'B.csv', 'C.csv']
 5 filename_queue = tf.train.string_input_producer(filenames, shuffle=False, num_epochs=2)
 6 # 定义Reader
 7 reader = tf.TextLineReader()
 8 key, value = reader.read(filename_queue)
 9 # 定义Decoder
10 example, label = tf.decode_csv(value, record_defaults=[['string'], ['string']])
11 with tf.Session() as sess:
12     coord = tf.train.Coordinator() #创建一个协调器,管理线程
13     threads = tf.train.start_queue_runners(coord=coord) #启动QueueRunner, 此时文件名队列已经进队。
14     for i in range(12):
15         e_val, l_val = sess.run([example, label])
16         print(e_val, l_val)
17     coord.request_stop()
18     coord.join(threads)
程序中,首先根据文件列表,通过tf.train.string_input_producer(filenames, shuffle=False)函数建立了一个对应的文件管理队列,其中shuffle=False表 示不对文件顺序进行打乱(True表示打乱,每次输出顺序将不再一致)。此外,还可通过设置第三个参数num_epochs来控制文件数据多少。
运行结果如下: 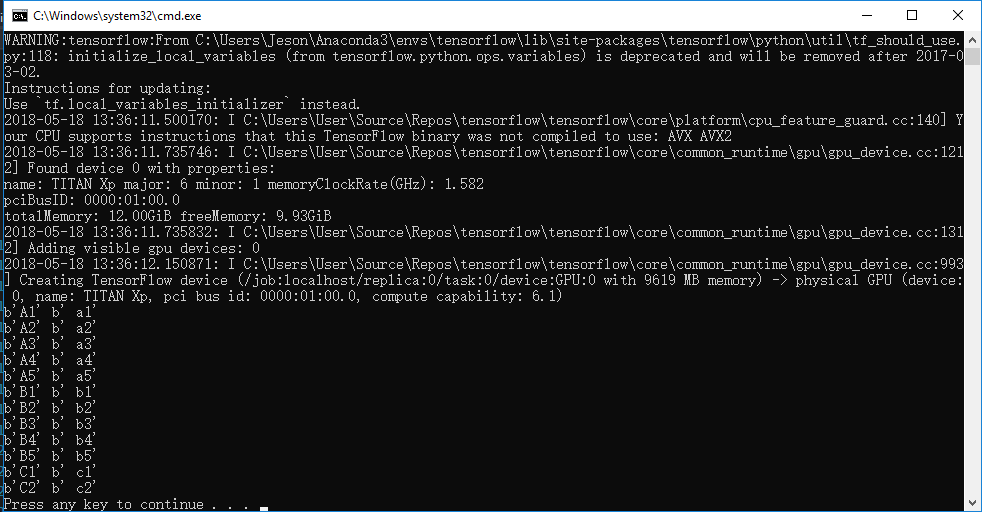
上段程序中,主要完成以下几方面工作:
- 针对文件名列表,建立对应的文件队列
- 使用reader读取对应文件数据集
- 解码数据集,得到样本example和标注label
感兴趣的读者可以打开tf.train.string_input_producer(...)函数,可以看到如下代码
 1     """
 2  @compatibility(eager)
 3   Input pipelines based on Queues are not supported when eager execution is
 4   enabled. Please use the `tf.data` API to ingest data under eager execution.
 5   @end_compatibility
 6   """
 7   if context.in_eager_mode():
 8     raise RuntimeError(
 9         "Input pipelines based on Queues are not supported when eager execution"
10         " is enabled. Please use tf.data to ingest data into your model"
11         " instead.")
12   with ops.name_scope(name, "input_producer", [input_tensor]):
13     input_tensor = ops.convert_to_tensor(input_tensor, name="input_tensor")
14     element_shape = input_tensor.shape[1:].merge_with(element_shape)
15     if not element_shape.is_fully_defined():
16       raise ValueError("Either `input_tensor` must have a fully defined shape "
17                        "or `element_shape` must be specified")
18     if shuffle:
19       input_tensor = random_ops.random_shuffle(input_tensor, seed=seed)
20     input_tensor = limit_epochs(input_tensor, num_epochs)
21     q = data_flow_ops.FIFOQueue(capacity=capacity,
22                                 dtypes=[input_tensor.dtype.base_dtype],
23                                 shapes=[element_shape],
24                                 shared_name=shared_name, name=name)
25     enq = q.enqueue_many([input_tensor])
26     queue_runner.add_queue_runner(
27         queue_runner.QueueRunner(
28             q, [enq], cancel_op=cancel_op))
29     if summary_name is not None:
30       summary.scalar(summary_name,
31                      math_ops.to_float(q.size()) * (1. / capacity))
32     return q
可以看到该段代码主要完成以下工作:
- 创建队列Queue
- 创建线程enqueue_many
- 添加QueueRunner到collection中
- 返回队列Queue
数据解析
1 # 定义Reader
2 reader = tf.TextLineReader()
3 key, value = reader.read(filename_queue)
4 # 定义Decoder
5 example, label = tf.decode_csv(value, record_defaults=[['string'], ['string']])
这里,我们通过定义一个reader来读取每个数据文件内容,也可图中也展示了TensorFlow支持定义多个reader并且读取文件队列中文件内容,从而提供数据读取效率。然后,采用一个decoder_csv函数对读取的原始CSV文件内容进行解码,平时我们也可根据自己数据存储格式选择不同数据解码方式。在这里需要指出的是,上述程序中并没有用到图中展示的第二个数据队列,这是为什么呢。
实际上做深度学习or机器学习训练过程中,为了保证训练过程的高效性通常不采用单个样本数据给训练模型,而是采用一组N个数据(称作mini-batch),并把每组样本个数N成为batch-size。现在假设我们每组需要喂给模型N个数据,需通过N次循环读入内存,然后再通过GPU进行前向or返向传播运算,这就意味着GPU每次运算都需要一段时间等待CPU读取数据,从而大大降低了训练效率。而第二个队列(数据队列)就是为了解决这个问题提出来的,代码实现即为:tf.train.batch()和 tf.train.shuffle_batch,这两个函数的主要区别在于是否需要将列表中数据进行随机打乱。
 1 #-*- coding:gbk -*-
 2 import tensorflow as tf
 3 # 生成一个先入先出队列和一个QueueRunner,生成文件名队列
 4 filenames = ['A.csv', 'B.csv', 'C.csv']
 5 filename_queue = tf.train.string_input_producer(filenames, shuffle=False, num_epochs=3)
 6 # 定义Reader
 7 reader = tf.TextLineReader()
 8 key, value = reader.read(filename_queue)
 9 # 定义Decoder
10 example, label = tf.decode_csv(value, record_defaults=[['string'], ['string']])
11 #example_batch, label_batch = tf.train.shuffle_batch([example,label], batch_size=16, capacity=200, min_after_dequeue=100, num_threads=2)
12 example_batch, label_batch = tf.train.batch([example,label], batch_size=8, capacity=200, num_threads=2)
13 #example_list = [tf.decode_csv(value, record_defaults=[['string'], ['string']])
14 #         for _ in range(2)] # Reader设置为2
15 ### 使用tf.train.batch_join(),可以使用多个reader,并行读取数据。每个Reader使用一个线程。
16 #example_batch, label_batch = tf.train.batch_join(
17 #   example_list, batch_size=5)
18 init_local_op = tf.initialize_local_variables()
19 with tf.Session() as sess:
20     sess.run(init_local_op)
21     coord = tf.train.Coordinator() #创建一个协调器,管理线程
22     threads = tf.train.start_queue_runners(coord=coord) #启动QueueRunner, 此时文件名队列已经进队。
23     for i in range(5):
24 # Retrieve a single instance:
25         e_val, l_val = sess.run([example_batch, label_batch])
26         print(e_val, l_val)
27     coord.request_stop()
28     coord.join(threads)
使用tf.train.batch()函数,每次根据自己定义大小会返回一组训练数据,从而避免了往内存中循环读取数据的麻烦,提高了效率。并且还可以通过设置reader个数,实现多线程高效地往数据队列(或叫内存队列)中填充数据,直到文件队列读完所有文件(或文件数据不足一个batch size)。
tf.train.batch()程序运行结果如下 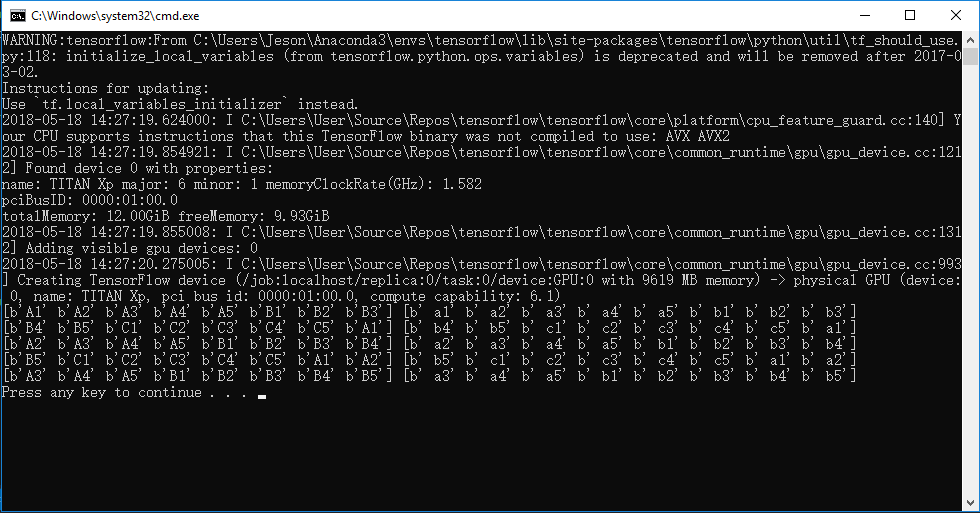
注:tf.train.batch([example,label], batch_size=8, capacity=200, num_threads=2)参数中,capacity表示队列大小,每次读出数据后队尾会按顺序依次补充。num_treads=2表示两个线程(据说在一个reader下可达到最优),batch_size=8表示每次返回8组训练数据,即batch size大小。tf.train.shuffle_batch()比tf.train.bathc()多一个min_after_dequeue参数,意思是在每次抛出一个batch后,剩余数据样本不少于多少个。