离线安装完成后,一般情况下只装了个基础环境,catalog镜像没有导入,本文主要侧重在jenkins的一些环境设置和演示。
1.导入镜像
首先follow下面链接下载镜像
https://docs.openshift.com/container-platform/3.11/install/disconnected_install.html
我们这里下载的主要是
$ docker pull registry.redhat.io/openshift3/jenkins-2-rhel7:
$ docker pull registry.redhat.io/openshift3/jenkins-slave-maven-rhel7:
$ docker pull registry.redhat.io/openshift3/jenkins-slave-nodejs-rhel7:
导入到本地镜像仓库
[root@node2 images]# docker images
REPOSITORY                                                   TAG                 IMAGE ID            CREATED             SIZE

registry.example.com/openshift3/jenkins-2-rhel7              latest              0f36706e2c53        10 months ago       1.13 GB
registry.example.com/openshift3/jenkins-slave-maven-rhel7    latest              5ce887d9bf31        11 months ago       1.02 GB
registry.example.com/openshift3/jenkins-slave-nodejs-rhel7   latest              a32c719893f2        11 months ago       971 MB
但现在进入查看jenkins image stream, 发现仍然是不可用状态。
[root@master ~]# oc describe is jenkins -n openshift Name: jenkins Namespace: openshift Created: 5 months ago Labels:Annotations: openshift.io/display-name=Jenkins openshift.io/image.dockerRepositoryCheck=2019-08-30T14:32:54Z Docker Pull Spec: docker-registry.default.svc:5000/openshift/jenkins Image Lookup: local=false Unique Images: 1 Tags: 3 1 tagged from registry.example.com/openshift3/jenkins-1-rhel7:latest prefer registry pullthrough when referencing this tag Provides a Jenkins 1.X server on RHEL 7. For more information about using this container image, including OpenShift considerations, see https://github.com/openshift/jenkins/blob/master/README.md. Tags: hidden, jenkins ! error: Import failed (InternalError): Internal error occurred: Get https://registry.example.com/v2/: dial tcp 192.168.56.105:443: connect: connection refused 5 months ago
执行导入
oc import-image jenkins --from=registry.example.com/openshift3/jenkins-2-rhel7:latest --confirm --insecure=true
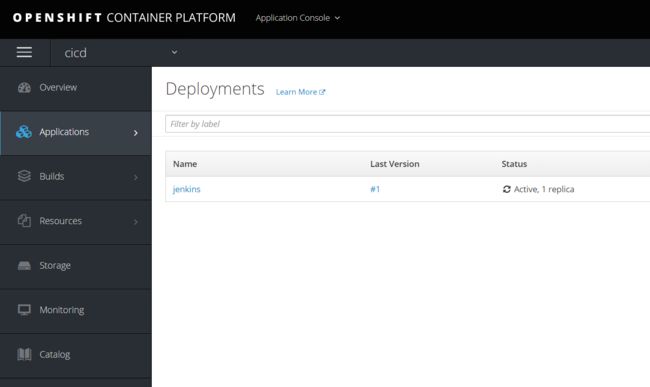
确认导入成功后,在项目中选择Jenkins(Ephemeral),然后等待创建完成。
注意这只是生成一个jenkins master环境。
同样导入用到的其他镜像
oc import-image mongodb:3.2  --from=registry.example.com/rhscl/mongodb-32-rhel7:latest  --confirm --insecure=true

oc import-image tomcat:8-slim  --from=registry.example.com/tomcat:8-slim  --confirm --insecure=true
2. 简单演示Pipeline部署
创建一个samplepiple.yaml文件,文件里面创建了一个pipeline,mongodb svc, mongodb 数据库。
因为是拿别人的修改的,所以里面的很多parameter没有用到。
apiVersion: v1
kind: Template
labels:
  template: application-template-sample-pipeline
message: |-
  A Jenkins server must be instantiated in this project to manage
  the Pipeline BuildConfig created by this template.  You will be able to log in to
  it using your OpenShift user credentials.
metadata:
  annotations:
    openshift.io/display-name: Pipeline Build Example
    description: |-
      This example showcases the new Jenkins Pipeline integration in OpenShift,
      which performs continuous integration and deployment right on the platform.
      The template contains a Jenkinsfile - a definition of a multi-stage CI/CD process - that
      leverages the underlying OpenShift platform for dynamic and scalable
      builds. OpenShift integrates the status of your pipeline builds into the web
      console allowing you to see your entire application lifecycle in a single view.
    iconClass: icon-jenkins
    tags: instant-app,jenkins
  name: jenkins-pipeline-example
parameters:
- description: The name assigned to all of the frontend objects defined in this template.
  displayName: Name
  name: NAME
  required: true
  value: nodejs-mongodb-example
- description: The exposed hostname that will route to the Node.js service, if left
    blank a value will be defaulted.
  displayName: Application Hostname
  name: APPLICATION_DOMAIN
- description: The URL of the repository with your application source code.
  displayName: Git Repository URL
  name: SOURCE_REPOSITORY_URL
  required: true
  value: https://github.com/openshift/nodejs-ex.git
- displayName: Database Name
  name: DATABASE_NAME
  required: true
  value: sampledb
- description: Username for MongoDB user that will be used for accessing the database.
  displayName: MongoDB Username
  from: user[A-Z0-9]{3}
  generate: expression
  name: DATABASE_USER
- description: Password for the MongoDB user.
  displayName: MongoDB Password
  from: '[a-zA-Z0-9]{16}'
  generate: expression
  name: DATABASE_PASSWORD
- description: Maximum amount of memory the Node.js container can use.
  displayName: Memory Limit
  name: MEMORY_LIMIT
  required: true
  value: 512Mi
- description: Maximum amount of memory the MongoDB container can use.
  displayName: Memory Limit (MongoDB)
  name: MEMORY_MONGODB_LIMIT
  required: true
  value: 512Mi
- displayName: Database Service Name
  name: DATABASE_SERVICE_NAME
  required: true
  value: mongodb
- description: Password for the database admin user.
  displayName: Database Administrator Password
  from: '[a-zA-Z0-9]{16}'
  generate: expression
  name: DATABASE_ADMIN_PASSWORD
- description: Set this to a branch name, tag or other ref of your repository if you
    are not using the default branch.
  displayName: Git Reference
  name: SOURCE_REPOSITORY_REF
- description: Set this to the relative path to your project if it is not in the root
    of your repository.
  displayName: Context Directory
  name: CONTEXT_DIR
- description: Github trigger secret.  A difficult to guess string encoded as part of the webhook URL.  Not encrypted.
  displayName: GitHub Webhook Secret
  from: '[a-zA-Z0-9]{40}'
  generate: expression
  name: GITHUB_WEBHOOK_SECRET
- description: A secret string used to configure the Generic webhook.
  displayName: Generic Webhook Secret
  from: '[a-zA-Z0-9]{40}'
  generate: expression
  name: GENERIC_WEBHOOK_SECRET
- description: The custom NPM mirror URL
  displayName: Custom NPM Mirror URL
  name: NPM_MIRROR
- description: The OpenShift Namespace where the NodeJS and MongoDB ImageStreams reside.
  displayName: Namespace
  name: NAMESPACE
  required: true
  value: openshift
objects:
- apiVersion: v1
  kind: BuildConfig
  metadata:
    annotations:
      pipeline.alpha.openshift.io/uses: '[{"name": "${NAME}", "namespace": "", "kind": "DeploymentConfig"}]'
    labels:
      name: sample-pipeline
    name: sample-pipeline
  spec:
    strategy:
      jenkinsPipelineStrategy:
        jenkinsfile: |-
          try {
             timeout(time: 20, unit: 'MINUTES') {
                node('nodejs') {
                    stage('deploy') {
                      openshift.withCluster() {
                        openshift.withProject() {
                          openshift.newApp("tomcat:8-slim", "--name=mytomcat").narrow('svc').expose()
                        }
                      }
                    }
                  }
             }
          } catch (err) {
             echo "in catch block"
             echo "Caught: ${err}"
             currentBuild.result = 'FAILURE'
             throw err
          }
      type: JenkinsPipeline
    triggers:
    - github:
        secret: secret101
      type: GitHub
    - generic:
        secret: secret101
      type: Generic
- apiVersion: v1
  kind: Service
  metadata:
    annotations:
      description: Exposes the database server
    name: ${DATABASE_SERVICE_NAME}
  spec:
    ports:
    - name: mongodb
      port: 27017
      targetPort: 27017
    selector:
      name: ${DATABASE_SERVICE_NAME}
- apiVersion: v1
  kind: DeploymentConfig
  metadata:
    annotations:
      description: Defines how to deploy the database
    name: ${DATABASE_SERVICE_NAME}
  spec:
    replicas: 1
    selector:
      name: ${DATABASE_SERVICE_NAME}
    strategy:
      type: Recreate
    template:
      metadata:
        labels:
          name: ${DATABASE_SERVICE_NAME}
        name: ${DATABASE_SERVICE_NAME}
      spec:
        containers:
        - env:
          - name: MONGODB_USER
            value: ${DATABASE_USER}
          - name: MONGODB_PASSWORD
            value: ${DATABASE_PASSWORD}
          - name: MONGODB_DATABASE
            value: ${DATABASE_NAME}
          - name: MONGODB_ADMIN_PASSWORD
            value: ${DATABASE_ADMIN_PASSWORD}
          image: ' '
          livenessProbe:
            initialDelaySeconds: 30
            tcpSocket:
              port: 27017
            timeoutSeconds: 1
          name: mongodb
          ports:
          - containerPort: 27017
          readinessProbe:
            exec:
              command:
              - /bin/sh
              - -i
              - -c
              - mongo 127.0.0.1:27017/$MONGODB_DATABASE -u $MONGODB_USER -p $MONGODB_PASSWORD
                --eval="quit()"
            initialDelaySeconds: 3
            timeoutSeconds: 1
          resources:
            limits:
              memory: ${MEMORY_MONGODB_LIMIT}
          volumeMounts:
          - mountPath: /var/lib/mongodb/data
            name: ${DATABASE_SERVICE_NAME}-data
        volumes:
        - emptyDir:
            medium: ""
          name: ${DATABASE_SERVICE_NAME}-data
    triggers:
    - imageChangeParams:
        automatic: true
        containerNames:
        - mongodb
        from:
          kind: ImageStreamTag
          name: mongodb:3.2
          namespace: ${NAMESPACE}
      type: ImageChange
    - type: ConfigChange
oc new-project pipelineproject

oc new-app -f  samplepipeline.yaml
--> Deploying template "pipelineproject/jenkins-pipeline-example" for "samplepipeline.yaml" to project pipelineproject

     Pipeline Build Example
     ---------
     This example showcases the new Jenkins Pipeline integration in OpenShift,
     which performs continuous integration and deployment right on the platform.
     The template contains a Jenkinsfile - a definition of a multi-stage CI/CD process - that
     leverages the underlying OpenShift platform for dynamic and scalable
     builds. OpenShift integrates the status of your pipeline builds into the web
     console allowing you to see your entire application lifecycle in a single view.

     A Jenkins server must be instantiated in this project to manage
     the Pipeline BuildConfig created by this template.  You will be able to log in to
     it using your OpenShift user credentials.

     * With parameters:
        * Name=nodejs-mongodb-example
        * Application Hostname=
        * Git Repository URL=https://github.com/openshift/nodejs-ex.git
        * Database Name=sampledb
        * MongoDB Username=userYOB # generated
        * MongoDB Password=k3XGgVjtUljSY8Tm # generated
        * Memory Limit=512Mi
        * Memory Limit (MongoDB)=512Mi
        * Database Service Name=mongodb
        * Database Administrator Password=1R4HJpe3kYHYpYb3 # generated
        * Git Reference=
        * Context Directory=
        * GitHub Webhook Secret=H23NSFhL2aiYBUX7YQJHOfSktEgFEdf2Oofi5hr8 # generated
        * Generic Webhook Secret=PUsLojY1wddyQNTg3w2JfDi5LNa8LfOdpSGP8bPO # generated
        * Custom NPM Mirror URL=
        * Namespace=openshift

--> Creating resources ...
    buildconfig.build.openshift.io "sample-pipeline" created
    service "mongodb" created
    deploymentconfig.apps.openshift.io "mongodb" created
--> Success
    Use 'oc start-build sample-pipeline' to start a build.
    Application is not exposed. You can expose services to the outside world by executing one or more of the commands below:
     'oc expose svc/mongodb'
    Run 'oc status' to view your app.
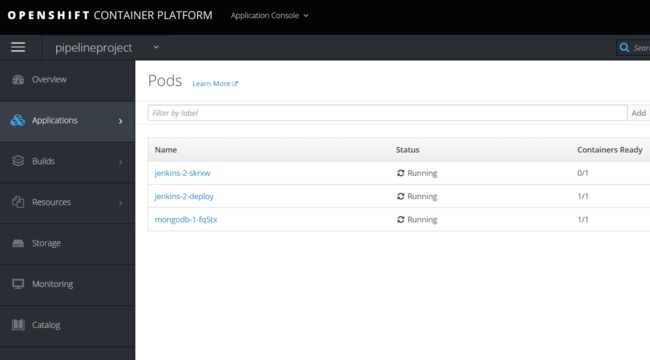
查看一下console,同时等待ready.
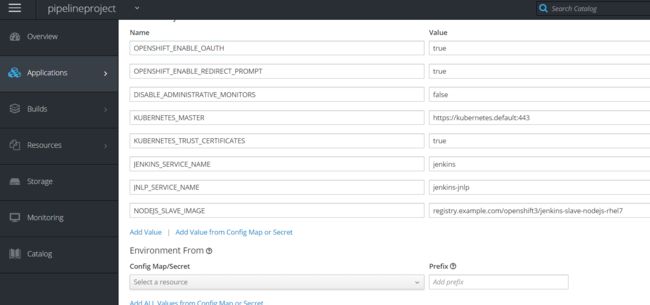
在jenkins的deployment下环境变量中加入 NODEJS_SLAVE_IMAGE=registry.example.com/openshift3/jenkins-slave-nodejs-rhel7,保存生效
如果不加入环境变量,slave的镜像就会从redhat官网上拉取了。
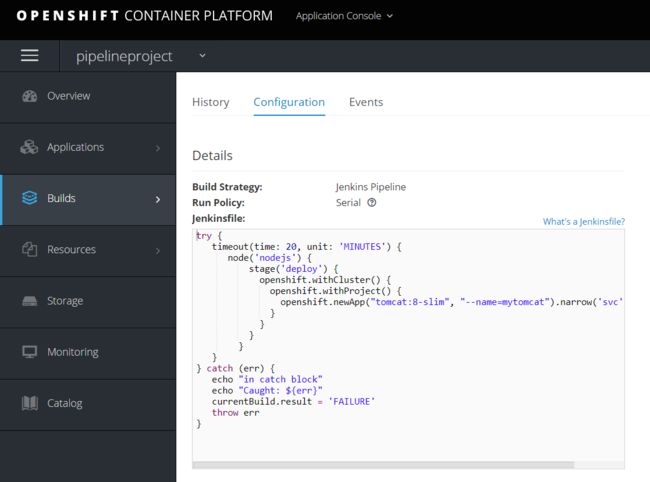
进入pipeline页面,看configuration
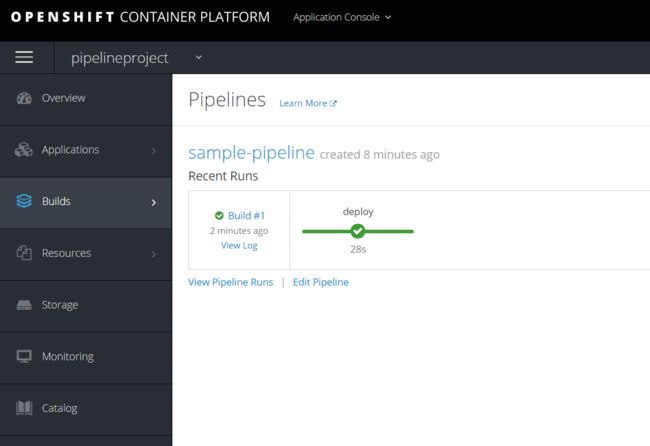
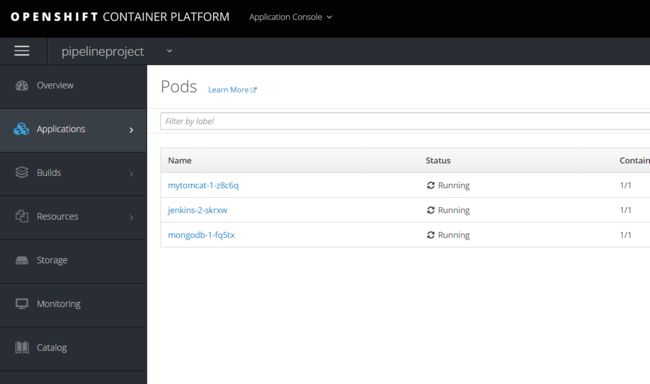
然后运行,发现会启动一个jenkins slave,然后创建一个mytomcat的应用和服务。
修改pipeline里面的内容为,也就是说prepare阶段输出project名,Approval阶段需要用户输入意见,deploy阶段会在myproject项目中部署一个应用。
try {
   timeout(time: 20, unit: 'MINUTES') {
      node('nodejs') {
          stage('prepare') {
                openshift.withCluster() {
                    openshift.withProject() {
                        echo "Using project: ${openshift.project()}"
                    }
                }
            }
          stage('Approval') {
                timeout(time: 2, unit: 'HOURS') {
                    input message: 'Approve Deploy?', ok: 'Yes'
                }
            }
          stage('deploy') {
            openshift.withCluster() {
              openshift.withProject("myproject") {
                openshift.newApp("tomcat:8-slim", "--name=mytomcatcicd").narrow('svc').expose()
              }
            }
          }
        }
   }
} catch (err) {
   echo "in catch block"
   echo "Caught: ${err}"
   currentBuild.result = 'FAILURE'
   throw err
}
需要把jenkins加入myproject的admin权限。
oc adm policy add-role-to-user admin system:serviceaccount:pipelineproject:jenkins -n myproject
多集群支持详见
https://github.com/openshift/jenkins-client-plugin/
https://docs.openshift.com/container-platform/3.9/dev_guide/dev_tutorials/openshift_pipeline.html
