Spring Cloud简介
Spring Cloud是一个基于Spring Boot实现的云应用开发工具,它为基于JVM的云应用开发中涉及的配置管理、服务发现、断路器、智能路由、微代理、控制总线、全局锁、决策竞选、分布式会话和集群状态管理等操作提供了一种简单的开发方式。
Spring Cloud包含了多个子项目(针对分布式系统中涉及的多个不同开源产品),比如:Spring Cloud Config、Spring Cloud Netflix、Spring Cloud0 CloudFoundry、Spring Cloud AWS、Spring Cloud Security、Spring Cloud Commons、Spring Cloud Zookeeper、Spring Cloud CLI等项目。
Spring Cloud Eureka
首先,我们来尝试使用Spring Cloud Eureka来实现服务治理。
Spring Cloud Eureka是Spring Cloud Netflix项目下的服务治理模块。而Spring Cloud Netflix项目是Spring Cloud的子项目之一,主要内容是对Netflix公司一系列开源产品的包装,它为Spring Boot应用提供了自配置的Netflix OSS整合。通过一些简单的注解,开发者就可以快速的在应用中配置一下常用模块并构建庞大的分布式系统。它主要提供的模块包括:服务发现(Eureka),断路器(Hystrix),智能路由(Zuul),客户端负载均衡(Ribbon)等。
下面,就来具体看看如何使用Spring Cloud Eureka实现服务治理。
创建“服务注册中心”
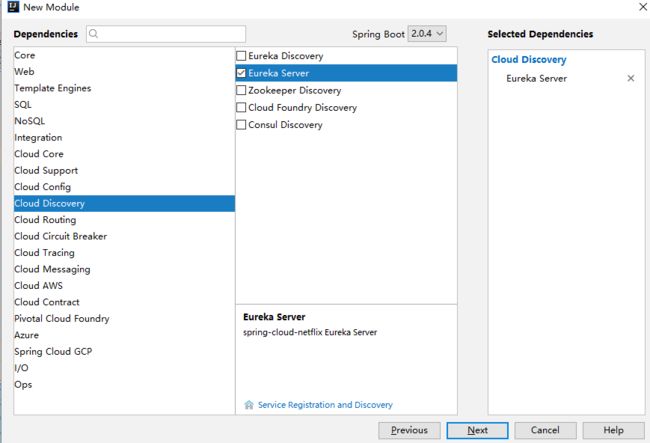
利用Idea的Spring Initializr来快速构建Spring Boot/Cloud工程,勾选Cloud Discovery下的Eureka Server
通过@EnableEurekaServer注解启动一个服务注册中心提供给其他应用进行对话。这一步非常的简单,只需要在一个普通的Spring Boot应用中添加这个注解就能开启此功能,比如下面的例子:
package com.example.springcloud;
import org.springframework.boot.SpringApplication;
import org.springframework.boot.autoconfigure.SpringBootApplication;
import org.springframework.cloud.netflix.eureka.server.EnableEurekaServer;
@SpringBootApplication
@EnableEurekaServer
public class SpringCloudApplication {
public static void main(String[] args) {
SpringApplication.run(SpringCloudApplication.class, args);
}
}
在默认设置下,该服务注册中心也会将自己作为客户端来尝试注册它自己,所以我们需要禁用它的客户端注册行为,只需要在application.yml配置文件中增加如下信息:
server:
port: 8761
eureka:
instance:
hostname: localhost
client:
register-with-eureka: false
fetch-registry: false
service-url:
default-zone:http: //${eureka.instance.hostname}:${server.port}/eureka/
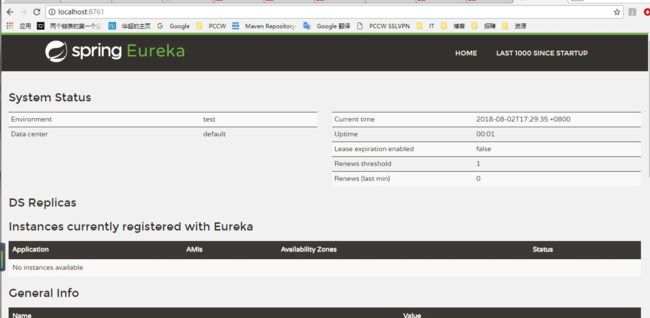
启动工程后,访问:http://localhost:8761/,可以看到下面的页面,其中还没有发现任何服务。
创建“服务提供方”
下面我们创建提供服务的客户端,并向服务注册中心注册自己。本文我们主要介绍服务的注册与发现,所以我们不妨在服务提供方中尝试着提供一个接口来获取当前所有的服务信息。
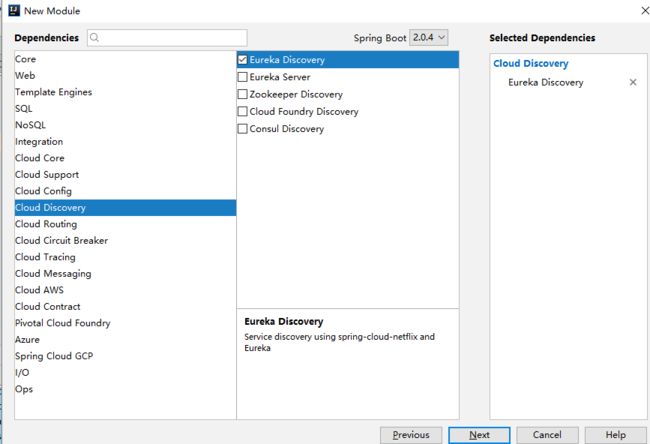
在刚刚建好的项目下,直接再创建一个Moudle,同样利用Idea的Spring Initializr来快速构建Spring Boot/Cloud工程,勾选Cloud Discovery下的Eureka Discovry
通过@EnableEurekaServer注解启动一个服务注册中心提供给其他应用进行对话。这一步非常的简单,只需要在一个普通的Spring Boot应用中添加这个注解就能开启此功能,比如下面的例子:
package com.example.springcloudclient;
import org.springframework.beans.factory.annotation.Value;
import org.springframework.boot.SpringApplication;
import org.springframework.boot.autoconfigure.SpringBootApplication;
import org.springframework.cloud.netflix.eureka.EnableEurekaClient;
import org.springframework.web.bind.annotation.RequestMapping;
import org.springframework.web.bind.annotation.RequestParam;
import org.springframework.web.bind.annotation.RestController;
@SpringBootApplication
@EnableEurekaClient
@RestController
public class ServiceHiApplication {
public static void main(String[] args) {
SpringApplication.run(ServiceHiApplication.class, args);
}
@Value("${server.port}")
String port;
@RequestMapping("/hi")
public String home(@RequestParam String name){
return "Hi " + name + " I am from port:" + port;
}
}
在默认设置下,该服务注册中心也会将自己作为客户端来尝试注册它自己,所以我们需要禁用它的客户端注册行为,只需要在application.yml配置文件中增加如下信息:
eureka:
client:
service-url:
defaultZone: http://localhost:8761/eureka/
server:
port: 8762
spring:
application:
name: service-hi
通过spring.application.name属性,我们可以指定微服务的名称后续在调用的时候只需要使用该名称就可以进行服务的访问。eureka.client.serviceUrl.defaultZone属性对应服务注册中心的配置内容,指定服务注册中心的位置。为了在本机上测试区分服务提供方和服务注册中心,使用server.port属性设置不同的端口。
由于Idea中默认的SpringBoot是单实例模式运行,要想多个实例同时运行,参考:Idea同时运行多个SpringBoot。
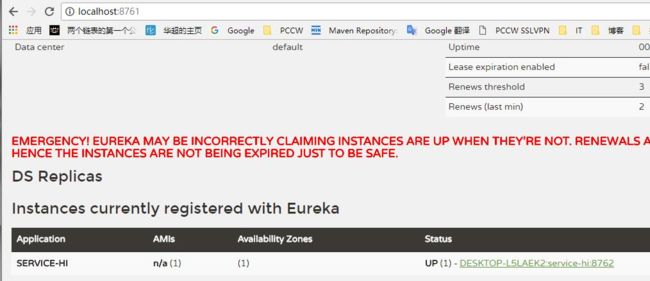
启动工程后,再次访问http://localhost:8761/ 可以发现我们定义的服务被成功注册了
我们也可以访问 http://localhost:8762/hi


