vue内使用 cytoscape.js学习(一)
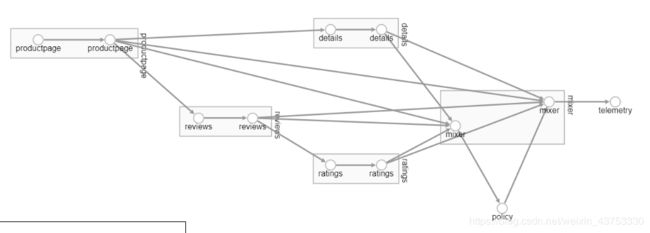
最近项目需求根据返回的数据渲染出一个拓扑图。看了一些文档和demo决定用cytoscape.js来实现,因为之前也没接触个这个库,也是第一次用,所以记录一下,也给需要用到的朋友提供一些帮助。
官方文档点击: 文档
废话不多说,开始:
npm install cytoscape --save //安装
main.js中配置
import cytoscape from "cytoscape";
Vue.prototype.cytoscape = cytoscape
或者在需要用到得模块中
import cytoscape from 'cytoscape'
cytoscape.js最主要得有四个模块。
- 容器 container
- 元素 elements
- 样式 style
- 布局 layout
首先需要初始化,用一个dom元素容器来进行布局和渲染。
 const cy = cytoscape({
          container: document.getElementById('cy'),
        });
这样就初始化完成了 接下来可以设置一些基本信息,这里只对我项目中用到得属性简单说明下,具体得请查看文档。
const cy = cytoscape({
          container: document.getElementById('cy'),
          userZoomingEnabled: false, //是否允许用户事件(例如鼠标滚轮,捏合缩放)缩放图形
          wheelSensitivity: 0.1, //缩放时更改滚轮灵敏度。
          autoungrabify: true,//节点是否可以拖拽
          minZoom: 0.3,//图表缩放得最小界限
        });
下面设置布局 给我们提供了几种布局。
- preset 该preset布局使节点在您手动指定的位置。
- grid grid布局使节点在良好隔开的网格。
- circle 该circle布局使节点在一个圆圈。
- concentric 该concentric布局定位在同心圆节点,根据您所指定的节点分隔成水平的度量。此布局设置concentric值ele.scratch()。
- breadthfirst breadthfirst布局使在层次结构中的节点,基于所述图的breadthfirst遍历。默认的自上而下模式
- random, //该random布局使节点在视口内随机位置。
layout: {
            name: 'random', //该random布局使节点在视口内随机位置。

            fit: true, //如果要适应视区
            padding: 30, //安装padding
            boundingbox: 未定义, //约束布局边界;x1,y1,x2,y2或x1,y1,w,h
            animate: false, //如果要转换节点位置
            动画持续时间: 500, //如果启用动画持续时间(毫秒)
            AnimationEleasing: 未定义, //如果启用,则释放动画
            animatefilter: 函数( node, i) 返回true;, //一个确定是否应为节点设置动画的函数。默认情况下,所有节点都启用了动画。非动画节点在布局开始时立即定位。
            ready: 未定义, //layoutready上的回调
            stop: 未定义, //在layoutstop上回调
            transform: 函数( node, position) 返回位置; //转换给定的节点位置。用于在离散布局中更改方向
          },
接着设置样式,可以给每个节点 连线等设置。
style: [{
        //设置节点样式
              selector: 'node',
              style: {
                'content': 'data(id)',
                "shape": "data(type)", //节点体
                'text-opacity': 0.5,
                "height": 40,
                "width": 40,
                'pie-size': '100%',
                'text-valign': 'center',
                'text-halign': 'left',

                // 'pie-1-background-color': '#E8747C',
                // 'pie-1-background-size': 'mapData(occupy, 0, 10, 0, 100)',
              }
            },
          //设置连线样式
            {
              selector: 'edge',
              style: {
                width: 3,
                'target-arrow-shape': 'triangle',
                // "target-arrow-fill": "hollow", //箭头填充 空心
                'line-color': '#9dbaea',
                'target-arrow-color': '#9dbaea',
                'curve-style': 'bezier',
              }
            },

          ],
最后设置数据
  elements: {
            //节点数据
            nodes: this.nodes,
            //关系
            edges: this.edges,
          }
数据结构
//节点数据
      nodes: [{
            data: {
              id: 'n0',
              xx:' '
            },
          },
          {
            data: {
              id: 'n1',
              xx:' '
            }
          },
        ],
        //连线数据
        edges: [{
            data: {
              source: 'n2',
              target: 'n1'
            }
          },

          {
            data: {
              source: 'n8',
              target: 'n1',
              label: '111111'
            }
          },
        ]
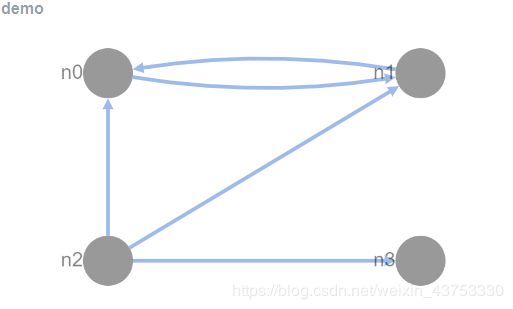
至此,最基本得配置就完成了。下面附上一个小demo 直接粘贴到.vue文件中 安装一个cytoscape就可以了。
demo

