在管理后台系统中,这次使用的是百度编辑器
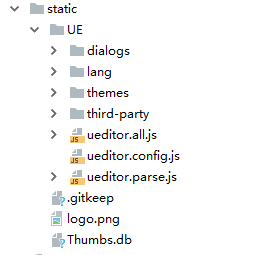
首先在vue的目录结构static下面,把从网上下载的UE解压放进去,如图
然后在main.js中引入
import '../static/UE/ueditor.config.js'
import '../static/UE/ueditor.all.js'
import '../static/UE/lang/zh-cn/zh-cn.js'
import '../static/UE/ueditor.parse.min.js'
在需要用的vue组件中写入
class="upload-demo" :action="imgUrl" :multiple=true :with-credentials="true" :on-exceed="handleExceed" :on-preview="handlePreview" :on-remove="handleRemove" :on-success="handleMultSuccess2" :on-error="handleError" :before-upload="beforeUpload2" :file-list="fileList3" list-type="picture">
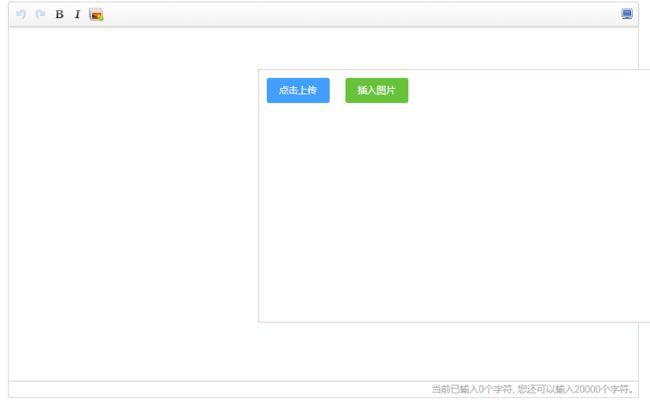
产品要求目前只需要展示这几个功能,其次为了更简单的使用编辑器,所在的环境又是elementui,所以上传图片直接借用element ui 里面的上传组件,结合七牛云,这样更利于操作。
editor:null,
config: {
//可以在此处定义工具栏的内容
toolbars: [
['fullscreen','','undo','redo','bold','italic','insertimg']
],
autoHeightEnabled:true,
autoFloatEnabled:true,
initialContent:'请输入内容',//初始化编辑器的内容
autoClearinitialContent:true,//是否自动清除编辑器初始内容
initialFrameWidth:800,
initialFrameHeight:450,
UEDITOR_HOME_URL:'./static/UE/'
},
以上编辑器的配置放在data()里面
mounted() {
// 初始化UE
const _this =this;
this.editor =UE.getEditor('editor',this.config);// 初始化UE
baidu.editor.commands['insertimg'] = {
execCommand:function () {
let $el =document.querySelectorAll('.editor .uploadDal')[0] ;
$el.style.display =$el.style.display=="none"?'block':"none";
return true;
},queryCommandState:function () {
}
};
},
mounted进行初始化设置
同时多加一个钩子函数
destroyed() {
this.editor.destroy();
},
上传图片
imgUrl:是后台给的上传图片到七牛云的地址
beforeUpload2(file){
const isJPG =/^image\/\w+$/.test(file.type)
return isJPG
},
上传图片之前控制它的图片格式
handleMultSuccess2(file, fileList) {
let url = fileList.response.data.url + fileList.response.data.fileName;
this.fileList4.push(url);
}
//fileList4里面存放所有图片
下回主要展示一下图片和文字 一起结合 起来上传,不错位
下面是点击插入图片绑定的事件
uploadImgs() {
var $this =this;
this.fileList4.forEach(
function(v,i,arr){
$this.editor.execCommand('insertHtml',"")
})
let $el =document.querySelectorAll('.editor .uploadDal')[0] ;
$el.style.display ="none";
this.fileList4 = [];
},
this.editor.getContent();
//
这是一个测试看看能不能成功
到这边就全部完成 了。
下面是对element ui 上传组件的详细步骤
其中包含上传一张图片 和多张图片
这个是上传一张图片
class="avatar-uploader" :action="imgUrl" :show-file-list="true" :with-credentials="true" :on-success="handleSuccess" :on-error="handleError" :before-upload="beforeUpload" >
:action="imgUrl" //这个是后台给你调的关于七牛云的接口 :show-file-list="true"//上传文件之后是否展示文件名字 :with-credentials="true"//本地调试是否允许携带cookie,可以跨域 :on-success="handleSuccess"//上传成功之后返回的信息 :on-error="handleError"//上传错误返回的信息 :before-upload="beforeUpload"//上传之前要做什么 imageUrl里面绑定的就是图片的地址 handleSuccess(res, file) { this.imageUrl = res.data.url + res.data.fileName; //这个res其实就是调接口返回的值 }, handleError() { this.$message.error('网络有误请稍后再试~'); }, beforeUpload(file) { //这个根据需求图片要为jpg的格式,大小要小于2M。 const isJPG =/^image\/\w+$/.test(file.type) const isLt2M = (file.size /1024 /1024 <2) && (file.size /1024 >200); if (!isJPG) { this.$message.error('上传头像图片只能是 JPG 格式!'); } if (!isLt2M) { this.$message.error('图片大小控制在200k-2M之间!'); } return isJPG &&isLt2M; }, 上传多张图片 class="upload-demo" :action="imgUrl" :multiple=true :limit=9 :with-credentials="true" :on-exceed="handleExceed" :on-preview="handlePreview" :on-remove="handleRemove" :on-success="handleMultSuccess" :on-error="handleError" :before-upload="beforeUpload" :file-list="fileList2" list-type="picture"> :multiple=true :limit=9 //多张上传,限制九张 :on-exceed="handleExceed" //文件超出个数限制时的钩子 :on-preview="handlePreview"//点击文件列表中已上传的文件时的钩子 :on-remove="handleRemove"//删除文件 :on-success="handleMultSuccess" //在这个里面要把每次上传的图片地址都存进一个数组里面 handleMultSuccess(file, fileList) { let url = fileList.response.data.url + fileList.response.data.fileName; this.fileList.push(url); }, 最后fileList里面拿到的就是上传多张图片的地址 这是时隔一段时间写的,只记得填了一些坑,但是不记得哪个代码填了哪个坑,,所以就把完整的写下来了。


