nginx详细讲解
Nginx是什么?
nginx是一个开源的,支持高性能,高并发的www服务和代理服务软件。
nginx因具有高并发(特别是静态资源),占用系统资源少等特性,且功能丰富而逐渐流行起来。nginx不但是一个优秀Web服务软件,还具有反向代理负载均衡功能和缓存服务功能,与lvs负载均衡及Haproxy等专业代理软件相比,Nginx部署起来更为简单,方便;在缓存功能方面,它又类似于Squid等专业的缓存服务软件。
Nginx的重要面试知识
Nginx的重要特性
支持高并发:能支持几万并发连接(特别是静态小文件业务环境) 资源消耗少:在3万并发连接下,开启10哥Nginx线程消耗的内存不到200MB
可以做HTTP反向代理及加速缓存,即负载均衡功能,内置对RS节点服务器健康检查功能,这相当于专业的Haproxy软件或LVS的功能具备Squid等专业缓存软件等的缓存功能。 支持异步网络I/O事件模型epoll(linux2.6+)。
Nginx软件的主要企业功能应用
(1)作为Web服务软件
Nginx是一个支持高性能,高并发的Web服务软件,它具有很多优秀的特性,作为Web服务器,与Apache相比,Nginx能够支持更多的并发连接访问,但占用的资源更少,效率更高,在功能上也强大了很多,几乎不逊色于Apache。
(2)反向代理或负载均衡服务
在反向代理或负载均衡服务方面,Nginx可以作为Web服务,PHP等动态服务及Memcached缓存的代理服务器,它具有类似专业反向代理软件(如Haproxy)的功能,同时也是一个优秀的邮件代理服务软件,但是Nginx的代理功能还是相对简单了些,特别是不支持TCP的代理(Nginx1.9.0版本已经开始支持TCP代理了)
(3)前端业务数据缓存服务
在Web缓存服务方面,Nginx可通过自身的proxy_cache模块实现类Squid等专业缓存软件的功能。
综上:Nginx的这三大功能(Web服务,反向代理或负载均衡服务,前端业务数据缓存服务)是国内使用Nginx的主要场景,特别是前两个。
为什么Nginx总体性能比Apache高?
Nginx使用最新的epoll(Linux2.6内核)和kqueue(freebsd)异步网络I/O模型,而Apache使用的是传统的select模型。目前Linux下能够承受高并发访问的Squid,Memcached软件采用的都是epoll模型。
处理大量连接的读写时,Apache所采用的select网络I/O模型比较低效。
如何正确选择Web服务器
虽然国内很多人都在使用Nginx,但是Apache,Lighttpd这两个Web服务器同样非常强大且实用,尤其时Apache,到目前为止仍是全球使用最广泛的Web服务软件。
在实际工作,我们需要根据业务需求来选择合适的业务服务软件,有关Web服务,建议如下。静态业务:若是高并发场景,尽量采用Nginx或Lighttpd,二者首选Nginx。
动态业务:理论上采用Nginx和Apache均可,建议选择Nginx,为了避免相同业务的服务软件多样化,增加额外维护成本。动态业务可以由Nginx兼做前端代理,再根据页面元素的类型或目录,转发到后端相应的服务器进行处理。
既有静态业务又有动态业务:采用Nginx
此外,如果并发不是很大,又对Apache很熟悉,采用Apache也是可以的,Apache2.4版本也很强大,并发连接数也有所增加。总的来说,在满足需求的前提下,首先选择自己最擅长的软件,若发现了更好的软件,可在掌握新软件之后逐步替换。虽然动态和静态业务都倾向于选择Nginx,但是大前提是自己要熟练掌握Nginx。切记,在工作中不要盲目选择软件,这可能最终会导致自己无法控制局面,从而给企业带来灾难性的损失。
1,nginx的编译安装部署
yum install -y pcre-devel openssl-devel         #用本地yum仓库安装依赖包

#wget -q http://nginx.org/download/nginx-1.10.2.tar.gz     #下载软件源码包

useradd -s /sbin/nologin -M www     #创建程序用户

tar xf nginx-1.10.2.tar.gz -C /usr/src/     #解压缩

cd /usr/src/nginx-1.10.2

./configure --user=nginx --group=nginx --prefix=/usr/local/nginx --with-http_stub_status_module --with-http_ssl_module       #预配置
make && make install        #编译和安装
ln -s /usr/local/nginx/sbin/* /usr/local/sbin/  #给命令做软连接,以便PATH能找到
/usr/local/nginx/sbin/nginx #启动nginx
特别提示:
/usr/local/nginx/sbin/nginx -s reload nginx平滑重启命令
/usr/local/nginx/sbin/nginx -s stop nginx停止服务命令
1.1 web排错三部曲下面介绍客户端排查的思路
第一步,在客户端上ping服务器端IP,命令如下:
ping 10.0.0.8排除物理线路问题影响
第二步,在客户端上telnet服务器端IP,端口,命令如下:
telnet 10.0.0.8 80排除防火墙等得影响
第三步,在客户端使用wget命令检测,如下:
wget 10.0.0.8(curl -I 10.0.0.8)模拟用户访问,排除http服务自身问题,根据输出在排错
提示:
以上三步是客户端访问网站异常排查的重要三部曲。
2,Nginx主配置文件nginx.conf
Nginx主配置文件nginx.conf是一个纯文本类型的文件(其他配置文件大多也是如此),它位于Nginx安装目录下的conf目录,整个配置文件是以区块的形式组织的。一般,每个区块以一个大括号“{}”来表示,区块可以分为几个层次,整个配置文件中Main区位于最上层,在Main区下面可以有Events区,HTTP区等层级,在HTTP区中又包含有一个或多个Server区,每个Server区中又可有一个或多个location区,整个Nginx配置文件nginx.conf的主体框架为:
[root@chensiqi conf]# egrep -v "#|^$" nginx.conf #去掉包含#号和空行的内容
worker_processes  1; #worker进程的数量
error_log  logs/error.log;  #错误日志(默认没开)
pid        logs/nginx.pid;  #进程号(默认没开)
events {    #事件区块开始
    worker_connections  1024;   #每个worker进程支持的最大连接数
}           #事件区块结束
http {      #http区块开始
    include       mime.types;   #Nginx支持的媒体类型库文件包含
    default_type  application/octet-stream; #默认的媒体类型
    sendfile        on;     #开启高效传输模式
    keepalive_timeout  65;  #连接超时。
    server {      #网站配置区域(第一个server第一个虚拟主机站点)
        listen       80;    #提供服务的端口,默认80
        server_name  www.chensiqi.org; #提供服务的域名主机名
        location / {    #第一个Location区块开始
            root   html;  #站点的根目录(相对于nginx安装路径)
            index  index.html index.htm; #默认的首页文件,多个用空格分开
        }
        error_page 500 502 503 504  /50x.html;  #出现对应的http状态码时,使用50x.html回应客户
        location = /50x.html {  #Location区块开始,访问50x.html
            root   html;     #指定对应的站点目录为html
        }
    }
    server {      #网站配置区域(第二个server第二个虚拟主机站点)
        listen       80;    #提供服务的端口,默认80
        server_name  bbs.chensiqi.org; #提供服务的域名主机名
        location / {    #服务区块
            root   html;  #相对路径(nginx安装路径)
            index  index.html index.htm;
        }
        location = /50x.html { #发生错误访问的页面
            root   html;
        }
    }
}
整个nginx配置文件的核心框架如下:
worker_processes 1;
events {

    worker_connections 1024;

}
http {
    include mime.types;
    server {
        listen  80;
        server_name localhost;
        location / {
            root  html;
            index  index.html index.htm;
        }
    }
}
3.Nginx的功能模块说明
4,Nginx虚拟主机配置实战
4.1 虚拟主机概念和类型介绍
4.1.1 虚拟主机概念
所谓虚拟主机,在Web服务里就是一个独立的网站站点(www.baidu.org),这个站点对应独立的域名(也可能是IP或端口),具有独立的程序及资源目录,可以独立地对外提供服务供用户访问。
这个独立的站点在配置里是由一定格式的标签段标记,对于Apache软件来说,一个虚拟主机的标签段通常被包含在内,而Nginx软件则使用一个server{}标签来标示一个虚拟主机,一个Web服务里可以有多个虚拟主机标签对,即同时可以支持多个虚拟主机站点。
4.1.2 虚拟主机类型
常见的虚拟主机类型有如下几种。
基于域名的虚拟主机
所谓基于域名的虚拟主机,意思就是通过不同的域名区分不同的虚拟主机,基于域名的虚拟主机是企业应用最广的虚拟主机类型,几乎所有对外提供服务的网站都是使用基于域名的虚拟主机,例如:www.etiantian.org
基于端口的虚拟主机
同理,所谓基于端口的虚拟主机,意思就是通过不同的端口来区分不同的虚拟主机,此类虚拟主机对应的企业应用主要为公司内部的网站,例如:一些不希望直接对外提供用户访问的网站后台等,访问基于端口的虚拟主机地址里要带有端口,例如:http://www.baidu.com:80
基于IP的虚拟主机
同理,所谓基于IP的虚拟主机,意思就是通过不同的IP区分不同的虚拟主机,此类虚拟主机对应的企业应用非常少见,一般不同业务需要使用多IP的场景都会在负载均衡器上进行VIP绑定,而不是在Web上通过绑定IP区分不同的虚拟机。
基于域名的虚拟主机配置实战
创建域名对应的站点目录文件
[root@localhost nginx]# mkdir -p /data/xingyun/basic
[root@localhost nginx]# mkdir -p /data/anttech/basic
[root@localhost nginx]# chown -R nginx:nginx /data/xingyun/basic/
[root@localhost nginx]# chown -R nginx:nginx /data/anttech/basic/
[root@localhost nginx]# mkdir -p /data/xingyun/basic
[root@localhost nginx]# mkdir -p /data/anttech/basic
[root@localhost nginx]# chown -R nginx:nginx /data/xingyun/basic/
[root@localhost nginx]# chown -R nginx:nginx /data/anttech/basic/
[root@localhost conf.d]# cat xingyun.conf
server {
listen 192.168.1.104:80;
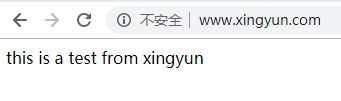
server_name www.xingyun.com;
access_log /data/xingyun/log/access.log combined;
location / {
root /data/xingyun/basic;
index index.html index.htm;
}
}
[root@localhost conf.d]# cat anttech.conf
server {
listen 192.168.1.104:80;
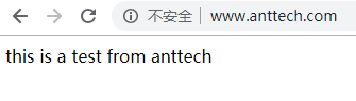
server_name www.anttech.com;
access_log /data/anttech/log/access.log combined;
location / {
root /data/anttech/basic/;
index index.html index.htm;
}
}
域名解析 C:\Windows\System32\drivers\etc
192.168.1.104 www.anttech.com
192.168.1.104 www.xingyun.com
结果测试
[root@localhost conf.d]# echo "this is a test from xingyun" >> /data/xingyun/basic/index.html
[root@localhost conf.d]# echo "this is a test from anttech" >> /data/anttech/basic/index.html
6 Nginx常用功能配置实战
6.1 规范化Nginx配置文件
下面是优化后的Nginx配置的实战方案
worker_processes  1;
events {
    worker_connections  1024;
}
http {
    include       mime.types;
    default_type  application/octet-stream;
    sendfile        on;
    keepalive_timeout  65;
    include extra/www.conf;   #虚拟网站配置信息统一放在了当前的extra目录下
    include extra/mail.conf;
    include extra/status.conf;

}
[root@localhost nginx]# tree conf/extra/
conf/extra/
├── mail.conf
├── status.conf
└── www.conf

0 directories, 3 files

[root@localhost nginx]# cat conf/extra/www.conf
    server {
        listen       80;
        server_name  www.yunjisuan.com;
        location / {
            root   /var/www/html/wwwcom;
            index  index.html index.htm;
        }
        error_page   500 502 503 504  /50x.html;
        location = /50x.html {
            root   /var/www/html;
        }
    }
6.2 Nginx状态信息功能实战
6.2.1 确认编译时是否设定了此模块
root@localhost nginx]# /usr/local/nginx/sbin/nginx -V
nginx version: nginx/1.10.2
built by gcc 4.4.7 20120313 (Red Hat 4.4.7-4) (GCC)
built with OpenSSL 1.0.1e-fips 11 Feb 2013
TLS SNI support enabled
configure arguments: --user=www --group=www --prefix=/usr/local/nginx-1.10.2/ --with-http_stub_status_module --with-http_ssl_module

##说明
--with-http_stub_status_module模块就是状态信息模块
6.2.2 设定信息模块配置
[root@localhost nginx]# cat conf/extra/status.conf
##status


server{

    listen  80;
    server_name  status.yunjisuan.com;
    location / {
       stub_status  on;   #开启状态信息功能
           access_log   off;  #不记录访问日志

         }
}

##说明
状态信息模块配置方式和搭建虚拟网站类似需要占用一个域名来访问
注意:需要重启Nginx服务
6.2.3 Nginx status显示结果详解
[root@localhost nginx]# curl status.yunjisuan.com Active connections:
2 #表示Nginx正在处理的活动连接2个 server accepts handled requests 39 39 41
Reading: 0 Writing: 1 Waiting: 1 第一个server表示Nginx启动到现在2共处理了39个连接
第二个accepts表示Nginx启动到现在共成功创建了39次握手 请求丢失数=(握手数-连接数),可以看出,本次状态显示没有丢失请求。
第三个handled requests,表示总共处理了41次请求。 Reading为Nginx读取到客户端的Header信息数
Writing为Nginx返回给客户端的Header信息数
Waiting为Nginx已经处理完正在等候下一次请求指令的驻留连接。在开启keep-alive的情况下,这个值等于active -
(reading+writing)
特别提示:
出于安全起见,这个状态信息要防止外部用户查看。
6.3 增加错误日志
范例:error_log file level;
常见的日志级别【debug|info|notice|warn|error|crit|alert|emerg】
生产场景一般是warn|error|crit这三个级别之一,注意不要配置info等较低级别,会带来巨大磁盘I/O消耗。
error_log的默认值为:
#default:error_log logs/error.log error;

worker_processes  1;
error_log  logs/error.log;    #非常简单,一般增加此行即可
events {
    worker_connections  1024;
}
http {
    include       mime.types;
    default_type  application/octet-stream;
    sendfile        on;
    keepalive_timeout  65;
    include extra/www.conf;
    include extra/mail.conf;
    include extra/status.conf;

}
6.4 Nginx访问日志轮询切割
默认情况下Nginx会把所有的访问日志生成到一个指定的访问日志文件access.log里,但这样一来,时间长了就会导致日志个头很大,不利于日志的分析和处理,因此,有必要对Nginx日志,按天或按小时进行切割,使其分成不同的文件保存。

[root@localhost nginx]# cat /server/scripts/cut_nginx_log.sh
#!/bin/bash
#日志切割脚本可挂定时任务,每天00点整执行

Dateformat=`date +%Y%m%d`
Basedir="/usr/local/nginx"
Nginxlogdir="$Basedir/logs"
Logname="access"

[ -d $Nginxlogdir ] && cd $Nginxlogdir || exit 1
[ -f ${Logname}.log ] || exit 1
/bin/mv ${Logname}.log ${Dateformat}_${Logname}.log
$Basedir/sbin/nginx -s reload

[root@localhost nginx]# cat >>/var/spool/cron/root << KOF
#cut nginx access log by Mr.chen
00 00 * * * /bin/bash /server/scripts/cut_nginx_log.sh >/dev/null 2>&1
6.5 Nginx location
6.5.1 location使用的语法为:
location [ = | ~ | ~* | ^~ ] uri {

  ...

}
上图是对location语法的说明。上述语法中的URI部分是关键,这个URI可以是普通的字符串地址路径,或者是正则表达式,匹配成功则执行后面大括号里的相关命令。正则表达式的前面还可以有“~”或“~*”等特殊字符。
![]()
匹配这两种特殊字符“~”或“~*”的区别为:“~”用于区分大小写(大小写敏感)的匹配;“~*”用于不区分大小写的匹配。还可以用逻辑操作符“!”对上面的匹配取反,即“!~”和“!~*”。此外,“^~”的作用是先进行字符串的前缀匹配(必须以后边的字符串开头),如果能匹配到,就不再进行其他location的正则匹配了。
6.5.2 location匹配示例
[root@localhost nginx]# cat /usr/local/nginx/conf/extra/www.conf
    server {
        listen       80;
        server_name  www.yunjisuan.com;
    root    /var/www/html/wwwcom;
        location / {
        return 401;
        }
    location = / {
        return 402;
    }
    location = /images/ {
        return 501;
    }
    location /documents/ {
        return 403;
    }
    location ^~ /images/ {
        return 404;
    }
    location ~* \.(gif|jpg|jpeg)$ {
        return 500;
    }

    }
正则匹配结果如下:
[root@localhost nginx]# curl -s -o /dev/null -w "%{http_code}\n" www.yunjisuan.com
402        #匹配了=的情况
[root@localhost nginx]# curl -s -o /dev/null -w "%{http_code}\n" www.yunjisuan.com/
402         #匹配了=的情况
[root@localhost nginx]# curl -s -o /dev/null -w "%{http_code}\n" www.yunjisuan.com/xxxx
401         #匹配不到默认匹配 /的情况
[root@localhost nginx]# curl -s -o /dev/null -w "%{http_code}\n" www.yunjisuan.com/documents/
403         #匹配字符串
[root@localhost nginx]# curl -s -o /dev/null -w "%{http_code}\n" www.yunjisuan.com/images/
501         #优先匹配=的情况
[root@localhost nginx]# curl -s -o /dev/null -w "%{http_code}\n" www.yunjisuan.com/images/1.jpg
404         #匹配
[root@localhost nginx]# curl -s -o /dev/null -w "%{http_code}\n" www.yunjisuan.com/documents/images/1.jpg
500         #匹配~*的情况
从多个location的配置匹配可以看出匹配的优先顺序
顺序 匹配标识的location 匹配说明
1	" location = / { "	精确匹配
2	" location ^~ /images/ { "	先进行字符串的前缀匹配,如果匹配到就不做正则匹配检查
3	" loction ~* \.(gif | jpg | jpeg)$ { "	正则匹配,*为不区分大小写
4	" location /documents/ { "	匹配常规字符串,模糊匹配,如果有正则检查,正则优先
5	" location / { "	所有location都不能匹配后的默认匹配原则
6.6 Nginx rewrite
6.6.1 什么是Nginx rewrite?
和Apache等Web服务软件一样,Nginx rewrite的主要功能也是实现URL地址重写。Nginx的rewrite规则需要PCRE软件的支持,即通过Perl兼容正则表达式语法进行规则匹配。默认参数编译时,Nginx就会安装支持rewrite的模块,但是,也必须要有PCRE软件的支持。
6.6.2 Nginx rewrite 语法
(1)rewrite指令语法
指令语法:rewrite regex replacement 【flag】; 默认值:none
应用位置:server,location,if
rewrite是实现URL重写的关键指令,根据regex(正则表达式)部分的内容,重定向到replacement部分,结尾是flag标记。下面是一个简单的URL
rewrite跳转例子:
rewrite ^/(.*) http://www.baidu.com/$1 permanent;
在上述指令中,rewrite为固定关键字,表示开启一条rewrite匹配规则,regex部分是^(.*),这是一个正则表达式,表示匹配所有,匹配成功后跳转到http://www.baidu.com/$1 。这里的$1是取前面regex部分括号里的内容,结尾的permanent;是永久301重定向标记,即跳转到后面的http://www.baidu.com/$1 地址上。
(2)regex常用正则表达式说明
(3)rewrite指令的最后一项参数flag标记的说明

6.6.3 Nginx rewrite 的企业应用场景
Nginx的rewrite功能在企业里应用非常广泛:
可以调整用户浏览的URL,使其看起来更规范,合乎开发及产品人员的需求。
为了让搜索引擎收录网站内容,并让用户体验更好,企业会将动态URL地址伪装成静态地址提供服务
网站换新域名后,让旧域名的访问跳转到新的域名上,例如:让京东的360buy换成了jd.com
根据特殊变量,目录,客户端的信息进行URL跳转等。
6.6.4 Nginx rewrite 301 跳转
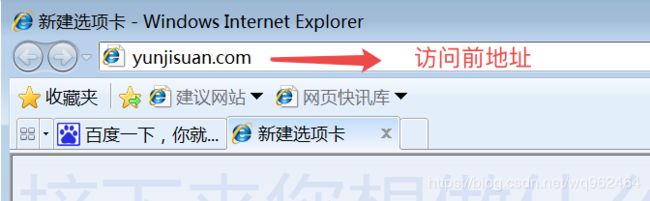
以往我们是通过别名方式实现yunjisuan.com和www.yunjisuan.com访问同一个地址的,事实上,除了这个方式外,还可以使用nginx
rewrite 301 跳转的方式来实现。实现的配置如下:
[root@localhost nginx]# cat conf/extra/www.conf
#www virtualhost by Mr.chen
    server {
        listen       80;
        server_name  www.yunjisuan.com;
    root    /var/www/html/wwwcom;
        location / {
        index index.html index.htm;
        }
#location = / {
#return 402;
#}
    location = /images/ {
        return 501;
    }
    location /documents/ {
        return 403;
    }
    location ^~ /images/ {
        return 404;
    }
    location ~* \.(gif|jpg|jpeg)$ {
        return 500;
    }

    }

    server{
        listen  80;
        server_name yunjisuan.com;
        rewrite ^/(.*)  http://www.yunjisuan.com/$1 permanent;
        #当用户访问yunjisuan.com及下面的任意内容时,都会通过这条rewrite跳转到www.yunjisuan.com对应的地址
    }
测试结果
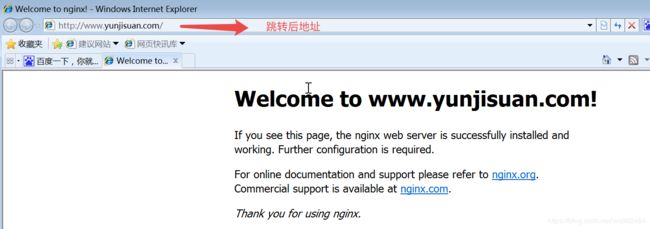
实现不同域名的URL跳转
示例:实现访问http://mail.yunjisuan.com时跳转到http://www.yunjisuan.com/mail/yunjisuan.html
外部跳转时,使用这种方法可以让浏览器地址变为跳转后的地址,另外,要事先设置http://www.yunjisuan.com/mail/yunjisuan.html有结果输出,不然会出现401等权限错误。
(1)配置Nginx rewrite规则
[root@localhost nginx]# cat conf/extra/mail.conf
    server {
        listen       80;
        server_name  mail.yunjisuan.com;
        location / {
            root   /var/www/html/mailcom;
            index  index.html index.htm;
        }
    if ( $http_host ~* "^(.*)\.yunjisuan\.com$") {
        set $domain $1;
        rewrite ^(.*) http://www.yunjisuan.com/$domain/yunjisuan.html break;

    }
}
测试


6.7 Nginx访问认证
有时,在实际工作中企业要求我们为网站设置访问账号和密码权限,这样操作后,只有拥有账号密码的用户才可以访问网站内容。
这种使用账号密码才可以访问网站的功能主要应用在企业内部人员访问的地址上,例如:企业网站后台,MySQL客户端phpmyadmin,企业内部的CRM,WIKI网站平台。
6.7.1 创建密码文件
我们可以借用apache的htpasswd软件,来创建加密的账号和密码
[root@localhost ~]# which htpasswd
[root@localhost ~]# htpasswd -bc /usr/local/nginx/conf/htpasswd yunjisuan 123123
Adding password for user yunjisuan
[root@localhost ~]# cat /usr/local/nginx/conf/htpasswd
yunjisuan:FC1/eEc/iK0Mo   #账号密码是加密的(htpasswd是文件的名字)
6.7.2 在虚拟主机配置文件里加入两条配置信息
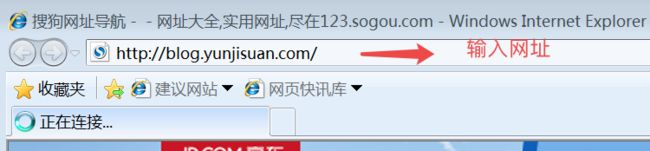
[root@localhost html]# cat /usr/local/nginx/conf/extra/blog.conf
    server {
        listen       80;
        server_name  blog.yunjisuan.com;
        location / {
            root   /var/www/html/blogcom;
            index  index.html index.htm;
            auth_basic      "yunjisuan training";   #加入这条配置
            auth_basic_user_file    /usr/local/nginx/conf/htpasswd; #加入这条配置
        }
    }
#配置解释:
auth_basic :验证的基本信息选项(后边跟着的双引号里就是验证窗口的名字)
auth_basic_user_file :验证的用户文件(后边根账号密码文件的绝对路径)