SpringBoot整合SpringMVC+Mybatis+Maven
关于微服务的相关知识这里就不介绍了,百度上很多文章都有详细的说明,这里主要介绍微服务框架的基础组件SpringBoot项目的构建,帮助大家快速上手学习,同时自己也是刚接触这方面的内容,如有不当,欢迎指教,谢谢!
这里先说明一下,本demo采用的数据库是SQL SERVER数据库,其他数据库亦可。(PS:吐槽一下,SQL SERVER整合还是挺麻烦的,不推荐)具体步骤如下:
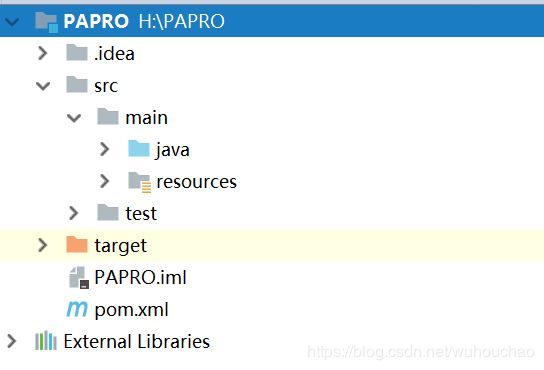
第一步:自己构建一个空的maven项目。
第二步:配置pom.xml文件,具体代码如下
    4.0.0

    com.winning
    PAPRO
    1.0-SNAPSHOT


        org.springframework.boot
        spring-boot-starter-parent
        1.5.1.RELEASE


            org.springframework.boot
            spring-boot-starter-web


            org.springframework
            spring-tx
            ${spring.version}


            org.springframework.boot
            spring-boot-starter-thymeleaf


            com.microsoft.sqlserver
            sqljdbc4
            4.0
            4.0


            com.microsoft.sqlserver
            mssql-jdbc
            6.2.0.jre8
            runtime


            org.mybatis.spring.boot
            mybatis-spring-boot-starter
            1.3.0


            org.springframework.boot
            spring-boot-devtools
            true
注:这里面配置了 thymeleaf 组件(基于H5页面的模板引擎,可以替代jsp),springboot官网推荐使用,不使用jsp页面。关于SQL SERVER依赖的注入,这里需要自己手工本地导入。(额。。吐血,现在知道为什么吐槽了吧,具体步骤转:https://blog.csdn.net/dianhuilu4947/article/details/81866392)
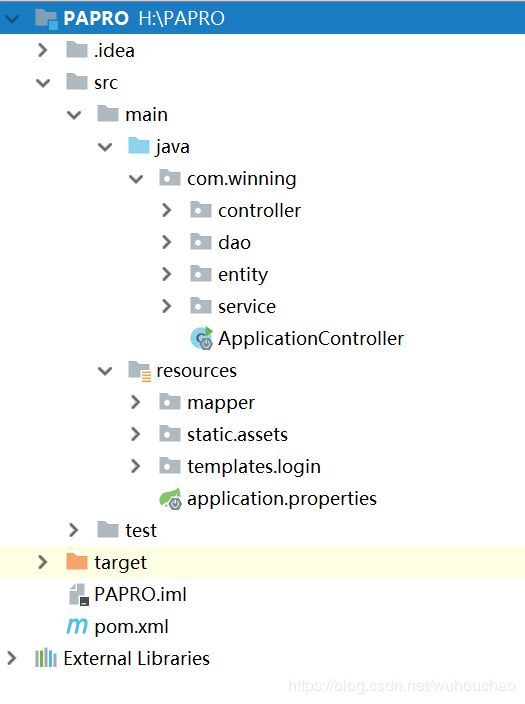
第三步:上面两个准备工作完成之后,开始构建项目的具体目录。(可以参考我的目录,也可以自己定义)
具体展开为:这里写了一个登陆功能模块。
第四步:对目录机构进行简单的说明,注意ApplicationController的位置(需要放在其他包的最外面,因为该类为启动类,需要扫描其他类)和application.propertites位置(放在resources目录下,这样程序能自动扫描该配置文件)。resouces下static目录下存放一下静态资源文件,templates目录下存放一些基于thymeleaf 的H5页面。接下来在目录构建完成后,需要配置一下启动类和配置文件。
ApplicationController:
package com.winning;
import org.mybatis.spring.annotation.MapperScan;
import org.springframework.boot.SpringApplication;
import org.springframework.boot.autoconfigure.SpringBootApplication;
import org.springframework.context.annotation.ComponentScan;

//@Controller
//@EnableAutoConfiguration     // @SpringBootApplication 注解等同于 @EnableAutoConfiguration 和 controller注解标注和扫描
@SpringBootApplication
@MapperScan("com.winning.mapper")
@ComponentScan
public class ApplicationController {
    public  static  void  main(String[] args) throws  Exception{
        SpringApplication.run(ApplicationController.class,args);
    }
}
注意:@SpringBootApplication表明该类是一个启动类,@MapperScan扫描mapper文件。
application.propertites:
#thymeleaf模板配置
spring.thymeleaf.prefix=classpath:/templates/
spring.thymeleaf.suffix=.html
spring.thymeleaf.mode=HTML5
spring.thymeleaf.encoding=UTF-8
spring.thymeleaf.content-type=text/html
#热部署文件,页面不产生缓存,及时更新
spring.thymeleaf.cache=false
spring.resources.chain.strategy.content.enabled=true
spring.resources.chain.strategy.content.paths=/**
#配置SQL SERVER数据源
spring.datasource.url=jdbc:sqlserver://127.0.0.1:1433; DatabaseName=PAPRO
spring.datasource.driverClassName=com.microsoft.sqlserver.jdbc.SQLServerDriver
spring.datasource.username=sa
spring.datasource.password=123456
#Mybatis xml文件路径配置
mybatis.mapper-locations=classpath:/mapper/*.xml
第五步:构建具体业务功能。
LoginInfoController:

package com.winning.controller;
import com.winning.service.LoginInfoService;
import org.springframework.beans.factory.annotation.Autowired;
import org.springframework.beans.factory.annotation.Qualifier;
import org.springframework.stereotype.Controller;
import org.springframework.web.bind.annotation.RequestMapping;
import org.springframework.web.servlet.ModelAndView;
import javax.servlet.http.HttpServletRequest;
import javax.servlet.http.HttpServletResponse;
import java.util.HashMap;

@Controller
@RequestMapping("/login")
public class LoginInfoController {
    @Autowired
    @Qualifier("loginService")
    private LoginInfoService loginService;

    @RequestMapping("/home")           //主页面
    public ModelAndView welToHome() throws  Exception{
        return  new ModelAndView("login/login");
    }

    @RequestMapping("/judgeInfoAndDis")  // 登陆信息验证和页面跳转
    public  ModelAndView judgeInfoAndDis(HttpServletRequest request, HttpServletResponse response) throws Exception{
        HashMap paraMap=new HashMap();
        String dispatcherPath="";
        paraMap.put("number",request.getParameter("number"));
        paraMap.put("password",request.getParameter("password"));
        if(loginService.selUsers(paraMap).size()>0){
            dispatcherPath="login/main";
            paraMap.put("message","1");
        }else {
            dispatcherPath="login/login";
            paraMap.put("message","0");
        }
        return new ModelAndView(dispatcherPath,paraMap);
    }
}

LoginInfoDao:

package com.winning.dao;
import org.apache.ibatis.annotations.Mapper;
import org.springframework.stereotype.Repository;
import java.util.HashMap;
import java.util.List;
import java.util.Map;

@Mapper
@Repository
public interface LoginInfoDao {
    public List selUsers(Map map) throws Exception;
}
User:

package com.winning.entity;
public class User {
    private  String name;
    private  int    age;
    private  String  tel;

    public String getName() {
        return name;
    }

    public void setName(String name) {
        this.name = name;
    }

    public int getAge() {
        return age;
    }

    public void setAge(int age) {
        this.age = age;
    }

    public String getTel() {
        return tel;
    }

    public void setTel(String tel) {
        this.tel = tel;
    }
}
LoginInfoService:

package com.winning.service;
import java.util.HashMap;
import java.util.List;
import java.util.Map;

public interface LoginInfoService {
    public List selUsers(Map map) throws Exception;
}
LoginInfoServiceImp :

package com.winning.service.serviceImp;
import com.winning.dao.LoginInfoDao;
import com.winning.service.LoginInfoService;
import org.springframework.beans.factory.annotation.Autowired;
import org.springframework.stereotype.Service;
import java.util.HashMap;
import java.util.List;
import java.util.Map;

@Service("loginService")
public class LoginInfoServiceImp implements LoginInfoService
{
    @Autowired
    private LoginInfoDao loginInfoDao;

    @Override
    public List selUsers(Map map)  throws Exception{
        return loginInfoDao.selUsers(map);
    }
}
loginInfoMapper.xml:
login.html:
PAPRO
注意:使用thymeleaf时,不要忘了在h5头上加引用。
所有代码已经粘贴上去,自己定义项目目录的请复制代码的时候注意取舍,至此项目搭建已经完成,接着就是部署启动。(需要注意的是接口对数据库的访问写法,写mapper文件的时候,命名空间要是dao层接口的全包名,实行方法映射)
第六步:部署,启动。
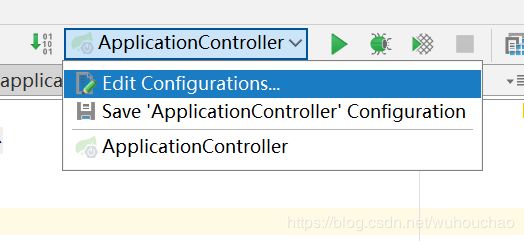
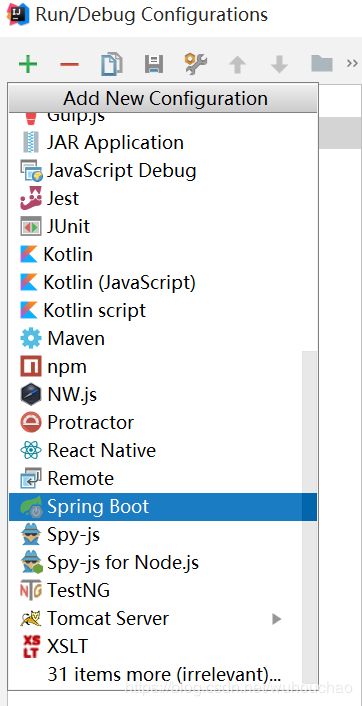
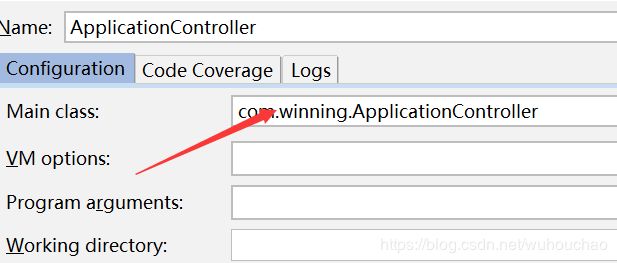
点击编辑配置,选择springboot,然后配置Main class找到我们的启动类,配置ok,接着直接运行。
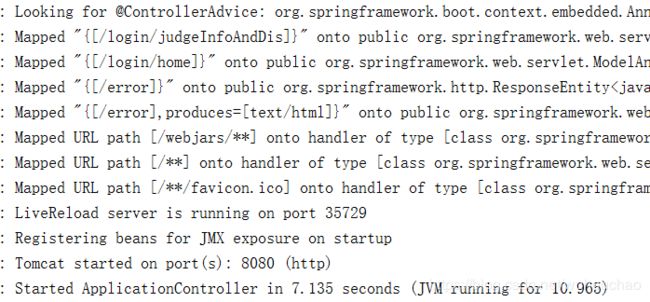
第七步:控制台启动成功,并且给出端口号和自定义Controller类中的访问路径。(这里忘了说,tomcat也集成在springboot配置文件里,不需要我们部署配置,直接使用即可)
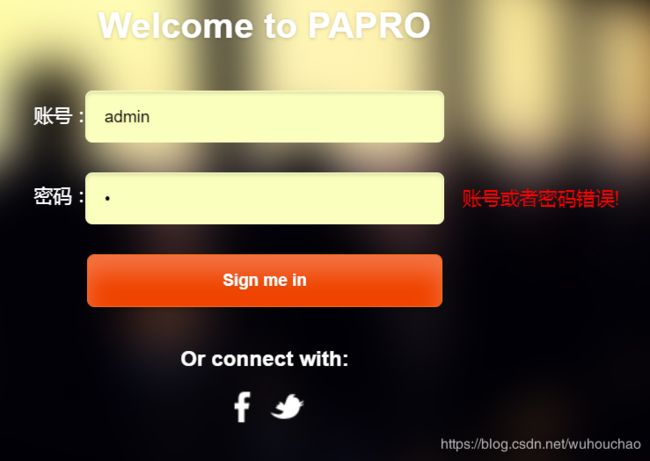
访问结果:完成了简单的数据校验,整合完成。(PS:登陆访问页面效果自定义,只要能实现数据访问就ok了,我给的html因为没有给出css等资源文件,所以没效果很正常)
至此,一个springboot整合项目已经完成,希望对大家有帮助!
