一 准备
i. 一个安装好的linux系统,
i. jdk软件 jdk-8u144-linux-x64.rpm
i. hadoop 软件 hadoop-3.0.0-alpha4.tar.gz
ii. 关闭防火墙 centos7 使用firewalld:
systemctl stop firewalld.service
二安装
下面是正式安装
- linux 系统安装 请参照
linux centos7 虚拟机VirtualBox安装详细:
http://www.jianshu.com/p/95faae6d299b - jdk 的安装配置 请参照
linux下tomcat7安装 jdk 1.8安装部分:
http://www.jianshu.com/p/ad87b72b6eaf
下面是hadoop的正式安装
- 首先下载hadoop
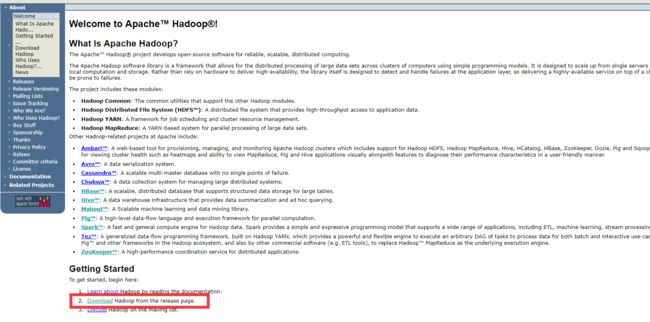
登录hadoop的官网下载
http://hadoop.apache.org/
我们能看到官网给出了许多的hadoop的子项目
我们现在需要的就在 [Getting Started]下面
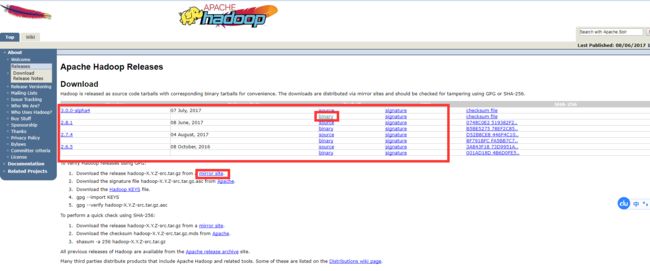
点击download进入下载页面
http://hadoop.apache.org/releases.html
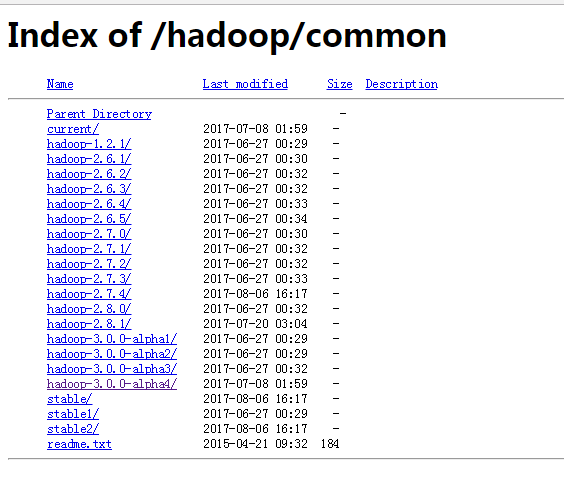
可以直接选择binary版本或者点下面镜像站点选择下载
直接点解超链接下载软件就行了
下完 有将近300M 我们通过xftp 上传到linux 中
使用 进行 解压
tar -xvf hadoop-3.0.0-alpha4.tar.gz
接下来是hadoop软件的安装,
- 创建一些目录
mkdir  /root/hadoop
mkdir  /root/hadoop/tmp
mkdir  /root/hadoop/var
mkdir  /root/hadoop/dfs
mkdir  /root/hadoop/dfs/name
mkdir  /root/hadoop/dfs/data
[root@localhost ~]# mkdir  /root/hadoop
[root@localhost ~]# mkdir  /root/hadoop/tmp
[root@localhost ~]# mkdir  /root/hadoop/var
[root@localhost ~]# mkdir  /root/hadoop/dfs
[root@localhost ~]# mkdir  /root/hadoop/dfs/name
[root@localhost ~]# mkdir  /root/hadoop/dfs/data
- 修改etc/hadoop中的一系列配置文件
[root@localhost ~]# cd /home/hadoop/hadoop-3.0.0-alpha4/etc/hadoop/
[root@localhost hadoop]# ls
capacity-scheduler.xml      hadoop-policy.xml                 kms-acls.xml          mapred-queues.xml.template     yarn-env.cmd
configuration.xsl           hadoop-user-functions.sh.example  kms-env.sh            mapred-site.xml                yarn-env.sh
container-executor.cfg      hdfs-site.xml                     kms-log4j.properties  shellprofile.d                 yarn-site.xml
core-site.xml               httpfs-env.sh                     kms-site.xml          ssl-client.xml.example
hadoop-env.cmd              httpfs-log4j.properties           log4j.properties      ssl-server.xml.example
hadoop-env.sh               httpfs-signature.secret           mapred-env.cmd        user_ec_policies.xml.template
hadoop-metrics2.properties  httpfs-site.xml                   mapred-env.sh         workers
2.1. 修改core-site.xml
在
        hadoop.tmp.dir
        /root/hadoop/tmp
        Abase for other temporary directories.


        fs.default.name
        hdfs://hserver1:9000
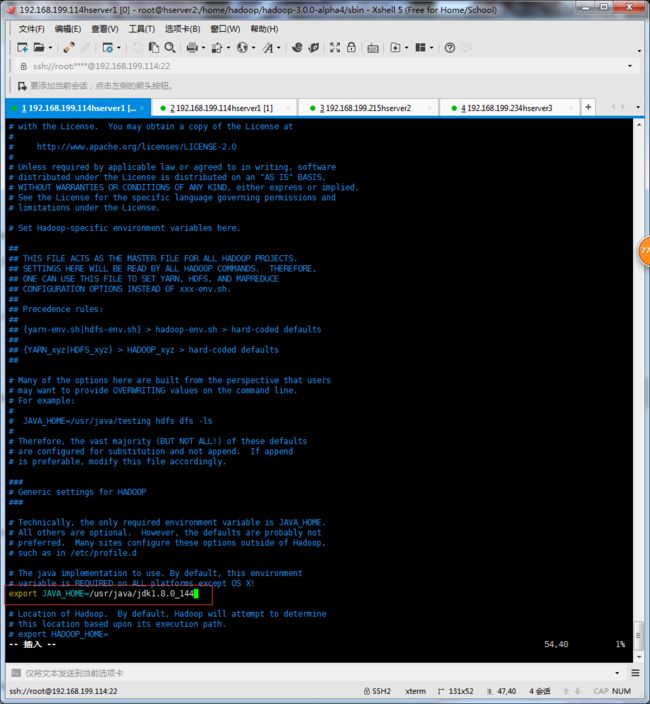
2.2. 修改hadoop-env.sh
将export JAVA_HOME=${JAVA_HOME}
修改为:
export JAVA_HOME=/usr/java/jdk1.8.0_144
- 说明:修改为自己的JDK路径
先检查下javahome路径 echo $JAVA_HOME
[root@localhost hadoop]# echo $JAVA_HOME
/usr/java/jdk1.8.0_144
[root@localhost hadoop]#
其实这一步我感觉不必要,因为环境变量已经设置好了
说道环境变量 应该先把hadoop 添加到环境变量中
JAVA_HOME=/usr/java/jdk1.8.0_144
PYTHON_HOME=/usr/local/python3
HADOOP_HOME=/home/hadoop/hadoop
PATH=$JAVA_HOME/bin:$PYTHON_HOME/bin:$HADOOP_HOME/bin:$PATH
CLASSPATH=.:$JAVA_HOME/lib/dt.jar:$JAVA_HOME/lib/tools.jar
export JAVA_HOME
export PYTHON_HOME
export HADOOP_HOME
export PATH
export CLASSPATH
添加完别忘了执行 source 使生效
[root@localhost hadoop]# vim /etc/profile
[root@localhost hadoop]# source /etc/profile
[root@localhost hadoop]#
环境配置完了可以执行 hadoop version 查看生效
[root@localhost hadoop]# hadoop version
Hadoop 3.0.0-alpha4
Source code repository https://git-wip-us.apache.org/repos/asf/hadoop.git -r e324cf8a2a6e55e996414ff281fee757f09d8172
Compiled by andrew on 2017-06-30T01:52Z
Compiled with protoc 2.5.0
From source with checksum 74491a36456845ab59719bc761659d3
This command was run using /home/hadoop/hadoop-3.0.0-alpha4/share/hadoop/common/hadoop-common-3.0.0-alpha4.jar
[root@localhost hadoop]#
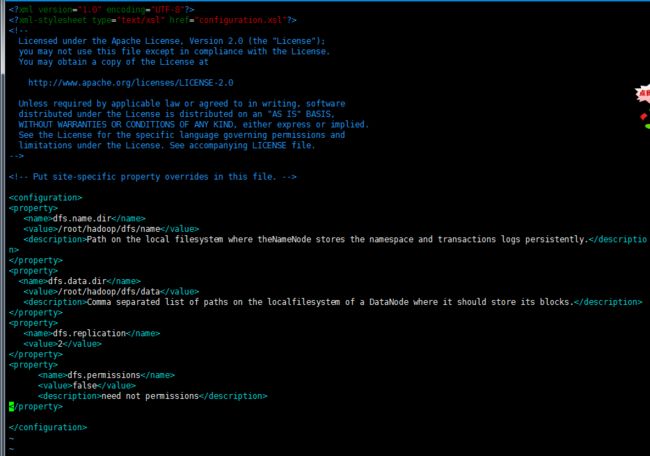
2.3. 修改hdfs-site.xml
在
   dfs.name.dir
   /root/hadoop/dfs/name
   Path on the local filesystem where theNameNode stores the namespace and transactions logs persistently.


  dfs.data.dir
   /root/hadoop/dfs/data
   Comma separated list of paths on the localfilesystem of a DataNode where it should store its blocks.


   dfs.replication
   2


      dfs.permissions
      false
      need not permissions
- 说明:dfs.permissions配置为false后,可以允许不要检查权限就生成dfs上的文件,方便倒是方便了,但是你需要防止误删除,请将它设置为true,或者直接将该property节点删除,因为默认就是true。
2.4. 修改mapred-site.xml
修改这个新建的mapred-site.xml文件,在
    mapred.job.tracker
    hserver1:49001


      mapred.local.dir
       /root/hadoop/var


       mapreduce.framework.name
       yarn
2.5. 修改slaves文件 这一版本叫workers
修改 workers文件,将里面的localhost删除,添加如下内容:
hserver2
hserver3
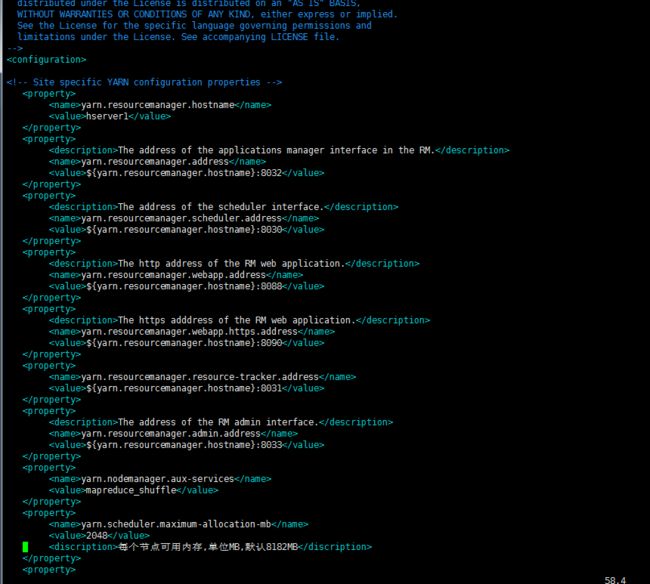
2.6. 修改yarn-site.xml文件
在
        yarn.resourcemanager.hostname
        hserver1


        The address of the applications manager interface in the RM.
        yarn.resourcemanager.address
        ${yarn.resourcemanager.hostname}:8032


        The address of the scheduler interface.
        yarn.resourcemanager.scheduler.address
        ${yarn.resourcemanager.hostname}:8030


        The http address of the RM web application.
        yarn.resourcemanager.webapp.address
        ${yarn.resourcemanager.hostname}:8088


        The https adddress of the RM web application.
        yarn.resourcemanager.webapp.https.address
        ${yarn.resourcemanager.hostname}:8090


        yarn.resourcemanager.resource-tracker.address
        ${yarn.resourcemanager.hostname}:8031


        The address of the RM admin interface.
        yarn.resourcemanager.admin.address
        ${yarn.resourcemanager.hostname}:8033


        yarn.nodemanager.aux-services
        mapreduce_shuffle


        yarn.scheduler.maximum-allocation-mb
        2048
        每个节点可用内存,单位MB,默认8182MB


        yarn.nodemanager.vmem-pmem-ratio
        2.1


        yarn.nodemanager.resource.memory-mb
        2048


        yarn.nodemanager.vmem-check-enabled
        false
- 说明:yarn.nodemanager.vmem-check-enabled这个的意思是忽略虚拟内存的检查,如果你是安装在虚拟机上,这个配置很有用,配上去之后后续操作不容易出问题。如果是实体机上,并且内存够多,可以将这个配置去掉。
到此 hadoop的配置算是完成 下面还需要两台机器组集群
由于我是用虚拟机安装的所以用克隆出两台来 以上的配置可以省略了 若是真机请复制软件解压文件到其他机器上相同路径下, 软后重复检查安装步骤
-
安装3个虚拟机并实现ssh免密码登录 下面开始克隆
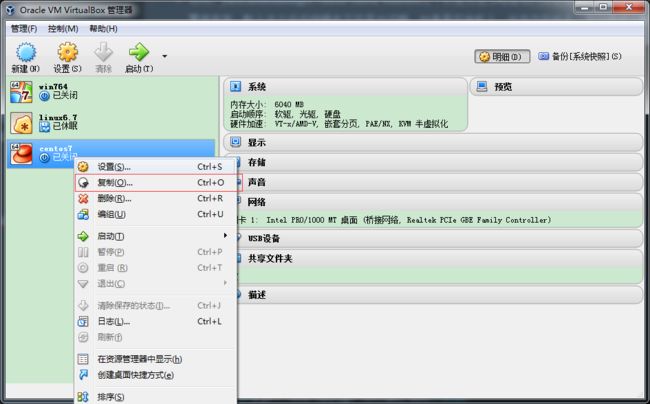
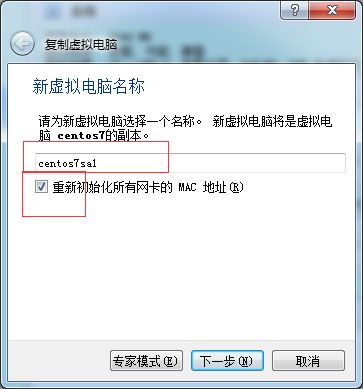
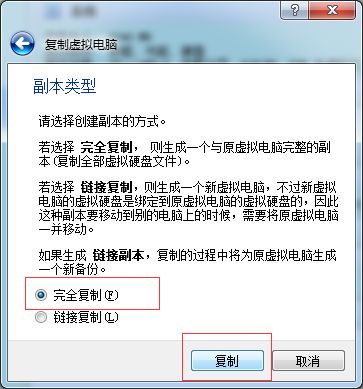
3.1. 首先关机然后复制
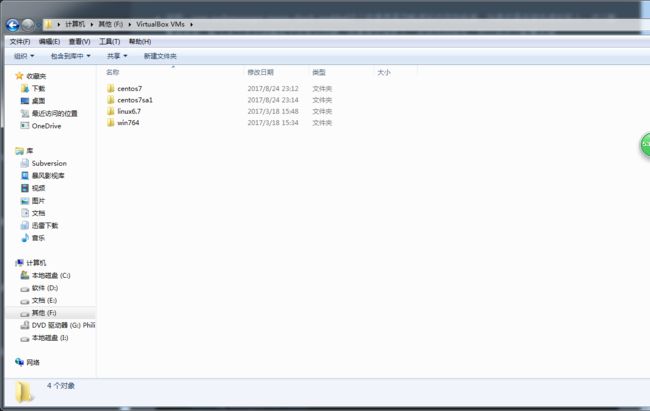
多丽复活啦
可以看到你的安装目录下生成新的disk 文件
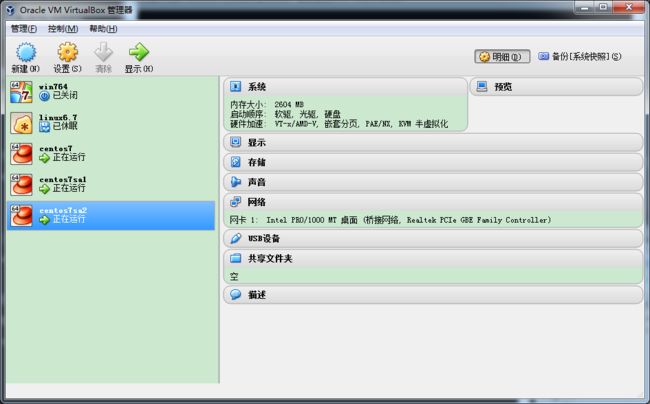
克隆完了,注意修改每个的内存大小,然后启动
全部启动后 需要手动重启下网卡重新分下ip
记录下ip 和 分配的名
192.168.199.114 hserver1
192.168.199.215 hserver2
192.168.199.234 hserver3
接下来就是奇迹的旅程了
需要用的ssh免密码登录配置
下面进行配置
3.2. 检查机器名称
[root@localhost ~]# hostname
localhost.localdomain
[root@localhost ~]#
发现,这个机器名称不是我们想要的。不过这个好办, 我给它改个名称,命令是:
hostname hserver1
[root@localhost ~]# hostname   hserver1
[root@localhost ~]# hostname
hserver1
[root@localhost ~]#
3.3. 修改/etc/hosts文件
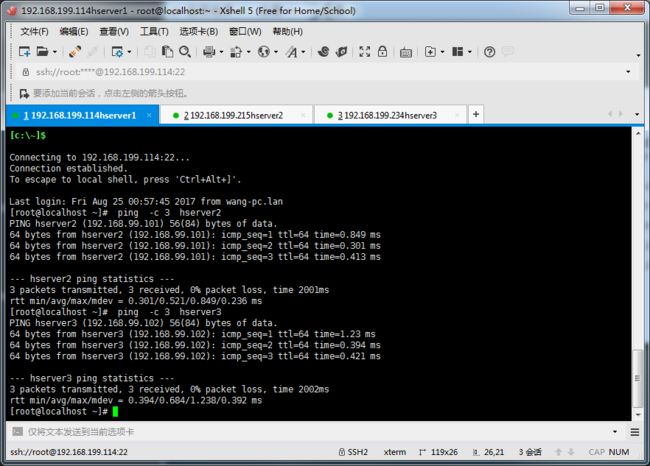
配置完成后使用ping命令检查这3个机器是否相互ping得通,以hserver1为例,在什么执行命令:
ping -c 3 hserver2
结果并不通,看来需要组一个内网环境
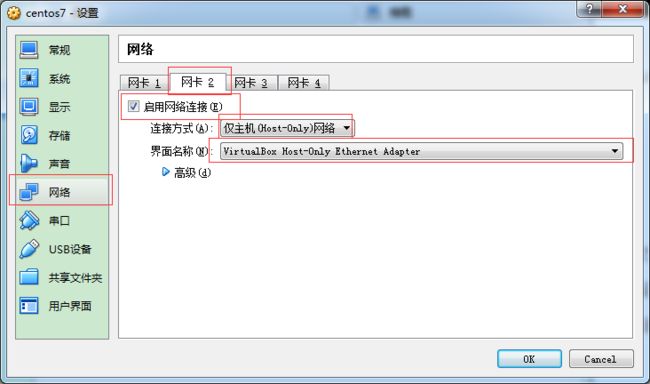
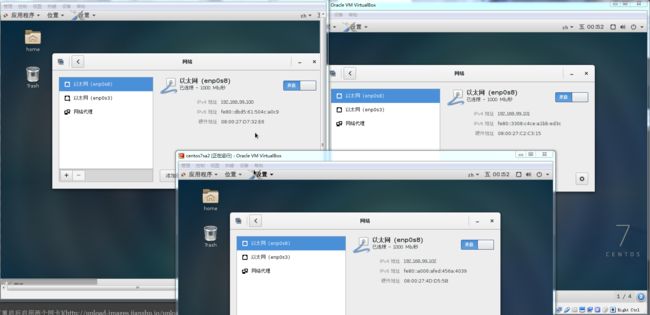
关机 給每个机器添加一块网卡
*每个都需要这么做
然后重启
注意你的网卡名称
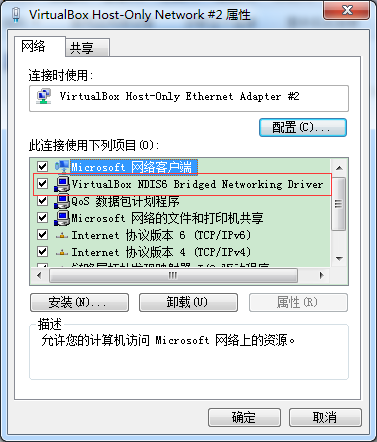
然后右击勾选 nds6
然后重启这个网卡
不然你的虚拟机启动不了的
重新记录ip和 名称
192.168.56.101 hserver1
192.168.56.102 hserver2
192.168.56.103 hserver3
但是xshell 的连接还是用外网的不用变也行
连接上xshell 重新修改 hosts文件
再试一次 ping
看样是通过了,接下来就是免密码授权登录了
3.4. 给3个机器生成秘钥文件
修改完hostname
hostname hserver1
三个机器修改完后执行ssh-keygen
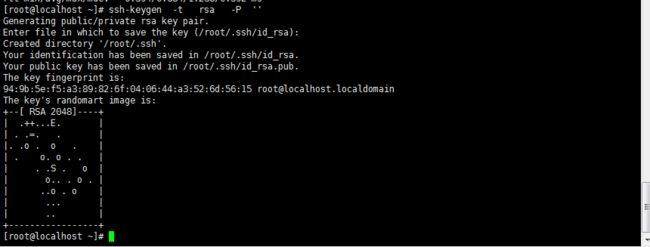
以hserve1为例,执行命令,生成空字符串的秘钥(后面要使用公钥),命令是:
ssh-keygen -t rsa -P ''
因为我现在用的是root账户,所以秘钥文件保存到了/root/.ssh/目录内,可以使用命令查看,命令是:
[root@localhost ~]# ls /root/.ssh
id_rsa  id_rsa.pub
[root@localhost ~]#
- 使用同样的方法为hserver2和hserver3生成秘钥(命令完全相同,不用做如何修改)。
3.5. 在hserver1上创建authorized_keys文件
接下来要做的事情是在3台机器的/root/.ssh/目录下都存入一个内容相同的文件,文件名称叫authorized_keys,文件内容是我们刚才为3台机器生成的公钥。为了方便,我下面的步骤是现在hserver1上生成authorized_keys文件,然后把3台机器刚才生成的公钥加入到这个hserver1的authorized_keys文件里,然后在将这个authorized_keys文件复制到hserver2和hserver3上面。
首先使用命令,在hserver1的/root/.ssh/目录中生成一个名为authorized_keys的文件,命令是:
touch  /root/.ssh/authorized_keys
cat /root/.ssh/id_rsa.pub
vim /root/.ssh/authorized_keys
合并完成后复制到另外两台机器上
3.6. 测试使用ssh进行无密码登录
在hserver1上进行测试 输入命令:
[root@localhost ~]# ssh hserver2
The authenticity of host 'hserver2 (192.168.99.101)' can't be established.
ECDSA key fingerprint is 0c:21:c8:44:2f:a4:5e:eb:86:09:a2:31:70:3f:4a:1b.
Are you sure you want to continue connecting (yes/no)? yes
Warning: Permanently added 'hserver2,192.168.99.101' (ECDSA) to the list of known hosts.
Last login: Fri Aug 25 01:12:12 2017 from wang-pc.lan
[root@hserver2 ~]#
可以看到输入命令后在输入yes 即可远程 101机器了
到此 密码的登录配置好了
接下来进行最终配置启动
- 启动hadoop
4.1在namenode上执行初始化
因为hserver1是namenode,hserver2和hserver3都是datanode,所以只需要对hserver1进行初始化操作,也就是对hdfs进行格式化。
进入到hserver1这台机器的/home/hadoop/hadoop-3.0.0-alpha4/bin目录,也就是执行命令:
cd /home/hadoop/hadoop-3.0.0-alpha4/bin
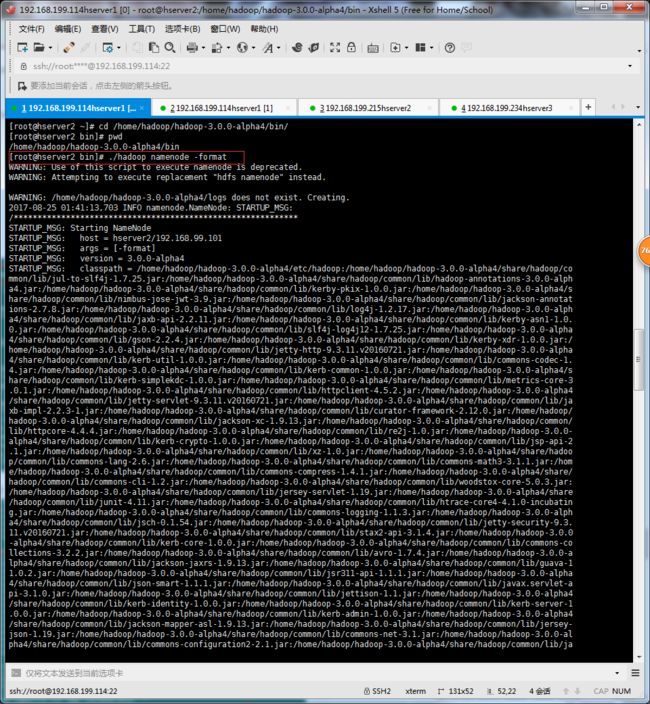
执行初始化脚本,也就是执行命令:
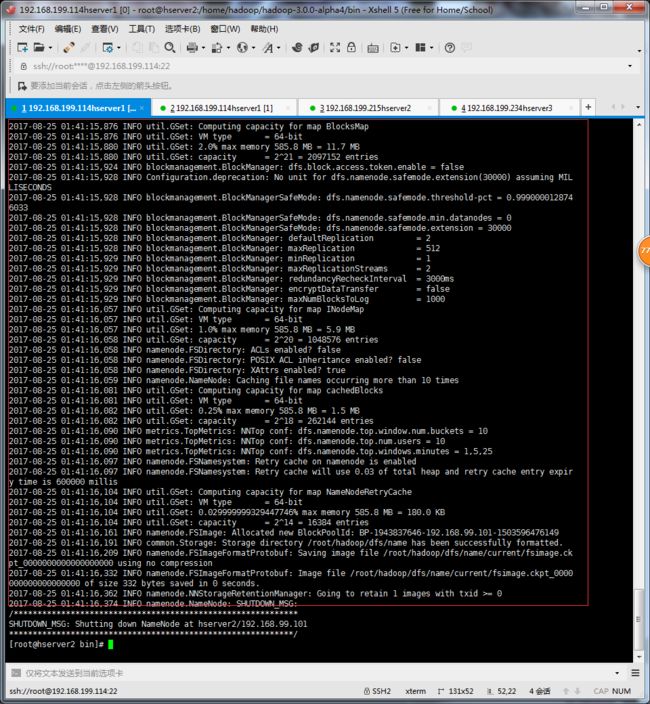
./hadoop namenode -format
查看 dfs 多出许多文件
[root@hserver2 bin]# ls /root/hadoop/dfs/name/current/
fsimage_0000000000000000000  fsimage_0000000000000000000.md5  seen_txid  VERSION
[root@hserver2 bin]#
4.2. 在namenode上执行启动命令
因为hserver1是namenode,hserver2和hserver3都是datanode,所以只需要再hserver1上执行启动命令即可。
进入到hserver1这台机器的/opt/hadoop/hadoop-2.8.0/sbin目录,也就是执行命令:
cd /opt/hadoop/hadoop/sbin
执行初始化脚本,也就是执行命令:
./start-all.sh
第一次执行上面的启动命令,会需要我们进行交互操作,在问答界面上输入yes回车
[root@hserver2 sbin]# ./start-all.sh
Starting namenodes on [hserver1]
ERROR: Attempting to operate on hdfs namenode as root
ERROR: but there is no HDFS_NAMENODE_USER defined. Aborting operation.
Starting datanodes
ERROR: Attempting to operate on hdfs datanode as root
ERROR: but there is no HDFS_DATANODE_USER defined. Aborting operation.
Starting secondary namenodes [hserver2]
ERROR: Attempting to operate on hdfs secondarynamenode as root
ERROR: but there is no HDFS_SECONDARYNAMENODE_USER defined. Aborting operation.
Starting resourcemanager
ERROR: Attempting to operate on yarn resourcemanager as root
ERROR: but there is no YARN_RESOURCEMANAGER_USER defined. Aborting operation.
Starting nodemanagers
ERROR: Attempting to operate on yarn nodemanager as root
ERROR: but there is no YARN_NODEMANAGER_USER defined. Aborting operation.
[root@hserver2 sbin]#
出现以上错误
解决方法
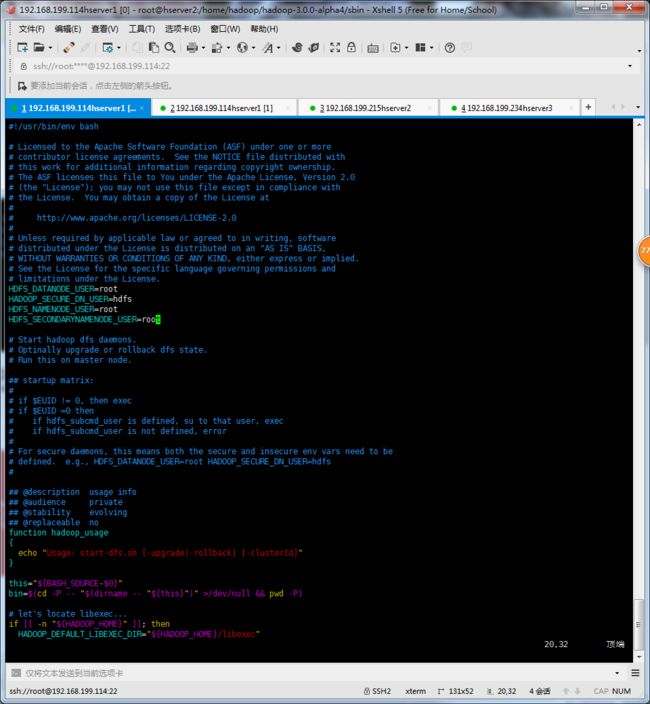
是因为缺少用户定义造成的,所以分别编辑开始和关闭脚本
$ vim sbin/start-dfs.sh
$ vim sbin/stop-dfs.sh
在顶部空白处添加内容:
HDFS_DATANODE_USER=root
HADOOP_SECURE_DN_USER=hdfs
HDFS_NAMENODE_USER=root
HDFS_SECONDARYNAMENODE_USER=root
再次执行
[root@hserver2 sbin]# ./start-all.sh
WARNING: HADOOP_SECURE_DN_USER has been replaced by HDFS_DATANODE_SECURE_USER. Using value of HADOOP_SECURE_DN_USER.
Starting namenodes on [hserver1]
上一次登录:五 8月 25 01:36:22 CST 2017从 hserver1pts/1 上
hserver1: Warning: Permanently added 'hserver1,192.168.99.100' (ECDSA) to the list of known hosts.
hserver1: ERROR: JAVA_HOME is not set and could not be found.
Starting datanodes
上一次登录:五 8月 25 01:56:14 CST 2017pts/1 上
hserver3: Warning: Permanently added 'hserver3,192.168.99.102' (ECDSA) to the list of known hosts.
hserver2: Warning: Permanently added 'hserver2,192.168.99.101' (ECDSA) to the list of known hosts.
hserver2: ERROR: JAVA_HOME is not set and could not be found.
hserver3: ERROR: JAVA_HOME is not set and could not be found.
Starting secondary namenodes [hserver2]
上一次登录:五 8月 25 01:56:15 CST 2017pts/1 上
hserver2: ERROR: JAVA_HOME is not set and could not be found.
Starting resourcemanager
ERROR: Attempting to operate on yarn resourcemanager as root
ERROR: but there is no YARN_RESOURCEMANAGER_USER defined. Aborting operation.
Starting nodemanagers
ERROR: Attempting to operate on yarn nodemanager as root
ERROR: but there is no YARN_NODEMANAGER_USER defined. Aborting operation.
[root@hserver2 sbin]#
出现错误 说hserver2的java_home 没有设置
出现的原因可能是前面说的配置我没有进行设置 现在修改
vim /home/hadoop/hadoop-3.0.0-alpha4/etc/hadoop/hadoop-env.sh
再次执行
[root@hserver2 sbin]# ./start-all.sh
WARNING: HADOOP_SECURE_DN_USER has been replaced by HDFS_DATANODE_SECURE_USER. Using value of HADOOP_SECURE_DN_USER.
Starting namenodes on [hserver1]
上一次登录:五 8月 25 01:56:18 CST 2017pts/1 上
hserver1: ERROR: JAVA_HOME is not set and could not be found.
Starting datanodes
上一次登录:五 8月 25 02:07:32 CST 2017pts/1 上
hserver3: WARNING: /home/hadoop/hadoop-3.0.0-alpha4/logs does not exist. Creating.
Starting secondary namenodes [hserver2]
上一次登录:五 8月 25 02:07:32 CST 2017pts/1 上
Starting resourcemanager
ERROR: Attempting to operate on yarn resourcemanager as root
ERROR: but there is no YARN_RESOURCEMANAGER_USER defined. Aborting operation.
Starting nodemanagers
ERROR: Attempting to operate on yarn nodemanager as root
ERROR: but there is no YARN_NODEMANAGER_USER defined. Aborting operation.
还有错误
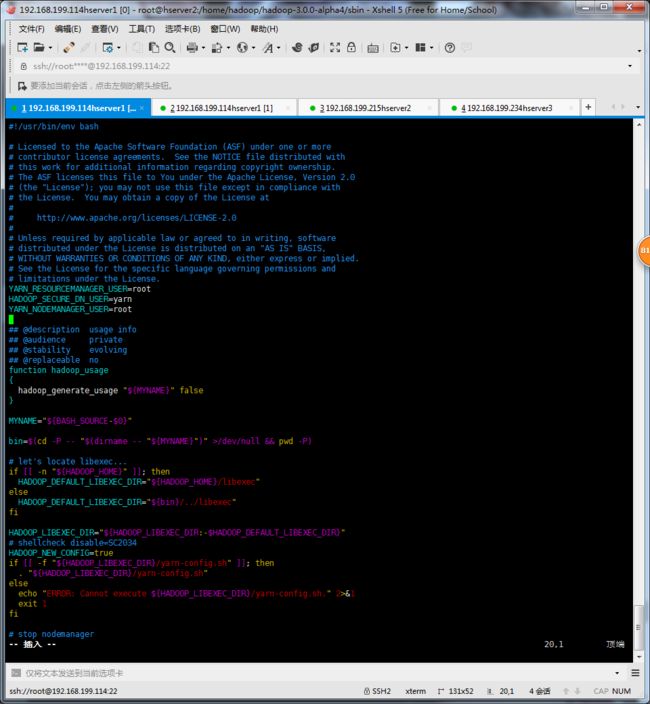
是因为缺少用户定义造成的,所以分别编辑开始和关闭脚本
$ vim sbin/start-yarn.sh
$ vim sbin/stop-yarn.sh
在顶部空白处添加内容:
YARN_RESOURCEMANAGER_USER=root
HADOOP_SECURE_DN_USER=yarn
YARN_NODEMANAGER_USER=root
再次执行
[root@localhost sbin]# ./start-all.sh
WARNING: HADOOP_SECURE_DN_USER has been replaced by HDFS_DATANODE_SECURE_USER. Using value of HADOOP_SECURE_DN_USER.
Starting namenodes on [hserver1]
上一次登录:日 8月 27 21:24:27 CST 2017从 hserver2pts/2 上
hserver1: Warning: Permanently added 'hserver1,192.168.56.101' (ECDSA) to the list of known hosts.
Starting datanodes
上一次登录:日 8月 27 21:26:48 CST 2017pts/1 上
hserver2: WARNING: /home/hadoop/hadoop/logs does not exist. Creating.
hserver3: WARNING: /home/hadoop/hadoop/logs does not exist. Creating.
Starting secondary namenodes [hserver1]
上一次登录:日 8月 27 21:26:50 CST 2017pts/1 上
Starting resourcemanager
上一次登录:日 8月 27 21:26:57 CST 2017pts/1 上
Starting nodemanagers
上一次登录:日 8月 27 21:27:07 CST 2017pts/1 上
[root@localhost sbin]#
这次并没有错误
测试看下有没有问题
反正安装是没有问题了,但是就是起不来,不知道为什么,下面是测试
有个警告
HADOOP_SECURE_DN_USER has been replaced by HDFS_DATANODE_SECURE_USER. Using value of HADOOP_SECURE_DN_USER
因为 HADOOP_SECURE_DN_USER 在
hadoop-3.0.0-alpha4版本中被替换掉了
修改
$ vim sbin/start-dfs.sh
$ vim sbin/stop-dfs.sh
$ vim sbin/start-yarn.sh
$ vim sbin/stop-yarn.sh
再次启动测试
[root@localhost sbin]# ./start-all.sh
Starting namenodes on [hserver1]
上一次登录:日 8月 27 21:47:15 CST 2017pts/1 上
Starting datanodes
上一次登录:日 8月 27 21:58:30 CST 2017pts/1 上
Starting secondary namenodes [hserver1]
上一次登录:日 8月 27 21:58:33 CST 2017pts/1 上
Starting resourcemanager
上一次登录:日 8月 27 21:58:40 CST 2017pts/1 上
Starting nodemanagers
上一次登录:日 8月 27 21:58:49 CST 2017pts/1 上

# 分别在执行 jps
[root@localhost sbin]# jps
10699 NameNode
11851 Jps
11006 SecondaryNameNode
11263 ResourceManager
[root@localhost sbin]#

[root@localhost ~]# jps
7712 DataNode
8041 Jps
7839 NodeManager
[root@localhost ~]#

[root@localhost ~]# jps
7911 Jps
7708 NodeManager
7581 DataNode
[root@localhost ~]#

# 查看运行状态
[root@localhost ~]# /home/hadoop/hadoop/bin/hdfs dfsadmin -report
Configured Capacity: 0 (0 B)
Present Capacity: 0 (0 B)
DFS Remaining: 0 (0 B)
DFS Used: 0 (0 B)
DFS Used%: NaN%
Under replicated blocks: 0
Blocks with corrupt replicas: 0
Missing blocks: 0
Missing blocks (with replication factor 1): 0
Pending deletion blocks: 0

-------------------------------------------------
[root@localhost ~]#
- 测试hadoop
haddoop启动了,需要测试一下hadoop是否正常。
执行命令,关闭防火墙,CentOS7下,命令是:
systemctl stop firewalld.service
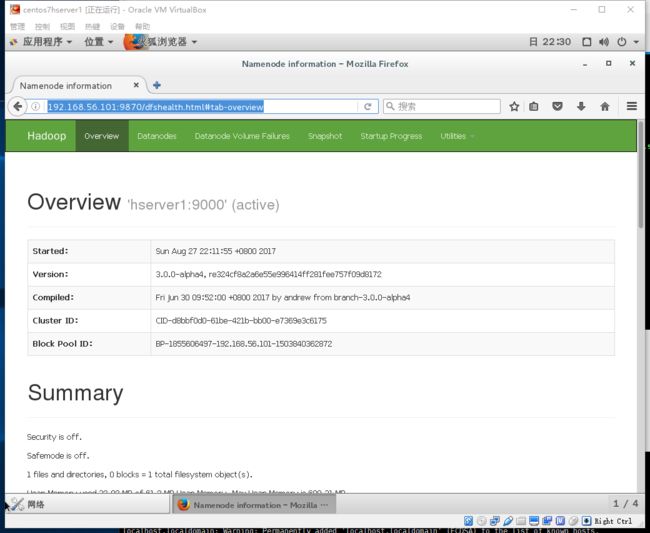
hserver1是我们的namanode,该机器的IP是192.168.56.101 ,在本地电脑访问如下地址:
http://192.168.56.101:9870/
自动跳转到了overview页面
问题保留
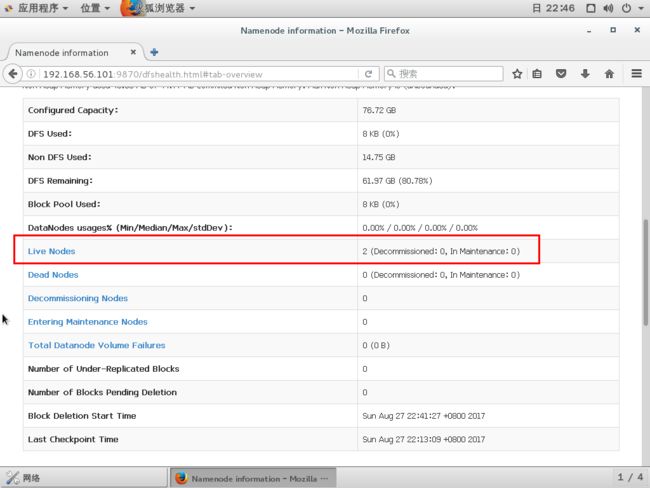
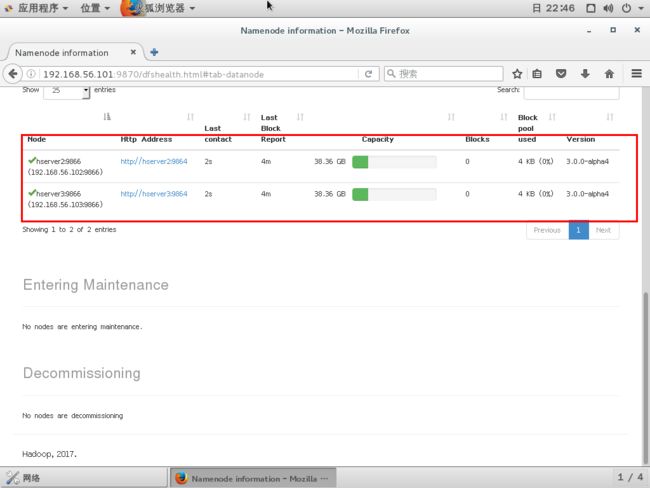
- 通过start-all.sh 所有的节点都启动了但是我没有在管理上看到节点的信息
- 通过stop-all.sh 只能停止当前机器,所有节点还需手动停止。。。
ps 1 问题解决
systemctl stop firewalld.service
并不能永久关闭,机器重启,防火墙又开启,正确关闭方法
永久关闭防火墙命令。重启后,防火墙不会自动启动。
systemctl disable firewalld

