由于刚到公司接手老项目,项目第三方库的使用管理竟然是手动管理,让我感觉有点惊讶。于是决定抽时间把一些基础的lib打包成framework并可以通过Cocopods来集成。方便别人使用,同时也让项目的整体结构看起来清晰一点。
1、framework的开发
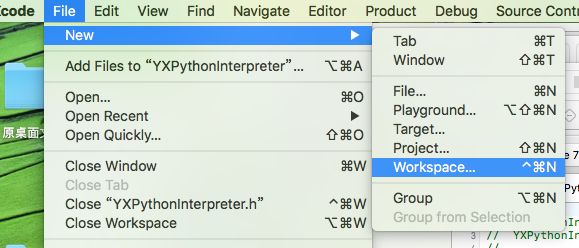
我采用的Workspace来联调测试framework。
1、首先创建一个Workspace,名字随便取
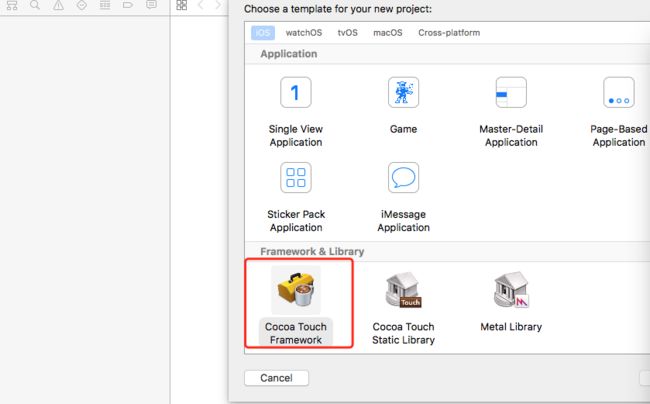
2、创建framework开发工程,并加入刚刚我们创建的workspace中
3、创建测试工程,并加入我们创建的workspace中,这里和上面的步骤差不多,就不截图了。
下图为创建好后的目录结构
4、关联调试,
在framework中添加一个类,并写个类方法,用来测试调用
+ (void)initPythonInterpreter{

    NSLog(@"我需要初始化python执行的脚本环境");
}
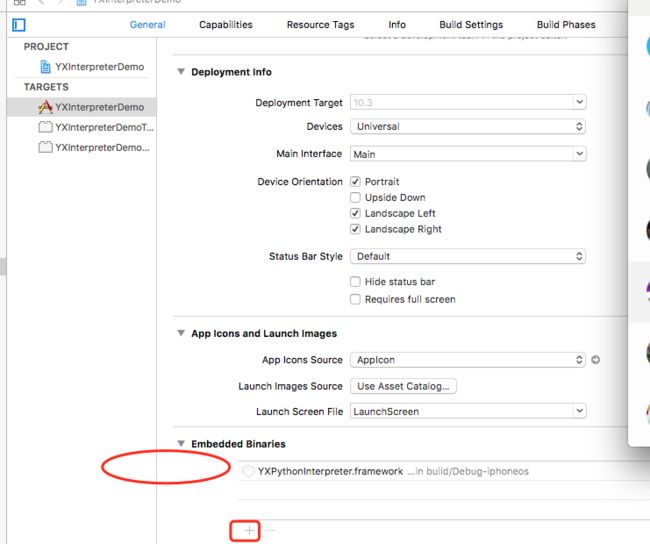
在测试工程中,添加framework
设置Header Search Paths,设置其路径为
${SRCROOT}/../YXPythonInterpreter
注意:这个要根据自己工程的路径来设置
现在运行测试工程就能调试SDK 了。
2、framework的打包
可以用手动或者脚本进行打包,我这里因为要支持Cocopods,所有选择Cocopods插件打包
1、执行下面的命令
pod lib create YXPythonInterpreter
2、编写podspec文件
Pod::Spec.new do |s|
  s.name             = 'YXPythonInterpreter'
  s.version          = '0.1.0'
  s.summary          = 'A short description of YXPythonInterpreter.'

# This description is used to generate tags and improve search results.
#   * Think: What does it do? Why did you write it? What is the focus?
#   * Try to keep it short, snappy and to the point.
#   * Write the description between the DESC delimiters below.
#   * Finally, don't worry about the indent, CocoaPods strips it!

  s.description      = <<-DESC
TODO: Add long description of the pod here.
                       DESC

  s.homepage         = 'https://github.com/full-of-fire/YXPythonInterpreter'
  # s.screenshots     = 'www.example.com/screenshots_1', 'www.example.com/screenshots_2'
  s.license          = { :type => 'MIT', :file => 'LICENSE' }
  s.author           = { 'full-of-fire' => '[email protected]' }
  s.source           = { :git => '/Users/谭德林/Desktop/Framework开发/YXPythonInterpreter/YXPythonInterpreter_Release/YXPythonInterpreter', :tag => s.version.to_s }
  # s.social_media_url = 'https://twitter.com/'

  s.ios.deployment_target = '8.0'

  s.source_files = 'YXPythonInterpreter/Classes/**/*'

  s.public_header_files = 'YXPythonInterpreter/Classes/**/*.h'
  s.ios.vendored_frameworks = 'YXPythonInterpreter/*.framework'
  s.libraries = 'xml2', 'z','bz2','sqlite3','c++','stdc++'
  s.resource = 'YXPythonInterpreter/PythonEnvironment.bundle'

  # s.resource_bundles = {
  #   'YXPythonInterpreter' => ['YXPythonInterpreter/Assets/*.png']
  # }

  # s.public_header_files = 'Pod/Classes/**/*.h'
  # s.frameworks = 'UIKit', 'MapKit'
  # s.dependency 'AFNetworking', '~> 2.3'
end
3、复制文件到对应目录
4、验证podspec文件
pod lib lint YXPythonInterpreter.podspec --allow-warnings --use-libraries
如果验证通过YXPythonInterpreter passed validation.
到测试工程中测试一下
cd Example/
pod install
5、安装cocoapods-packager插件
sudo gem install cocoapods-packager
6、打包
6.1,验证
开发完成静态类库之后,需要运行pod lib lint验证一下类库是否符合pod的要求(cd到podspec文件所在目录下),如果确认无误可略过。
pod lib lint XXXLIB.podspec -only-errors --verbose --allow-warnings --use-libraries
6.2,更新pod(cd到Podfile文件所在目录下)
pod update --verbose --no-repo-update 或者pod install
6.3,提交,更新版本号(cd到podspec文件所在目录下)
git add .
git commit -a -m'v请换成版本号'
 git tag -a 版本号 -m'v版本号'
6.4,将podspec文件中s.version的版本号替换为所需要的版本号**(第三步git tag的版本)
修改podspec文件中s.version = "修改为自己需要打包的版本"
6.5,打包(cd到podspec所在文件目录下)
# pod package XXXLIB.podspec --library --force     打包成.a文件。--force是指强制覆盖

# pod package XXXLIB.podspec --force               打包成.framework文件
7、发布cocopods
7.1、在git上创建一个远程仓库,
7.2、.podspec文件的编写,
7.3、关联本地和远程仓库
git add .
git commit -m 'init'
git remote add origin xxx(git 地址)
git push origin master
git tag '1.0.0'
git push --tags
7.4、验证.podspec
pod spec lint xxxxx.podspec
7.5、发布
pod trunk push xxx.podspec


