windows+bazel+tensorflow-v1.12.0(GPU)编译生成dll与lib
目录
0.最终环境
1.安装 vs2015、cuda9.0、python3.5+
2.安装 MSYS2
3.安装 Bazel
4.下载tensorflow-v1.12
5.修改文件配置
6.使用powershell进行配置与编译
7.vs无法解析的外部符号与powershell编译出现无法解析的外部符号错误
8.准备tensorflow的dll、lib、include
8.1 简版tensorflow的dll、lib、include
9.调用模型测试程序
10.尝试编译debug版本
11.遇到的问题
12.参考
这篇博客写着,是因为windows+bazel+tensorflow-r1.12(GPU)编译生成dll与lib,上一篇,虽然编译成功了,但是在使用tensorflow\examples\label_image\main.cc怎么都不能成功生成解决方案,因为缺很多链接库。所以写了这篇。
其中,我已经编译好的tensorflow-v1.12.0 dll,lib,include,如何出现缺链接库的话,自己可以将错误的符号加入tf_exported_symbols_msvc.lds文件中,自己编译生成自己的dll与lib文件:
下载链接:
tensorflow-v1.12.0 dll,lib,include
提取码:
0ugf
0.最终环境
-
win10
-
vs2015
-
cuda9
.0
-
cudnn7
.6
-
python3
.5
.2
-
tensorflow-v1
.12
.0
-
bazel0
.22
.0
-
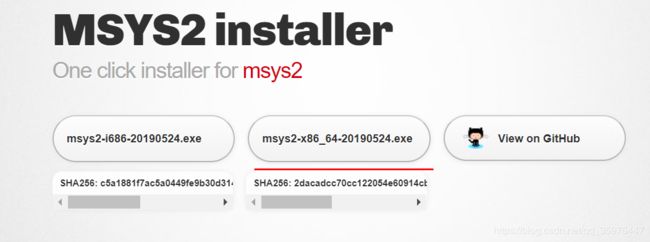
msys2-x86_64-20190524
1.安装 vs2015、cuda9.0、python3.5+
2.安装 MSYS2
http://www.msys2.org/下载,
其中这个最好按照默认路径安装,否则编译时没过几秒钟,可能会出现下面的问题:
/usr/bin/env: 'python': No such file or directory windows
所有安装步骤都默认一路next下去,安装完成以后,需要配置:
- 将目录C:\msys64和C:\msys64\usr\bin 加入系统环境变量path
- 打开cmd.exe,输入一下命令(有时可能安装不了,多试几次好了):
pacman -Syuu patch
3.安装 Bazel
在github下载Bazel,https://github.com/bazelbuild/bazel/releases,这里我下载的bazel-0.22.0-windows-x86_64.exe
![]()
将下载好的 bazel-0.22.1-windows-x86_64.exe复制到C:\msys64下,更名为bazel.exe。
配置bazel:新建环境变量:BAZEL_SH,BAZEL_VC ,BAZEL_VS
4.下载tensorflow-v1.12
git与直接下载都可以,我是直接下载的压缩包。
5.修改文件配置
此处参考https://github.com/guikarist/tensorflow-windows-build-script
1.将tensorflow-1.12.0.zip解压到tensorflow-1.12.0目录下,并将目录下的tensorflow-1.12.0文件夹重命名为source;
2.下载tensorflow-windows-build-script的压缩包,解压,将其中的patchs与build.ps.1复制到tensorflow-1.12.0目录下;
3.将patchs下的eigen_half.patch复制到tensorflow-1.12.0\source\third_party下;
![]()
4.将patchs下的tf_exported_symbols_msvc.lds复制到tensorflow-1.12.0\source\tensorflow下,这里使用我编译使用过的tf_exported_symbols_msvc.lds替换;
![]()
5.可以使用Notepad++修改build.ps1文件如下(后面可能会出现Copy-Item命令的问题);
修改 line154-182:
-
# Apply patches to source.
-
if (
$buildVersion -eq
"v1.11.0") {
-
# Eigen Patch for v1.11.0
-
git apply --ignore-space-change --ignore-white
"..\patches\eigen.1.11.0.patch"
-
Copy-Item ..\patches\eigen_half.patch third_party\
-
} elseif (
$buildVersion -eq
"v1.12.0") {
-
# Eigen Patch for v1.12.0
-
git apply --ignore-space-change --ignore-white
"..\patches\eigen.1.12.0.patch"
-
Copy-Item ..\patches\eigen_half.patch third_party\
-
} elseif (
$buildVersion -eq
"v1.13.1") {
-
[Net.ServicePointManager]::SecurityProtocol = [Net.SecurityProtocolType]::Tls12
-
(Invoke-WebRequest https://github.com/tensorflow/tensorflow/commit/ec727016282383aacf9d26386b01f6bdbd65b14b.patch).Content | git apply -v --ignore-space-change --ignore-white
-
}
-
-
if (
$BuildCppAPI) {
-
if (
$buildVersion -eq
"v1.11.0") {
-
# C++ Symbol Patch for v1.11.0
-
git apply --ignore-space-change --ignore-white
"..\patches\cpp_symbol.1.11.0.patch"
-
Copy-Item ..\patches\tf_exported_symbols_msvc.lds tensorflow\
-
} elseif (
$buildVersion -eq
"v1.12.0") {
-
# C++ Symbol Patch for v1.12.0
-
git apply --ignore-space-change --ignore-white
"..\patches\cpp_symbol.1.12.0.patch"
-
Copy-Item ..\patches\tf_exported_symbols_msvc.lds tensorflow\
-
} elseif (
$buildVersion -eq
"v1.13.1") {
-
# C++ Symbol Patch for v1.13.1
-
git apply --ignore-space-change --ignore-white
"..\patches\cpp_symbol.1.13.1.patch"
-
Copy-Item ..\patches\tf_exported_symbols_msvc.lds tensorflow\
-
}
-
}
-
为:
-
为:
-
# Apply patches to source.
-
if (
$buildVersion -eq
"v1.11.0") {
-
# Eigen Patch for v1.11.0
-
git apply --ignore-space-change --ignore-white
"..\patches\eigen.1.11.0.patch"
-
Copy-Item ..\patches\eigen_half.patch third_party\
-
} elseif (
$buildVersion -eq
"v1.12.0") {
-
# Eigen Patch for v1.12.0
-
git apply --ignore-space-change --ignore-white
"..\patches\eigen.1.12.0.patch"
-
#Copy-Item ..\patches\eigen_half.patch third_party\
-
} elseif (
$buildVersion -eq
"v1.13.1") {
-
[Net.ServicePointManager]::SecurityProtocol = [Net.SecurityProtocolType]::Tls12
-
(Invoke-WebRequest https://github.com/tensorflow/tensorflow/commit/ec727016282383aacf9d26386b01f6bdbd65b14b.patch).Content | git apply -v --ignore-space-change --ignore-white
-
}
-
-
if (
$BuildCppAPI) {
-
if (
$buildVersion -eq
"v1.11.0") {
-
# C++ Symbol Patch for v1.11.0
-
git apply --ignore-space-change --ignore-white
"..\patches\cpp_symbol.1.11.0.patch"
-
Copy-Item ..\patches\tf_exported_symbols_msvc.lds tensorflow\
-
} elseif (
$buildVersion -eq
"v1.12.0") {
-
# C++ Symbol Patch for v1.12.0
-
git apply --ignore-space-change --ignore-white
"..\patches\cpp_symbol.1.12.0.patch"
-
#Copy-Item ..\patches\tf_exported_symbols_msvc.lds tensorflow\
-
} elseif (
$buildVersion -eq
"v1.13.1") {
-
# C++ Symbol Patch for v1.13.1
-
git apply --ignore-space-change --ignore-white
"..\patches\cpp_symbol.1.13.1.patch"
-
Copy-Item ..\patches\tf_exported_symbols_msvc.lds tensorflow\
-
}
-
}
6.使用powershell进行配置与编译
1.打开powershell
输入下面命令,这是bazel编译的选项,为不同的语言(python、c、c++)其//后对应的都不一样:
$parameterString = "--config=opt --config=cuda --define=no_tensorflow_py_deps=true --copt=-nvcc_options=disable-warnings //tensorflow:libtensorflow_cc.so --verbose_failures"
bazel编译的选项,为不同的语言(python、c、c++)其//后对应的都不一样,参考https://github.com/guikarist/tensorflow-windows-build-script:
然后输入:
-
.\build.ps1 `
-
-BazelBuildParameters
$parameterString `
-
-BuildCppAPI -ReserveSource
会出现build.ps1错误:无法加载文件 ******.ps1,因为在此系统中禁止执行脚本,参考https://www.cnblogs.com/zhaozhan/archive/2012/06/01/2529384.html,解决输入一下命令:
set-executionpolicy remotesigned
下面执行开始需要互动配置了如下(如果出错重新编译的话,最好删除编译目录下,建的venv文件夹):
-
(venv) PS D:\Users\tensorflow-1.12.0> .\build.ps1 `
-
>> -BazelBuildParameters
$parameterString `
-
>> -BuildCppAPI -ReserveSource
-
-
Select a Tensorflow version:
-
[1] 1 - v1.13.1 [2] 2 - v1.12.0 [3] 3 - v1.11.0 [S] Select another version [?] 帮助 (默认值为“1”): 2
-
...
-
Starting
local Bazel server and connecting to it...
-
.
-
INFO: Starting clean.
-
WARNING: --batch mode is deprecated. Please instead explicitly shut down your Bazel server using the
command
"bazel shutdown".
-
You have bazel 0.15.0 installed.
-
Do you wish to build TensorFlow with Apache Ignite support? [Y/n]: n
-
No Apache Ignite support will be enabled
for TensorFlow.
-
-
Do you wish to build TensorFlow with XLA JIT support? [y/N]: n
-
No XLA JIT support will be enabled
for TensorFlow.
-
-
Do you wish to build TensorFlow with ROCm support? [y/N]: n
-
No ROCm support will be enabled
for TensorFlow.
-
-
Do you wish to build TensorFlow with CUDA support? [y/N]: y
-
CUDA support will be enabled
for TensorFlow.
-
-
Please specify the CUDA SDK version you want to use. [Leave empty to default to CUDA 9.0]:
-
-
-
Please specify the location
where CUDA 9.0 toolkit is installed. Refer to README.md
for more details. [Default is C:/Program Files/NVIDIA GPU Computing Toolkit/CUDA/v9.0]: D:\Users\CUDA9.0
-
-
Please specify the cuDNN version you want to use. [Leave empty to default to cuDNN 7]:
-
-
-
Please specify the location
where cuDNN 7 library is installed. Refer to README.md
for more details. [Default is D:/Users/CUDA9.0]:
-
-
-
Please specify a list of comma-separated Cuda compute capabilities you want to build with.
-
You can find the compute capability of your device at: https://developer.nvidia.com/cuda-gpus.
-
Please note that each additional compute capability significantly increases your build time and binary size. [Default is: 3.5,7.0]: 5.0
-
-
-
Please specify optimization flags to use during compilation when bazel option
"--config=opt" is specified [Default is /arch:AVX]:
-
-
-
Would you like to override eigen strong inline
for some C++ compilation to reduce the compilation time? [Y/n]: y
-
Eigen strong inline overridden.
-
-
Starting
local Bazel server and connecting to it...
-
.....................
-
WARNING: The following configs were expanded more than once: [cuda]. For repeatable flags, repeats are counted twice and may lead to unexpected behavior.
编译好以后,将
7.vs无法解析的外部符号与powershell编译出现无法解析的外部符号错误
出现下面问题都按这个步骤做,只不过第4步中,vs是加上,powershell可能会加上或者去掉tf_exported_symbols_msvc.lds文件EXPORTS中的链接:
1.如果是vs无法解析的外部符号,这样解决,错误与解决方案如下(为了能清):
- 错误:
无法解析的外部符号 "public: virtual __cdecl tensorflow::internal::LogMessage::~LogMessage(void)" (??1LogMessage@internal@tensorflow@@UEAA@XZ),该符号在函数 "public: void __cdecl tensorflow::internal::LogMessage::`vbase destructor'(void)" (??_DLogMessage@internal@tensorflow@@QEAAXXZ) 中被引用huawei_video_tensorflow
- 解决方法:函数调用后与(该符号该符号在函数)前括号内的内容添加
??1LogMessage@internal@tensorflow@@UEAA@XZ
复制到tensorflow-1.12.0\source\tensorflow\tf_exported_symbols_msvc.lds文件的EXPORTS最后面。
2.如果powershell编译出现无法解析的外部符号错误
- 错误:
无法解析的外部符号 "public: virtual __cdecl tensorflow::internal::LogMessage::~LogMessage(void)" (??1LogMessage@internal@tensorflow@@UEAA@XZ),该符号在函数 "public: void __cdecl tensorflow::internal::LogMessage::`vbase destructor'(void)" (??_DLogMessage@internal@tensorflow@@QEAAXXZ) 中被引用
- 解决方法:(该符号该符号在函数)前括号内的内容,从tensorflow-1.12.0\source\tensorflow\tf_exported_symbols_msvc.lds文件中所有包含的部分全部删除:
??1LogMessage@internal@tensorflow@@UEAA@XZ
最后不断解决重复解决遇到的头文件与无法解析外部符号问题,终于编译工程并能够正常运行程序了。
通过这个步骤,在另外一台机器上也测试成功了:
8.准备tensorflow的dll、lib、include
新建tensorflow文件夹,然后在目录下再新建两个目录,dll与lib
dll:将上面图片中路径的libtensorflow_cc.so改名为tensorflow_cc.dll,放到tensorflow\dll目录下(vs调试时会调用的文件,路径要加入到环境变量中,或者也可以将文件加到当前工程运行的release目录下)
lib:将上面图片路径下的liblibtensorflow_cc.so.ifso改名为tensorflow_cc.lib,放到tensorflow\lib目录下 (路径要加入到vs包含库目录中,或将文件放到当前工程运行的release目录下,并添加库目录)
include:将bazel_source目录下,不管是快捷方式(可能会复制不全,可以去上图中目录下,找到对应文件,反正一定要复制全,不要有空目录,不然就会缺失头文件,报错),还是文件内的文件,都需要一起复制到tensorflow下。
下面是我自己编译好的tensorflow-v1.12.0 dll,lib,include,如何出现缺链接库的话,自己可以将错误的符号加入tf_exported_symbols_msvc.lds文件中,自己编译生成自己的dll与lib文件:
提取码:
0ugf
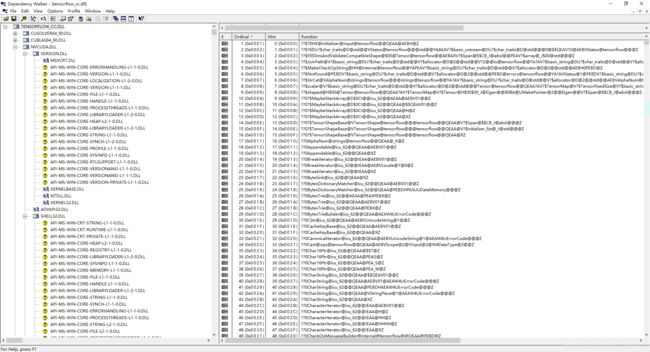
可以使用Dependency Walker工具查看该DLL:
8.1 简版tensorflow的dll、lib、include
此处感谢cjAlgthm!!!
1.首先给出文件结构图:
2.下载链接:
链接:libtensorflow
提取码:rgzf
3.使用
--解压后,将libtensorflow/include加入包含目录;
--将lib路径包含到库目录,也可以放到对应工程的生成目录中,比如x64/Release/,同样也需要包含到库目录下;(这里我是放到对应工程的生成目录下,使用的相对路径)
且需要放到附加依赖项中:
--将dll放到对应工程的生成目录中,比如x64/Release/,或者将路径添加到系统环境变量中也可以。
4.如何整理此环境,可以参考
https://blog.csdn.net/carbon06/article/details/82588150
5.对于想更改tensorflow_cc名的
请注意:
6.demo测试结果
7.对tensorflow的库做了如下修改
修改了下面三个文件:
![]()
将这几个文件中的min与max修改成下面这样:
-
string_view.h
-
line491
-493
-
-
private:
-
static
constexpr size_type kMaxSize =
-
std::numeric_limits
::max();
-
-
改为
-
private:
-
static
constexpr size_type kMaxSize =
-
(
std::numeric_limits
::max)();
9.调用模型测试程序
这部分主要参考,以及博主的cv版本代码。
下面是我自己的批处理测试单张图像代码:
-
#define COMPILER_MSVC
-
#define NOMINMAX
-
#define PLATFORM_WINDOWS // 指定使用tensorflow/core/platform/windows/cpu_info.h
-
-
#include
-
#include
-
#include"tensorflow/core/public/session.h"
-
#include "tensorflow/core/platform/env.h"
-
#include
-
-
using
namespace tensorflow;
-
using
namespace cv;
-
using
std::
cout;
-
using
std::
endl;
-
-
int main() {
-
const
std::
string model_path =
"E:/c++work/tf_testdemo/tf_testdemo/latest_model_MobileUNet_0603.pb";
// tensorflow模型文件,注意不能含有中文
-
const
std::
string image_path =
"E:/c++work/tf_testdemo/tf_testdemo/001_00045.png";
// 待inference的图片grace_hopper.jpg
-
// 设置输入图像
-
cv::Mat img = cv::imread(image_path);
-
cv::cvtColor(img, img, cv::COLOR_BGR2RGB);
-
//resize(img, img, cv::Size(512, 512),0,0, INTER_NEAREST);
-
int height = img.rows;
-
int width = img.cols;
-
int depth = img.channels();
-
-
// 图像预处理
-
img = (img -
0) /
255.0;
-
img.convertTo(img, CV_32F);
-
-
// 取图像数据,赋给tensorflow支持的Tensor变量中
-
const
float* source_data = (
float*)img.data;
-
tensorflow::
Tensor input_tensor(DT_FLOAT, TensorShape({ 1, height, width, depth }));
//这里只输入一张图片,参考tensorflow的数据格式NHWC
-
auto input_tensor_mapped = input_tensor.tensor<
float,
4>();
// input_tensor_mapped相当于input_tensor的数据接口,“4”表示数据是4维的。后面取出最终结果时也能看到这种用法
-
-
// 把数据复制到input_tensor_mapped中,实际上就是遍历opencv的Mat数据
-
for (
int i =
0; i < height; i++) {
-
const
float* source_row = source_data + (i * width * depth);
-
for (
int j =
0; j < width; j++) {
-
const
float* source_pixel = source_row + (j * depth);
-
for (
int c =
0; c < depth; c++) {
-
const
float* source_value = source_pixel + c;
-
input_tensor_mapped(
0, i, j, c) = *source_value;
-
//printf("%d");
-
}
-
}
-
}
-
// 初始化tensorflow session
-
Session* session;
-
Status status = NewSession(SessionOptions(), &session);
-
if (!status.ok()) {
-
std::
cerr << status.ToString() <<
endl;
-
return
-1;
-
}
-
else {
-
cout <<
"Session created successfully" <<
endl;
-
}
-
-
-
// 读取二进制的模型文件到graph中
-
tensorflow::GraphDef graph_def;
-
status = ReadBinaryProto(Env::Default(), model_path, &graph_def);
-
if (!status.ok()) {
-
std::
cerr << status.ToString() <<
endl;
-
return
-1;
-
}
-
else {
-
cout <<
"Load graph protobuf successfully" <<
endl;
-
}
-
-
-
// 将graph加载到session
-
status = session->Create(graph_def);
-
if (!status.ok()) {
-
std::
cerr << status.ToString() <<
endl;
-
return
-1;
-
}
-
else {
-
cout <<
"Add graph to session successfully" <<
endl;
-
}
-
// 输入inputs,“ x_input”是我在模型中定义的输入数据名称
-
std::
vector<
std::pair<
std::
string, tensorflow::Tensor>> inputs = {
-
{
"input_x:0", input_tensor },
-
};
-
-
// 输出outputs
-
//tensorflow::Tensor outputs(DT_FLOAT, TensorShape({ 1, height, width, depth }));
-
std::
vector
outputs;
-
-
//批处理识别
-
for (
int k =
0; k <
200; k++) {
-
-
double start = clock();
-
// 运行会话,计算输出"x_predict",即我在模型中定义的输出数据名称,最终结果保存在outputs中
-
status = session->Run(inputs, {
"outimage:0" }, {}, &outputs);
-
if (!status.ok()) {
-
std::
cerr << status.ToString() <<
endl;
-
return
-1;
-
}
-
else {
-
cout <<
"Run session successfully" <<
endl;
-
}
-
-
// 下面进行输出结果的可视化
-
// 下面进行输出结果的可视化
-
tensorflow::Tensor output =
std::move(outputs.at(
0));
// 模型只输出一个结果,这里首先把结果移出来(也为了更好的展示)
-
auto out_shape = output.shape();
// 这里的输出结果为1x4x16
-
auto out_val = output.tensor<
float,
4>();
// 与开头的用法对应,4代表结果的维度
-
-
cv::
Mat out_image(height, width, CV_32FC(depth));
-
float* data = (
float*)out_image.data;
-
for (
int y =
0; y < height; ++y)
-
{
-
float* dataRow = data + (y * width * depth);
-
for (
int x =
0; x < width; ++x)
-
{
-
float* dataPixel = dataRow + (x * depth);
-
for (
int c =
0; c < depth; ++c)
-
{
-
float* dataValue = dataPixel + c;
-
*dataValue = out_val(
0, y, x, c);
-
}
-
}
-
-
}
-
-
-
cv::imshow(
"outimage", out_image);
-
cv::waitKey(
1);
-
double finish = clock();
-
double duration = (
double)(finish - start) / CLOCKS_PER_SEC;
-
cout <<
"spend time:" << duration <<
endl;
-
}
-
/*cv::cvtColor(out_image, out_image, cv::COLOR_RGB2BGR);
-
cv::cvtColor(out_image_final, out_image_final, cv::COLOR_RGB2BGR);
-
cv::imwrite("E:/c++work/tf_testdemo/tf_testdemo/001_00045_out.png", out_image*255);
-
cv::imwrite("E:/c++work/tf_testdemo/tf_testdemo/001_00045_out_final.png", out_image_final * 255);*/
-
system(
"PAUSE");
-
}
环境配置:
包含目录:
E:\Users\tensorflow\bazel-source;E:\Users\tensorflow\bazel-source\external\org_tensorflow;E:\Users\tensorflow\bazel-source\external\protobuf_archive\src;E:\Users\tensorflow\bazel-source\external\com_google_absl;E:\Users\tensorflow\bazel-source\external\eigen_archive;E:\Users\tensorflow\bazel-source\bazel-out\x64_windows-opt\genfiles;E:\Users\tensorflow;E:\Opencv-vs2015\opencv342\include;E:\Opencv-vs2015\opencv342\include\opencv;E:\Opencv-vs2015\opencv342\include\opencv2;
E:\Users\tensorflow\bazel-source;E:\Users\tensorflow\bazel-source\external\org_tensorflow;E:\Users\tensorflow\bazel-source\external\protobuf_archive\src;E:\Users\tensorflow\bazel-source\external\com_google_absl;E:\Users\tensorflow\bazel-source\external\eigen_archive;E:\Users\tensorflow\bazel-source\bazel-out\x64_windows-opt\genfiles;E:\Users\tensorflow;E:\Opencv-vs2015\opencv342\include;E:\Opencv-vs2015\opencv342\include\opencv;E:\Opencv-vs2015\opencv342\include\opencv2;
库目录:
E:\Opencv-vs2015\opencv342\lib;E:\c++work\tf_testdemo\x64\Debug;
链接器输入附加依赖项:
opencv_world342d.lib;opencv_world342.lib;tensorflow_cc.lib;
10.尝试编译debug版本
因为项目需要,我自己也尝试了编译tensorflow的debug版本:
-
$parameterString =
"-c fastbuild --config=cuda --define=no_tensorflow_py_deps=true --copt=-nvcc_options=disable-warnings //tensorflow:libtensorflow_cc.so --verbose_failures"
-
.\build.ps1 `
-
-BazelBuildParameters
$parameterString `
-
-BuildCppAPI -ReserveSource -ReserveVenv
与
-
$parameterString =
"-c dbg--config=cuda --define=no_tensorflow_py_deps=true --copt=-nvcc_options=disable-warnings //tensorflow:libtensorflow_cc.so --verbose_failures"
-
.\build.ps1 `
-
-BazelBuildParameters
$parameterString `
-
-BuildCppAPI -ReserveSource -ReserveVenv
但是卡在了下面的错误
tensorflow::io::GetTempFilename
这个错误相关的github issue有这两个issue1,issue2和我自己开了一个issue,但是都建议编译release version。所以这里我暂停了继续编译debug版本。
11.遇到的问题
1.c++运行相同的pb模型,使用gpu,测试单张图像速度比python慢?
python测试单张图像20ms,c++测试单张图像26ms;
相关issue:issue3,issue4.
2.编译时遇到max的问题:
-
string_view.h
-
line491
-493
-
-
private:
-
static
constexpr size_type kMaxSize =
-
std::numeric_limits
::max();
-
-
改为
-
private:
-
static
constexpr size_type kMaxSize =
-
(
std::numeric_limits
::max)();
其他出错的头文件部分一一修改。
![]()
12.参考
[1]编译windows tensorflowv1.11-1.13 dll release version
[2]cv输入+tensorflow dll测试
[3]Tensorflow C++的Tensor和OpenCV的Mat相互转换
[4]tensorflow_c++_api_1
[5]tensorflow_c++_api_2
[6]Mat <=> Tensor方法2
这里非常感谢TerryBryant,给我解答问题,应用部分主要参考他的;也非常感谢guikarist分享的编译方法。


