【译】Basemap手册 第二章 进阶(二)
title: “【译】Basemap手册 第二章 进阶(二)”
date: 2020-02-02T10:28:32+08:00
draft: true
绘制数据
添加注释
用带箭头的文本给地图上的点添加注释。用不带箭头的文本添加注释的方法,参见 text
annotate(*args, **kwargs)
- 这个方法不属于Basemap,而是属于matplotlib,所以只能和plot、axis一起使用。
- 第一个参数是文本的内容。
- xy是包含x、y轴坐标的列表,这个坐标点就是箭头指向的点。
- xycoords 指定xy使用的坐标类型:
- data表示坐标使用的data(投影坐标)
- offset points表示points的偏移量
- axes pixels 表示坐标左下角的像素点
- 其他参数参见annotation docs
- xytext 文本标签的位置,在箭头的起点
- textcoords 指定坐标类型,和xycoords一样
- arrowprops 设置箭头属性,参见Line2D
- color 文本的颜色,参见This page explains all the color options
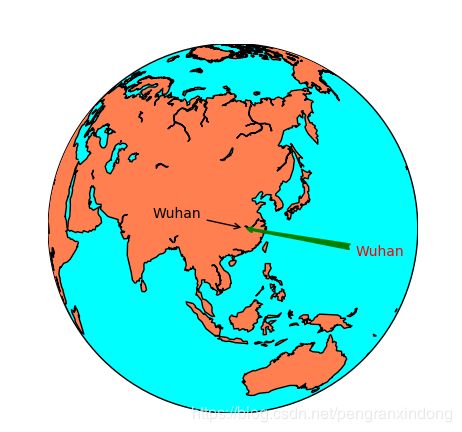
标记处武汉
from mpl_toolkits.basemap import Basemap
import matplotlib.pyplot as plt


map = Basemap(projection='ortho',
              lat_0=30, lon_0=110)

map.drawmapboundary(fill_color='aqua')
map.fillcontinents(color='coral',lake_color='aqua')
map.drawcoastlines()


x, y = map(114, 30) # 经纬度坐标 东经114°,北纬30°
x2, y2 = (80, -20)

plt.annotate('Wuhan', xy=(x, y),  xycoords='data',
                xytext=(x2, y2), textcoords='offset points',
                color='r',
                arrowprops=dict(arrowstyle="fancy", color='g')
                )

x2, y2 = map(80, 30)
plt.annotate('Wuhan', xy=(x, y),  xycoords='data',
                xytext=(x2, y2), textcoords='data',
                arrowprops=dict(arrowstyle="->")
                )
plt.show()
效果如下:
barbs
在地图上绘制风向
barbs(x, y, u, v, *args, **kwargs)
这个暂时不太常用,具体用法参见The barbs docs from the matplotlib documentation。
contour
绘制等高线
contour(x, y, data)
- x和y是矩阵数据
- data是包含点的坐标的矩阵
- 还可以传递第四个参数,这个参数的值是关于等高线等级的列表
- 默认的colormap是jet,但是可以修改为cmap
- tri=True可以假定栅格为非结构化的
示例代码
import matplotlib.pyplot as plt
from osgeo import gdal
from numpy import linspace
from numpy import meshgrid

map = Basemap(projection='tmerc',
              lat_0=0, lon_0=3,
              llcrnrlon=1.819757266426611,
              llcrnrlat=41.583851612359275,
              urcrnrlon=1.841589961763497,
              urcrnrlat=41.598674173123)

ds = gdal.Open("dem.tiff")
data = ds.ReadAsArray()

x = linspace(0, map.urcrnrx, data.shape[1])
y = linspace(0, map.urcrnry, data.shape[0])

xx, yy = meshgrid(x, y)

map.contour(xx, yy, data)

plt.show()
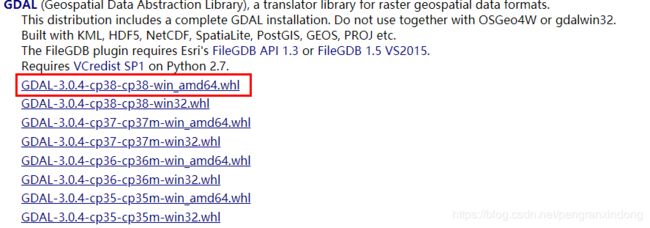
如果运行不成功,可能出现的错误有两点:
- 没有gdal库
gdal库的下载方法同前面讲的,在这里找到
- 没有dem.tiff文件
可以在这里下载dem.tiff
contourf
绘制着色的等高线图
这些在上一张中也有介绍,详情可以参考文档contourf

