STM32F103C8T6使用0.96寸OLED显示QR二维码
一.功能说明
使用STM32F103C8T6把字符信息转换QR code在0.96寸OLED显示


二.硬件&软件
硬件:STM32F103C8T6最小系统 、4线IIC0.96寸OLED、ST_LINK下载器、杜邦线若干。
软件:windows pc、KEIL5
三.实现过程
硬件:
STM32 OLED
GND -----> GND
VCC -----> VCC
PB7 -----> SDA
PB6 -----> SCL
软件程序:
1.移植QR code 底层驱动到stm32工程,下图是工程截图,APP里面则驱动
2.OLED 驱动
绘制二维码主要用OLED 的花点函数
void OLED_DrawPoint( uint8_t x,uint8_t y,uint8_t mode )
#include "OLED_I2C.h"
#include "SysTick.h"
#include "codetab.h"
#include "math.h"
void I2C_Configuration(void)
{
	I2C_InitTypeDef  I2C_InitStructure;
	GPIO_InitTypeDef  GPIO_InitStructure;

	RCC_APB1PeriphClockCmd(RCC_APB1Periph_I2C1,ENABLE);
	RCC_APB2PeriphClockCmd(RCC_APB2Periph_GPIOB,ENABLE);

	/*STM32F103C8T6芯片的硬件I2C: PB6 -- SCL; PB7 -- SDA */
	GPIO_InitStructure.GPIO_Pin =  GPIO_Pin_6 | GPIO_Pin_7;
	GPIO_InitStructure.GPIO_Speed = GPIO_Speed_50MHz;
	GPIO_InitStructure.GPIO_Mode = GPIO_Mode_AF_OD;//I2C必须开漏输出
	GPIO_Init(GPIOB, &GPIO_InitStructure);

	I2C_DeInit(I2C1);//使用I2C1
	I2C_InitStructure.I2C_Mode = I2C_Mode_I2C;
	I2C_InitStructure.I2C_DutyCycle = I2C_DutyCycle_2;
	I2C_InitStructure.I2C_OwnAddress1 = 0x30;//主机的I2C地址,随便写的
	I2C_InitStructure.I2C_Ack = I2C_Ack_Enable;
	I2C_InitStructure.I2C_AcknowledgedAddress = I2C_AcknowledgedAddress_7bit;
	I2C_InitStructure.I2C_ClockSpeed = 400000;//400K

	I2C_Cmd(I2C1, ENABLE);
	I2C_Init(I2C1, &I2C_InitStructure);
}

void I2C_WriteByte(uint8_t addr,uint8_t data)
{
  while(I2C_GetFlagStatus(I2C1, I2C_FLAG_BUSY));

	I2C_GenerateSTART(I2C1, ENABLE);//开启I2C1
	while(!I2C_CheckEvent(I2C1, I2C_EVENT_MASTER_MODE_SELECT));/*EV5,主模式*/

	I2C_Send7bitAddress(I2C1, OLED_ADDRESS, I2C_Direction_Transmitter);//器件地址 -- 默认0x78
	while(!I2C_CheckEvent(I2C1, I2C_EVENT_MASTER_TRANSMITTER_MODE_SELECTED));

	I2C_SendData(I2C1, addr);//寄存器地址
	while (!I2C_CheckEvent(I2C1, I2C_EVENT_MASTER_BYTE_TRANSMITTED));

	I2C_SendData(I2C1, data);//发送数据
	while (!I2C_CheckEvent(I2C1, I2C_EVENT_MASTER_BYTE_TRANSMITTED));

	I2C_GenerateSTOP(I2C1, ENABLE);//关闭I2C1总线
}

void WriteCmd(unsigned char I2C_Command)//写命令
{
	I2C_WriteByte(0x00, I2C_Command);
}

void WriteDat(unsigned char I2C_Data)//写数据
{
	I2C_WriteByte(0x40, I2C_Data);
}

void OLED_Init(void)
{
	delay_ms(100); //这里的延时很重要

	WriteCmd(0xAE); //display off
	WriteCmd(0x20);	//Set Memory Addressing Mode
	WriteCmd(0x10);	//00,Horizontal Addressing Mode;01,Vertical Addressing Mode;10,Page Addressing Mode (RESET);11,Invalid
	WriteCmd(0xb0);	//Set Page Start Address for Page Addressing Mode,0-7
	WriteCmd(0xc8);	//Set COM Output Scan Direction
	WriteCmd(0x00); //---set low column address
	WriteCmd(0x10); //---set high column address
	WriteCmd(0x40); //--set start line address
	WriteCmd(0x81); //--set contrast control register
	WriteCmd(0xff); //亮度调节 0x00~0xff
	WriteCmd(0xa1); //--set segment re-map 0 to 127
	WriteCmd(0xa6); //--set normal display
	WriteCmd(0xa8); //--set multiplex ratio(1 to 64)
	WriteCmd(0x3F); //
	WriteCmd(0xa4); //0xa4,Output follows RAM content;0xa5,Output ignores RAM content
	WriteCmd(0xd3); //-set display offset
	WriteCmd(0x00); //-not offset
	WriteCmd(0xd5); //--set display clock divide ratio/oscillator frequency
	WriteCmd(0xf0); //--set divide ratio
	WriteCmd(0xd9); //--set pre-charge period
	WriteCmd(0x22); //
	WriteCmd(0xda); //--set com pins hardware configuration
	WriteCmd(0x12);
	WriteCmd(0xdb); //--set vcomh
	WriteCmd(0x20); //0x20,0.77xVcc
	WriteCmd(0x8d); //--set DC-DC enable
	WriteCmd(0x14); //
	WriteCmd(0xaf); //--turn on oled panel
}

void OLED_SetPos(unsigned char x, unsigned char y) //设置起始点坐标
{
	WriteCmd(0xb0+y);
	WriteCmd(((x&0xf0)>>4)|0x10);
	WriteCmd((x&0x0f)|0x01);
}

void OLED_Fill(unsigned char fill_Data)//全屏填充
{
	unsigned char m,n;
	for(m=0;m<8;m++)
	{
		WriteCmd(0xb0+m);		//page0-page1
		WriteCmd(0x00);		//low column start address
		WriteCmd(0x10);		//high column start address
		for(n=0;n<128;n++)
			{
				WriteDat(fill_Data);
			}
	}
}

void OLED_CLS(void)//清屏
{
	OLED_Fill(0x00);
}

//--------------------------------------------------------------
// Prototype      : void OLED_ON(void)
// Calls          :
// Parameters     : none
// Description    : 将OLED从休眠中唤醒
//--------------------------------------------------------------
void OLED_ON(void)
{
	WriteCmd(0X8D);  //设置电荷泵
	WriteCmd(0X14);  //开启电荷泵
	WriteCmd(0XAF);  //OLED唤醒
}

//--------------------------------------------------------------
// Prototype      : void OLED_OFF(void)
// Calls          :
// Parameters     : none
// Description    : 让OLED休眠 -- 休眠模式下,OLED功耗不到10uA
//--------------------------------------------------------------
void OLED_OFF(void)
{
	WriteCmd(0X8D);  //设置电荷泵
	WriteCmd(0X10);  //关闭电荷泵
	WriteCmd(0XAE);  //OLED休眠
}

//--------------------------------------------------------------
// Prototype      : void OLED_ShowChar(unsigned char x, unsigned char y, unsigned char ch[], unsigned char TextSize)
// Calls          :
// Parameters     : x,y -- 起始点坐标(x:0~127, y:0~7); ch[] -- 要显示的字符串; TextSize -- 字符大小(1:6*8 ; 2:8*16)
// Description    : 显示codetab.h中的ASCII字符,有6*8和8*16可选择
//--------------------------------------------------------------
void OLED_ShowStr(unsigned char x, unsigned char y, unsigned char ch[], unsigned char TextSize)
{
	unsigned char c = 0,i = 0,j = 0;
	switch(TextSize)
	{
		case 1:
		{
			while(ch[j] != '\0')
			{
				c = ch[j] - 32;
				if(x > 126)
				{
					x = 0;
					y++;
				}
				OLED_SetPos(x,y);
				for(i=0;i<6;i++)
					WriteDat(F6x8[c][i]);
				x += 6;
				j++;
			}
		}break;
		case 2:
		{
			while(ch[j] != '\0')
			{
				c = ch[j] - 32;
				if(x > 120)
				{
					x = 0;
					y++;
				}
				OLED_SetPos(x,y);
				for(i=0;i<8;i++)
					WriteDat(F8X16[c*16+i]);
				OLED_SetPos(x,y+1);
				for(i=0;i<8;i++)
					WriteDat(F8X16[c*16+i+8]);
				x += 8;
				j++;
			}
		}break;
	}
}

//--------------------------------------------------------------
// Prototype      : void OLED_ShowCN(unsigned char x, unsigned char y, unsigned char N)
// Calls          :
// Parameters     : x,y -- 起始点坐标(x:0~127, y:0~7); N:汉字在codetab.h中的索引
// Description    : 显示codetab.h中的汉字,16*16点阵
//--------------------------------------------------------------
void OLED_ShowCN(unsigned char x, unsigned char y, unsigned char N)
{
	unsigned char wm=0;
	unsigned int  adder=32*N;
	OLED_SetPos(x , y);
	for(wm = 0;wm < 16;wm++)
	{
		WriteDat(F16x16[adder]);
		adder += 1;
	}
	OLED_SetPos(x,y + 1);
	for(wm = 0;wm < 16;wm++)
	{
		WriteDat(F16x16[adder]);
		adder += 1;
	}
}

//--------------------------------------------------------------
// Prototype      : void OLED_DrawBMP(unsigned char x0,unsigned char y0,unsigned char x1,unsigned char y1,unsigned char BMP[]);
// Calls          :
// Parameters     : x0,y0 -- 起始点坐标(x0:0~127, y0:0~7); x1,y1 -- 起点对角线(结束点)的坐标(x1:1~128,y1:1~8)
// Description    : 显示BMP位图
//--------------------------------------------------------------
void OLED_DrawBMP(unsigned char x0,unsigned char y0,unsigned char x1,unsigned char y1,unsigned char BMP[])
{
	unsigned int j=0;
	unsigned char x,y;

  if(y1%8==0)
		y = y1/8;
  else
		y = y1/8 + 1;
	for(y=y0;y127||y>63)return;

	i=7-y/8;//算出第几页
	j=y%8;
	temp=0x01<<(7-j);//由位运算精确找出坐标像素点
	if(mode==0)
		OLED_GRAM[x][i]&=~temp;
	else
		OLED_GRAM[x][i]|=temp;
}
//更新显存到LCD
void OLED_Refresh_Gram(void)
{
	u8 i,n;
	for(i=0;i<8;i++)
	{
		WriteCmd (0xb0+i);    //设置页地址(0~7)
		WriteCmd (0x00);      //设置显示位置—列低地址
		WriteCmd (0x10);      //设置显示位置—列高地址
		for(n=0;n<128;n++)WriteDat(OLED_GRAM[n][i]);
	}
}
void draw_circle(u8 x0,u8 y0,u8 r) //圆心(x0,y0),半径r
{
	u8 x,y;
	for(x = 0;x <= 63;x++){
		y = sqrt(pow(r,2)-pow(x-x0,2))+y0; //圆方程  x,y反置
		OLED_DrawPoint(y,x,1);      //上半圆
		OLED_DrawPoint(63-y,x,1);   //下半圆
	}
}
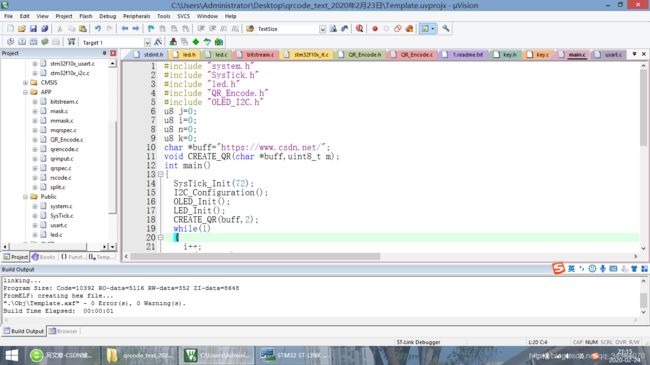
3.mian函数实现
#include "system.h"
#include "SysTick.h"
#include "led.h"
#include "QR_Encode.h"
#include "OLED_I2C.h"
u8 j=0;
u8 i=0;
u8 n=0;
u8 k=0;
char *buff="https://www.csdn.net/";
void CREATE_QR(char *buff,uint8_t m);
int main()
{
	SysTick_Init(72);
	I2C_Configuration();
	OLED_Init();
	LED_Init();
	CREATE_QR(buff,2);
	while(1)
	{
		i++;
		if(i%20==0)
		{
			led1=!led1;
		}
		delay_ms(100);
	}}
/***************************************
--------------------------------------------------------------
 Prototype      : void CREATE_QR(char *buff,uint8_t m)
 Calls          :
 Parameters      : buff:需要显示的字符串 m:二维码像素点放大倍数
 Description    : 二维码在OLED12864上显示
--------------------------------------------------------------
**************************************/
void CREATE_QR(char *buff,uint8_t m)
{
	EncodeData(buff);	      //编码数据
	for(i=0;i
下载地址:https://download.csdn.net/download/qq_34384070/12189072