简简单单Swagger,普普通通Swagger
Swagger
谈一谈历史
前后端分离
现在的主流解决方案是Vue + SpringBoot
后端时代: 前端只用管理静态页面(html) 后端负责渲染,利用模板引擎(jsp) 后端是主力
前后端分离时代:
- 后端: 后端控制层(Controller), 服务层(Service), 数据访问层(Dao)
- 前端: 前端控制层, 视图层
- 伪造后端数据, json.已经存在了,不需要后端,前端依旧能够跑起来.
- 前端如何交互? ===>API接口
- 前后端相互独立,松耦合;
- 前后端可以部署在不同的服务器上
产生的问题:
- 前后端集成联调,前端人员和后端人员无法做到及时协商, 尽早解决. 最终导致问题集中爆发;
解决方案:
- 指定Schema[计划,或者提纲],实时更新最新我的API,降低集成的风险;
- 早些年:指定word计划文档;
- 前后端分离:
- 前端测试后端接口: postman
- 后端提供接口,需要实时更新最新的消息及改动!
Swagger诞生了!
- 号称世界上最流行的API框架
- RestFul API文档在线自动生成工具---->API文档与API定义同步更新
- 直接运行,可以在线测试API
- 支持多种语言(java,PHP)
官网: https://swagger.io/
在项目中使用swagger需要springfox;
- swagger2
- ui
Springboot集成Swagger
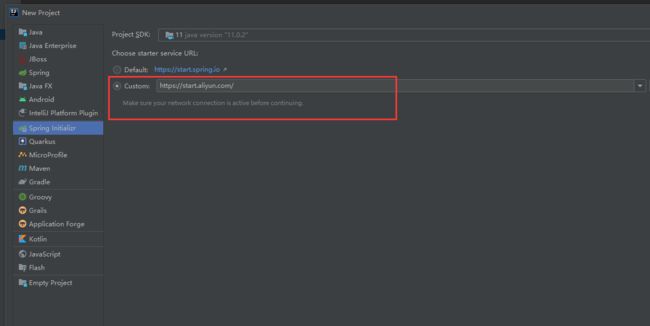
新建一个springboot-web项目
超快!aliyun牛逼!
导入相关依赖
<dependency>
    <groupId>io.springfoxgroupId>
    <artifactId>springfox-swagger2artifactId>
    <version>2.9.2version>
dependency>

<dependency>
    <groupId>io.springfoxgroupId>
    <artifactId>springfox-swagger-uiartifactId>
    <version>2.9.2version>
dependency>
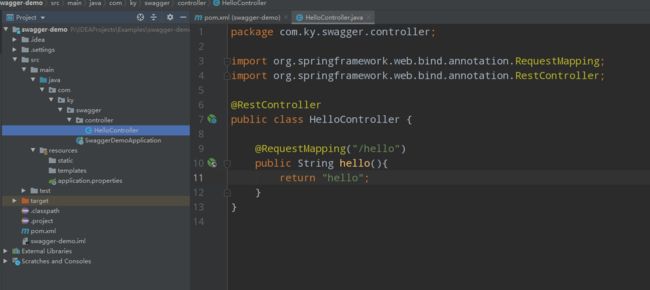
编写Hello工程
配置Swagger—>config
@Configuration
@EnableSwagger2
public class SwaggerConfig {

}
测试运行
访问 http://localhost:8080/swagger-ui.html
可以看到
配置Swagger
swagger的bean实例Docket;
@Configuration
@EnableSwagger2
public class SwaggerConfig {

    //配置了Swagger的Docket的bean实例
    @Bean
    public Docket docket(){
        return new Docket(DocumentationType.SWAGGER_2)
                .apiInfo(apiInfo())
            	.select();
    }

    //配置Swagger信息=apiInfo
    private ApiInfo apiInfo(){
        //作者信息
        Contact contact = new Contact("康袁", "https://blog.csdn.net/qq_41385887", "[email protected]");

        return new ApiInfo(
                "KK的SwaggerAPI文档",
                "冲就完事儿了",
                "v1.0",
                "https://blog.csdn.net/qq_41385887",
                contact,
                "Apache 2.0",
                "http://www.apache.org/licenses/LICENSE-2.0",
                new ArrayList());
    }
}
Swagger 配置扫描接口
Docket.select()
//配置了Swagger的Docket的bean实例
    @Bean
    public Docket docket(){
        /**
         * RequestHandlerSelectors,配置要扫描接口的方式
         * basePackage:指定要扫描的包
         * any():扫描全部
         * none():都不扫描
         * withClassAnnotation: 扫描类上的注解,参数是一个注解的反射对象
         * withMethodAnnotation: 扫描方法上的注解
         * paths: 过滤什么路径
         * 此处只扫描带有ky下面请求的接口,我们的Controller中没有定义,所以什么swaggerui上什么都不会显示
         */
        return new Docket(DocumentationType.SWAGGER_2)
                .apiInfo(apiInfo())
                .select()
                .apis(RequestHandlerSelectors.basePackage("com.ky.swagger.controller"))
            	.paths(PathSelectors.ant("/ky/**"))
                .build();
    }
配置是否启用Swagger
 //配置了Swagger的Docket的bean实例
     @Bean
     public Docket docket(){

     	return new Docket(DocumentationType.SWAGGER_2)
         .apiInfo(apiInfo())
         .enable(false)	 //enable:是否启用Swagger,如果为false,则Swagger不能在浏览器中访问
         .select()
         .apis(RequestHandlerSelectors.basePackage("com.ky.swagger.controller"))
         .build();
 }
我只希望我的Swagger在开发环境中使用,在生产环境中不使用
-
定义不同的properties配置文件
-
判断是不是生产环境 flag = false
-
注入enable(flag)
application.properties
spring.profiles.active=dev
application-dev.properties
server.port=8081
application-release.properties
server.port=8082
配置Docket
 //配置了Swagger的Docket的bean实例
    @Bean
    public Docket docket(Environment environment){
        //设置要显示的Swagger环境
        Profiles profiles = Profiles.of("dev","test");
        //通过environment.acceptsProfiles(profiles)判断是否处在自己设定的环境中
        boolean flag = environment.acceptsProfiles(profiles);

        return new Docket(DocumentationType.SWAGGER_2)
                .apiInfo(apiInfo())
                .enable(flag)   //监听flag.如果为true则开启swagger
                .select()
                .apis(RequestHandlerSelectors.basePackage("com.ky.swagger.controller"))
                .build();
    }
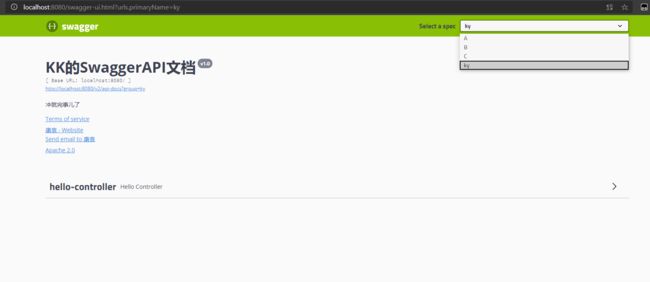
配置API文档的分组
.groupName("ky")
如何配置多个组?
配置多个Docket实例即可
@Bean
    public Docket docket1(){
        return new Docket(DocumentationType.SWAGGER_2).groupName("A");
    }
    @Bean
    public Docket docket2(){
        return new Docket(DocumentationType.SWAGGER_2).groupName("B");
    }
    @Bean
    public Docket docket3(){
        return new Docket(DocumentationType.SWAGGER_2).groupName("C");
    }


    //配置了Swagger的Docket的bean实例
    @Bean
    public Docket docket(Environment environment){
        //设置要显示的Swagger环境
        Profiles profiles = Profiles.of("dev","test");
        //通过environment.acceptsProfiles(profiles)判断是否处在自己设定的环境中
        boolean flag = environment.acceptsProfiles(profiles);

        return new Docket(DocumentationType.SWAGGER_2)
                .apiInfo(apiInfo())
                .groupName("ky")
                .enable(true)   //监听flag.如果为true则开启swagger
                .select()
                .apis(RequestHandlerSelectors.basePackage("com.ky.swagger.controller"))
                .build();
    }
运行结果
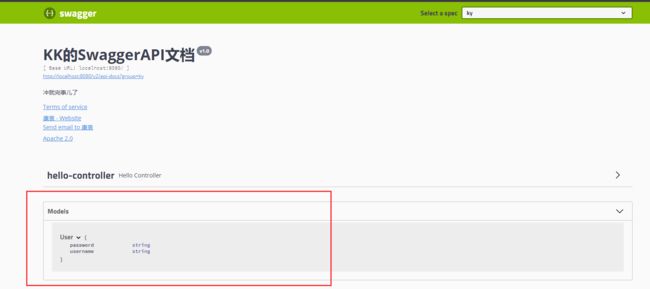
实体类配置
只要我们的接口中,返回值中存在实体类,他就会被扫描到Swagger中
//在Controller中加一个方法
//只要我们的接口中,返回值中存在实体类,他就会被扫描到Swagger中
    @PostMapping("/user")
    public User user(){
        return new User();
    }
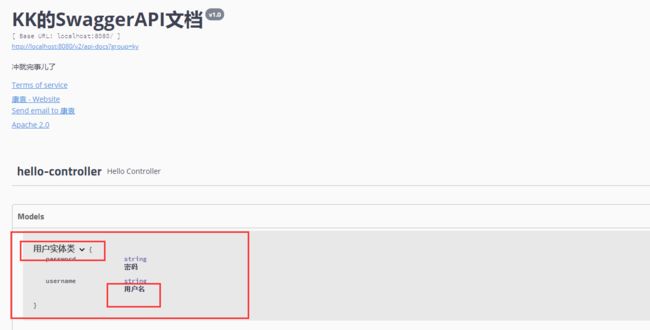
注释信息
//@Api(注释信息)
@ApiModel("用户实体类")
public class User {

    @ApiModelProperty("用户名")
    public String username;
    @ApiModelProperty("密码")
    public String password;

}
显示结果
Swagger的用处?
- 我们可以通过Swagger给一些比较难理解的属性或者接口, 增加注释信息
- 接口文档实时更新
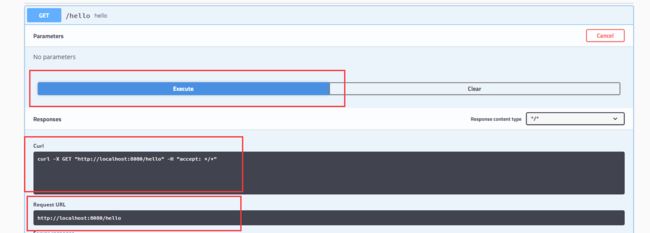
- 可以在线测试
基本上就是这么用的,当然如果想在Execute的时候输入参数测试,Controller中的方法中也必须定义入参才可以
总结
- 我们可以通过Swagger给一-些比较难理解的属性或者接口, 增加注释信息
- 接口文档实时更新
- 可以在线测试
Swagger是一个优秀的工具,几乎所有大公司都有使用它
注意
在正式发布的时候,关闭Swagger! ! !
出于安全考虑,并且也能节省内存.
