IntelliJ idea搭建微服务spring cloud框架(一)
有小伙伴不太了解微服务的请看小编
微服务以及的spring cloud核心组件
这两篇文章。
微服务是一种架构模式,微服务架构一定是分布式架构。一个大型复杂的软件
应用系统应该由一个或多个微服务组成,服务之间通过一些轻量级交互机制
来通信,比如http。系统中的各个微服务可被独立部署,都有自己独立的进
程,各个微服务之间是松耦合的,可以有自己的数据库,而且服务可以使用
不同的技术加以实现。可以不因为某个模块的升级和bug影响现有的系统业
务。
微服务是各个互联网公司的必备技能,其发展及其迅速,该文章主要介绍搭建微服务框架。
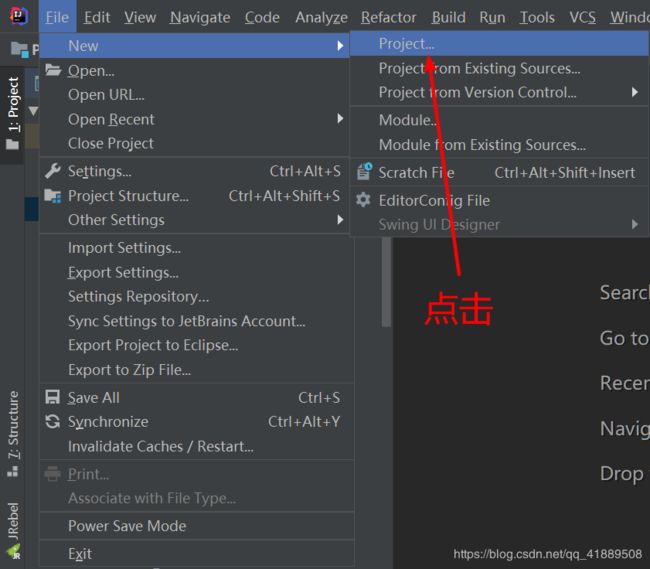
1、第一步搭建springcloud公共模块
(1)
(2)
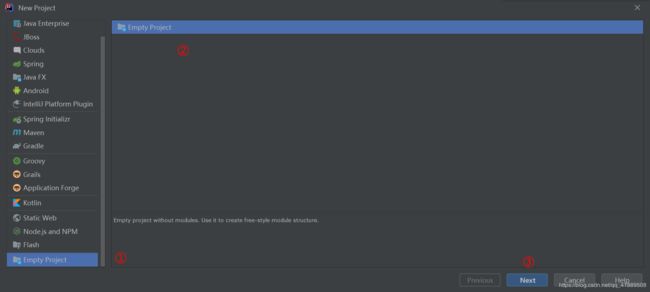
(3)

(4)

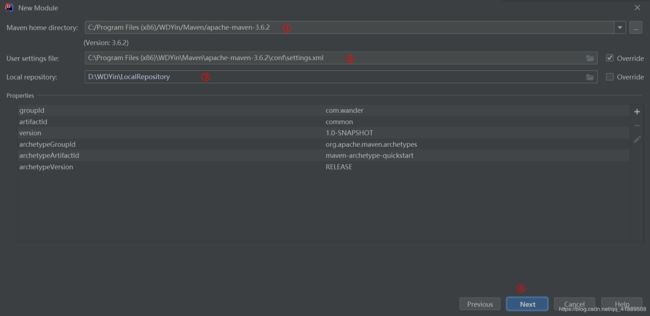
(5)配置maven


(6)

(7)
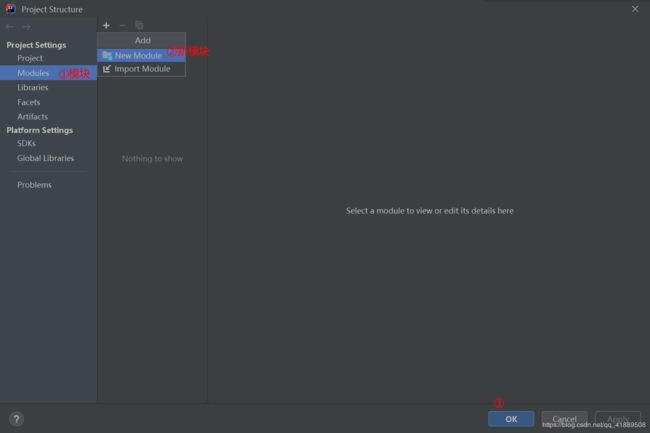
(8)

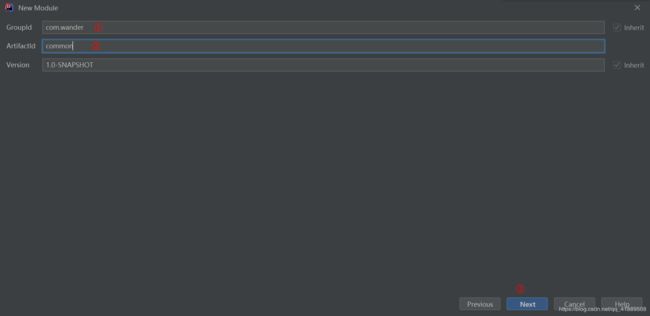
(9) 设置模块坐标
groupid和artifactId被统称为“坐标”是为了保证项目唯一性而提出的,如果你要把你项目弄到maven本地仓库去,你想要找到你的项目就必须根据这两个id去查找。
groupId一般分为多个段,这里我只说两段,第一段为域,第二段为公司名称。域又分为org、com、cn等等许多,其中org为非营利组织,com为商业组织。举个apache公司的tomcat项目例子:这个项目的groupId是org.apache,它的域是org(因为tomcat是非营利项目),公司名称是apache,artigactId是tomcat。
比如我创建一个项目,我一般会将groupId设置为com.wander,com为商业组织,wander是我个人姓名缩写,artifactId设置为common,表示你这个项目的名称是common,依照这个设置,你的包结构最好是com.wander.common打头的,如果有个BookController,它的全路径就是com.wander.common.BookController
(10)
(11)
(12)
点击import changes 加载pom文件

等待idea 加载一会,微服务的公共模块创建成功
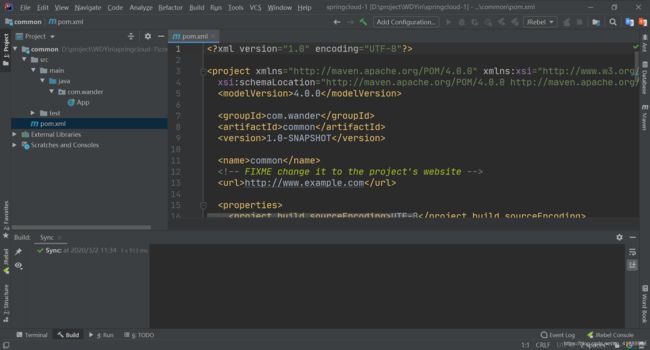
将公共模块的pom文件内容改为如下
  4.0.0

  com.wander
  common
  1.0-SNAPSHOT

  common

  http://www.example.com


    UTF-8
    1.7
    1.7


    org.springframework.boot
    spring-boot-starter-parent
    1.5.7.RELEASE


      org.springframework.boot
      spring-boot-starter-test
      test


      org.springframework.boot
      spring-boot-starter-tomcat


        org.springframework.cloud
        spring-cloud-dependencies
        Edgware.SR5
        pom
        import


  pom
2、第二步搭建Eureka服务端
Eureka主管服务注册与发现,也就是微服务的名称注册到Eureka,就可以通过Eureka找到微服务,而不需要修改服务调用的配置文件。
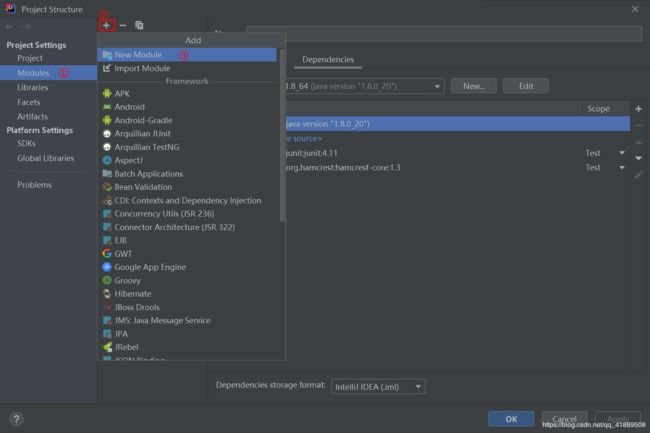
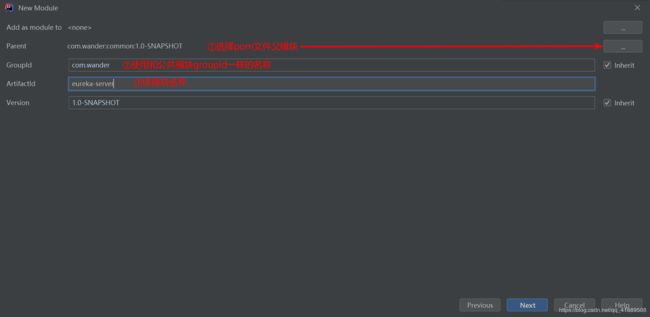
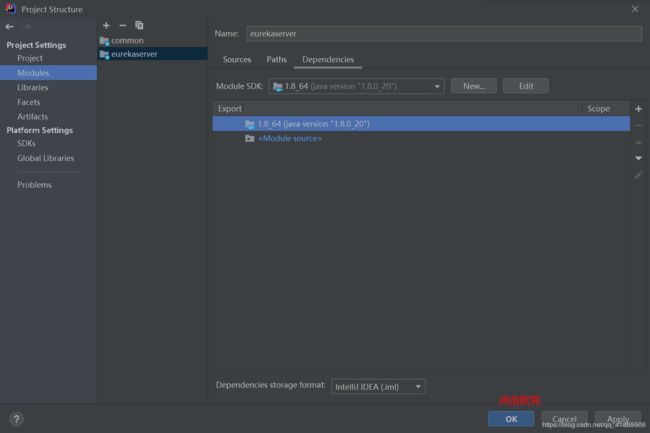
(1)打开项目结构File–>project structure重复搭建公共模块的步骤
(2)
(3)

(4)

(5)
pom文件内容如下
    common
    com.wander
    1.0-SNAPSHOT
    ../common/pom.xml


  4.0.0

  eureka-server
  1.0-SNAPSHOT

  eureka-server

  http://www.example.com


    UTF-8
    1.7
    1.7


      org.springframework.cloud
      spring-cloud-starter-netflix-eureka-server
(6)

(7)

(8)


application.yml内容如下:
server:
  port: 8700 # 端口自己决定

# 指定当前eureka客户端的注册地址,也就是eureka服务的提供方,当前配置的服务的注册服务方
eureka:
  client:
    service-url:
      defaultZone: http://${eureka.instance.hostname}:${server.port}/eureka
    register-with-eureka: false #自身 不在向eureka注册
    fetch-registry: false  #启动时禁用client的注册
  instance:
    hostname: localhost

#指定应用名称
spring:
  application:
    name: eureka-server
(9)
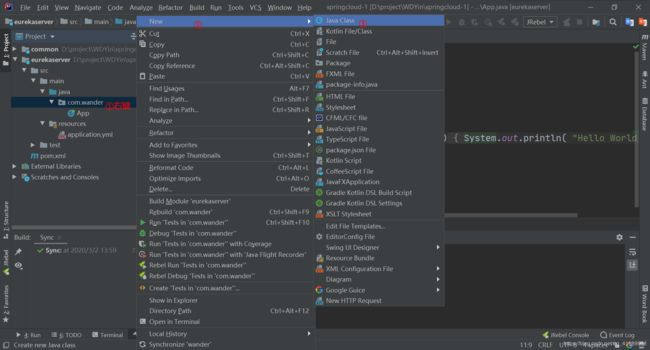
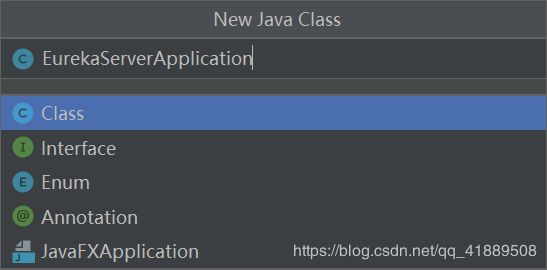
EurekaServcerApplication.java内容如下
server:
  port: 8700 # 端口自己决定

# 指定当前eureka客户端的注册地址,也就是eureka服务的提供方,当前配置的服务的注册服务方
eureka:
  client:
    service-url:
      defaultZone: http://${eureka.instance.hostname}:${server.port}/eureka
    register-with-eureka: false #自身 不在向eureka注册
    fetch-registry: false  #启动时禁用client的注册
  instance:
    hostname: localhost

#指定应用名称
spring:
  application:
    name: eureka-server
(10)

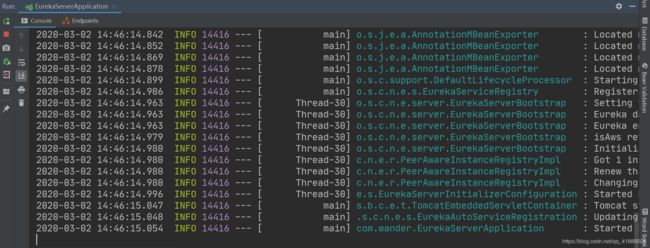
console内容如下:
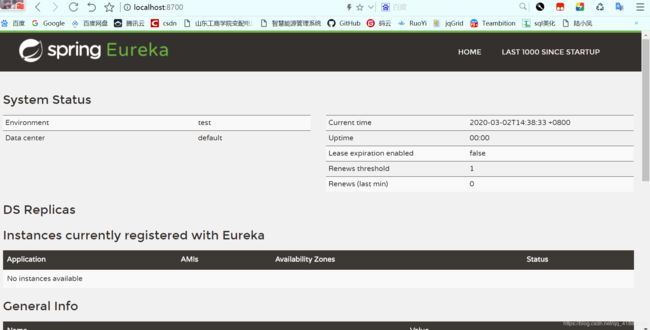
(11)根据eureka-server中的application.yml里配置的端口在浏览器访问
如下 管理界面已经可以登录了
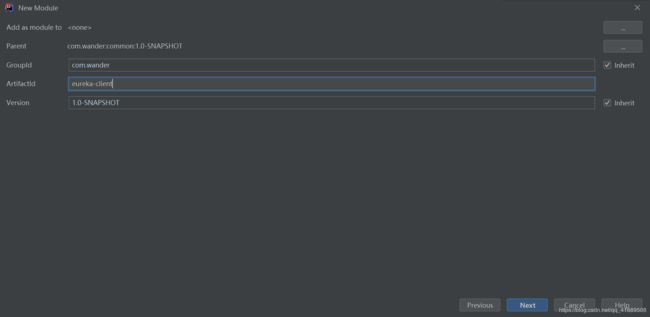
3、第三步搭建Eureka客户端
搭建方式如同搭建Eureka服务端,在这里只显示不一样的地方
(1)
(2)
eureka-client的pom文件内容
    common
    com.wander
    1.0-SNAPSHOT
    ../common/pom.xml


  4.0.0

  eureka-client
  1.0-SNAPSHOT

  eureka-client

  http://www.example.com


    UTF-8
    1.7
    1.7


      org.springframework.cloud
      spring-cloud-starter-netflix-eureka-client
eureka-client的application.yml内容如下
server:
  port: 8701 # 服务提供方

# 指定当前eureka客户端的注册地址,
eureka:
  client:
    service-url:
      defaultZone: http://${eureka.instance.hostname}:8700/eureka
  instance:
    hostname: localhost

#当前服务名称
spring:
  application:
    name: eureka-client
eureka-client启动类EurekaClientApplication的内容:
package com.wander;

import org.springframework.boot.SpringApplication;
import org.springframework.boot.autoconfigure.SpringBootApplication;
import org.springframework.cloud.client.discovery.EnableDiscoveryClient;

/**
 * eureka客户端
 *
 */
@SpringBootApplication
@EnableDiscoveryClient//代表自己是一个服务提供方
public class EurekaClientApplication {
    public static void main(String[] args) {
        SpringApplication.run(EurekaClientApplication.class,args);
    }
}
(3)

(4)运行该微服务

(5)运行成功后
此时再进入服务注册的页面 http://localhost:8700/
可以看见服务提供者已被注册进 服务注册者

源码地址在码云:https://gitee.com/wdyin/micro_service.git
到此,spring cloud的公共模块、eureka-server和eureka-client搭建完毕,稍后会搭建eureka-server集群、restTemplate-ribbon、feign+ribbon负载均衡、config+bus配置中心、hystrix+dashboard断路器等模块。
有小伙伴不太了解微服务的请看小编微服务以及的spring cloud核心组件这两篇文章。该文章主要介绍搭建微服务框架