Android自定义权限
#Android自定义权限
一、定义权限的相关知识
android允许我们使用permission标签,在Manifest文件中定义属于自己的权限,但Android不允许两个不同的应用定义一个相同名字的权限(除非这两个应用拥有相同的签名),所以在命名的时候,需要注意。android:exported
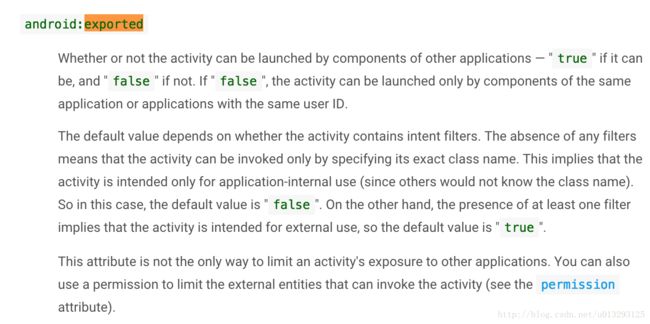
android:exported 是Android中的四大组件 Activity,Service,Provider,Receiver 四大组件中都会有的一个属性。总体来说它的主要作用是:是否支持其它应用调用当前组件。意思如下:
在Activity中该属性用来标示:当前Activity是否可以被另一个Application的组件启动:true允许被启动;false不允许被启动。
如果被设置为了false,那么这个Activity将只会被当前Application或者拥有同样user ID的Application的组件调用。
exported 的默认值根据Activity中是否有intent filter 来定。没有任何的filter意味着这个Activity只有在详细的描述了他的class name后才能被唤醒 .这意味着这个Activity只能在应用内部使用,因为其它application并不知道这个class的存在。所以在这种情况下,它的默认值是false。从另一方面讲,如果Activity里面至少有一个filter的话,意味着这个Activity可以被其它应用从外部唤起,这个时候它的默认值是true。
默认值:如果包含有intent-filter 默认值为true; 没有intent-filter默认值为false。
android:protectionLevel
在声明权限时需要一个android:protectionLevel的属性,它代表“风险级别”。必须是以下值之一: normal、dangerous、signature、signatureOrSystem。 normal:表示权限是低风险的,不会对系统、用户或其他应用程序造成危害。 dangerous:表示权限是高风险的,系统将可能要求用户输入相关信息,才会授予此权限。 signature:它告诉android,只有当应用程序所用数字签名与声明此权限的应用程序所有数字签名相同时,才能将权限授给它。 signatureOrSystem:它告诉Android,将权限授给具有相同数字签名的应用程序或Android包类,这一级别适用于非常特殊的情况,比如多个供应商需要通过系统影像共享功能时。android的自定义示例
<manifest xmlns:android="http://schemas.android.com/apk/res/android"
    package="com.example.yds.intenttest">

    <permission
        android:name="yds.permission.MY_CALL_PHONE"
        android:description="@string/permdesc_deadlyActivity"
        android:permissionGroup="yds.permission-group.MY_CALL_PHONE"
        android:protectionLevel="signature" />

	   ...
manifest>
对permission标签的各个属性大概说明一下,
name,该标签就是权限的名字啦。
description,该标签就是权限的介绍。
permissionGroup,指定该权限的组。
protectionLevel,指定保护级别。
二、自定义权限的使用
1、首先,我们需要建立两个Android应用,设为应用IntentTest和IntentTest2,将IntentTest应用作为系统应用,然后通过IntentTest2应用来访问IntentTest应用里的PhoneActivity。 2、在IntentTest里的PhoneActivity在manifest里的声明如下:...
<permission
android:protectionLevel="normal"
android:name="yds.permission.MY_CALL_PHONE"/>
...
<activity android:name=".PhoneActivity"
android:exported="true"
android:permission="yds.permission.MY_CALL_PHONE">
activity>
...
这里,在activity里定义android:permission=“yds.permission.MY_CALL_PHONE”,是因为如果不用这句,则其它任何程序都可以调用PhoneActivity,如果有了这句,则只有拥有该权限的应用才能调用PhoneActivity。
这里,android:exported="true"是必须的,否则,在IntentTest2调用时会报如下错误
Process: com.example.yds.intenttest2, PID: 29085
                                                                           java.lang.SecurityException: Permission Denial: starting Intent { cmp=com.example.yds.intenttest/.PhoneActivity } from ProcessRecord{15c5807 29085:com.example.yds.intenttest2/u0a256} (pid=29085, uid=10256) not exported from uid 10258
当然,以下的方法也是可以的
...

<permission
        android:protectionLevel="normal"
        android:name="yds.permission.MY_CALL_PHONE"/>

...

<activity android:name=".PhoneActivity"
      android:permission="yds.permission.MY_CALL_PHONE">
      <intent-filter>
              <action android:name="android.intent.action.test"/>
              <category android:name="android.intent.category.DEFAULT"/>
      intent-filter>
activity>

...
因为android:exported,如果包含有intent-filter 默认值为true; 没有intent-filter默认值为false。所以,以上两种写法都是可以的。
三、自定义权限完整写法
1、IntentTest程序的代码
(1)项目目录结构
(2)activity_phone.xml文件
<LinearLayout xmlns:android="http://schemas.android.com/apk/res/android"
    android:orientation="vertical" android:layout_width="match_parent"
    android:layout_height="match_parent">

    <TextView
        android:id="@+id/tv"
        android:layout_width="wrap_content"
        android:layout_height="wrap_content"
        android:text="这个页面被调用了"/>

LinearLayout>
(3)AndroidManifest.xml文件
<manifest xmlns:android="http://schemas.android.com/apk/res/android"
    package="com.example.yds.intenttest" >
    <permission
        android:protectionLevel="normal"
        android:name="yds.permission.MY_CALL_PHONE"/>
    <application
        android:allowBackup="true"
        android:icon="@mipmap/ic_launcher"
        android:label="@string/app_name"
        android:roundIcon="@mipmap/ic_launcher_round"
        android:supportsRtl="true"
        android:theme="@style/AppTheme" >
        <activity android:name=".MainActivity"
            >
            <intent-filter>
                <action android:name="android.intent.action.MAIN" />

                <category android:name="android.intent.category.LAUNCHER" />
            intent-filter>
        activity>
        <activity android:name=".PhoneActivity"
            android:permission="yds.permission.MY_CALL_PHONE">
            <intent-filter>
                <action android:name="android.intent.action.test"/>
                <category android:name="android.intent.category.DEFAULT"/>
            intent-filter>
        activity>
    application>

manifest>
2、IntentTest2程序的代码
(1)项目目录结构
(2)activity_main.xml文件
<android.support.constraint.ConstraintLayout xmlns:android="http://schemas.android.com/apk/res/android"
    xmlns:app="http://schemas.android.com/apk/res-auto"
    xmlns:tools="http://schemas.android.com/tools"
    android:layout_width="match_parent"
    android:layout_height="match_parent"
    tools:context="com.example.yds.intenttest2.MainActivity">

    <Button
        android:id="@+id/btn"
        android:layout_width="wrap_content"
        android:layout_height="wrap_content"
        android:text="button"/>

android.support.constraint.ConstraintLayout>
(3)AndroidManifest.xml文件
<manifest xmlns:android="http://schemas.android.com/apk/res/android"
    package="com.example.yds.intenttest2">

    <uses-permission android:name="yds.permission.MY_CALL_PHONE"/>
    <application
        android:allowBackup="true"
        android:icon="@mipmap/ic_launcher"
        android:label="@string/app_name"
        android:roundIcon="@mipmap/ic_launcher_round"
        android:supportsRtl="true"
        android:theme="@style/AppTheme">
        <activity android:name=".MainActivity">
            <intent-filter>
                <action android:name="android.intent.action.MAIN" />

                <category android:name="android.intent.category.LAUNCHER" />
            intent-filter>
        activity>
    application>

manifest>
(4)MainActivity.java文件
package com.example.yds.intenttest2;

import android.app.Activity;
import android.content.Intent;
import android.os.Bundle;
import android.view.View;
import android.widget.Button;

public class MainActivity extends Activity {
    private Button btn;
    @Override
    protected void onCreate(Bundle savedInstanceState) {
        super.onCreate(savedInstanceState);
        setContentView(R.layout.activity_main);

        btn = (Button) findViewById(R.id.btn);
        btn.setOnClickListener(new View.OnClickListener() {
            @Override
            public void onClick(View v) {
                Intent intent = new Intent();
		        intent.setClassName("com.example.yds.intenttest",
		              "com.example.yds.intenttest.PhoneActivity");
                startActivity(intent);
            }
        });
    }
}
