《Python机器学习基础教程》(二)——处理文本数据(交叉验证、网格搜索)
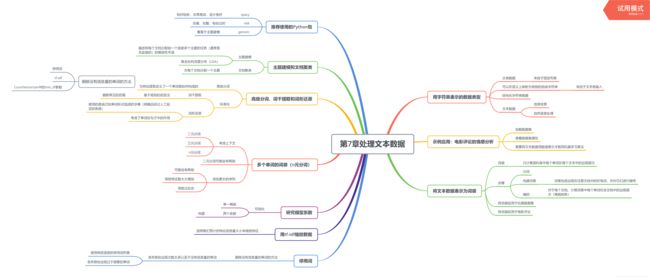
第7章 处理文本数据
前期准备
机器学习新手必看:Jupyter Notebook入门指南
Jupyter Notebook介绍、安装及使用教程
问题1
输入jupyter notebook后提示——
‘jupyter’ 不是内部或外部命令,也不是可运行的程序
或批处理文件。
按照下面链接一通操作之后——
‘jupyter’ 不是内部或外部命令,也不是可运行的程序
输入jupyter notebook之后仍然提示——
‘jupyter’ 不是内部或外部命令,也不是可运行的程序
或批处理文件。
最终我找到了解决方案!!!
如下图所示:

找到jupyter notebook.exe所在的文件路径
在该路径下输入jupyter notebook即可打开对应的交互环境
(一)示例应用:电影评论的情感分析
(1)
参考链接:
tree -L n
!tree -L 2 /home/user/aclImdb
/bin/sh: 1: tree: not found
怀疑是路径问题,但是在下面加载和读取数据过程中没有问题——
(2)
from sklearn.datasets import load_files
reviews_train = load_files("/home/user/aclImdb/train/")
text_train, y_train = reviews_train.data,reviews_train.target
print("type of text_train:{}".format(type(text_train)))
print("length of text_train:{}".format(len(text_train)))
print("text_train[1]:{}".format(text_train[1]))
type of text_train:
length of text_train:75000
text_train[1]:b"Amount of disappointment I am getting these days seeing movies like Partner, Jhoom Barabar and now, Heyy Babyy is gonna end my habit of seeing first day shows.
The movie is an utter disappointment because it had the potential to become a laugh riot only if the d\xc3\xa9butant director, Sajid Khan hadn’t tried too many things. Only saving grace in the movie were the last thirty minutes, which were seriously funny elsewhere the movie fails miserably. First half was desperately been tried to look funny but wasn’t. Next 45 minutes were emotional and looked totally artificial and illogical.
OK, when you are out for a movie like this you don’t expect much logic but all the flaws tend to appear when you don’t enjoy the movie and thats the case with Heyy Babyy. Acting is good but thats not enough to keep one interested.
For the positives, you can take hot actresses, last 30 minutes, some comic scenes, good acting by the lead cast and the baby. Only problem is that these things do not come together properly to make a good movie.
Anyways, I read somewhere that It isn’t a copy of Three men and a baby but I think it would have been better if it was."
(3)
test_train = [doc.replace(b"
", b" ") for doc in text_train]
清洗数据,删除文中不需要的格式
(二)将词袋应用于玩具数据集
bards_words = ["The fool doth think he is wise,", "but the wise man knows himself to be a fool"]
from sklearn.feature_extraction.text import CountVectorizer#词袋表示的实现
vect = CountVectorizer()#创建词袋数据结构,实例化
vect.fit(bards_words)#对玩具数据进行拟合
#拟合包括训练数据集的分词和词表的构建
#词表包括出现在任意文档中的所有词,并对它们进行编号(比如按照字母顺序)
#CountVectorizer是通过fit_transform函数将文本中的词语转换为词频矩阵
CountVectorizer(analyzer=‘word’, binary=False, decode_error=‘strict’,
dtype=
lowercase=True, max_df=1.0, max_features=None, min_df=1,
ngram_range=(1, 1), preprocessor=None, stop_words=None,
strip_accents=None, token_pattern=’(?u)\b\w\w+\b’,
tokenizer=None, vocabulary=None)
#经过上面fit函数的处理,我们输出一下现在词表的情况
print("vocabulary size:{}".format(len(vect.vocabulary_)))
print("vocabulary content:{}".format(vect.vocabulary_))
vocabulary size:13
vocabulary content:{‘but’: 1, ‘himself’: 5, ‘to’: 11, ‘man’: 8, ‘be’: 0, ‘knows’: 7, ‘he’: 4, ‘is’: 6, ‘fool’: 3, ‘think’: 10, ‘the’: 9, ‘wise’: 12, ‘doth’: 2
#创建训练数据的词袋表示
bag_of_words = vect.transform(bards_words)
print("bag_of_words:{}".format(repr(bag_of_words)))
#词袋表示保存在一个SciPy稀疏矩阵中,这种数据结构只保存非零元素
#形状2*13,每行对应于两个数据点之一,每个特征对应于词表中的一个单词
#使用稀疏矩阵是因为大多数文档只包含词表中的一小部分单词,也就是说,特证数组中的大部分元素都为0
bag_of_words:<2x13 sparse matrix of type ‘
with 16 stored elements in Compressed Sparse Row format>
#要想查看稀疏矩阵的实际内容,可以使用toarray方法将其转换为“密集的”NumPy数据(保存所有的0元素)
#这种情况只在玩具数据集下可以实现,否则内存错误
#计算词袋中的每个单词在该文档中的出现频次
print("Dense representation of bag_of_words:\n{}".format(bag_of_words.toarray()))
Dense representation of bag_of_words:
[[0 0 1 1 1 0 1 0 0 1 1 0 1]
[1 1 0 1 0 1 0 1 1 1 0 1 1]]
(三)停用词
#指定stop_words = "english"将使用内置列表
#我们也可以扩展这个列表并传入我们自己的列表
#min_df参数来设置词例至少在多少个文档中出现过,否则就不使用对应词例
vect = CountVectorizer(min_df=5, stop_words="english").fit(text_train)
X_train = vect.transform(text_train)
print("X_train with stop words:\n{}".format(repr(X_train)))
(四)用tf-idf缩放数据
#scikit-learn在两个类中实现了tf-idf方法:TfidfTransformer和TfidfVectorizer
#前者接受CountVectorizer生成的稀疏矩阵并将其进行转换
#后者接受文本数据并完成词袋特征提取和tf-idf变换
#tf-idf使用了训练数据的统计学属性,为了保证网格搜索的结果有效,需使用管道
from sklearn.feature_extraction.text import TfidfVectorizer
from sklearn.pipeline import make_pipeline
pipe = make_pipeline(TfidfVectorizer(min_df=5),LogisticRegression())#对于高维稀疏数据,类似于LogisticRegression的线性模型通常效果最好
param_grid = {'logisticregression_C':[0.001, 0.01, 0.1, 1, 10]}#首先需要用一个字典指定要搜索的参数,字典的键是我们要调节的参数名称
grid = GridSearchCV(pipe, param_grid, cv=5)#cv=5,分层k折交叉验证中k取值为5
grid.fit(text_train, y_train)
#grid对象的行为就像一个分类器,我们可以对它调用标准的fit、predict、score方法
#调用fit时,对我们指定的所有参数组合都运行交叉验证
#拟合fit对象不仅会搜索最佳参数,还会利用得到的最佳验证性能的参数在整个训练数据集上自动拟合一个新模型
#可以用predict、score方法来访问重新训练过的模型
#我们找到的参数保存在best_params_中
#交叉验证的最佳精度保存在best_score_中
print("Best cross-validation score:{:.2f}".format(grid.best_score_))
1.3涉及到的概念/算法
(一)交叉验证(cross-validation)
1.不再赘述简单交叉验证
2.K折交叉验证法原理及python实现
总结其精度经常计算平均值
优点:
每个样例都会刚好在测试集中出现一次:每个样例位于一个折中,而每个折都在测试集中出现一次。因此,模型需要对数据集中所有样本的泛化能力都很好,才能让所有交叉验证得分(及其平均值)都很高。
对数据进行多次划分,还可以提供给我们的模型对训练集选择的敏感性的信息。
对数据的使用更加高效。
缺点:
增加计算成本(比数据的单次划分慢k倍)
3.分层k折交叉验证
分层k折交叉验证:
划分数据,使每个折中类别之间的比例与整个数据集中的比例相同。
scikit-learn在分类问题中使用分层k折交叉验证,回归问题中使用标准k折交叉验证
4.其他策略
留一法:每折只包含单个样本的k折交叉验证
尤其对大型数据集来说,特别耗时。但是在小型数据集上有时能给出更好的估计结果。
打乱划分交叉验证:将数据打乱来代替分层。每次划分为训练集取样train_size个点,为测试集取样test_size个(与训练集)不相交的点,将这一划分方法重复n_iter次。
train_size/test_size:整数代表绝对大小,浮点数代表占整个数据集的比例。
可以在训练集和测试集之外独立控制迭代次数。
当train_size+test_size≠1时,每次迭代中可以仅使用部分数据。
分组交叉验证:对于每次划分,每个分组都是都是整体出现在训练集或测试集中。
适用于分组高度相关时。
(二)网格搜索(grid search)
1.
尝试我们关心的参数的所有可能组合。
↓
找到一个模型的重要参数(提供最佳泛化性能的参数)的取值
↓
通过调参来提升模型的泛化性能
2.
在评估所有参数的时候需要一个独立的数据集。
↓
将整个数据集划分为三个数据集:用于构建模型的训练集、用于选择模型参数的验证集(开发集)、用于评估所选参数性能的测试集
↓
利用验证集找到最佳参数之后,可以利用最佳参数重新构建一个模型,此时该模型要同时在训练数据和验证数据上进行训练。我们可以利用尽可能多的数据。
↓
交叉验证是在特定数据集上对给定算法进行评估的一种方法,它通常与网格搜索等参数搜索方法一起使用,所以常常使用交叉验证指代带交叉验证的网格搜索
3.带交叉验证的网格搜索
scikit-learn提供一个类GridSearchCV
