Spark(三)第一个Spark程序
学习过程我们先不去关注Spark的运行环境和部署方式,只要起来了能用,咱就开始先用着,如果一开始就深入研究里面的运行原理,会发现根本出不来了,所以我们先动手实现程序,在过程中慢慢去理解里面的执行原理。
首先我们先去百度看下,要怎么写自己的第一个程序呢?我们可以选择Python,Java,Scala。不过多数推荐Scala,Java现在也能写,但是我稍微去查了些资料,看见Java编写的技术文档不多,很多都是Scala的技术文档和问题解决。所以需要准备下面的东西:
开发环境:IDEA。
Spark版本:spark-3.0.0
Scala版本:2.12
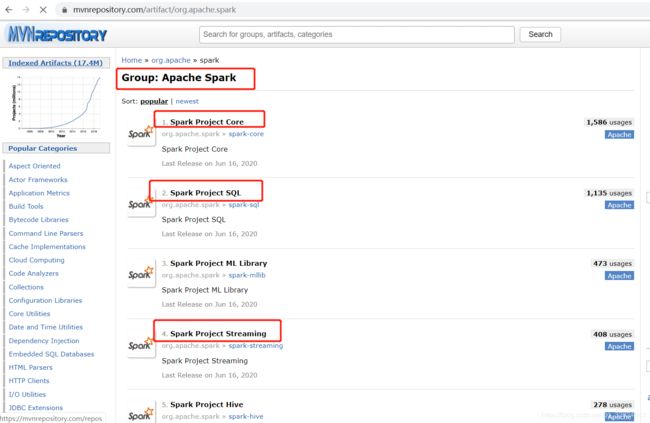
关于Spark和Scala版本的对应,可以去Maven仓库去查看(可以看见Spark3.0.0选择Scala的版本是2.12版本)


pom文件
<project xmlns="http://maven.apache.org/POM/4.0.0" xmlns:xsi="http://www.w3.org/2001/XMLSchema-instance" xsi:schemaLocation="http://maven.apache.org/POM/4.0.0 http://maven.apache.org/maven-v4_0_0.xsd">
  <modelVersion>4.0.0</modelVersion>
  <groupId>com.vedeng.scala.project</groupId>
  <artifactId>first.scala</artifactId>
  <version>1.0-SNAPSHOT</version>
  <properties>
    <scala.version>2.12.10</scala.version>
  </properties>

  <dependencies>
    <dependency>
      <groupId>org.apache.spark</groupId>
      <artifactId>spark-core_2.12</artifactId>
      <version>3.0.0</version>
    </dependency>
    <dependency>
      <groupId>org.apache.spark</groupId>
      <artifactId>spark-sql_2.12</artifactId>
      <version>3.0.0</version>
    </dependency>
    <dependency>
      <groupId>org.apache.spark</groupId>
      <artifactId>spark-catalyst_2.12</artifactId>
      <version>3.0.0</version>
    </dependency>
    <dependency>
      <groupId>mysql</groupId>
      <artifactId>mysql-connector-java</artifactId>
      <version>5.1.21</version>
    </dependency>
    <dependency>
      <groupId>com.redislabs</groupId>
      <artifactId>spark-redis_2.12</artifactId>
      <version>2.5.0</version>
    </dependency>
    <dependency>
      <groupId>org.scala-lang</groupId>
      <artifactId>scala-library</artifactId>
      <version>${scala.version}</version>
    </dependency>
    <dependency>
      <groupId>org.apache.spark</groupId>
      <artifactId>spark-streaming_2.12</artifactId>
      <version>3.0.0</version>
    </dependency>
  </dependencies>
    <build>
      <plugins>
        <!-- 打包插件, 否则 scala 类不会编译并打包进去 -->
        <plugin>
          <groupId>net.alchim31.maven</groupId>
          <artifactId>scala-maven-plugin</artifactId>
          <version>4.4.0</version>
          <executions>
            <execution>
              <goals>
                <goal>compile</goal>
                <goal>testCompile</goal>
              </goals>
            </execution>
          </executions>
        </plugin>
        <plugin>
          <groupId>org.apache.maven.plugins</groupId>
          <artifactId>maven-compiler-plugin</artifactId>
          <configuration>
            <source>1.8</source>
            <target>1.8</target>
          </configuration>
        </plugin>
        <plugin>
          <artifactId>maven-assembly-plugin</artifactId>
          <configuration>
            <descriptorRefs>
              <descriptorRef>jar-with-dependencies</descriptorRef>
            </descriptorRefs>
          </configuration>
        </plugin>
      </plugins>
    </build>
</project>
打包插件
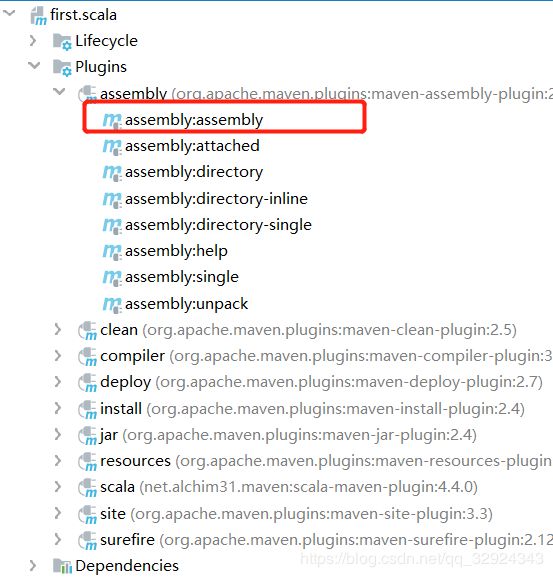
按照pom文件的打包插件,后续我们用maven-assembly-plugin打jar包。

jar包会打出两个,
一个是纯粹的是你程序的jar包(first.scala-1.0-SNAPSHOT.jar),没有任何依赖,依赖全在你Spark的环境中,
一个是包含了所有依赖的jar包(first.scala-1.0-SNAPSHOT-jar-with-dependencies.jar),可以独立运行。

代码编写
最后轮到代码了,代码我们就采用scala的方式编写吧,用Java其实也可以。
object TestFirst {
  def main(args: Array[String]): Unit = {
    val conf: SparkConf = new SparkConf().setAppName("WordCount").setMaster("spark://192.168.2.142:7077")
    val sc = new SparkContext(conf)
    //一、textFile如果要在windows内运行,需要下载一个hadoop.dll,
    //并拷贝到c:\windows\system32目录中,并且路径要使用windows内的路径
    //二、textFile如果是读取本地文件,需要加上file:///  读取hdfs文件加上  hdfs://
    val world = sc.textFile("file:///usr/local/bigdata/input.txt")
      .flatMap(_.split(" "))
      .map((_, 1))
      .reduceByKey(_ + _)
    world.saveAsTextFile("file:///usr/local/bigdata/output.txt")
    sc.stop()
  }
}
文件准备
这边我们需要准备input文件,注意这个文件需要142,143,144三台机器上都需要存在,并且143,144上的文件内容需要完全一致,这是由于Spark读取时要判断在每台机器上数据读取范围。(这个先大致知道一下,后续要去分析里面的原理)
usr/local/bigdata/input.txt
hello jack
hello mike
hello marry
hello ben
打包运行
在第一篇安装的里面,我们知道可以用submit命令运行我们的spark程序。因此我们将程序打包上传到linux环境内,执行submit命令
./bin/spark-submit --master spark://192.168.2.142:7077 --class com.vedeng.scala.project.TestFirst /usr/local/bigdata/first.scala-1.0-SNAPSHOT-jar-with-dependencies.jar
但是可能执行会报错:
Error while invoking RpcHandler#receive() for one-way message.
查找了一下,说是资源没给够,我的测试机器是2核心4G的,默认设置是1核2G,那么我们手动来设置一下运行参数
./bin/spark-submit --master spark://192.168.2.142:7077 --executor-memory 2G --executor-cores 2 --num-executors 2 --class com.vedeng.scala.project.TestFirst /usr/local/bigdata/first.scala-1.0-SNAPSHOT-jar-with-dependencies.jar
执行结果
我们在144的机器上发现了输出文件,打开可以看见

part-00000
(hello,4)
(mike,1)
(ben,1)
(jack,1)
part-00001
(marry,1)